Category Archives: Our First House

#mapfirsthouse- One Year Later

These are in no way “after” photos. However, it wasn’t until I looked through the before photos that I really realized how far we’ve come. Sometimes the slow progress towards my big ideas can be a bit discouraging. It feels like we’ll never finish everything or get it to a point where I can say it’s at least somewhat done. Now that it’s been a year since we’ve owned our first home together, I thought it would be nice to look at its current condition compared to where we started.

The kitchen

I think that you have to take a gander through the before photos to really appreciate the current state. I certainly did. While I felt a decent amount of anxiety of showing off my home in this awkward half way done stage, I’m thankful that I did. Honestly, if I wouldn’t have set it as an August goal, I would have continued to put it off! However, I do want to remember this stage. When I’m closer to finished, I’ll enjoy looking back and remembering this portion…the time when so much had been done and yet there was still so much left to do. If nothing else, forcing myself to share these photos inspired me to keep making progress. As I mentioned last week, we’d been at a bit of a standstill. With so much traveling, Matthew changing jobs, and no money tree in the backyard, it was hard to be inspired and find the time/money for house projects. However, I’m back in the game. I’ve started working on a few projects already, and I’m making a timeline for finally turning some big ideas into a reality.

The master bedroomBedroom pillowsCorner chair in the master bedroom with a sneak peek into the master bathroomMaster bathroom sinkMaster bedroom fireplace

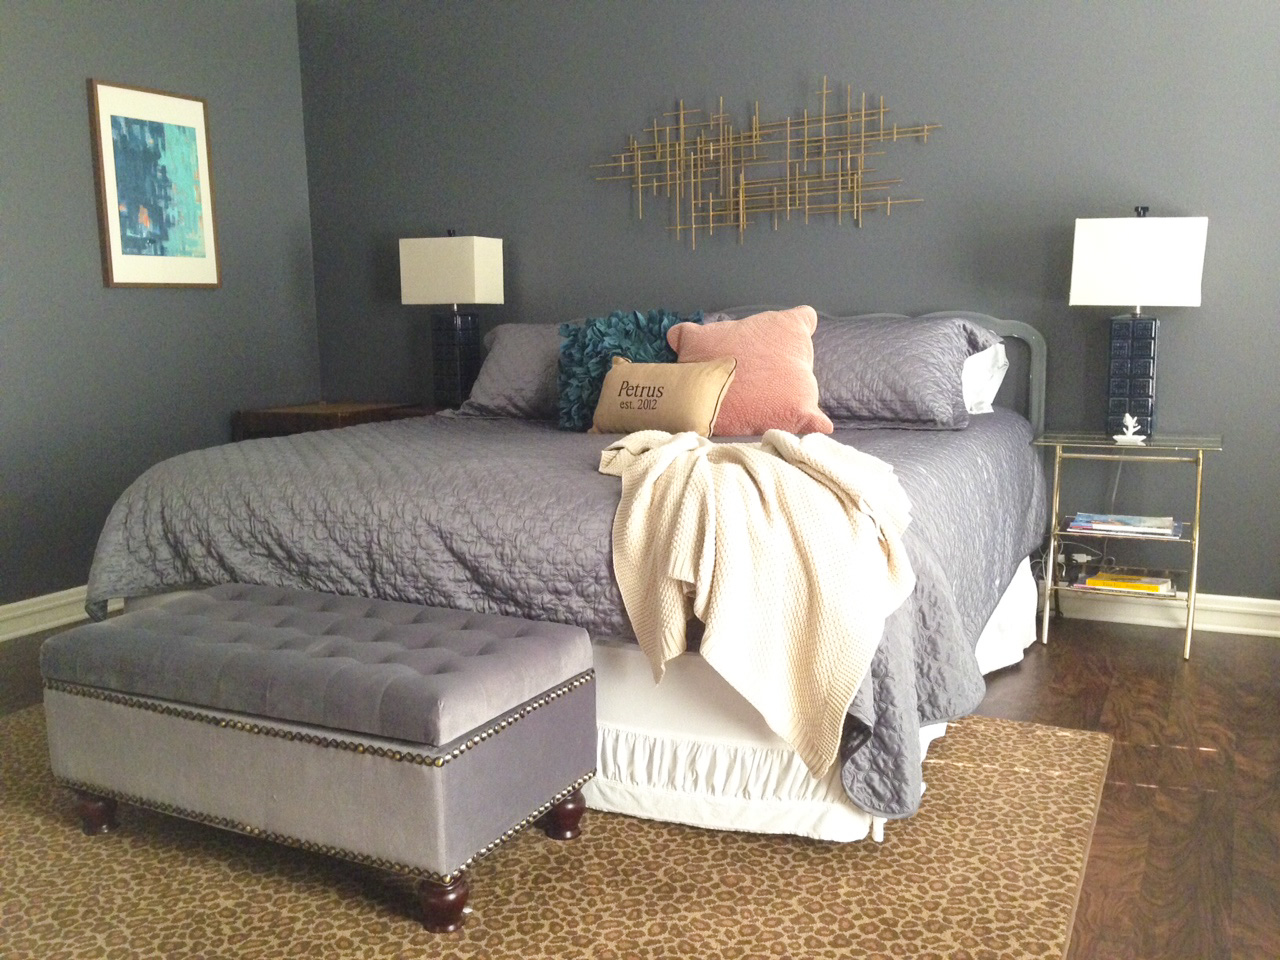
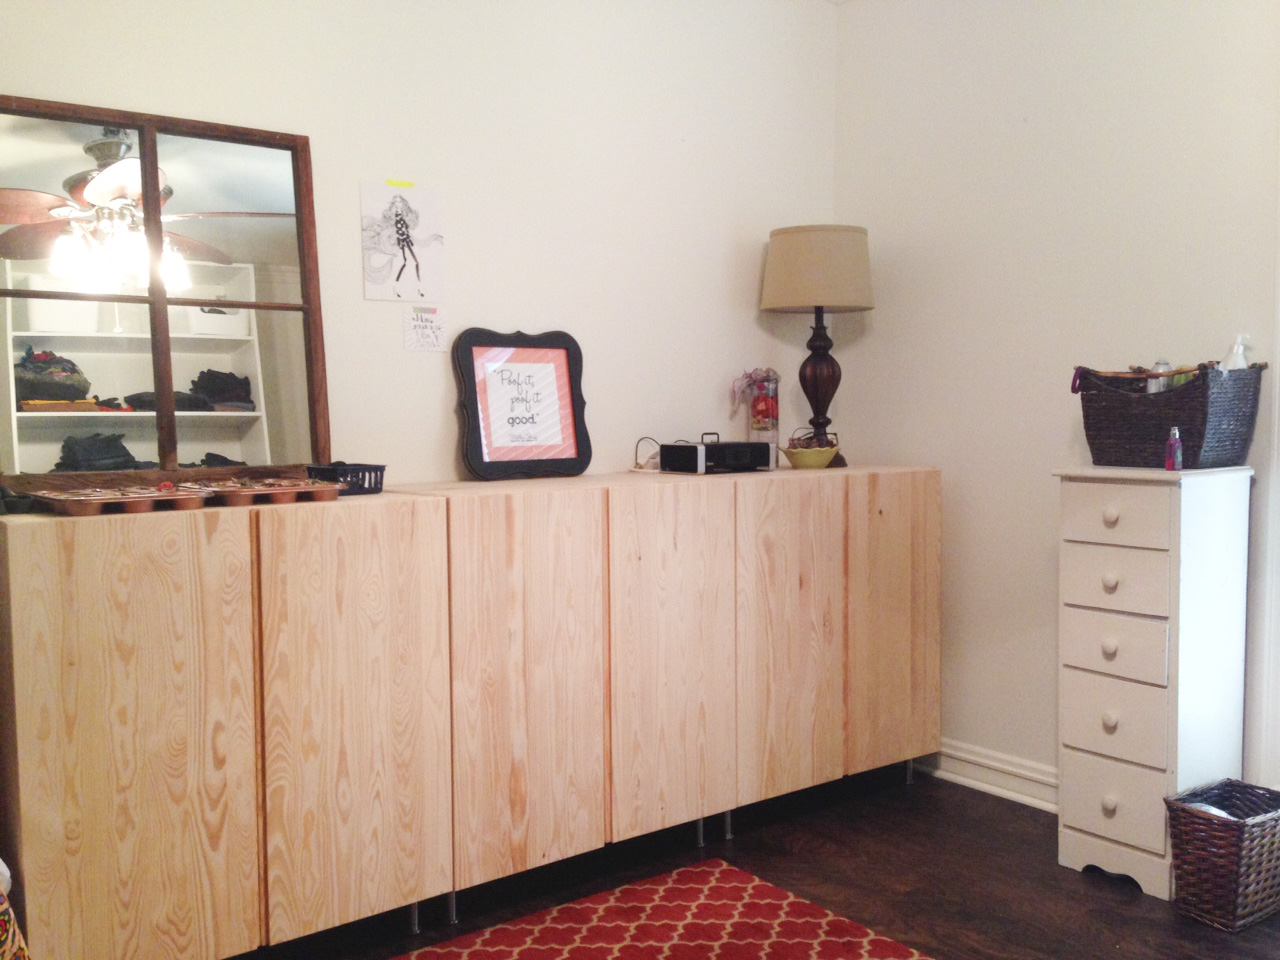
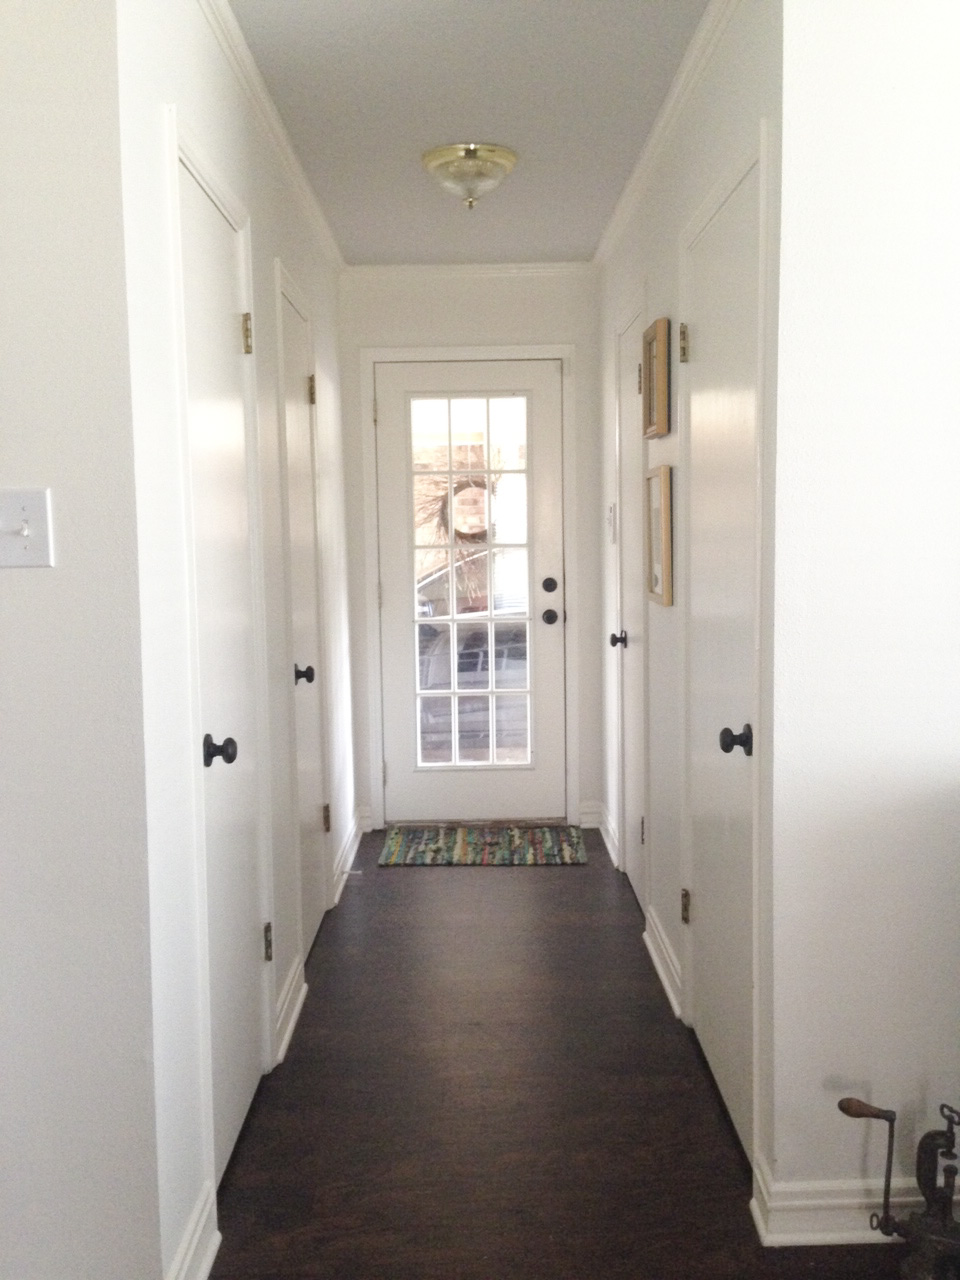
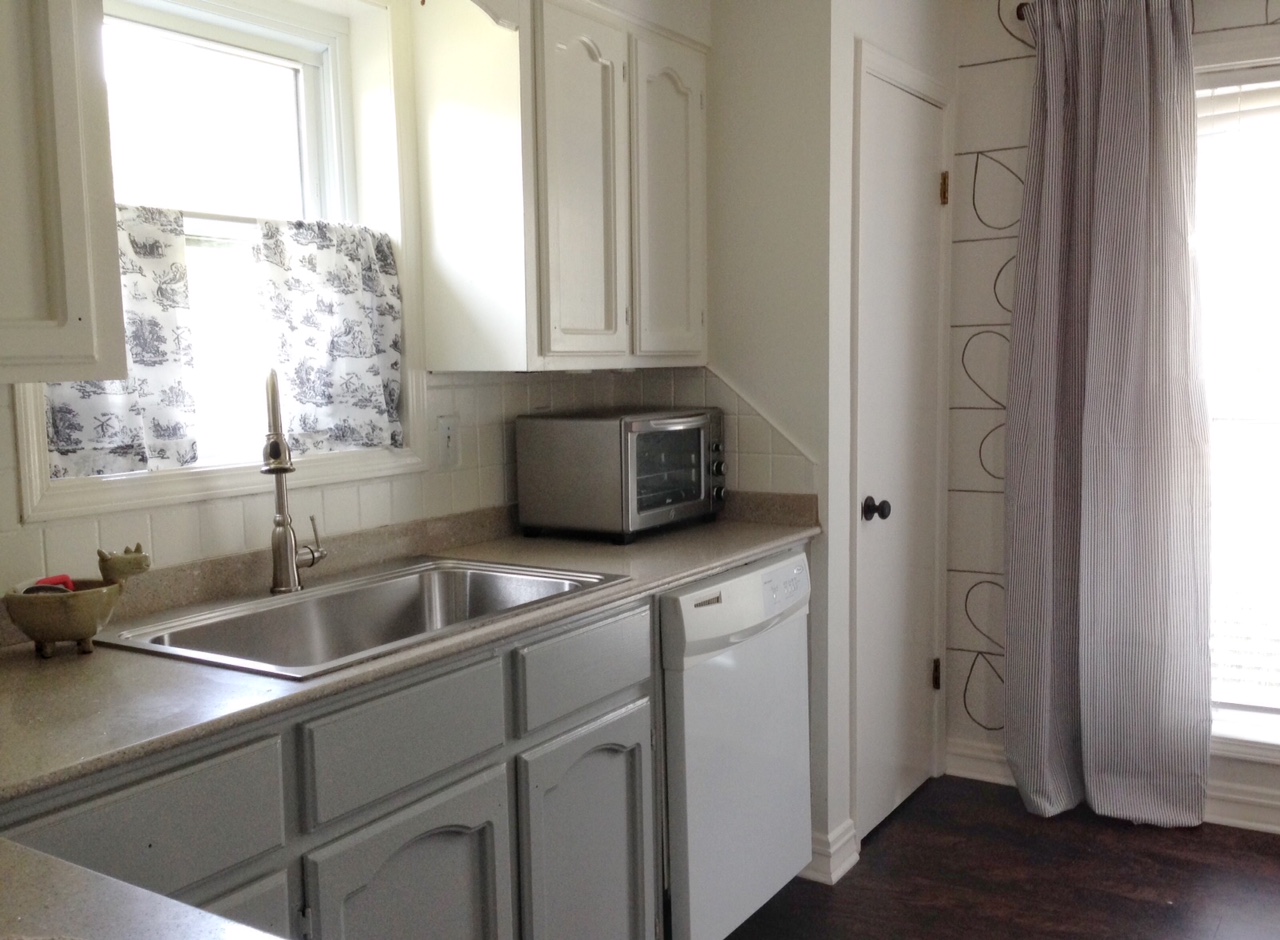
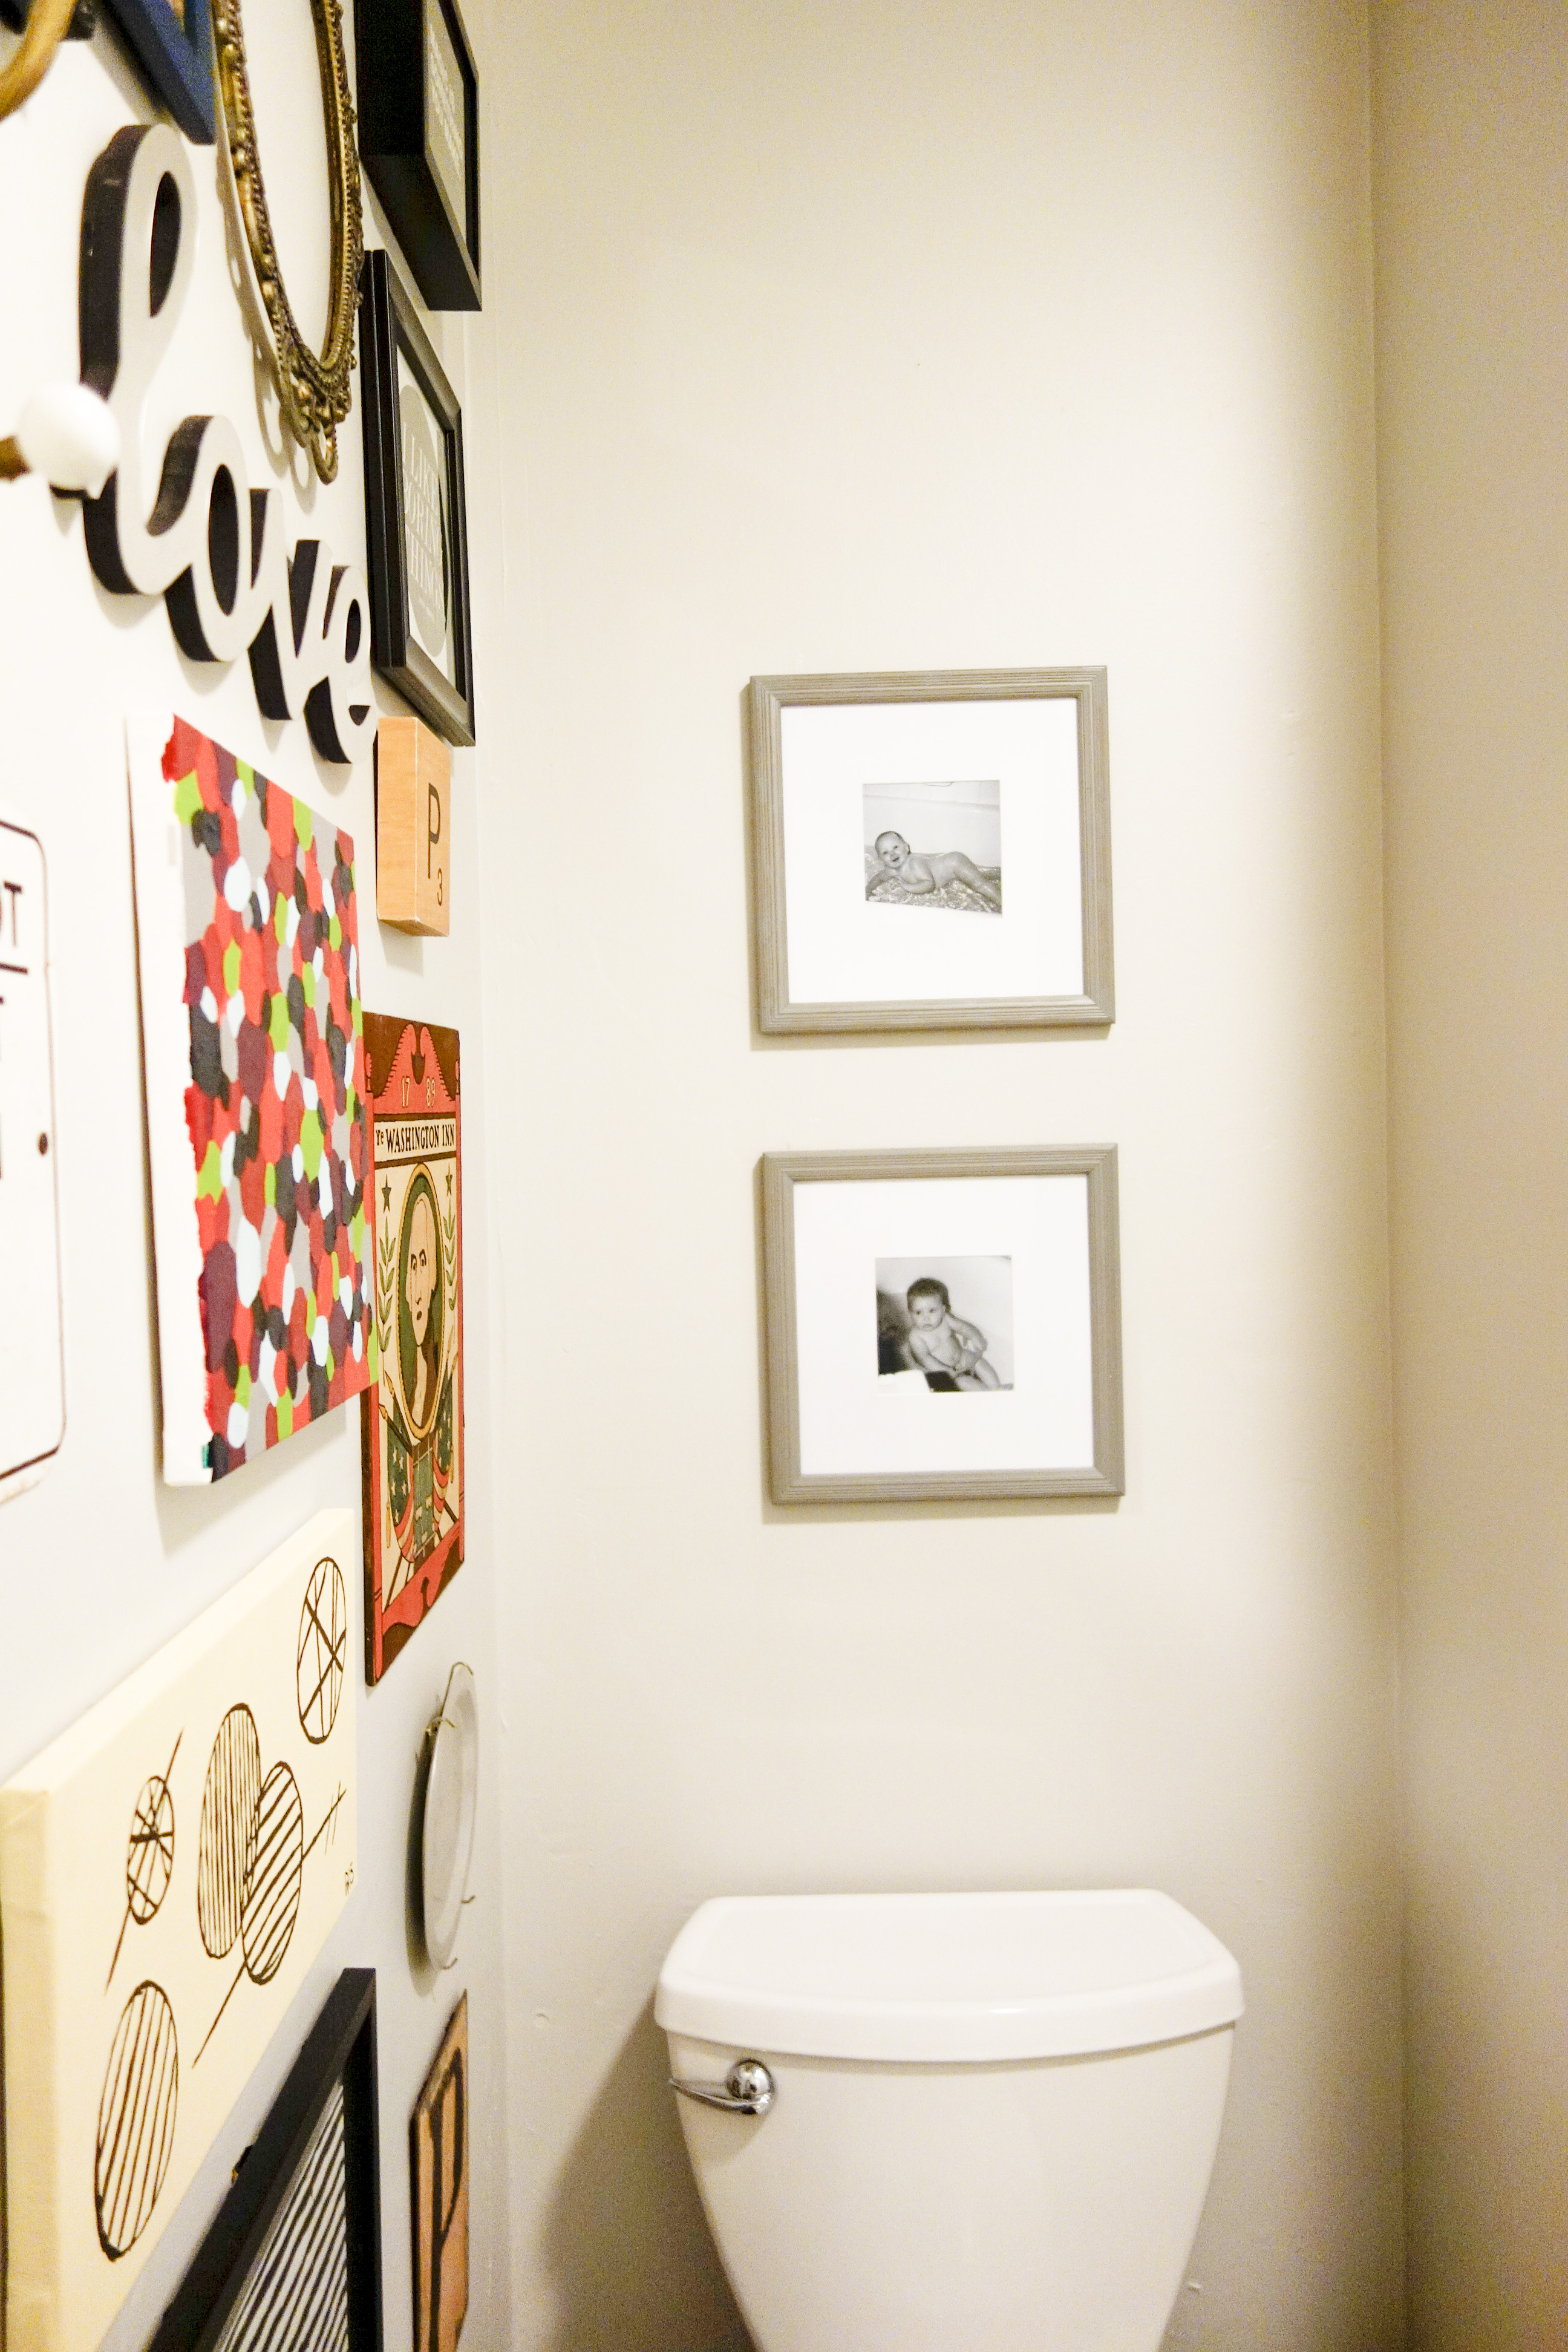
I mentioned lately that we’ve been working on a few big projects in the house. We’re in the process of turning our old guest room into a guest room/home office. We’re also FINALLY revamping my closet room to be more useful. This means you’re seeing strategic shots of my house right now. There are currently mattresses standing in the foyer until they make it to their new home. There are IKEA returns living in the corner of the dining room until we can make that 5 hour trip again. Speaking of IKEA, they were out of a portion of my new shelving system (that I’m so very excited about), so that project is only partially done too. The hallway to the bedrooms includes bags of clothes to be donated. The parts I’m showing you today certainly aren’t perfect. However, just remember you can make anything look decent from the right angle. (And with black and white photos.)

Home office in progress
Home office desk in progressCloset room progressCloset room progress

I really wanted to wait until everything was perfect to show you anything. (Shame on me.) I have to keep reminding myself that it doesn’t have to be perfect to be beautiful. I’m happy that I shared a progress report because it’s encouraged me to keep pushing forward. It also made me address those boxes of photos/memorabilia that were moved to the dining room from their safe little home under the guest bed (the one that’s now living in the foyer). It also reminded me how badly I want everything to have a place. I feel soooo much better when everything is tucked away nicely and neatly. I’m currently reading this book which is helping a ton with clutter…and is also the reason for the bags of donation items making a home in the hallway.

Carport hallway in progressCarport hallway in progressBreakfast area

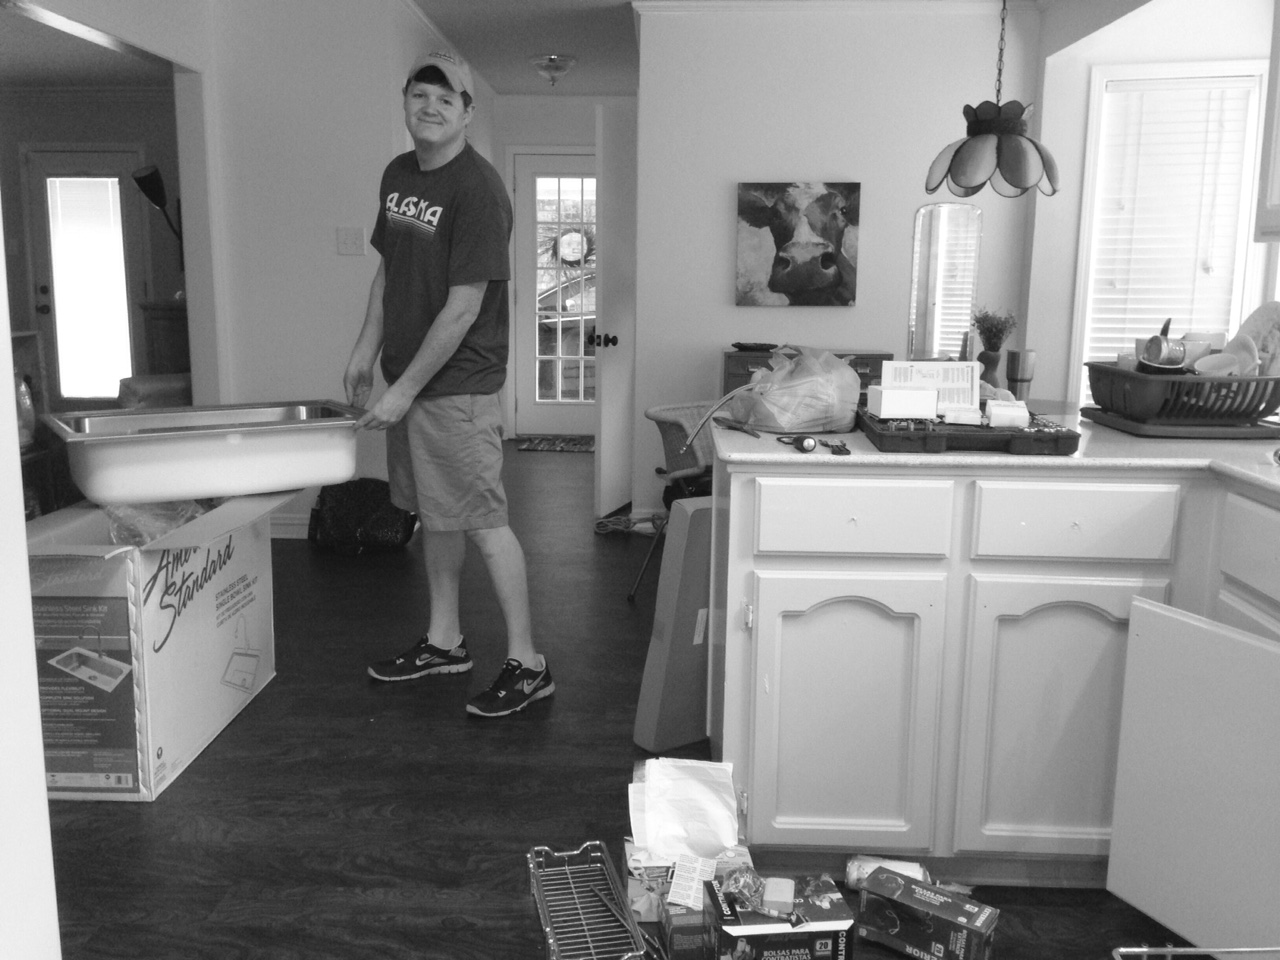
So far we’ve scraped the ceilings, painted every single surface (literally not one single thing was left unpainted), replaced all of the flooring, and did what feels like hundreds of small projects.  Some of the big items still left to do are:

  • all new light fixtures (I salvaged one here.)
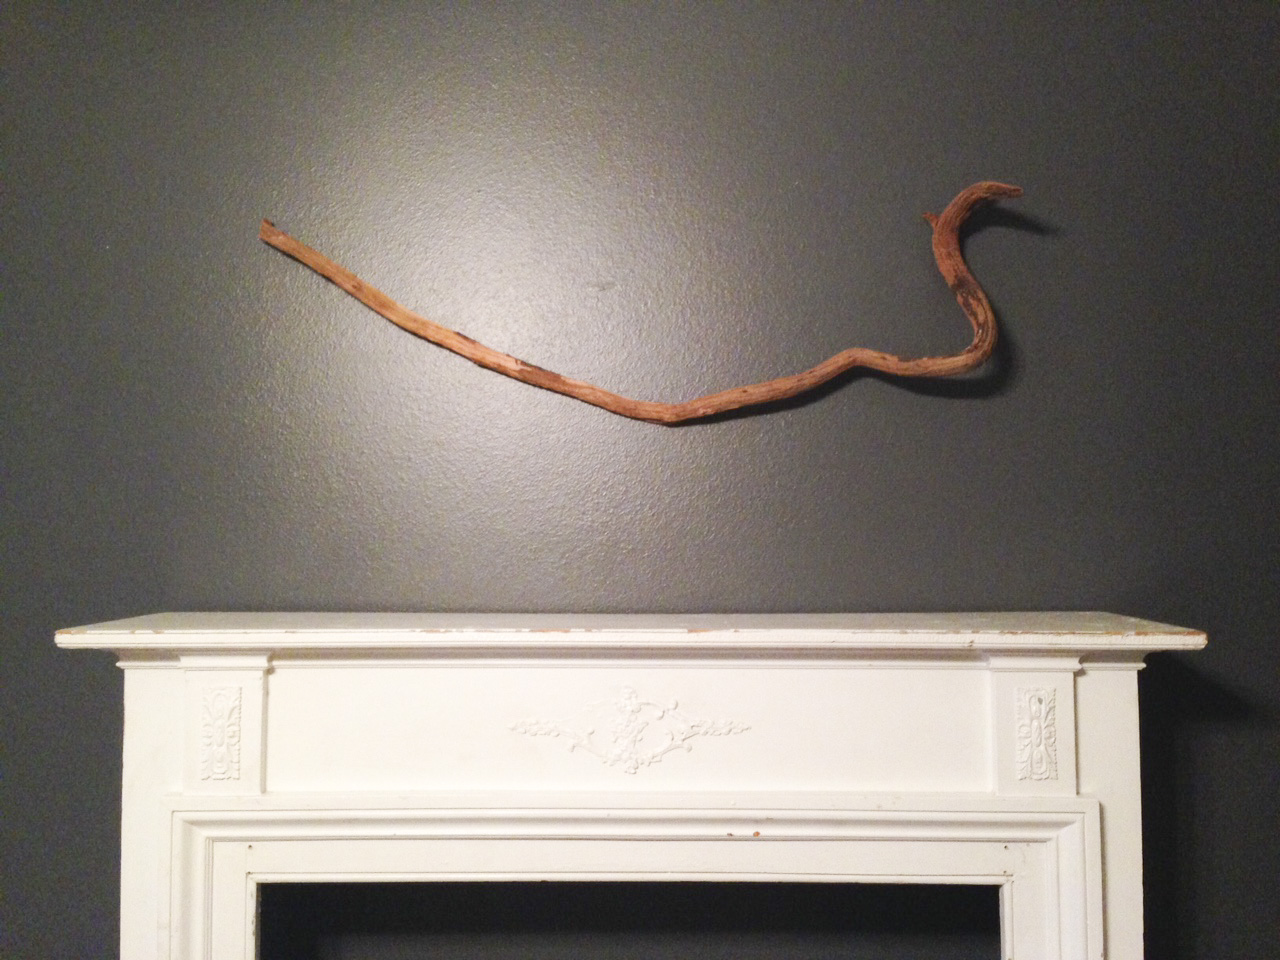
  • paint the fireplace brick and instal a wood header
  • paint a very big wall a very bold color
  • paint the hallway from the carport
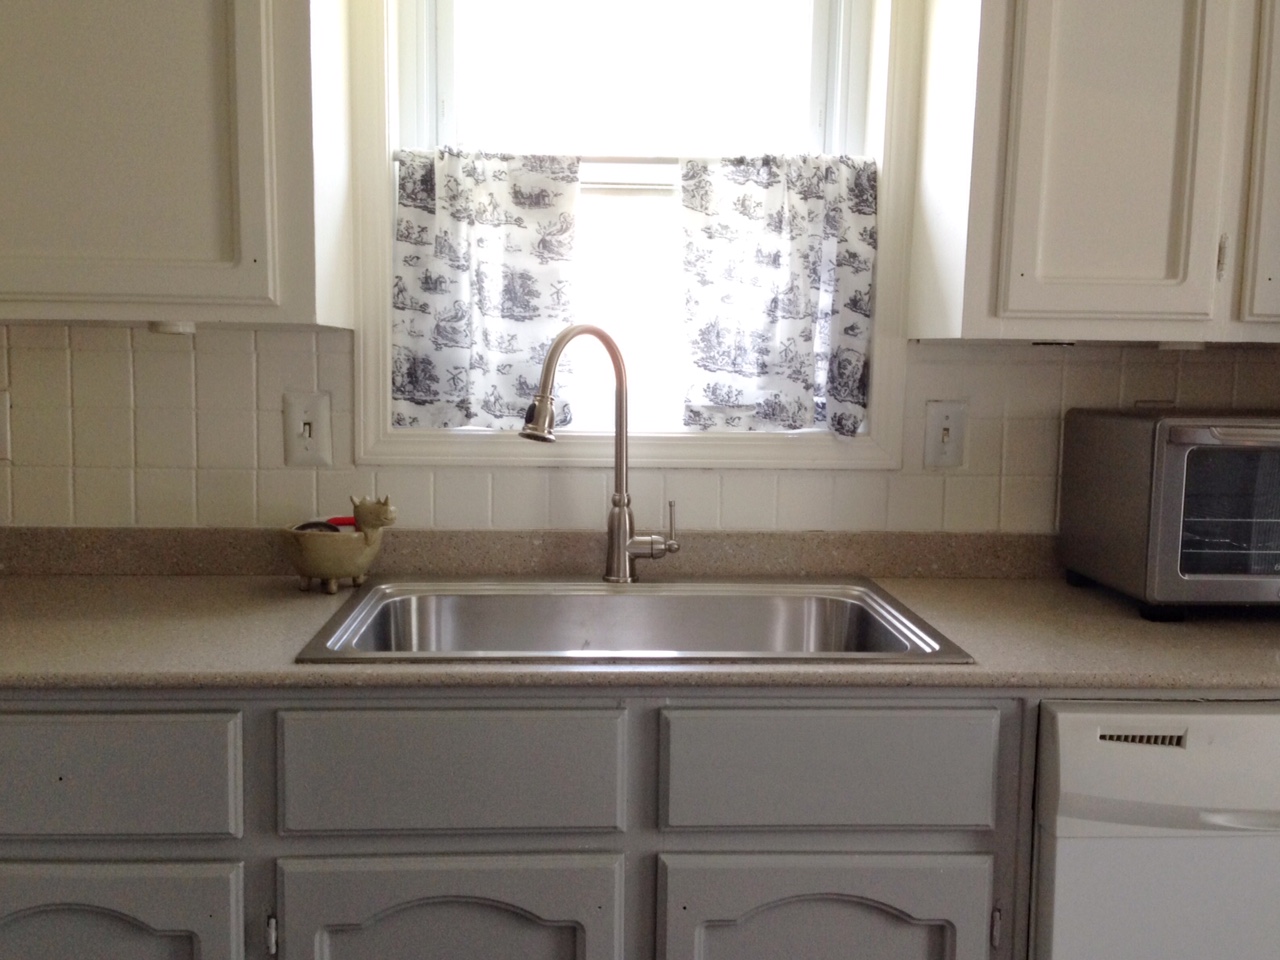
  • add kitchen hardware (It’s been ordered!)
  • new appliances
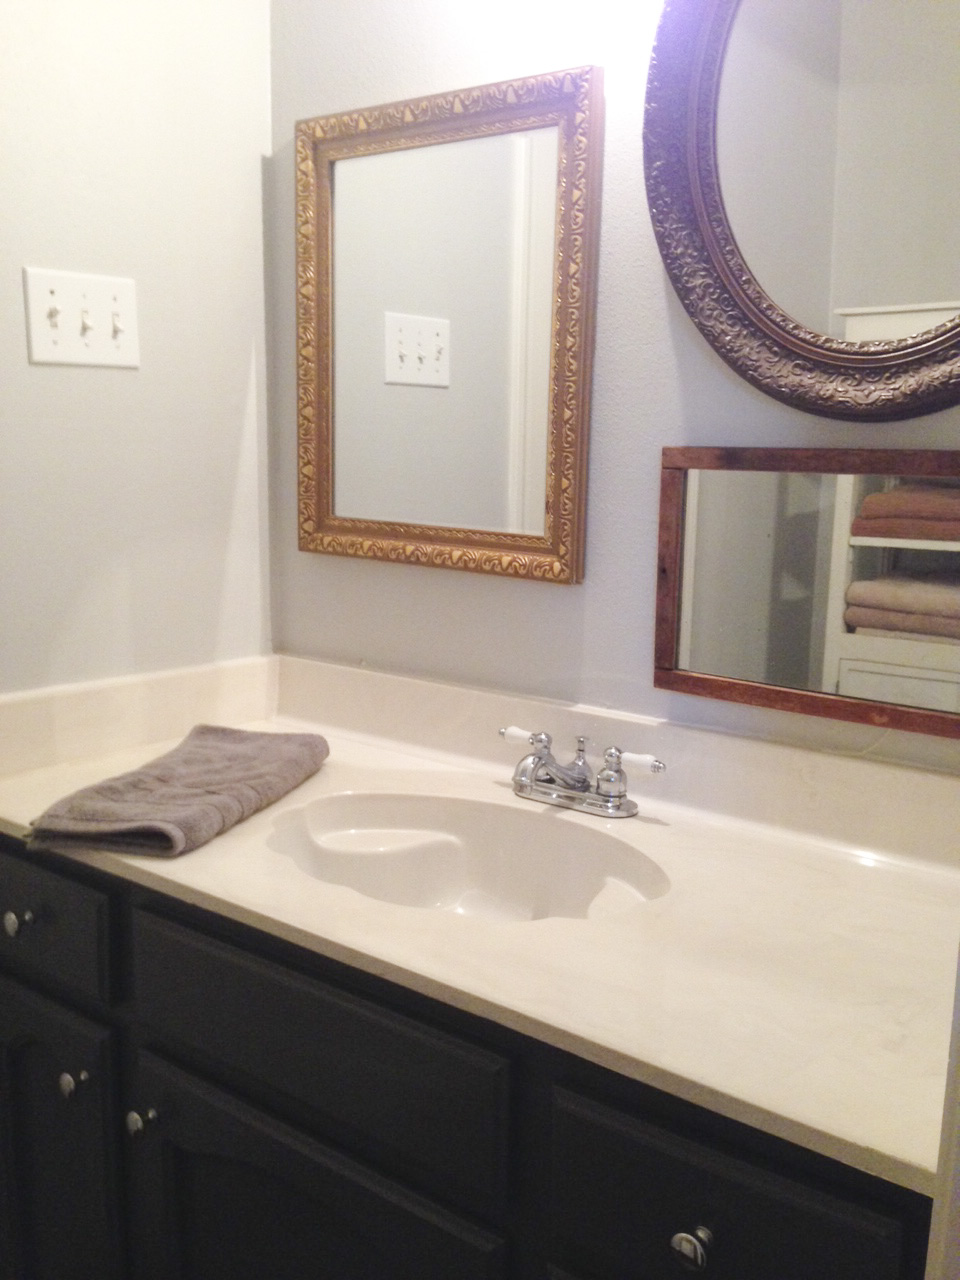
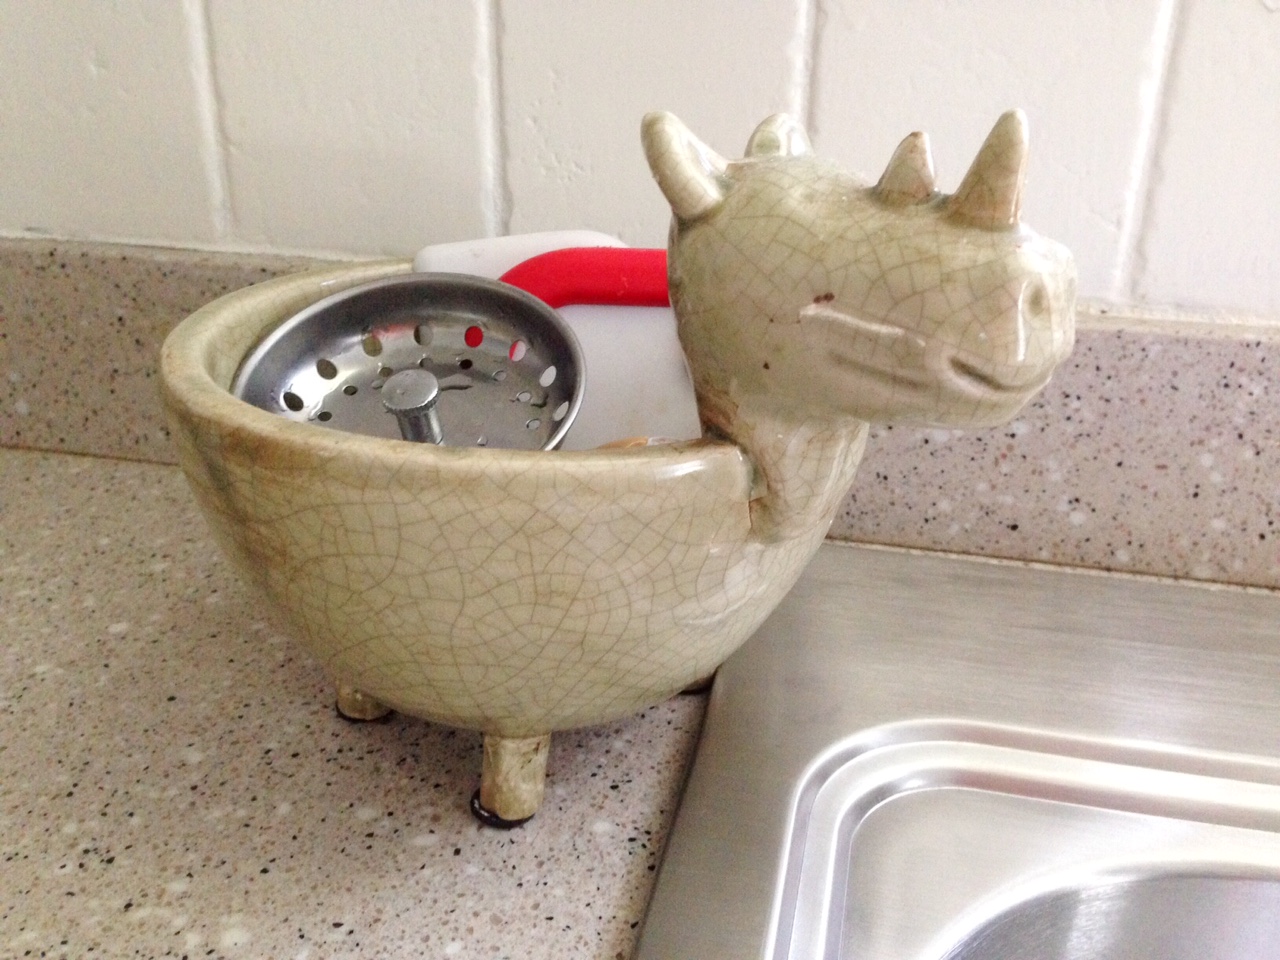
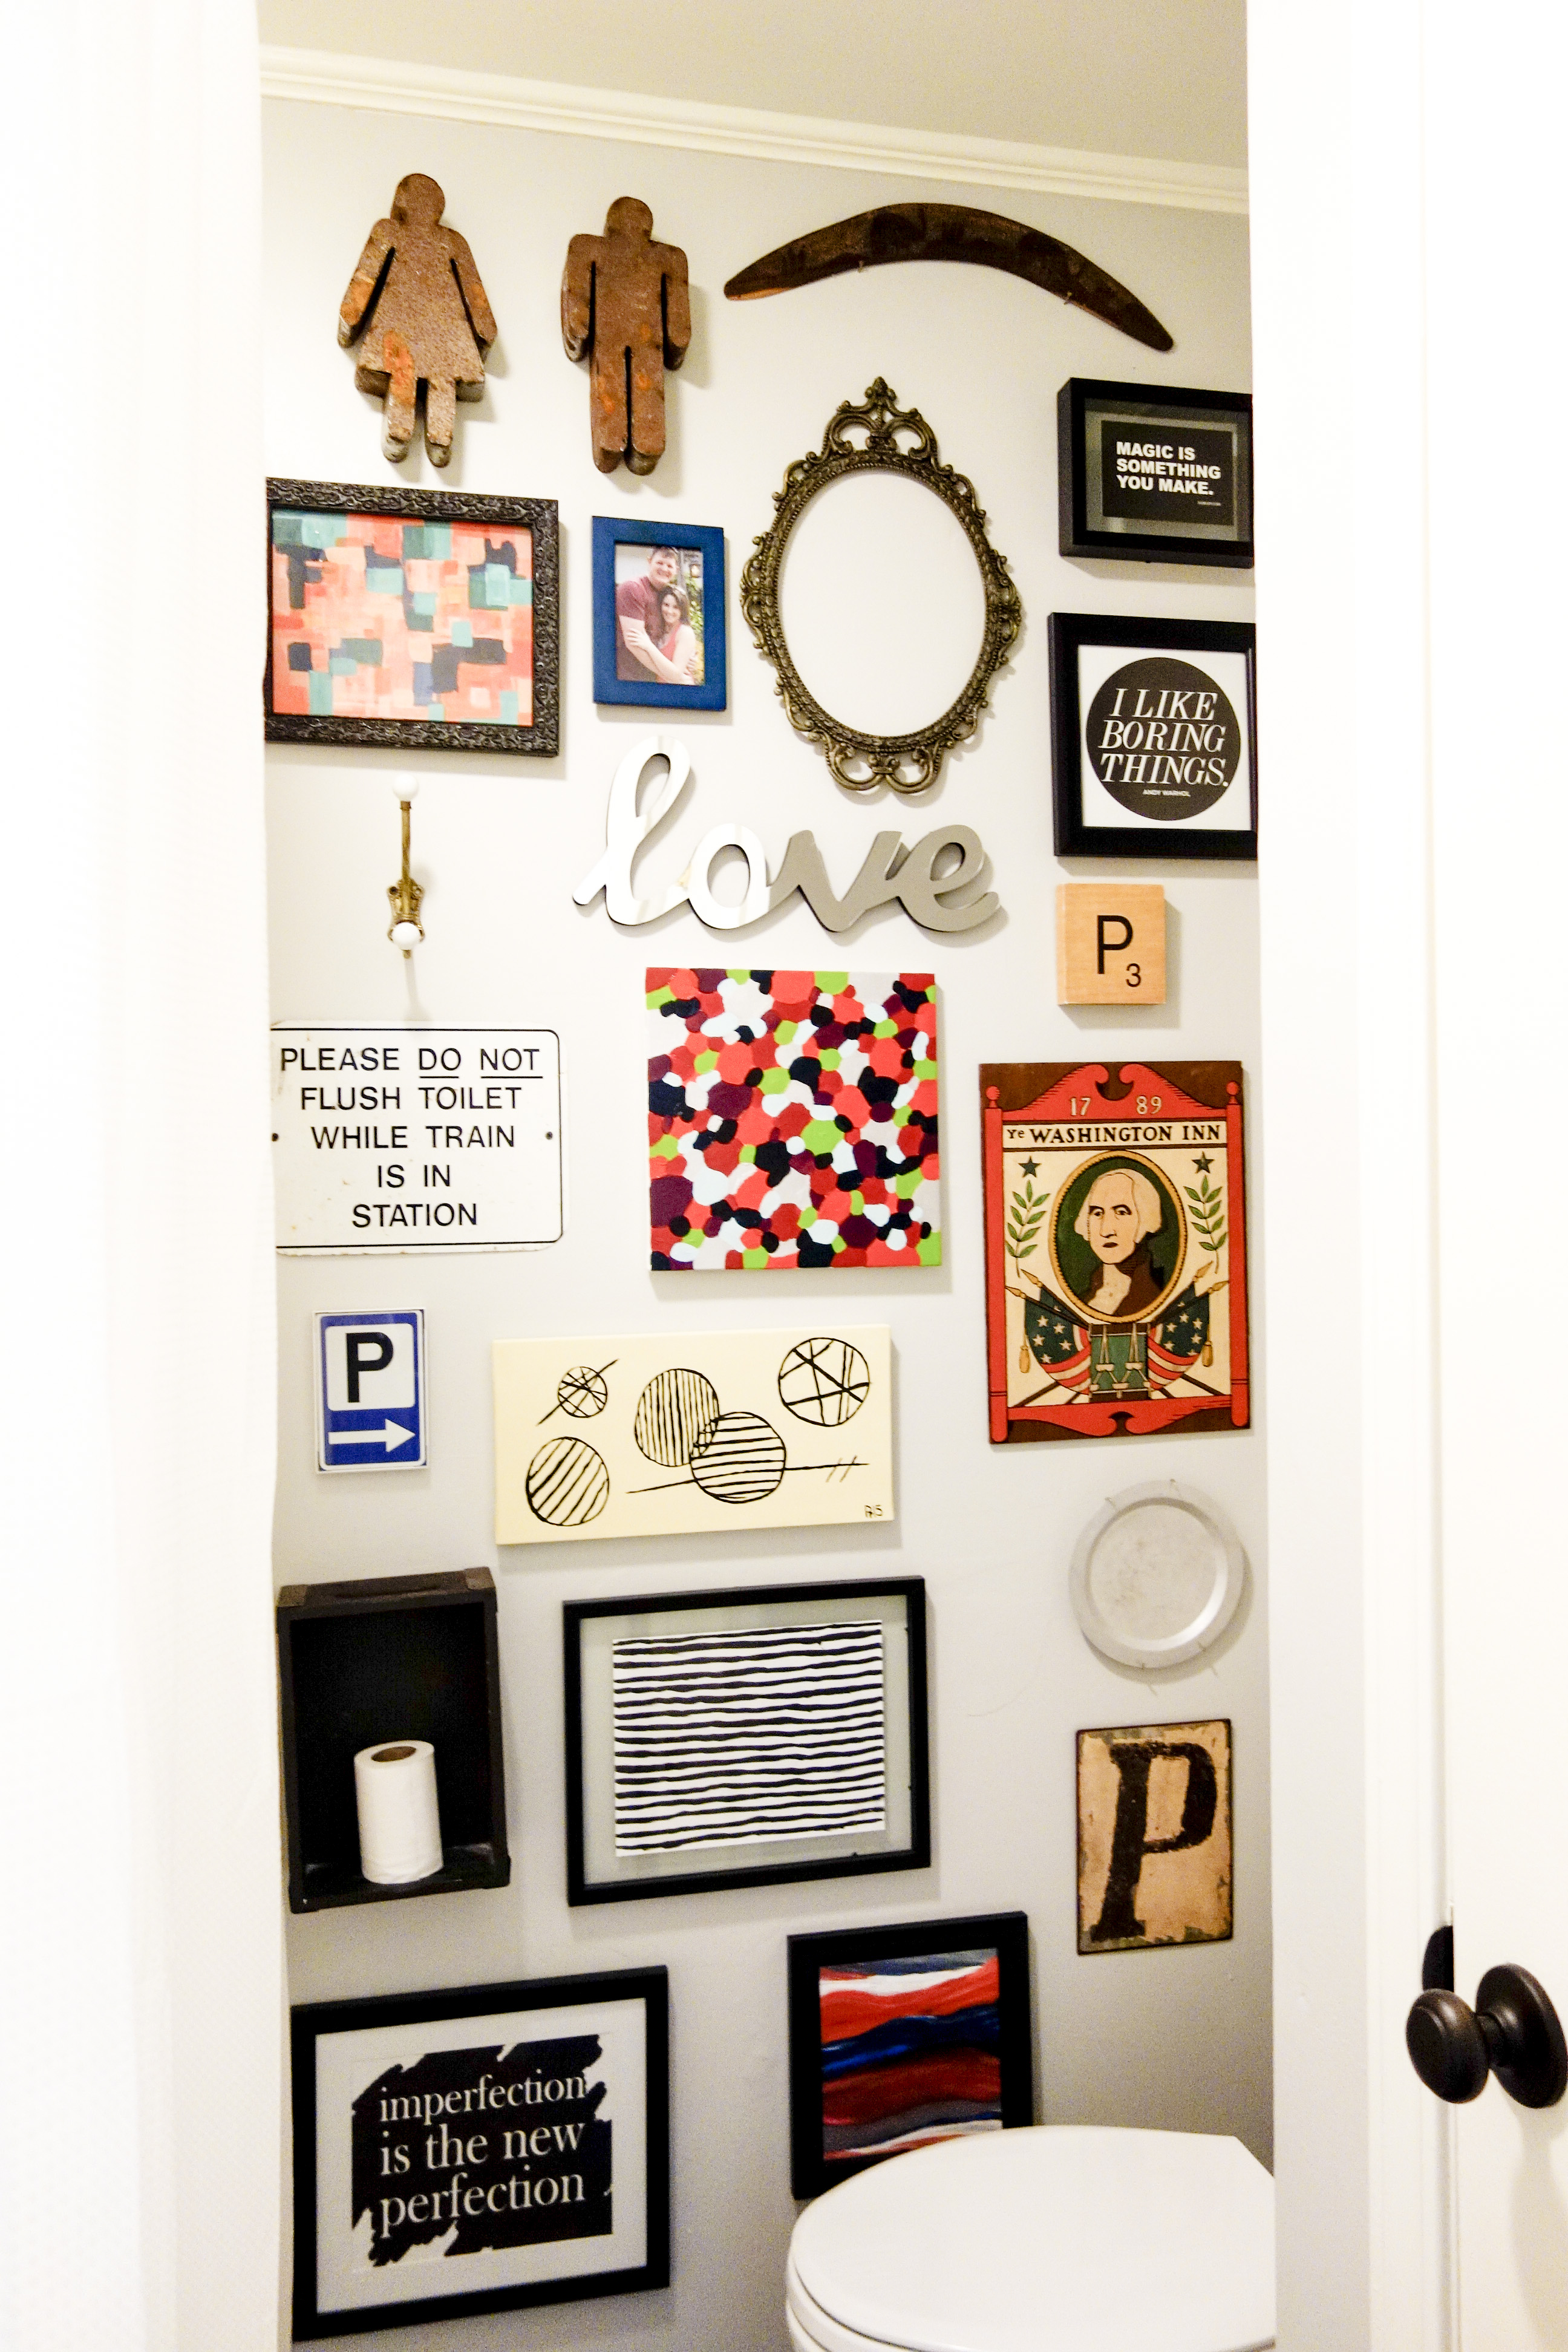
  • bathroom upgrades – no more seashell sink!!
  • install my mirror gallery wall
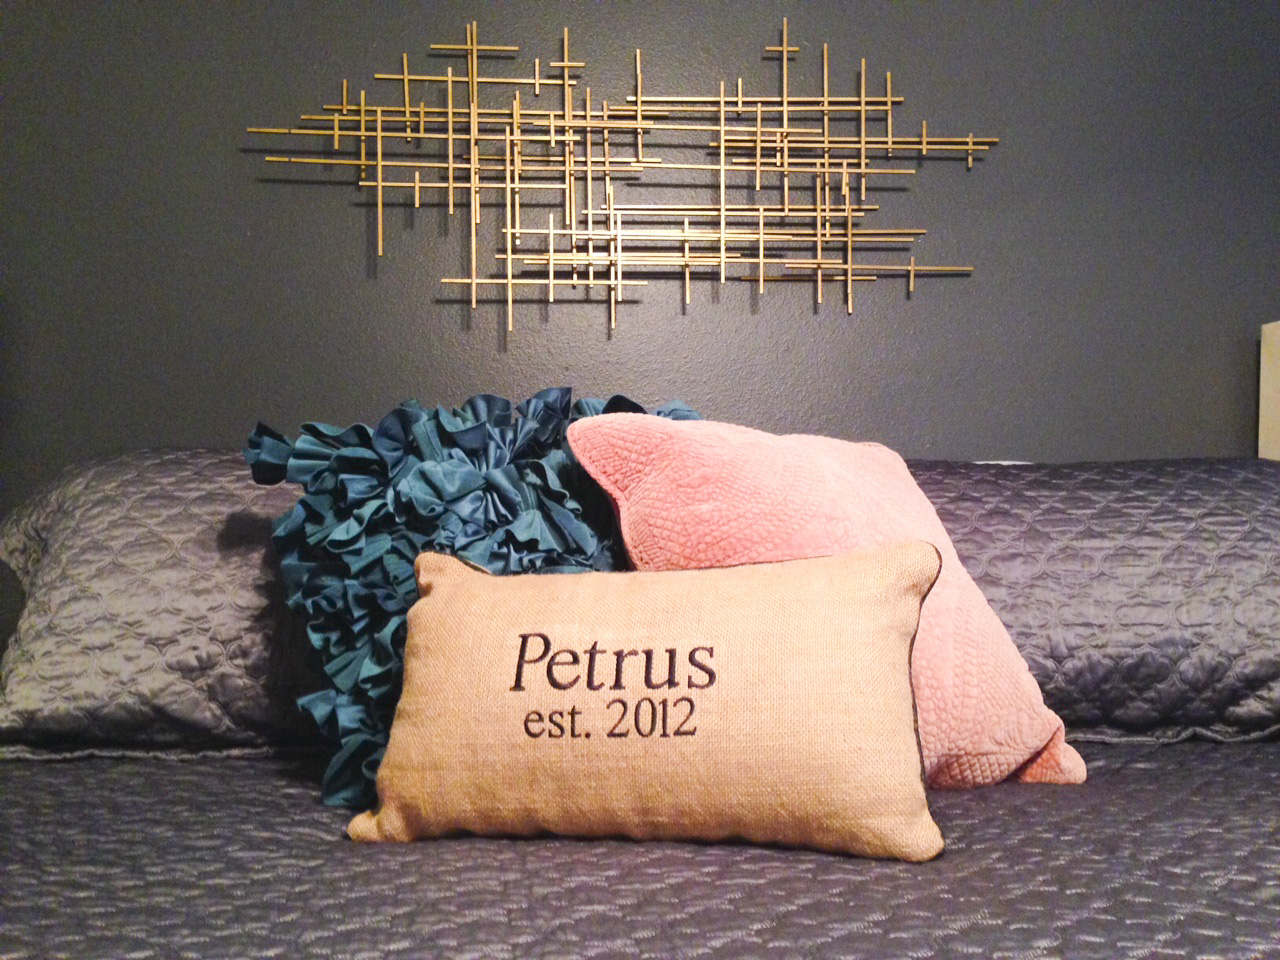
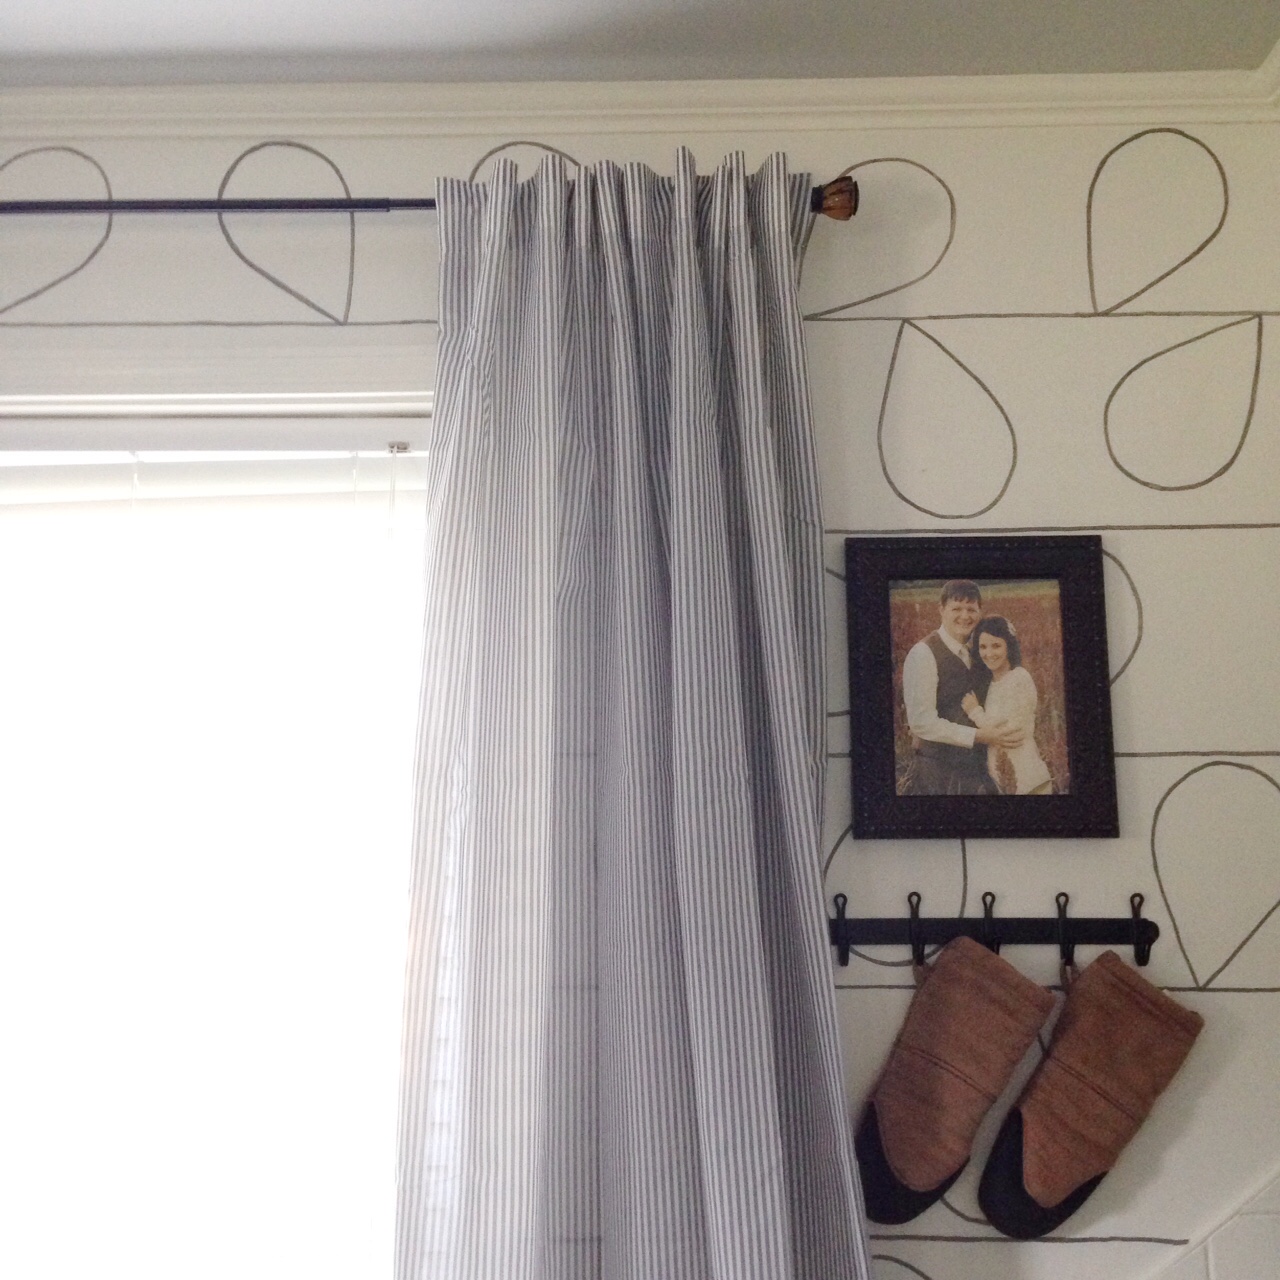
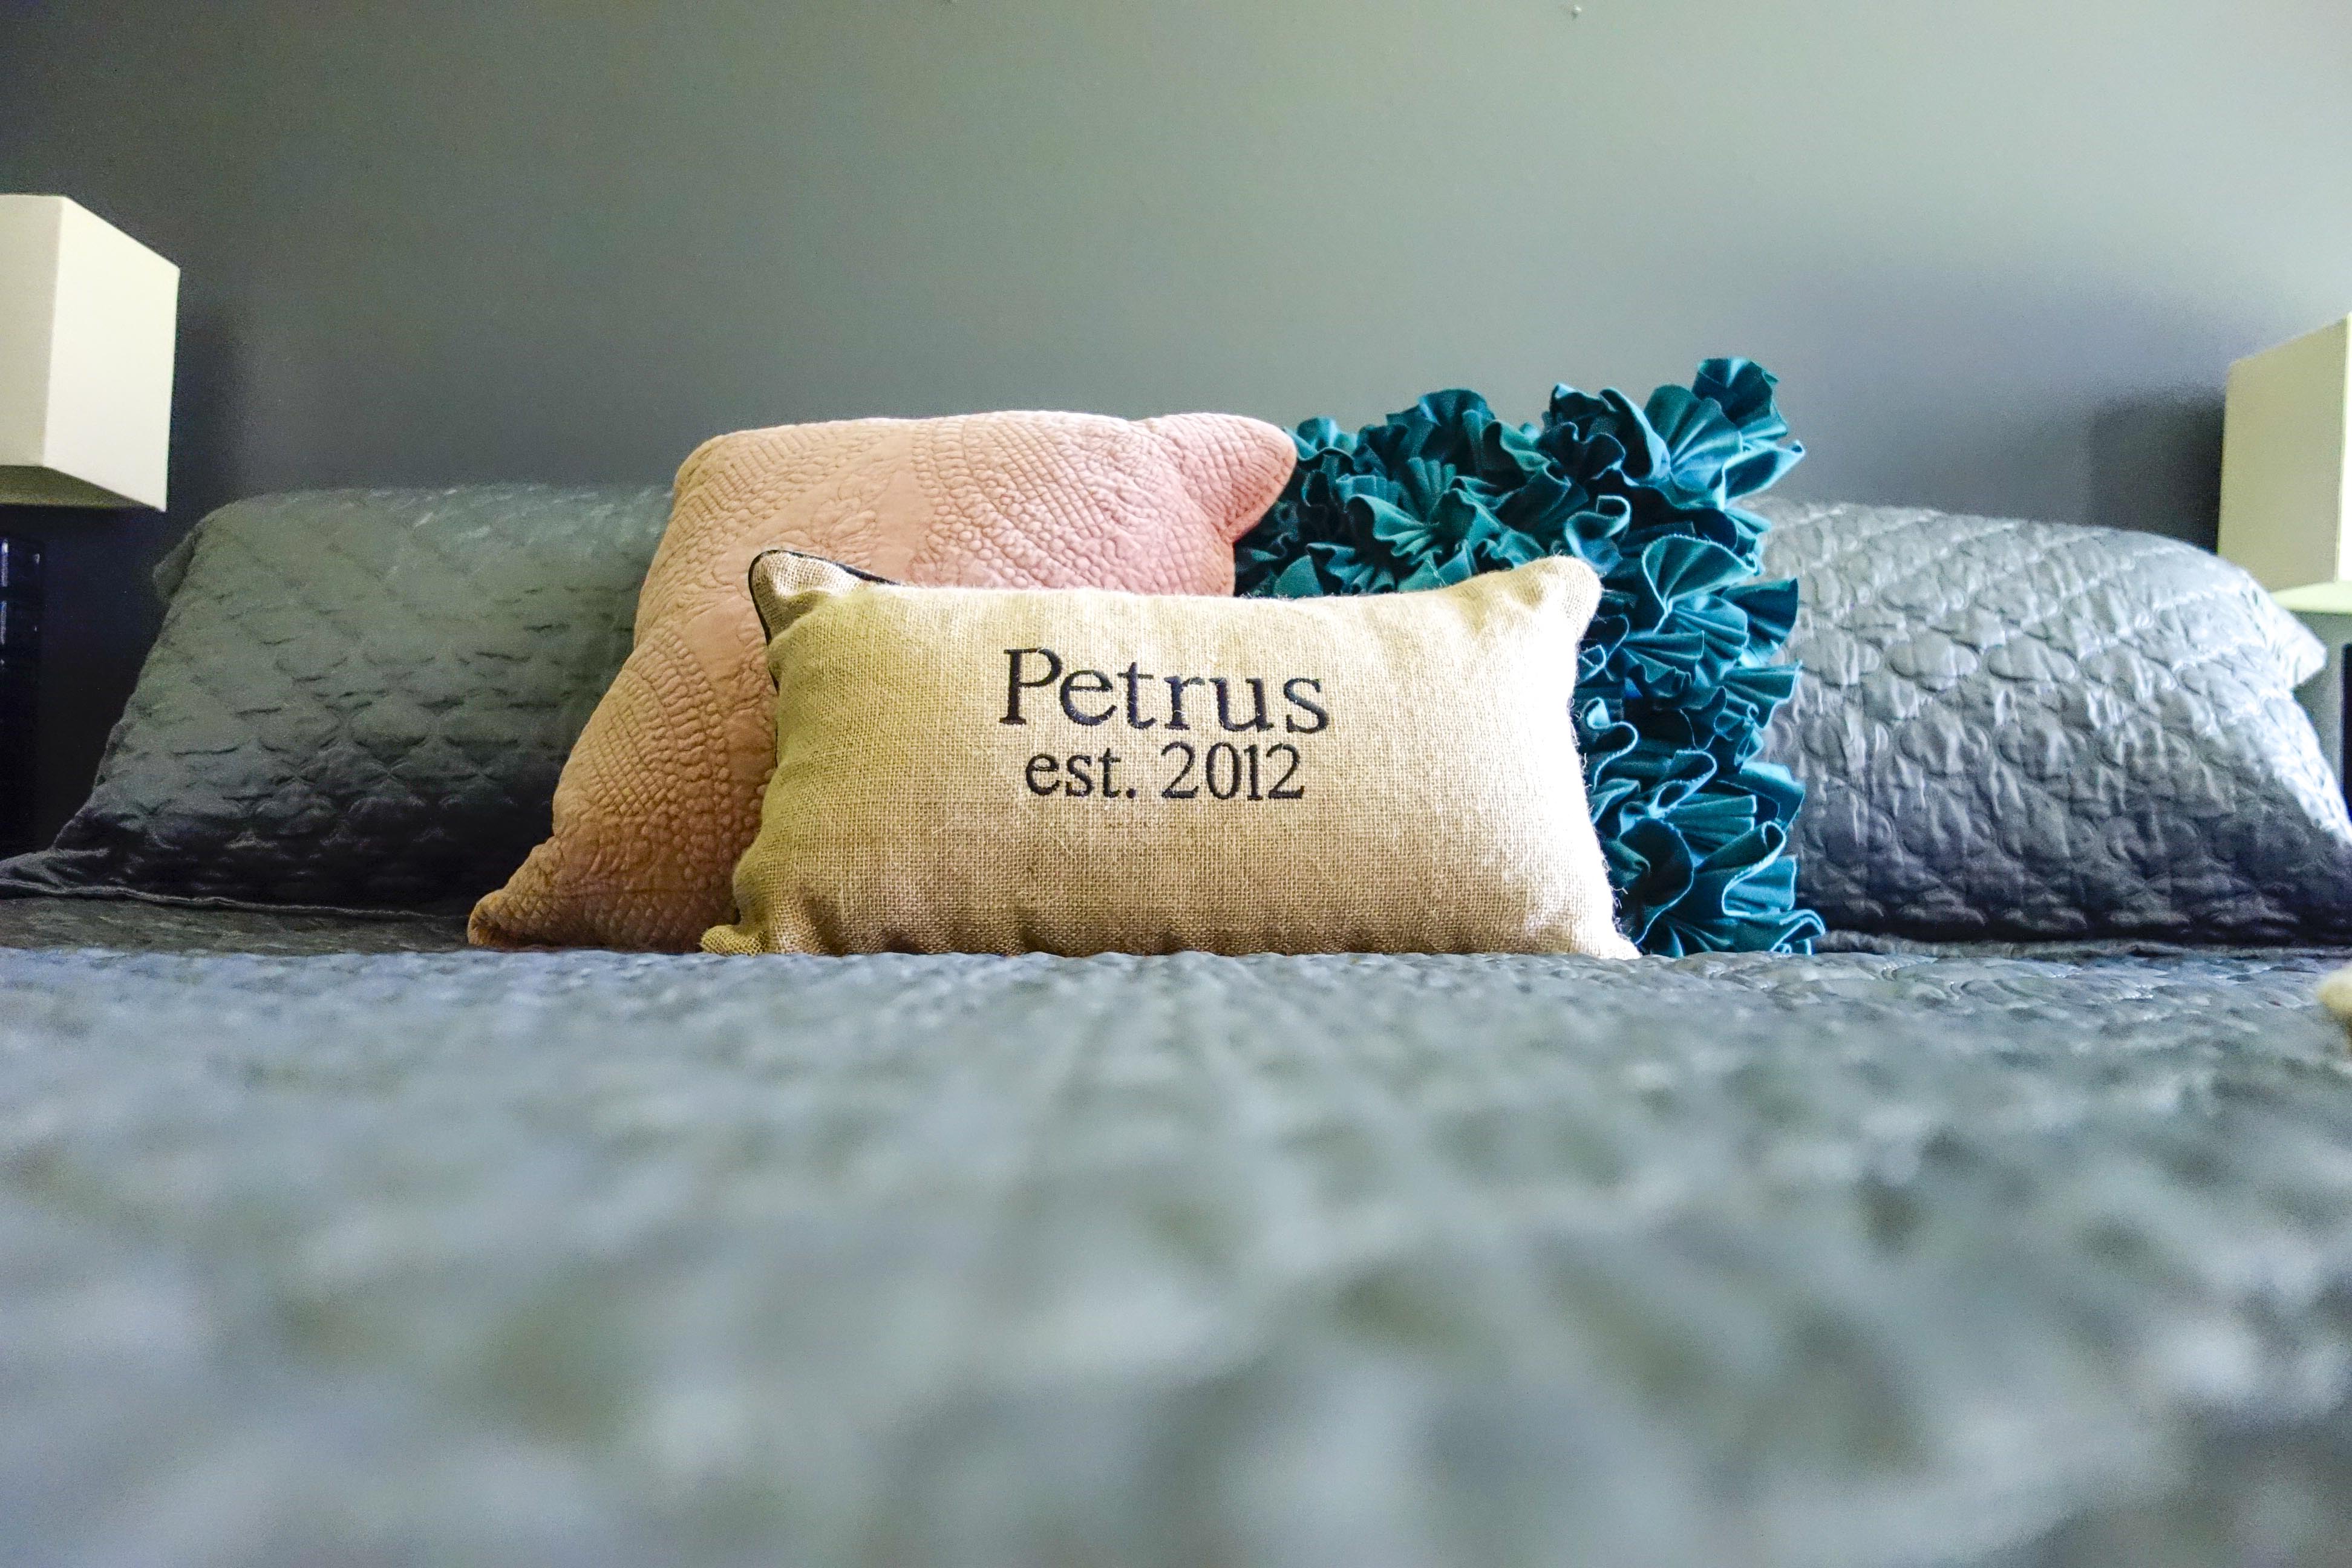
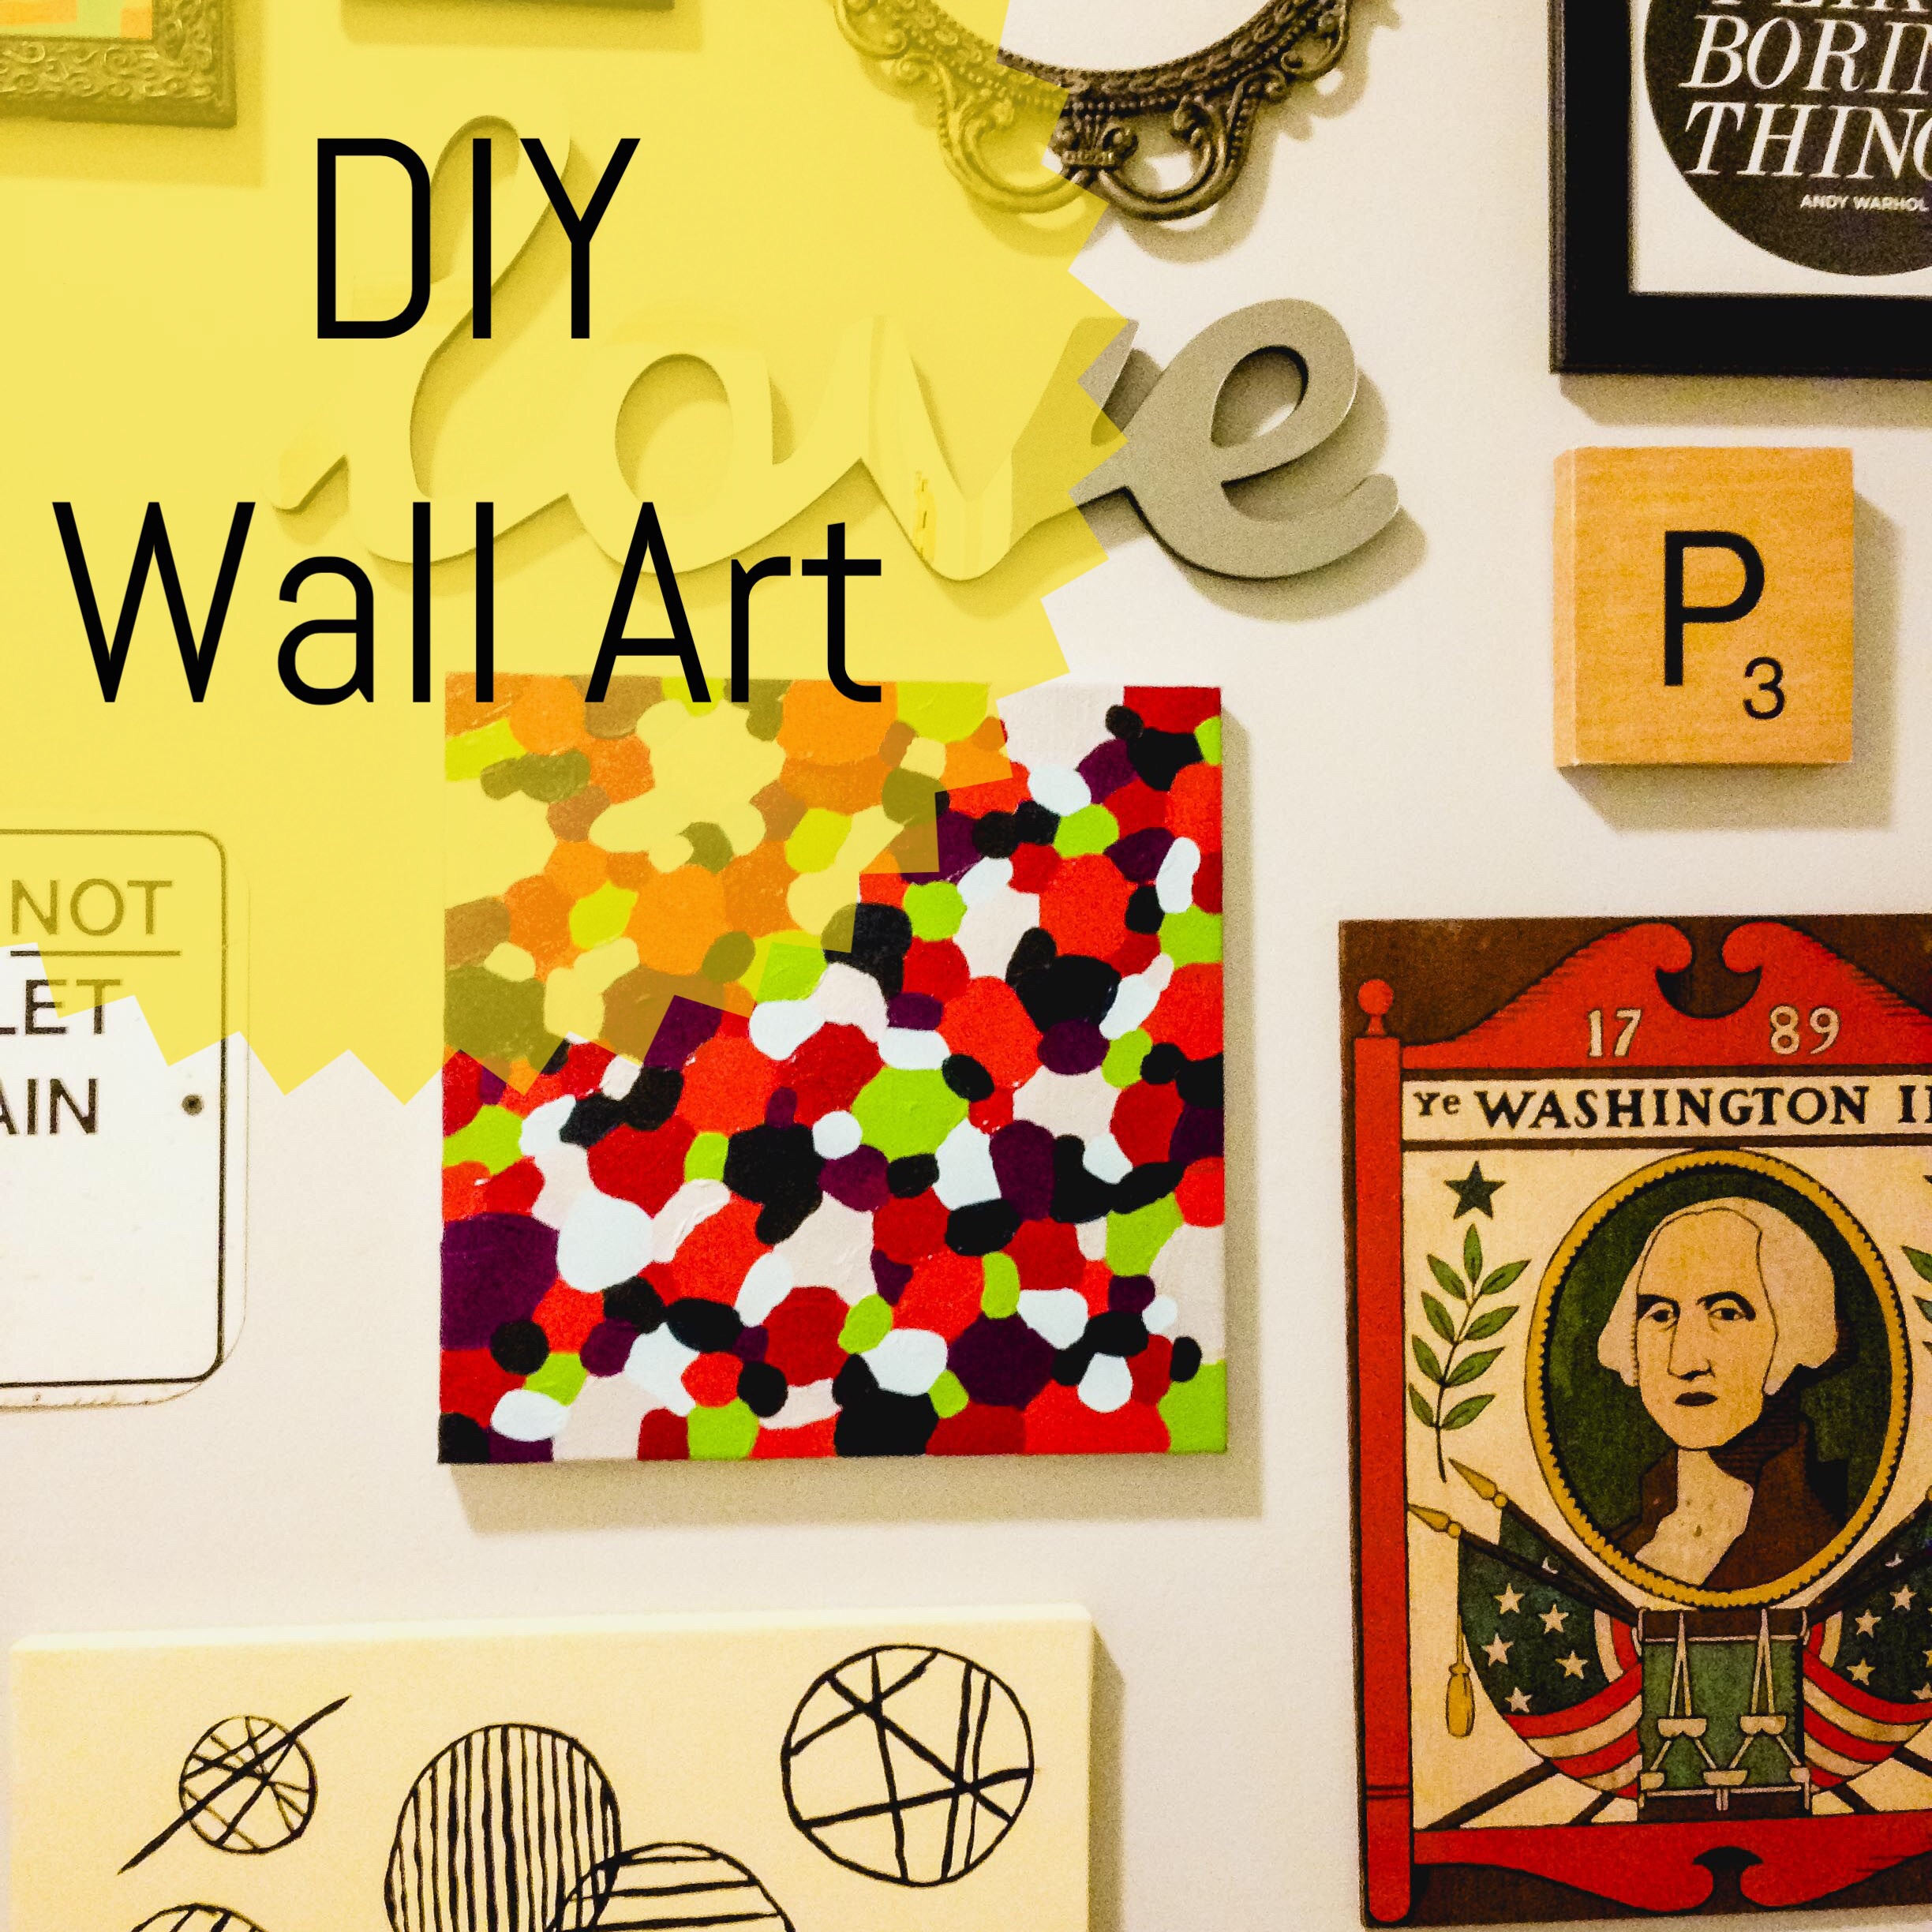
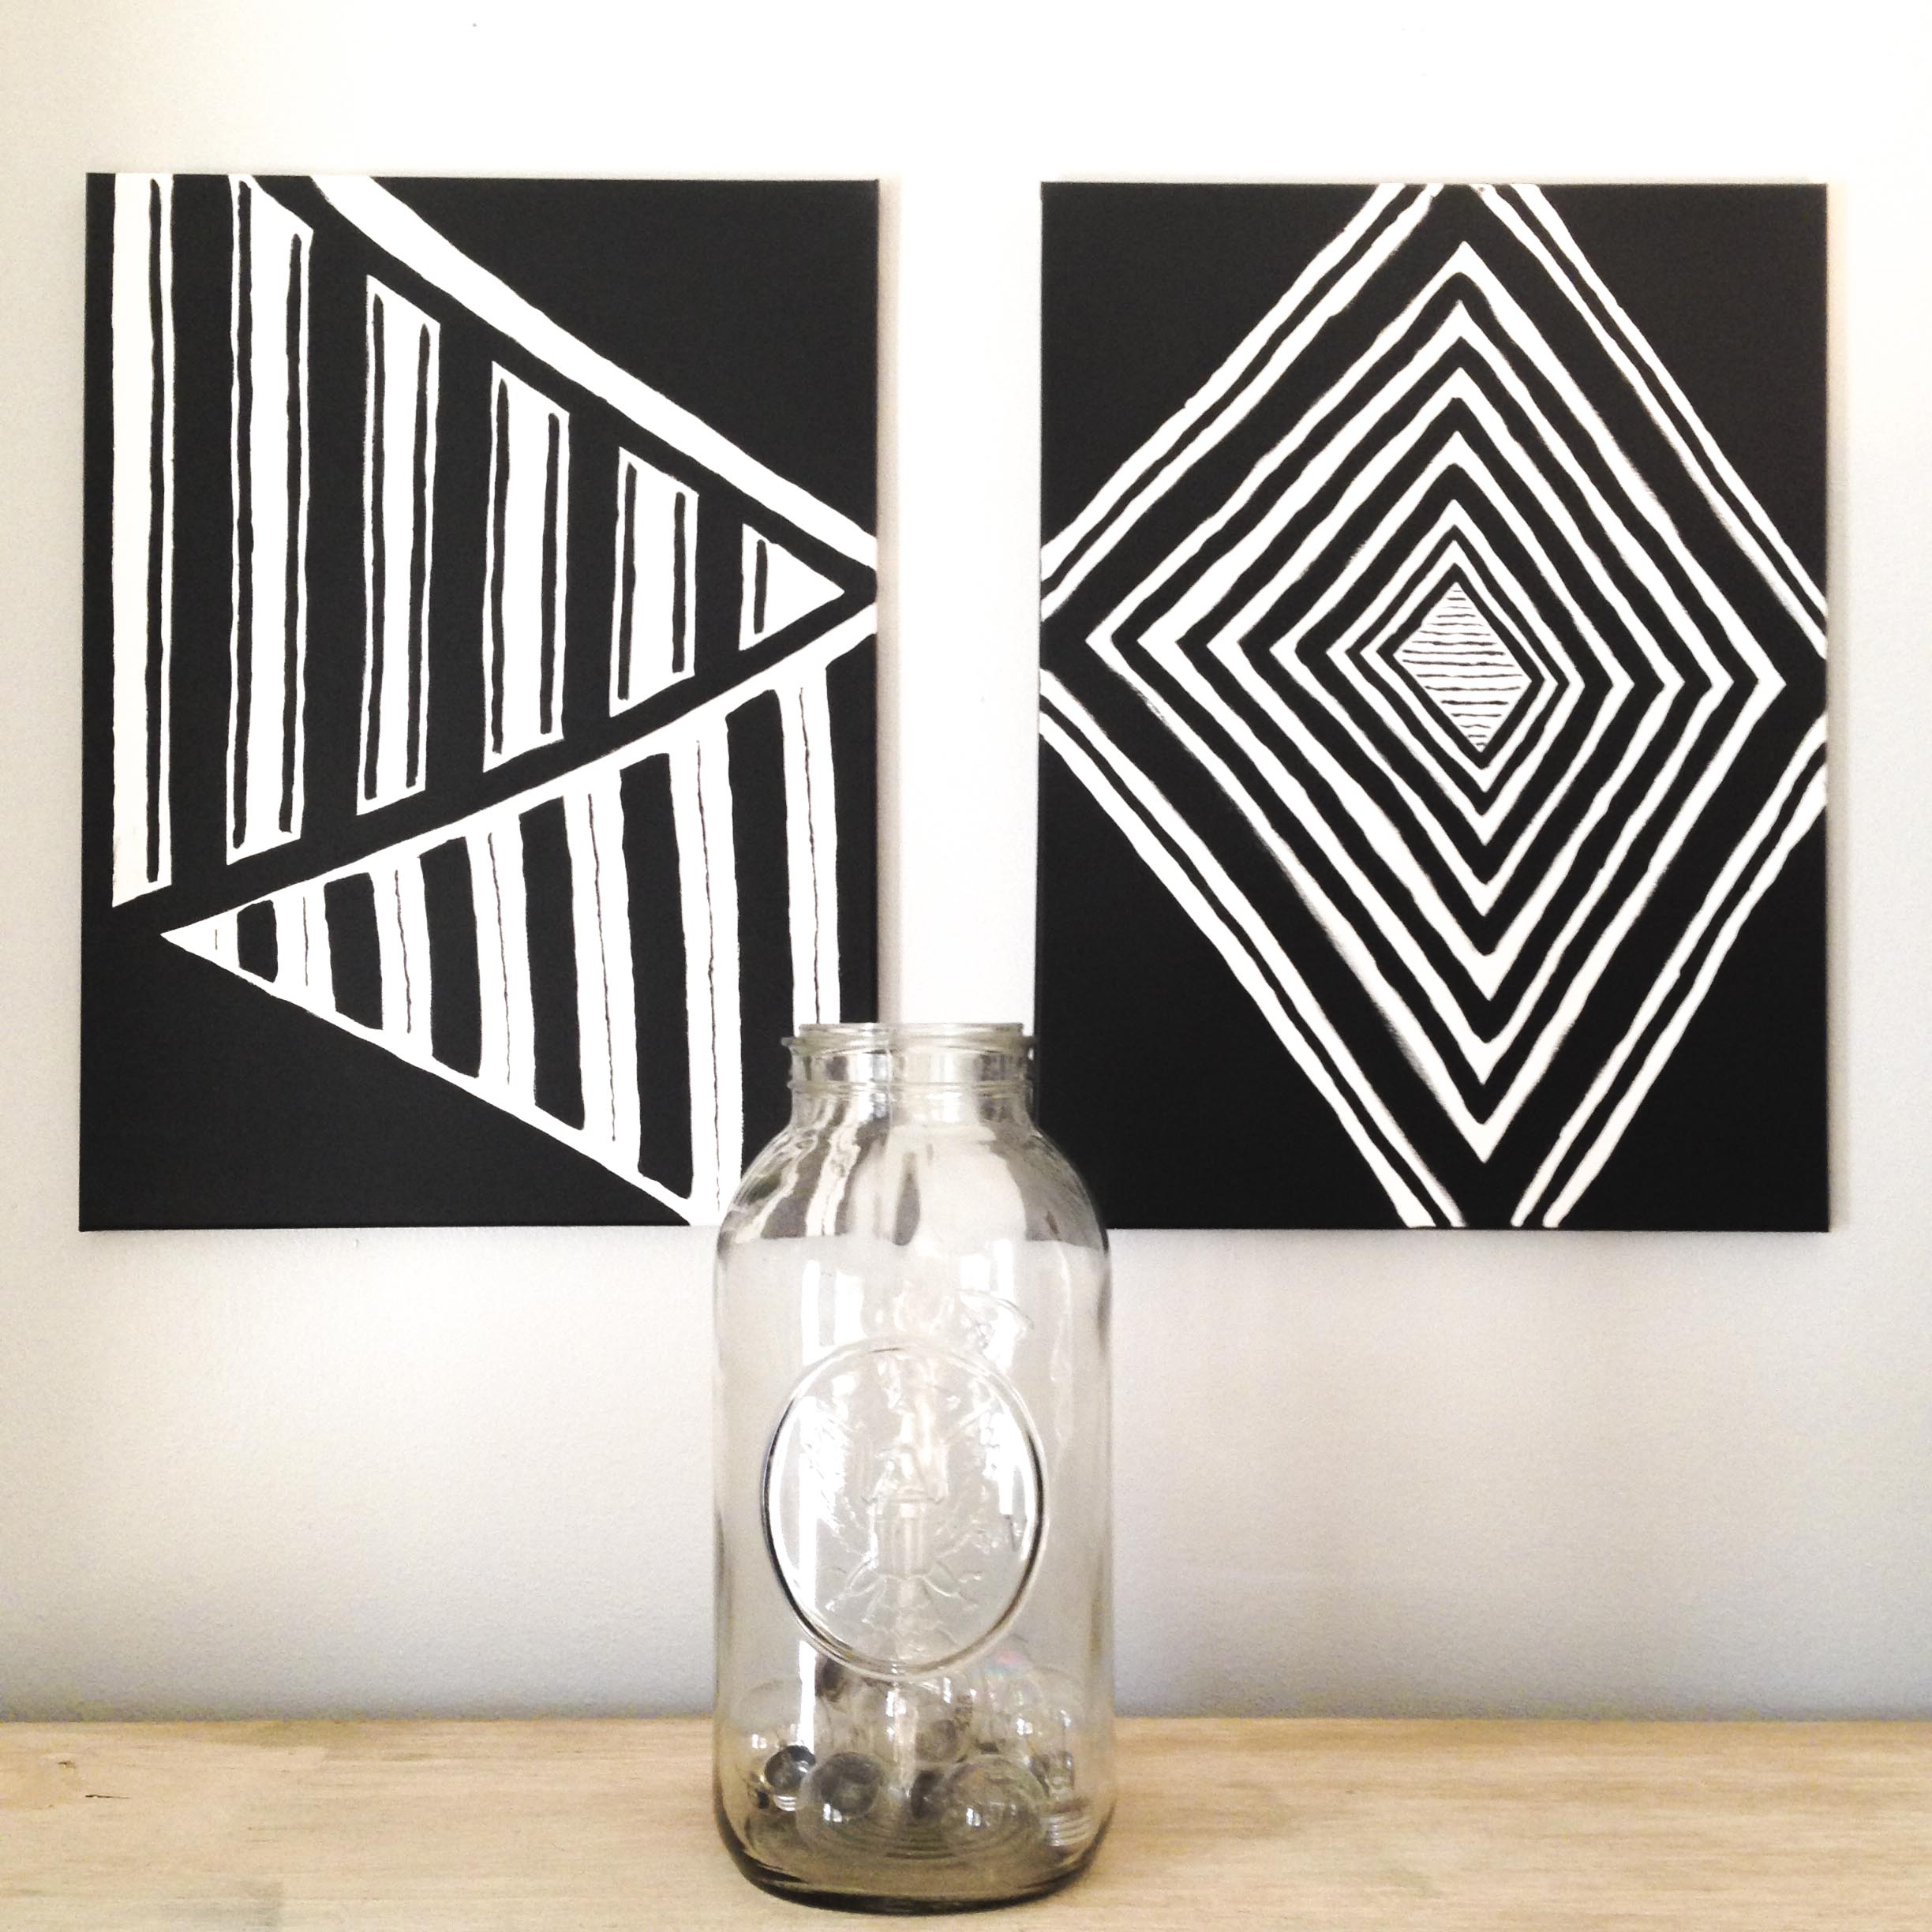
  • all of the decorating everywhere – curtains, pillows, artwork…you name it!

Living roomKitchen view of the living roomLiving room back wallAs I prepared for this post, I did make several decisions on different elements that I’ve been stewing over. This means I’m ready to make some magic happen again! I’ve decided that I’ll tackle these projects one little piece at a time. Waiting until I had all the money and all the time has obviously slowed down progress. Just like unpacking,  I’m going to start doing one thing at a time! Speaking of boxes, there are officially NO BOXES left in my house that are not intended to be there. Not even one little box hiding in a closet. That last box has been sent on its merry little way and that alone is something to celebrate.

Breakfast area and carport hallway from the kitchen

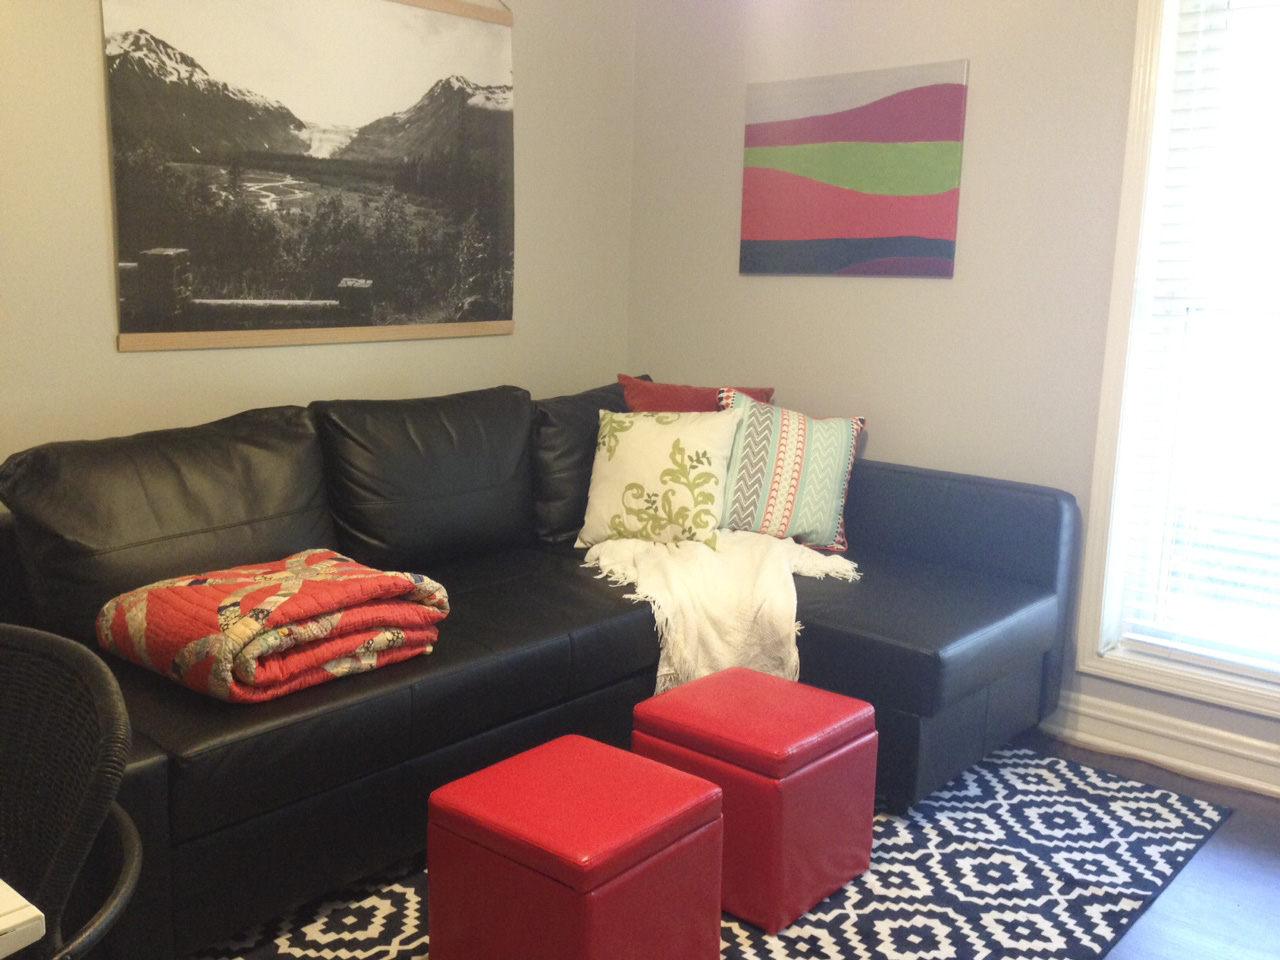
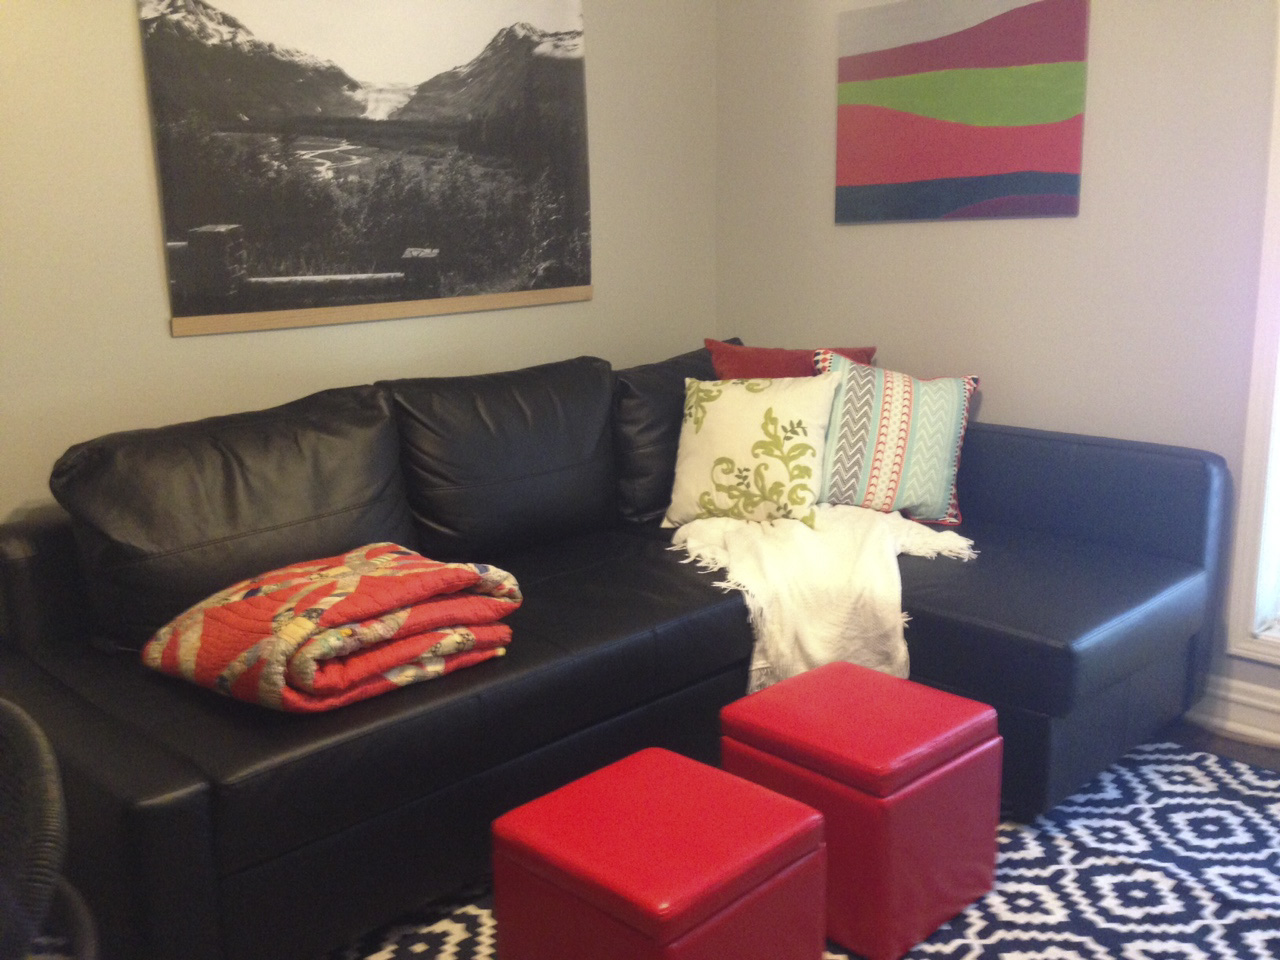
That’s a wrap for now. I’ll hopefully be sharing even more progress very soon! If you’d like to read more about the journey, check out our new couch, tips for changing flooring, and why I’m thankful for a new home.

Everything AND the kitchen sink.

new sinknew sink faucetI’ve mentioned time and time again that we have a rather lengthy update list for our house. There really isn’t anything here that we haven’t already changed or plan to change later. The past few weeks, Matthew and I have been a bit discouraged by that ever-growing list. Last week on the patio, we talked about how we probably just needed to start doing some things here and there to make ourselves feel encouraged again. We’d fallen in to the trap of waiting until we had all of the money to do all of the things. Let’s get real…that’ll never happen. After chatting on the patio for a bit, we decided we needed to just bite the bullet and get back to working on the updates. I had no idea that we’d start so soon.

Saturday morning we discovered some puddling water on the kitchen floor. After a bit of exploration, we (and by “we” I mean Matthew) discovered a leaky faucet. After I showed a few houses, he and I headed off to Lowe’s to pick a new faucet. We decided that we’d “price” some sinks while we were there. The old saying goes “everything but the kitchen sink.” In the case of our renovations, we had hoped to replace “everything AND the kitchen sink.” We just weren’t planning to do it quite so soon.

water leakAfter shopping our options, we decided to go ahead and replace the sink while we were working in the kitchen. I practically loathed the one that we had, and while it wasn’t my top priority, we’d save a bit of money (and time) by doing it all at once. We said we needed to start somewhere. I guess the sink would be our jumping off point. In an ideal world, I’d have some lovely farm sink built into my cabinets. Since that’s not in the cards, this one-tray stainless option will have to do.

While we were at Lowe’s I browsed the hardware section and picked a few options for our cabinet knobs. (We haven’t had knobs since we’ve moved in. Don’t judge.) If nothing else, having to replace our kitchen sink and faucet, got me back in the mood to get things finished. (I use that term lightly.) I came home and pinned 100 light options on my Pinterest and started dreaming of the possibilities. (I also did a bit of housekeeping over on Pinterest, so if you’re not already following me there, you should!) While I’d absolutely love an unlimited budget to do everything I want at once, I also know that having to do things one at a time and as economically as possible has some value.

what a mess! handy husband In addition to getting re-inspired, this little project also gave me the opportunity to think about my marriage a bit. You see, I learned early on to let Matthew have the reins on projects like this. For most women, that wouldn’t be a problem. For me though, it was a bit difficult. You see, I grew up with a mom who knew how to (and did) fix/repair/change/build/update everything herself. I feel pretty confident in my ability to do most minor fixes and updates around the house. I certainly won’t argue that I’d do everything perfectly. However, I do feel like I could make it work. When Matthew and I married, there was a bit of a standoff on who would be the one to handle these sorts of things. I definitely wanted him to fix things; I just had a bit of an opinion on how it should be done. Marriage is absolutely about a give and take between spouses. I decided the common DIY would be the area where I gave. That’s why I sat patiently and explored Instagram while Matthew selected what supplies we needed. He gives me the reigns sometimes and I hand them off to him sometimes. Today that means that I’ll search for amazing light fixtures while he determines how to best caulk the new sink. It’s a win, win for everyone.

Use a cute bowl to collect miscellaneous items by the sink! // pamelapetrus.comnew sink!Up next on Matthew and Pamela Very Slowly Update a House from Top to Bottom…..who knows. I guess we’ll see what breaks next. On a serious note, I promised you guys a house tour this month. I’m going to need for things to stop breaking in order to make that happen!

P.S. Don’t look too closely. Neither of the curtains pictured in this post are hemmed. That’s on the agenda for another day.  I’m planning a before/after post (including details about that stenciled wall) once those curtains are hemmed and a few other items are marked off the list. Hang in there!

Bathroom Gallery Wall

Bathroom Gallery Wall (9)It is no secret that I love a gallery wall. I’ve learned that I’m very far from a minimalist. Instead, I love a collection of several things together…in an organized and uncluttered way, of course. Ever since gallery walls started popping up on Pinterest, I’ve wanted to do one on every wall. I think it’s a great way to showcase multiple things you love, fill a large space, and add an ample dose of interest to your décor. Today, I’m showing you the wall I’ve done in our master bathroom.
Bathroom Gallery Wall (12)The master bathroom is one of those “big projects” on our renovation list that will likely be done in the year 2072. We did a few small things to make it work better for us, like taking out a closet in the sink area to add more standing room. I’ll show you the full bath eventually. Today, we’re just taking a peek into the shower/toilet area.

Bathroom Gallery Wall (10)
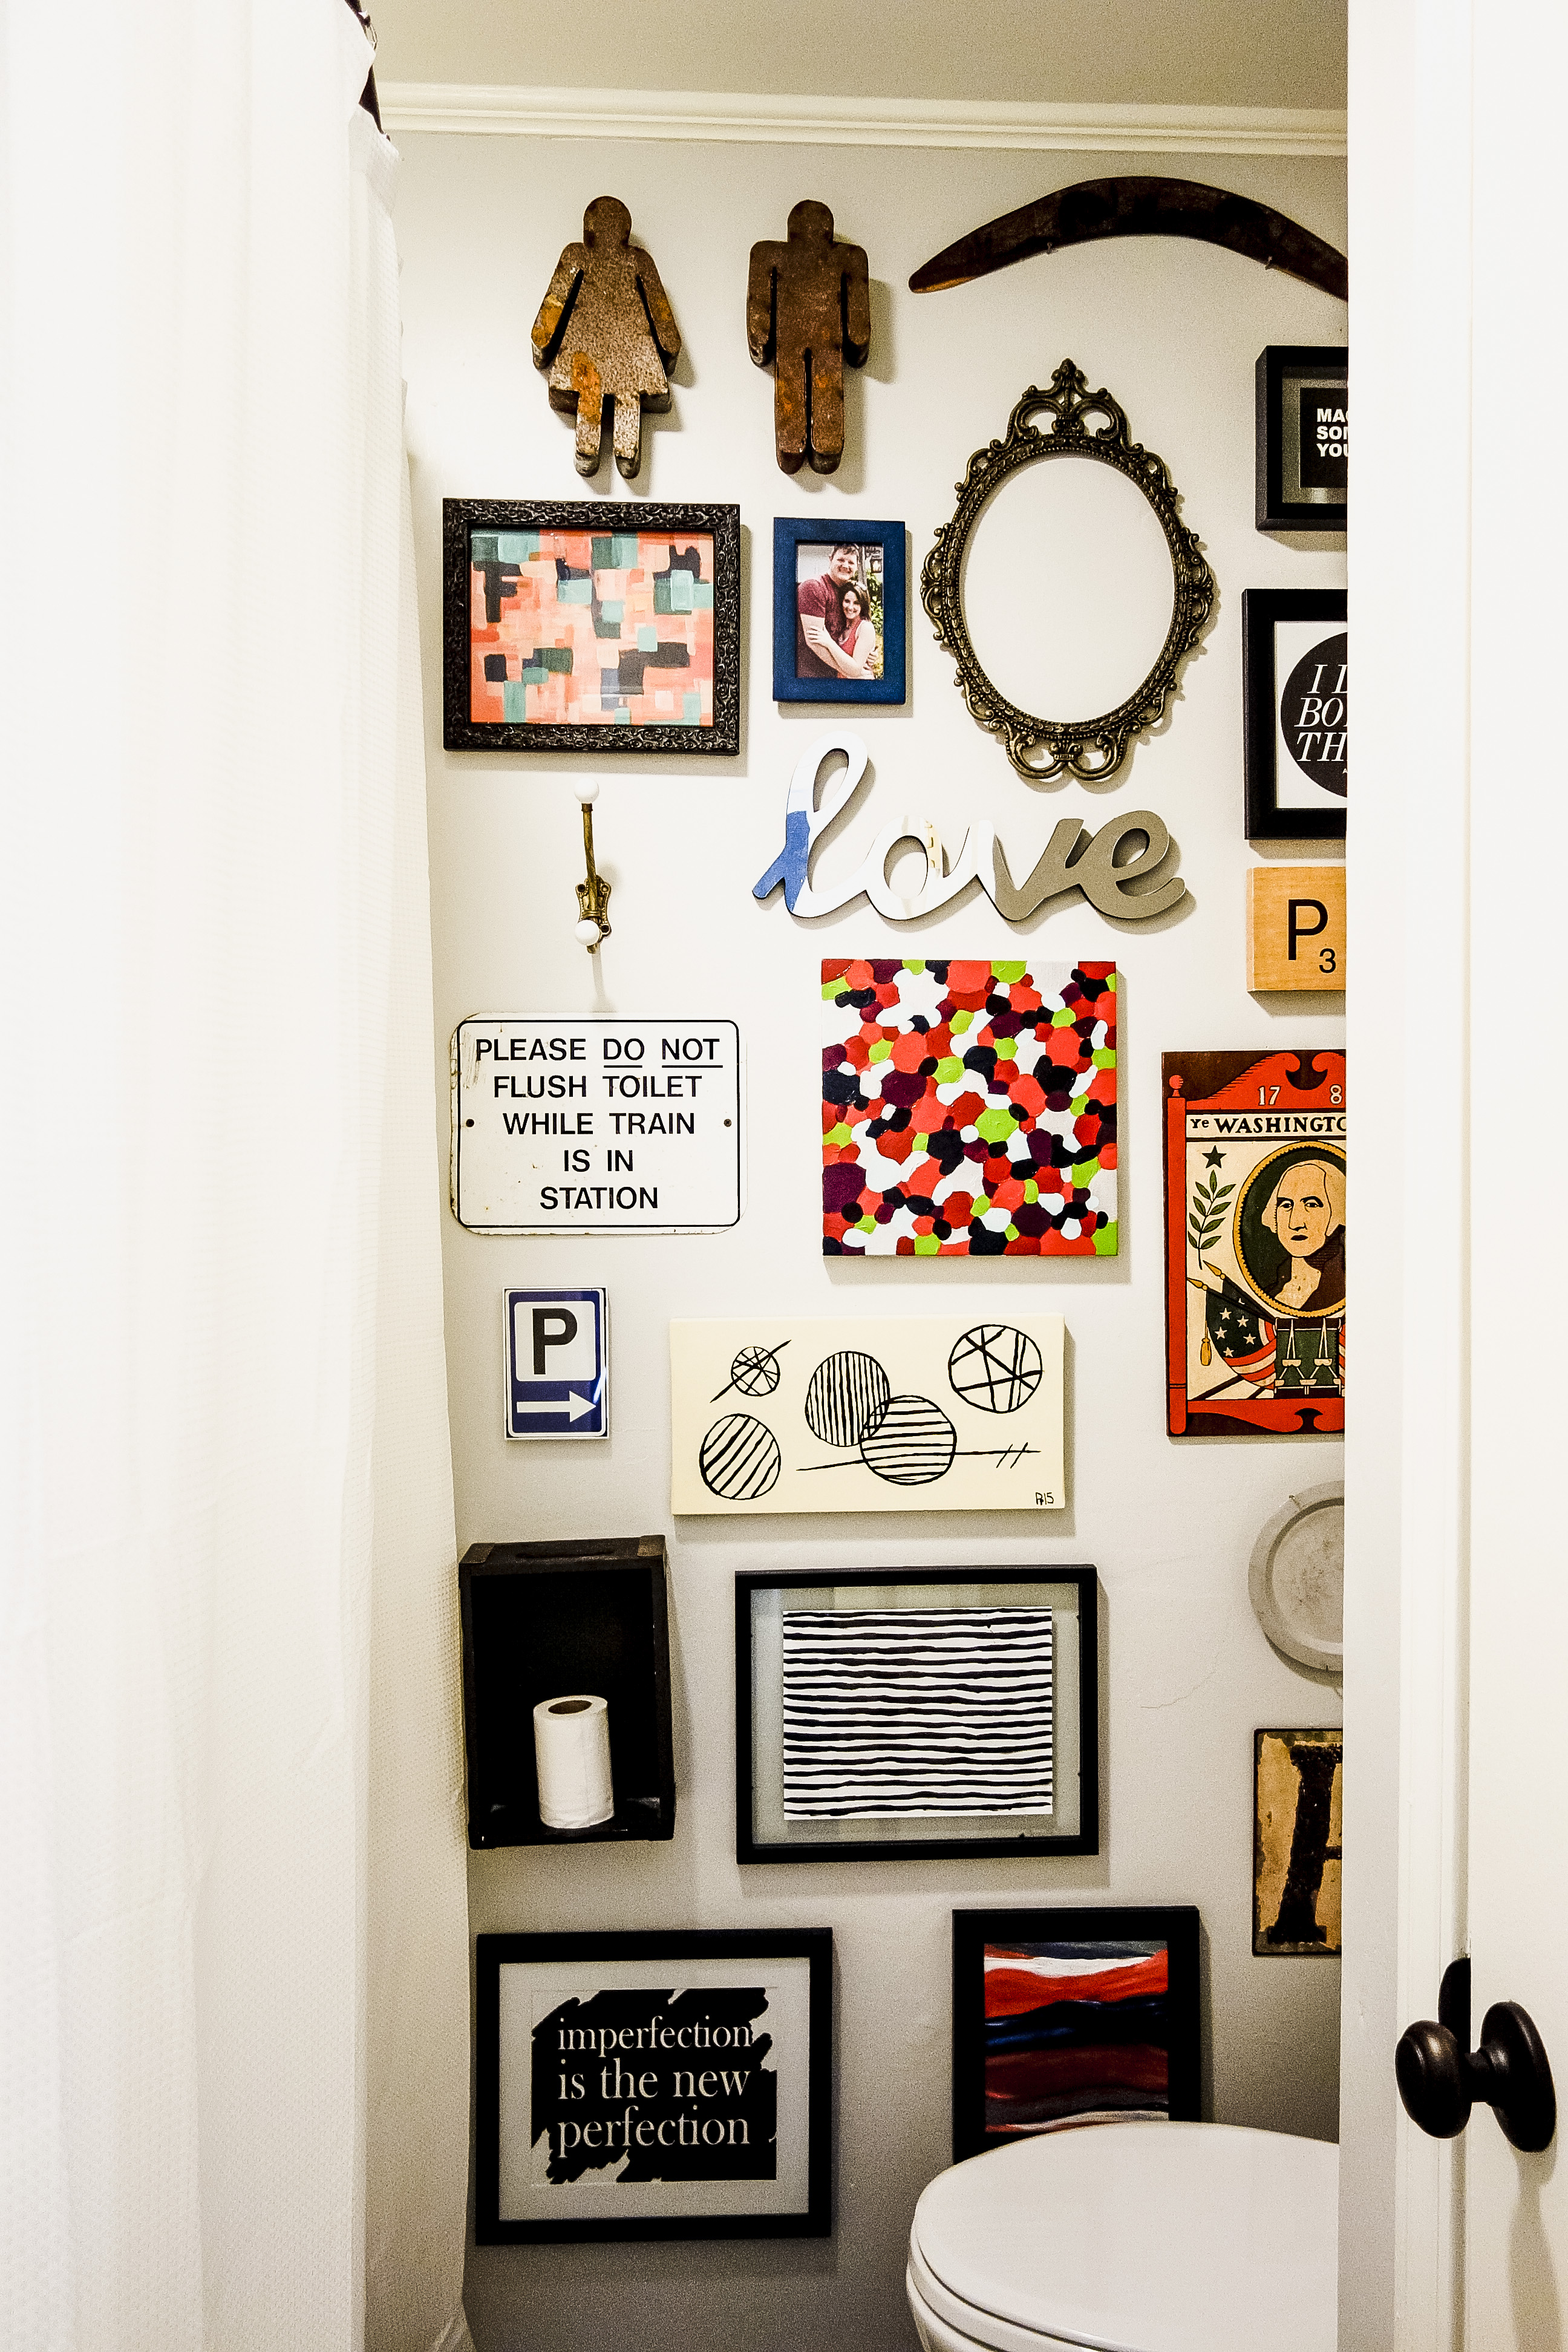
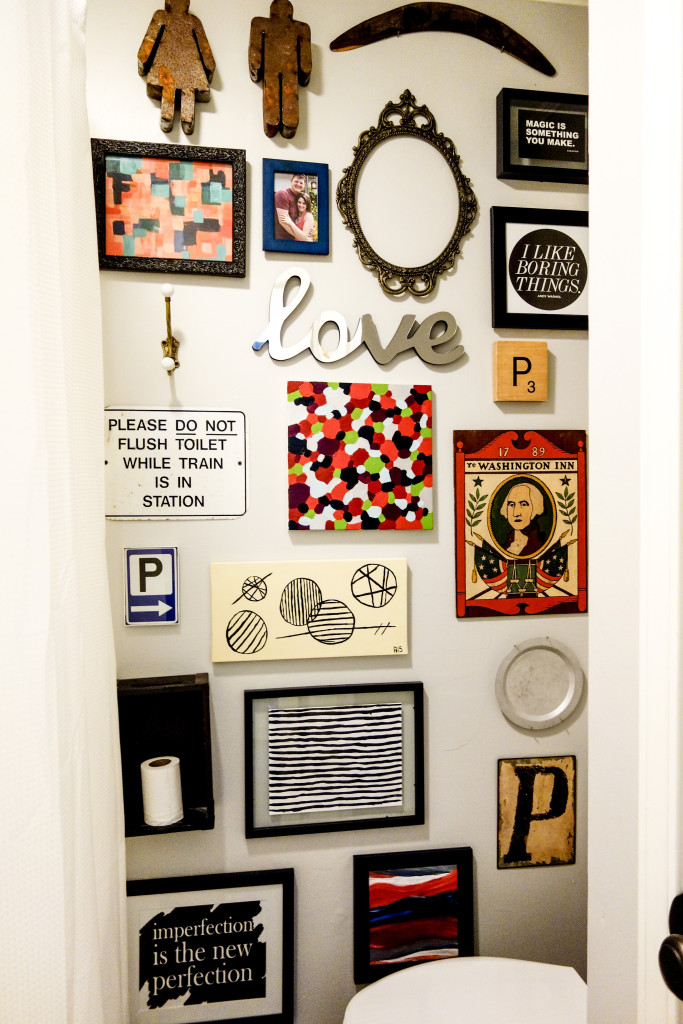
While we wait on the bathroom remodel fairy to arrive, I needed some sort of plan for giving this small space a bit of personality. One way to add some pizzazz to a small space is through the paint color. I did neutrals (all shades of gray) throughout the house because I had no idea what colors I wanted and a limited amount of time to decide. I did a lighter gray (Sherwin Williams light french gray) in here because I wanted the room to feel as large as possible, especially since there are no windows. The basic light gray, though, left the room feeling pretty bland.

Bathroom Gallery Wall (13)For the first several months, this room only had the light gray walls and plain white shower curtain. (It turns out that extra-long shower curtains are hard to find! I caught this one on sale at target.com and thought it was that fancy waffle knit fabric. It’s totally not, yet has served its purpose until I find something different.) After months of using the bland bathroom, I knew I had to do something bold in there. I found the marbled rug at TJ Maxx and started pulling together items for the wall that matched the rug’s crazy colors.

The collection started with that George Washington board. From there, I pulled together items that I already had and only had to purchase a few small things to fill in holes. I also made or re-purposed several items. Immediately after getting so many colorful items on the walls, I let out a sigh of relief. The room feels so much more alive and inspiring now…just what you need when you’re struggling to wake up in the mornings. I’ve included a list of resources below in case you’re curious about a certain piece.

Bathroom Gallery Wall (5)Bathroom Gallery Wall (7)In addition to adding the gallery wall, I also added photos of Matthew and me as babes in the tub over the toilet. I came across this idea in the early days Pinterest, and the link has since been removed. (If this was your original idea, Random Person on the Internet, here’s a high five for you!) I had the photos printed in black & white, because let’s face it, late 80s film photography isn’t known for its outstanding quality. I also decided to do them in light gray frames so that they wouldn’t take away from all of the color on the nearby wall. I didn’t want the toilet wall to be blank, and doing monotone art there would add something without distracting from the chaos on the adjoining wall. I must say, I absolutely love seeing our baby photos every day. I think it’s adorable, and I’m sure my husband is thrilled to have his naked bum on the internet. Shhhh…it’ll be our little secret.

Bathroom Gallery Wall (16)In other bathroom news, adding a curved shower rod made a huge difference in making the shower feel more spacious. It didn’t make the room feel smaller like I thought it would, and made the shower feel 100x bigger. The extra-long curtain also made a difference. Adding the extra height made the ceilings feel taller and gave the impression of extra space.

Overall, I’m pretty pleased with the outcome of the gallery wall. I’ll probably adjust some things here or there as time passes. For now, I’m happy with the outcome considering how little the project cost. If you’re interested in other walls I’ve done, check out my mirror wall and the small collection in my rent house living room. I certainly have more collections planned for this house and will share those as they’re completed!

Sources: 1. Nashville Flea Market 2. gift from Australia from Matthew’s grandmother. 3. Elise Blaha Cripe 4. frame – Hobby Lobby with our second photo ever taken! (I intended to replace the photo with something else and then decided it could stay.) 5. vintage 6. framed marketing piece from one of my Elise Joy purchases 7. my Mom’s house (I think.) 8. Hobby Lobby 9. free printable from the A Beautiful Mess newsletter 10. Hobby Lobby sale isle ($2!!) 11. TP Outdoors warehouse & it’s a favorite! 12. DIY painting 13. thrifted 14. Hobby Lobby ($2!) 15. DIY 16. Hobby Lobby 17. DIY & it’s a favorite. 18. thrifted 19. Hobby Lobby 20. DIY 21. Hobby Lobby (purchased right after this post)

Hanging all the things.

chalkboard artSunday was my only day off this week. This means I had one million personal items that needed to be done on Sunday, including not setting an alarm and slowly drinking my coffee…you know, the important stuff. Somehow amidst trying to squeeze in enough rest to make it through the upcoming week, I made quite a bit of progress on the home front.

I’ve mentioned before that hanging things on the wall gives me a bit of anxiety. After writing this post (and reading that fantastic book), I made a tremendous amount of progress with decorating. I was inspired and encouraged and even a bit fearless with making things happen. Then I hit a wall. Several months have passed where I’ve done very little decorating at all. The ideas were still coming, yet I was overwhelmed and not actually doing anything. I seemed to have hit that decorating paralysis where I was too afraid to do anything until I was certain. Or until I had a perfect plan.

gallery wallThankfully, I snapped out of that over the weekend. I mentioned that one of my August goals is to share a home tour, showing my home in its current state. (I feel my blood pressure rising just typing that sentence.) Even though we’re not even close to finished, we have made a ton of progress with our renovation. Knowing that I want to share a progress report this month, has forced me to really think about the unfinished portions of my home. In addition to the one million projects we haven’t started, there are also one hundred projects that just need to be finished. With our busy schedules, it’s easy to put off finishing things because we actually need time to rest or spend time with family/friends.

bedroom artWe’ve also started several new projects lately. We are currently in the middle of turning our guest room into a guest room/home office. This means we have mattresses standing in our foyer…totally normal. All of the items that were safely hidden under the guest bed are piled in my dining room. We’re also FINALLY making some progress in my closet room. We purchased a new storage system from Ikea that I’m so very excited about. However, some of the pieces were out of stock, so we’re at a standstill on that project too. This means there are piles of clothes here and there that don’t have somewhere to live just yet.

kitchen wallStarting two new, major projects while I still didn’t feel settled in the other rooms has made me feel a bit crazy. Sometimes, I’ve wanted to throw my hands up and quit. Or move. There has been a certain amount of chaos around our home lately that hasn’t been very conducive to progress for me. (Just imagine folded laundry piled up not far from the protruding mattresses.) I know that you have to start somewhere and tackle a bit at a time. However, sometimes I reach a point where I just can’t think that rationally. Finally, I started chipping away at the chaos today. I started in a corner of the dining room and worked through things one piece at a time. Shortly after squaring away a few items, I began feeling inspired to hang some things. I’d had a few lingering ideas lately and had not had the time (or the courage) to actually start putting nails in the walls. I recruited Matthew to come along, and we hung several new things here and there. It transformed my entire day and my outlook on our home.

First, we hung a new (and slightly dangerous) Hobby Lobby find over our bed. We finished my bathroom gallery wall that I’ve been working on for months. We hung two sets of curtains (!! – even though one is just temporary). We hung the pallet hanger that Matthew made for me for our second Christmas, and I played with chalk on an old chalkboard to hang there. I also ordered a print for the kitchen from Etsy and hung a frame to put it in.

bedroom curtainsAfter so long of a creative funk, it felt amazing to make some progress. Several of the projects still need some attention or are temporary, yet it still feels great. I am reminded that I CAN get this home looking how I’d like and that I WILL eventually be happy with it. I never intend to be “finished.” However, I want it to feel good enough. After yesterday’s progress, I’m feeling much better about the possibilities. I’m also wanting to paint everything deep, bold colors. (Thanks, Pinterest.) I’m fairly certain that at least a wall or two will become this green color. Brace yourselves! If you haven’t seen a home tour here by the end of the month, you might need to prod me a bit. I’ll probably be hiding in a corner somewhere…next to something that most likely doesn’t belong there.

(P.S. These aren’t the best photos, because I was running out of daylight. Please forgive me.)

How to Create a Relaxing Master Bedroom

a relaxing master bedroomThere are so many theories on what a master bedroom should be like. I like to think that I have my own set of theories and that they’re likely a combination of the massive amount of rules out there. There’s also a chance that they’re complete, polar opposites and totally contradict the “rules.” Doesn’t matter.

Here’s what I think a master bedroom should be like. It should be calming and relaxing. It should be a safe haven to hide away in. It should either be filled with light or dark and moody…whichever you prefer most. It should be free of clutter and distraction, and it should be a private, comfortable, functional space where you can easily wind down.

Our last bedroom was none of these things. I never “finished” that room (or really even got a good start) . I was immensely stifled by the horrible beige walls, and I had no motivation or inspiration for the space. We had so much extra crap in there and nothing really made any sense. I HATE thinking about that room. I loved it’s beautiful corner windows. That’s it though…nothing else.

master bedroomWhen we moved to this house, I knew I’d pick a dark color for the master. I wanted the room to feel dark and moody…the total opposite from the rest of the house. If you browse my inspiration board on Pinterest, you’ll get an idea of the look I was going for. I finally chose a deep, gray paint color (Sherwin Williams Peppercorn), and I think this is the color that my dreams are made of. I think it’s 100% perfect for a master bedroom (It’s also in our dining room.), and I absolutely love it.

I made a commitment when we bought this house that I’d finish our bedroom first. Practically everything you read says that in a time of transition, you should stabilize your bedroom first. It gives you a haven from the madness and ensures that you still sleep well. Besides, we had lived with a chaotic bedroom for so long that I desperately wanted a nice space.

As we began getting squared away, it felt like the master bedroom wasn’t coming together liked I’d hoped. Other rooms were feeling more put together than this one, and I felt like I was slipping into that same messy-bedroom trap. I’ve learned that I absolutely cannot force inspiration, so I just had to be patient and wait for things to come together in my mind. It turns out that our bedroom still ended up being the first room that I felt was complete! I am so, so happy about that.

master bedroom pillowsI’m only moments away from sharing the full room tour, as there are just a few finishing touches that I want to complete first. For now, enjoy these sneak peaks! If you’re feeling like your bedroom is the exact opposite of a safe haven, consider these few items:

  1. Remove any unnecessary clutter. Try not to stack thing in corners or on tops of dressers. Clean corners and surfaces, provide a much more relaxing space.
  2. Fold laundry somewhere other than the bedroom! Baskets of clean (folded or unfolded) clothes spilling over onto the floor, create the feeling of chaos. The first choice wood be to go ahead and put the clothes away (obviously). If that’s not an option, consider storing the clothes baskets in another room until you can handle them.
  3. Use lamps instead of overhead lighting. The light of a lamp or two provides a much more calming environment than harsh, overhead lighting. I almost never use the ceiling light in our bedroom. Lamps are much more relaxing (and romantic!).
  4. Decorate with your favorite items. Some “rules” say to keep things minimal in a bedroom. While that’s an option, I don’t think it’s mandatory. Instead, I say surround yourself with things that you love. Use your favorite pieces and highlight the things that make you the happiest.
  5. Choose a good paint color. As with any room, the paint color can either make it or break it. Like I said before, the awful beige of our last bedroom sucked the life right out of me. I don’t believe that your room color has to follow the traditional guidelines. Instead, choose whatever color relaxes and inspires you the most. I simply love our dark gray walls, and I couldn’t be happier with the color.
  6. Choose good bed linens. Regardless of the style of your room, having comfortable, appealing linens makes a huge difference in how the room looks/feels AND how well you sleep. If you’re going to splurge on anything, choose a good mattress and nice sheets. (Read how much of a difference our new sheets made in last month’s post, and they weren’t even expensive!)

Again, the actual style or color scheme that you choose for the room isn’t as important as how the room makes you feel. The ultimate goal is that you end up with a space that you can retreat to and relax. Our best night’s sleep come from a space in which we feel totally comfortable.

If you’re feeling overwhelmed by creating a relaxing space, start small. Remove a few items or tackle one small project at a time. Ending up with a space that you love usually doesn’t happen overnight. However, if you don’t start somewhere, you’ll never reach the finished product. What one, small thing can you do today to work towards a happy space? What one, small thing could you do tomorrow? That’s all you have to focus on….one tiny task at a time.

What will you do today to get started?

New Sheets

30New SheetsI’ve written before about trying to live a beautiful life, and I’ve made a diligent effort towards slowly replacing the less-beautiful things with items that are more fulfilling and inspiring. I didn’t realize, though, that new sheets were going to be part of this quest.

Matthew and I purchased our first new bed several months ago and we’d still been using the hand-me-down sheets that came with our old bed. We only had one lonely set (other than a flannel set that we can only use when it’s freezing), so we always had to strip the bed down, wash the sheets, and put them right back on. These golden yellow sheets were super comfy, yet they’ve never matched our bedroom. They didn’t match in the new house or our previous rent house.

In keeping with my don’t-replace-it-because-it-works-just-fine mentality, I continued using these comfy, gold sheets that didn’t match. I actually wanted to have a second set of sheets and never purchased any because I couldn’t commit to a color theme.

coffee and new sheetsThen finally it happened, our beloved hand-me-downs ripped straight down the middle. I’d be lying if I said I didn’t consider trying to patch them or sew up the tear. I had SO MUCH anxiety over buying new sheets. I’m not even sure where it came from. I guess it boiled down to the fact that sheets are expensive (!!), especially for a king bed. I was so afraid that I’d drop a ton of money on new sheets and then switch the color scheme of the room or hate the quality of them. (Part of the problem was also that I really, really wanted fun, patterned sheets, yet most of the pretty ones felt a bit like cardboard.)

Whether I was plagued with anxiety or not, the reality was we had to have new sheets pronto. I finally made a decision at Bed, Bath & Beyond and had to take a nerve pill at the checkout (kidding!). I spent 45 minutes making a decision only to get them home and they not fit the bed. Turns out, our fancy, new mattress is only 15″ deep and most new mattresses are 18 or 20-something inches. So…back to the store we go and we came home without new sheets.

One glorious morning I ordered a second pair online, thinking they were the right size. We waited for over a week for them to be delivered, while still sleeping on ripped sheets. Guess what? They didn’t fit. Finally, on a quick trip to Target, I was determined to leave with sheets or something of the sort. Our options were limited since most of the nicer sheets have deeper pockets, and we made a decision and left the store.

We ultimately decided to give a jersey knit sheet a shot. (I’ve always been a fan. Matthew…not so much.) We were concerned about them being hot, yet that hasn’t been much of a problem. Adjusting to the jersey feel has taken some time. However, the important part is, we have sheets that aren’t ripped!! Plus, these were a fraction of the cost of the ones I’d bought earlier.

New SheetsThe purpose of this post isn’t really about shopping for sheets though. Instead, it’s about how I unintentional brought more beauty in. Without realizing it, those gold sheets had been taunting me. Seeing them was a constant reminder of something I hadn’t marked off of my list…buying new sheets. The gold color stood out like a sore thumb against the rest of the room and as silly as it sounds, they sucked the beauty right out of the place.

Within moments of replacing the sheets, the room felt quiet and put together. Every time I crawl into bed, I feel relaxed and accomplished. I may still be adjusting to the feel of jersey, yet I’m very well adjusted to the “look.” As a matter of fact, it almost makes me happy to look over and see a scattered, unmade bed with these new, lightly patterned sheets peeping out at me. Without realizing it, I had replaced something good-enough with something great.

I do still need a second pair of sheets. For now, though, I’ll relish in the accomplishment of finding one new set. (If you know of somewhere to get good, quality sheets with a 15″ pocket that aren’t a full million dollars…please share!)

If you sit and think for a moment, you can probably think of a few things that you could replace with something more beautiful/functional/inspiring. The fact of the matter is, what we surround ourselves with controls our overall mood. What do you have around you that could be tweaked to create a more inspiring space? Making little changes here and there can certainly make a big difference!

Sundays are the best days.

Easy Sundays

This past Sunday was something like what dreams are made of. Matthew was home studying for his NCLEX. While he studied, I worked on project after project. Amidst negotiating contracts, chatting with new clients, and addressing issues at an open house, I also got so much done at home and enjoyed the heck out of a sunny Sunday.

This Sunday’s activities included:

  • a 6 mile bike ride together
  • driving to pick up lunch with the windows down and music blaring
  • eating lunch on our patio, again with music blaring
  • working on this and that with the windows open and taking time to chat in between (Remember, opening all of the windows in my house is one of my favorite things.)
  • laundry…boo.

I also watched a lizard shed his skin AND THEN EAT IT. It was literally one of the most disgusting things I’ve ever seen.

IMG_0962

While Matthew studied, I got caught up on #the100dayproject. Friday and Saturday were so incredibly busy that I didn’t have a chance to do my daily activities. I made up for it on Sunday by doing three items in one day. I painted muffin tins (more on this later), painted the rod for a rope curtain I made (more on this later too), AND I framed an elisejoy promotional card to add to a gallery wall.

Rope Curtain

In addition to these fun projects, I did still have work to do. I answered phone calls, texts, and emails. I attended a bridal shower and showed a house on the way back home. Like I’ve said before, there’s hardly a such thing as a day off in my world. However, this Sunday was very close. I realized that these days are the ones that give me the energy to make it through the busy work days. They’re what keep me from going completely insane.

Elise Promo Card

At first, I didn’t want to share this post because I felt like no one should know that I stayed home and did fun things on a Sunday. Then I realized something more important, I deserve these days. I needed the rest. I needed the sunshine, and I needed the time at home with my husband. Here’s to hoping for many more of these days in the near future! I hope you, too, had a fantastic weekend. Now, I’m off to conquer a massive, two-page to-do list!

No Clutter!

no clutterI’ve posted a lot about goals on the blog lately. Yearly goals, monthly goals and just miscellaneous goals in general. While sitting on the couch one Sunday, completely exhausted from working on our house for days like a mad woman, I realized that my biggest goal for this place is to get to a point where I don’t have to work on it.

I want to be in a position where things feel ok. I want to be in a place where Matthew and I can take spontaneous weekend trips or spend the afternoons biking or sitting on the patio. I want to go sit and chat at Starbucks or explore our neighborhood. I don’t want to always feel like I have to work on this house nonstop.

I’m sure these feelings are common for people moving in to a new home, but I remember feeling them until the day we moved from our rent house. I never finished that house. I never felt like things made sense, and I never felt like I could sit and take a breather there.

Today, I’m happy to finally put this unspoken goal into words. I’m not hoping to have a perfect home that’s always clean and wonderfully decorated. (Although, I do hope to get my head wrapped around the decor soon.) I understand that nothing will ever be perfect, and I actually hope that our home will always continue to evolve as we find new things that we love or make this place work better for us. However, I do expect to end up with a home that’s free of clutter. I want emptied boxes and closets that aren’t crammed to the brim. I want to be able to easily replace and remove items from their drawers, and I want everything to have a place to go. Basically, I don’t want any excess.

For many years, I’ve kept extra things around as a false sense of security. I found comfort in having things and I attached sentimental value to the silliest of items. When moving into this house, I decided that it was time to part ways with some of the stuff. Parting with the extra things, will make my daily life so much easier, less stressful, and more rewarding. Having a home to come to that’s a reflection of myself (extra clutter is not a reflection of who I am), will make such a huge difference in my overall well-being and feelings about myself and my home.

I’ve read lots of blogs on clutter-free living and creating spaces that work for you and your lifestyle instead of just housing your junk. Since Matthew and I have been married, I’ve done so much better at not holding on to so much stuff. Part of my problem is that I attach sentimental value to practically everything. The other part is that I hate to get rid of something that I’ve spent my hard-earned money on and that I’m afraid I might need/want later. Nonetheless, something can be said for learning to part with the extra stuff…only keeping that things you love and need.

I’m right on the brink of reaching this goal. Honestly, just the progress that I’ve made recently feels so rewarding. Knowing that I’m on the brink of feeling better about my world is such an invigorating feeling. I feel encouraged and inspired, and I know that I’ll feel even more amazing once the last item has found a home.

Now that this goal is out in the open, I have no choice but to make it happen. I’m determined to make this dream a reality. I’m determined to get to a point where our home is a place of relaxation, not of work. Need to declutter your home and let go of some extra baggage? Join me! I’d love to talk about our progress and ideas along the way. How do you feel about clutter? Do you tend to keep extra items or is it easy for you to part with things?

DIY Painted Light Fixtures

Before and After

When Matthew and I purchased our current home, we had quite a hefty list of updates that we planned to do. (You can see some of the before photos here.) Some of the updates we envisioned were immediate, like painting and new floors. Others will come along later, like painting the exterior and bathroom overhauls. Light fixtures were one of the items that we knew we’d do rather quickly. However, I’ve had the hardest time finding decently priced lights that I like, so we’re still working on this one.DIY Light Fixture

DIY Light FixtureWhen we bought the home, there were only two light fixtures in the house that I even remotely liked…the dining room chandelier and the entry way light. All of the others were very dated or not at all my style. (The leaf fan, for example, doesn’t fit my décor style.) Our bedroom fan is also leaves. The kitchen had a ceiling fan, which Matthew could only barely walk under without risking decapitation. The rest of the fixtures were classic 1990s brass. The two fixtures that I liked were also brass, but the bones were good. Rather than replacing these two, I decided to give them a little facelift.

DIY Light FixtureDIY Light Fixture
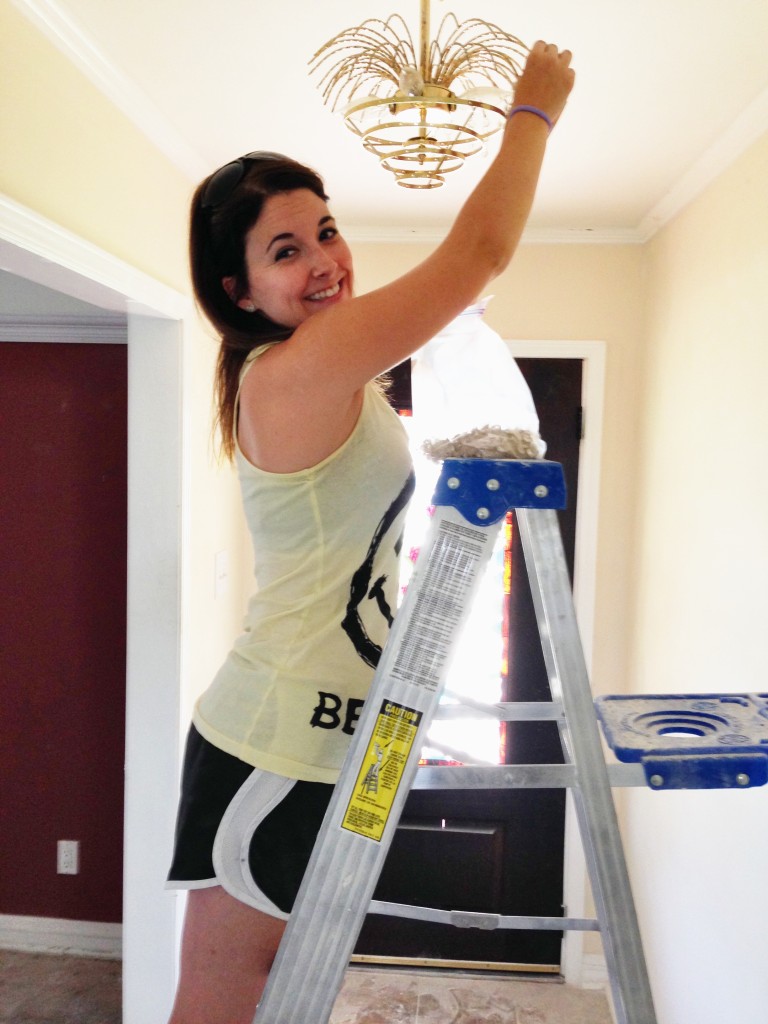
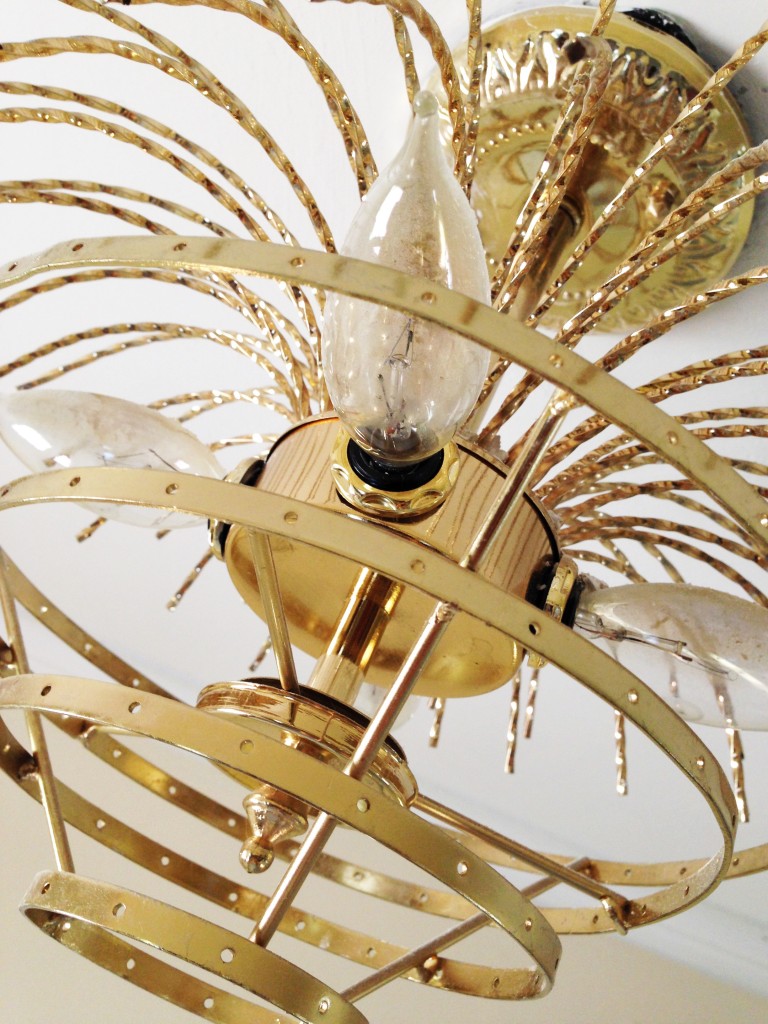
I haven’t tackled the dining chandelier yet, but I worked on the entry light pretty soon after moving in. I used Rust-oleum Hammered spray paint, and the process was rather quick and easy. Here’s what I did:

  1. Remove any crystals or globes. Luckily, the crystals on our entry light were attached with hooks instead of rings. I removed all of the crystals and cleaned them individually with a damp cloth. I didn’t want to submerge them in case it would cause a discoloration of the metal. Honestly, this was the most time consuming part of the process.
  2. Remove the fixture. Be sure to turn of the power before taking the fixture down!
  3. Clean the fixture well. You’ll want to be sure it’s free of dust and debris, especially if it’s an older fixture. Most of our lights (and every other square inch of the house) were covered in construction dust from having the ceilings scraped. Even after a professional cleaning, there was still quite a bit of dust in the crevices.
  4. Get to painting! I sprayed two coats of paint on our fixture, being sure to coat both the top and bottom of the fixture so that you didn’t see any traces of the old, brass color. Be sure to let it dry between coats. This was super quick and easy.
  5. Once the paint dries, hang the fixture back up and reattach any crystals or globes.

After Light FixturesSimple as that, you have a new fixture for less than $5. I’ve seen numerous tutorials online where people find dated fixtures at garage sales and thrift shops and paint them bright, fun colors. I went with a neutral color on our fixture because I wasn’t quite sure what décor I was going with yet. Whether you already have an old fixture or pick one up somewhere, using a little spray paint is a great, inexpensive way to update your lighting.

After Light FixturesNext up is the dining room chandelier. I have a bit of a different plan for it, but I’ll hopefully get to work on it soon. Have you ever used spray paint to update light fixtures in your home? I’d love to see your before and after pics!


DIY Paintings

imageIt’s been several months since we moved into our new home and even though I’ve made a conscious effort to get this place decorated quickly, there are still so many bare walls. This is partly because this house is a bit larger than our last, partly because we are trying to change our style up a bit, and partly because we have tall ceilings and huge, empty walls to fill.

I made a promise to share the progress of our home here on the blog. I have shared bits and pieces here and there,  but I haven’t really shared that much. The boxes are emptied, but if I were being honest, I’ve experienced quite a bit of frustration trying to get things pulled together. Decorating a new home from scratch while working full time and trying to have a social life is rather difficult, it turns out.

DIY PaintingWe need quite a bit of art to cover the big, bare walls here and finding enough pieces that are within our budget has proved to be impossible. Therefore, I decided it was time to do some DIY. I’ve done a little bit of panting in the past but I haven’t picked up a brush in a while. As a matter of a fact, I didn’t like the last few things I painted, so I decided to give it up. After a bit of a break, I realized that I just had to keep trying. (Listen to this two minute video if you need some encouragement in pushing through the ugly.) Once I got over this hump and picked up a brush, I actually loved the next thing I painted!

This post isn’t about teaching you to paint. Instead, it’s about encouraging you to just try. It’s about helping you to push through the ugly when you think you suck at something. Inevitably, you’re bound to eventually end up with something you like.

DIY PaintingFirst and foremost, I should say that I’m not a painter. Instead, I’m just a person that likes to paint. I’m someone who can splatter some paint on a canvas and call it good enough. I can fill my home with one-of-kind pieces that cover up empty walls. I’m not going to win any awards, but I can mark some items off of my to-do list.

My first painting that I did recently was the oblong circle painting. I took my inspiration from here, and ended up hating the result. I was getting ready to paint over it or add more circles, but Matthew insisted that we hang it as is. I’m still debating on whether it’ll stay or not.

DIY PaintingNext, I began the dot painting. I started with something like this in mind, but it ended up being a little more symmetrical. At first, I wasn’t quite happy with how it was turning out, but when I decide to add the light blue color, I fell in love. That was a different paint so the texture was a bit different, but it was what I had on hand. I ended up loving the difference in color and feel of the paint. (Lesson: don’t give up on something because you don’t like it immediately. Your big idea might be right around the corner!)

I was having so much fun with paint that day, that I decided to keep going. I didn’t have anymore canvases on hand, so I just pulled out some card-stock and made the black and white stripes and flowers. I didn’t really have anything in mind for these, but I ended up framing the striped one, and it’s one of my favorites!

DIY PaintingA few weeks passed after painting these four things, and I decided to keep going. I picked up some more canvases and went to town! (To be honest, my in-laws were coming into town for Matthew’s pinning, and I needed to cover these bare walls fast!) I saw an awesome wall mural covered in various black and white designs and fell in love. I hoped to show it to you, but I can’t find the link! My default is almost always black and white these days, and I knew that I’d love to create something similar. When I started those two paintings, I was using straight, sleek lines. Then, when I “messed up” the first time, I realized that I liked the rough look much better. Again, none of these projects are perfect, but they do cover wall space that was otherwise empty and bland. Plus, those bland walls would have likely stayed that way for many more months until I could commit to purchasing something else.

DIY PaintingIf you have bare walls and a small budget, I highly recommend creating some of your own art. The first several pieces might be terrible, but you’ll eventually get something you love. Besides, it’s a great creative outlet. If you’d like some more DIY painting suggestions, look here! Elise has done some great, DIY pieces in the past. Happy painting!