Tag Archives: DIY

Fun & Simple Halloween Projects

Halloween has always been one of my favorite holidays, so it’s no surprise that I’ve been pinning different fall and Halloween goodies for a while now. Since it’s officially fall (!!) and October is right around the corner, I thought I’d share a few of my latest favorites with you. It’s time to start making those fall and Halloween crafts, my friends!diy-crayon-pumpkin-tutorialdiy-crayon-pumpkin-tutorial
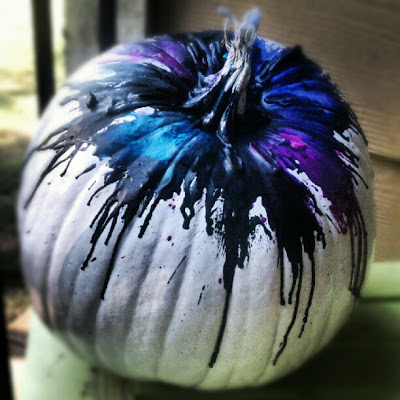
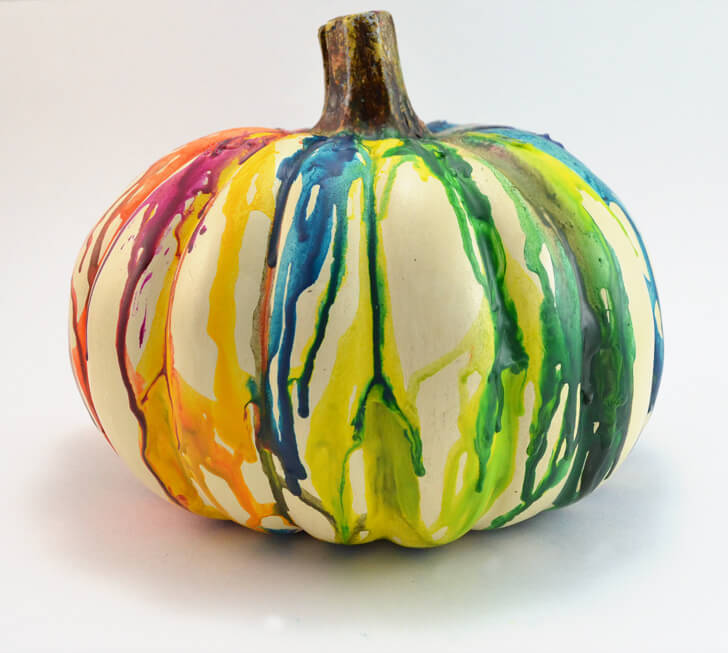
I’ve never been too much of a fan of the crayon art projects. These pumpkins though… *heart eyes*. That black/purple/blue one is GORGEOUS!

Sources: Oh Gee Lindsey & Dream A Little Bigger

wood-porch-pumpkins
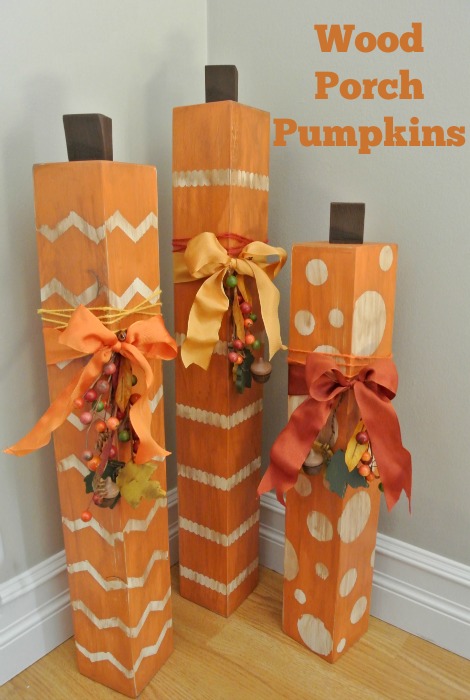
I also love a good, simple wood project. When we end up with scraps of wood from a project, I’m always wanting Matthew to save it. (I get it from my Mama..) And this is why! This project (and this wooden candy corn DIY without a source) would be so easy to make with scrap pieces from around the house. If you don’t have any scraps and aren’t super handy with the power tools, you can buy wood from Lowes and they’ll cut it to size for you there.

Sources: Hazel & Ruby & If that candy corn is your crafty work, please let me know!

diy-tin-can-halloween-art
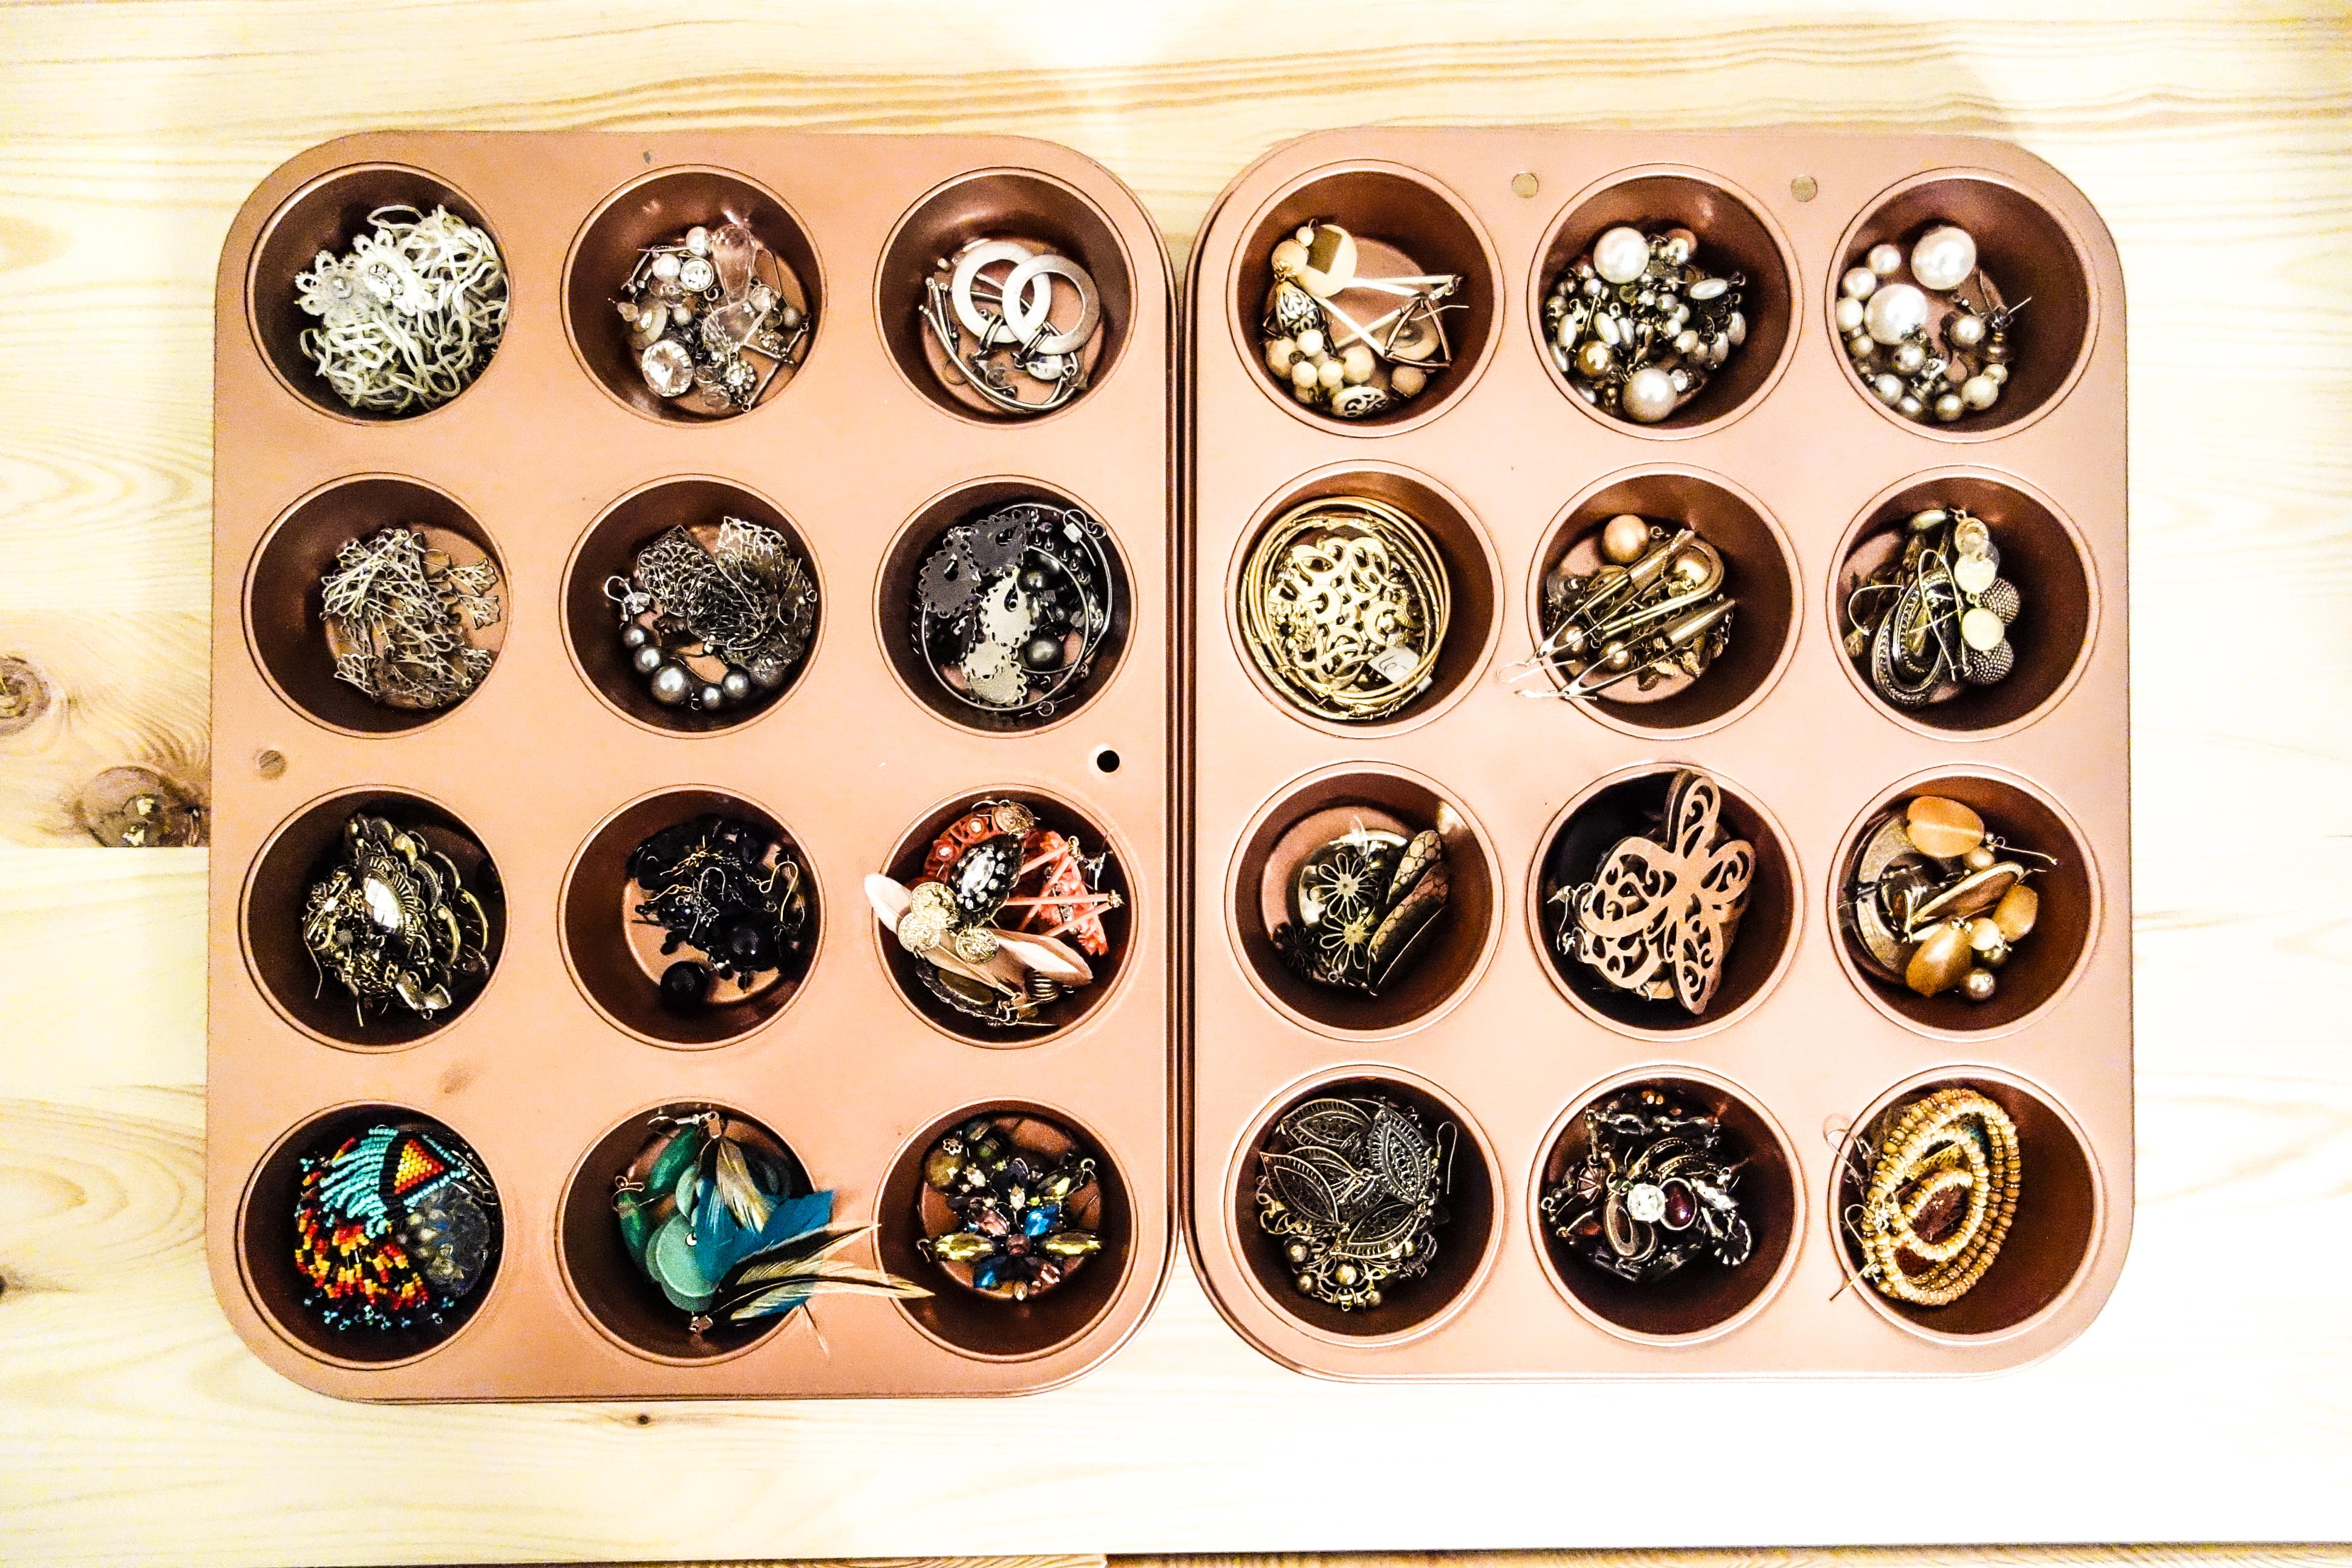
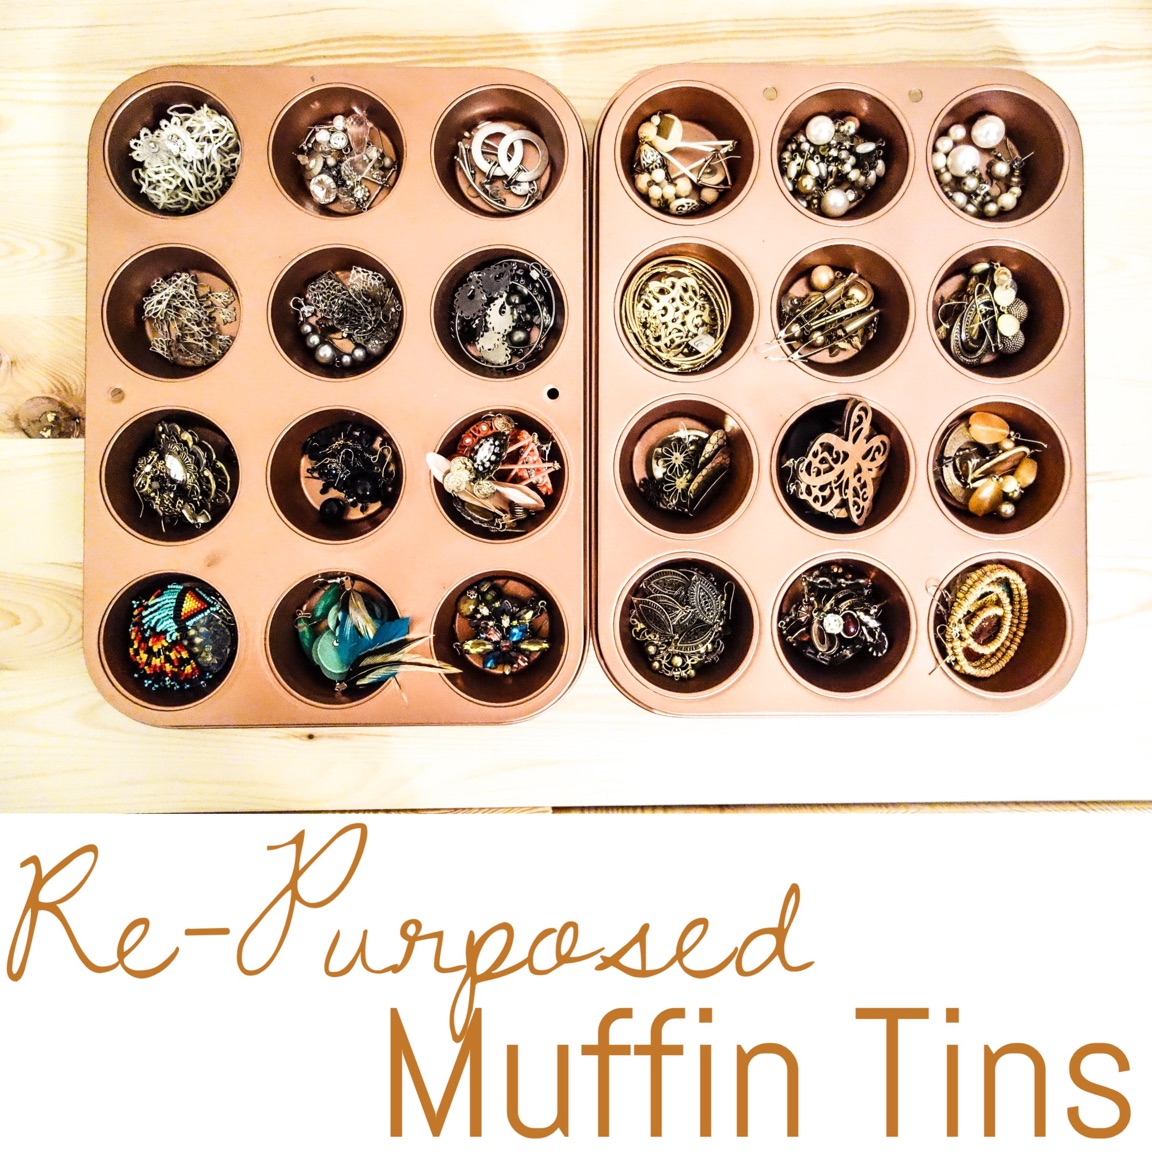
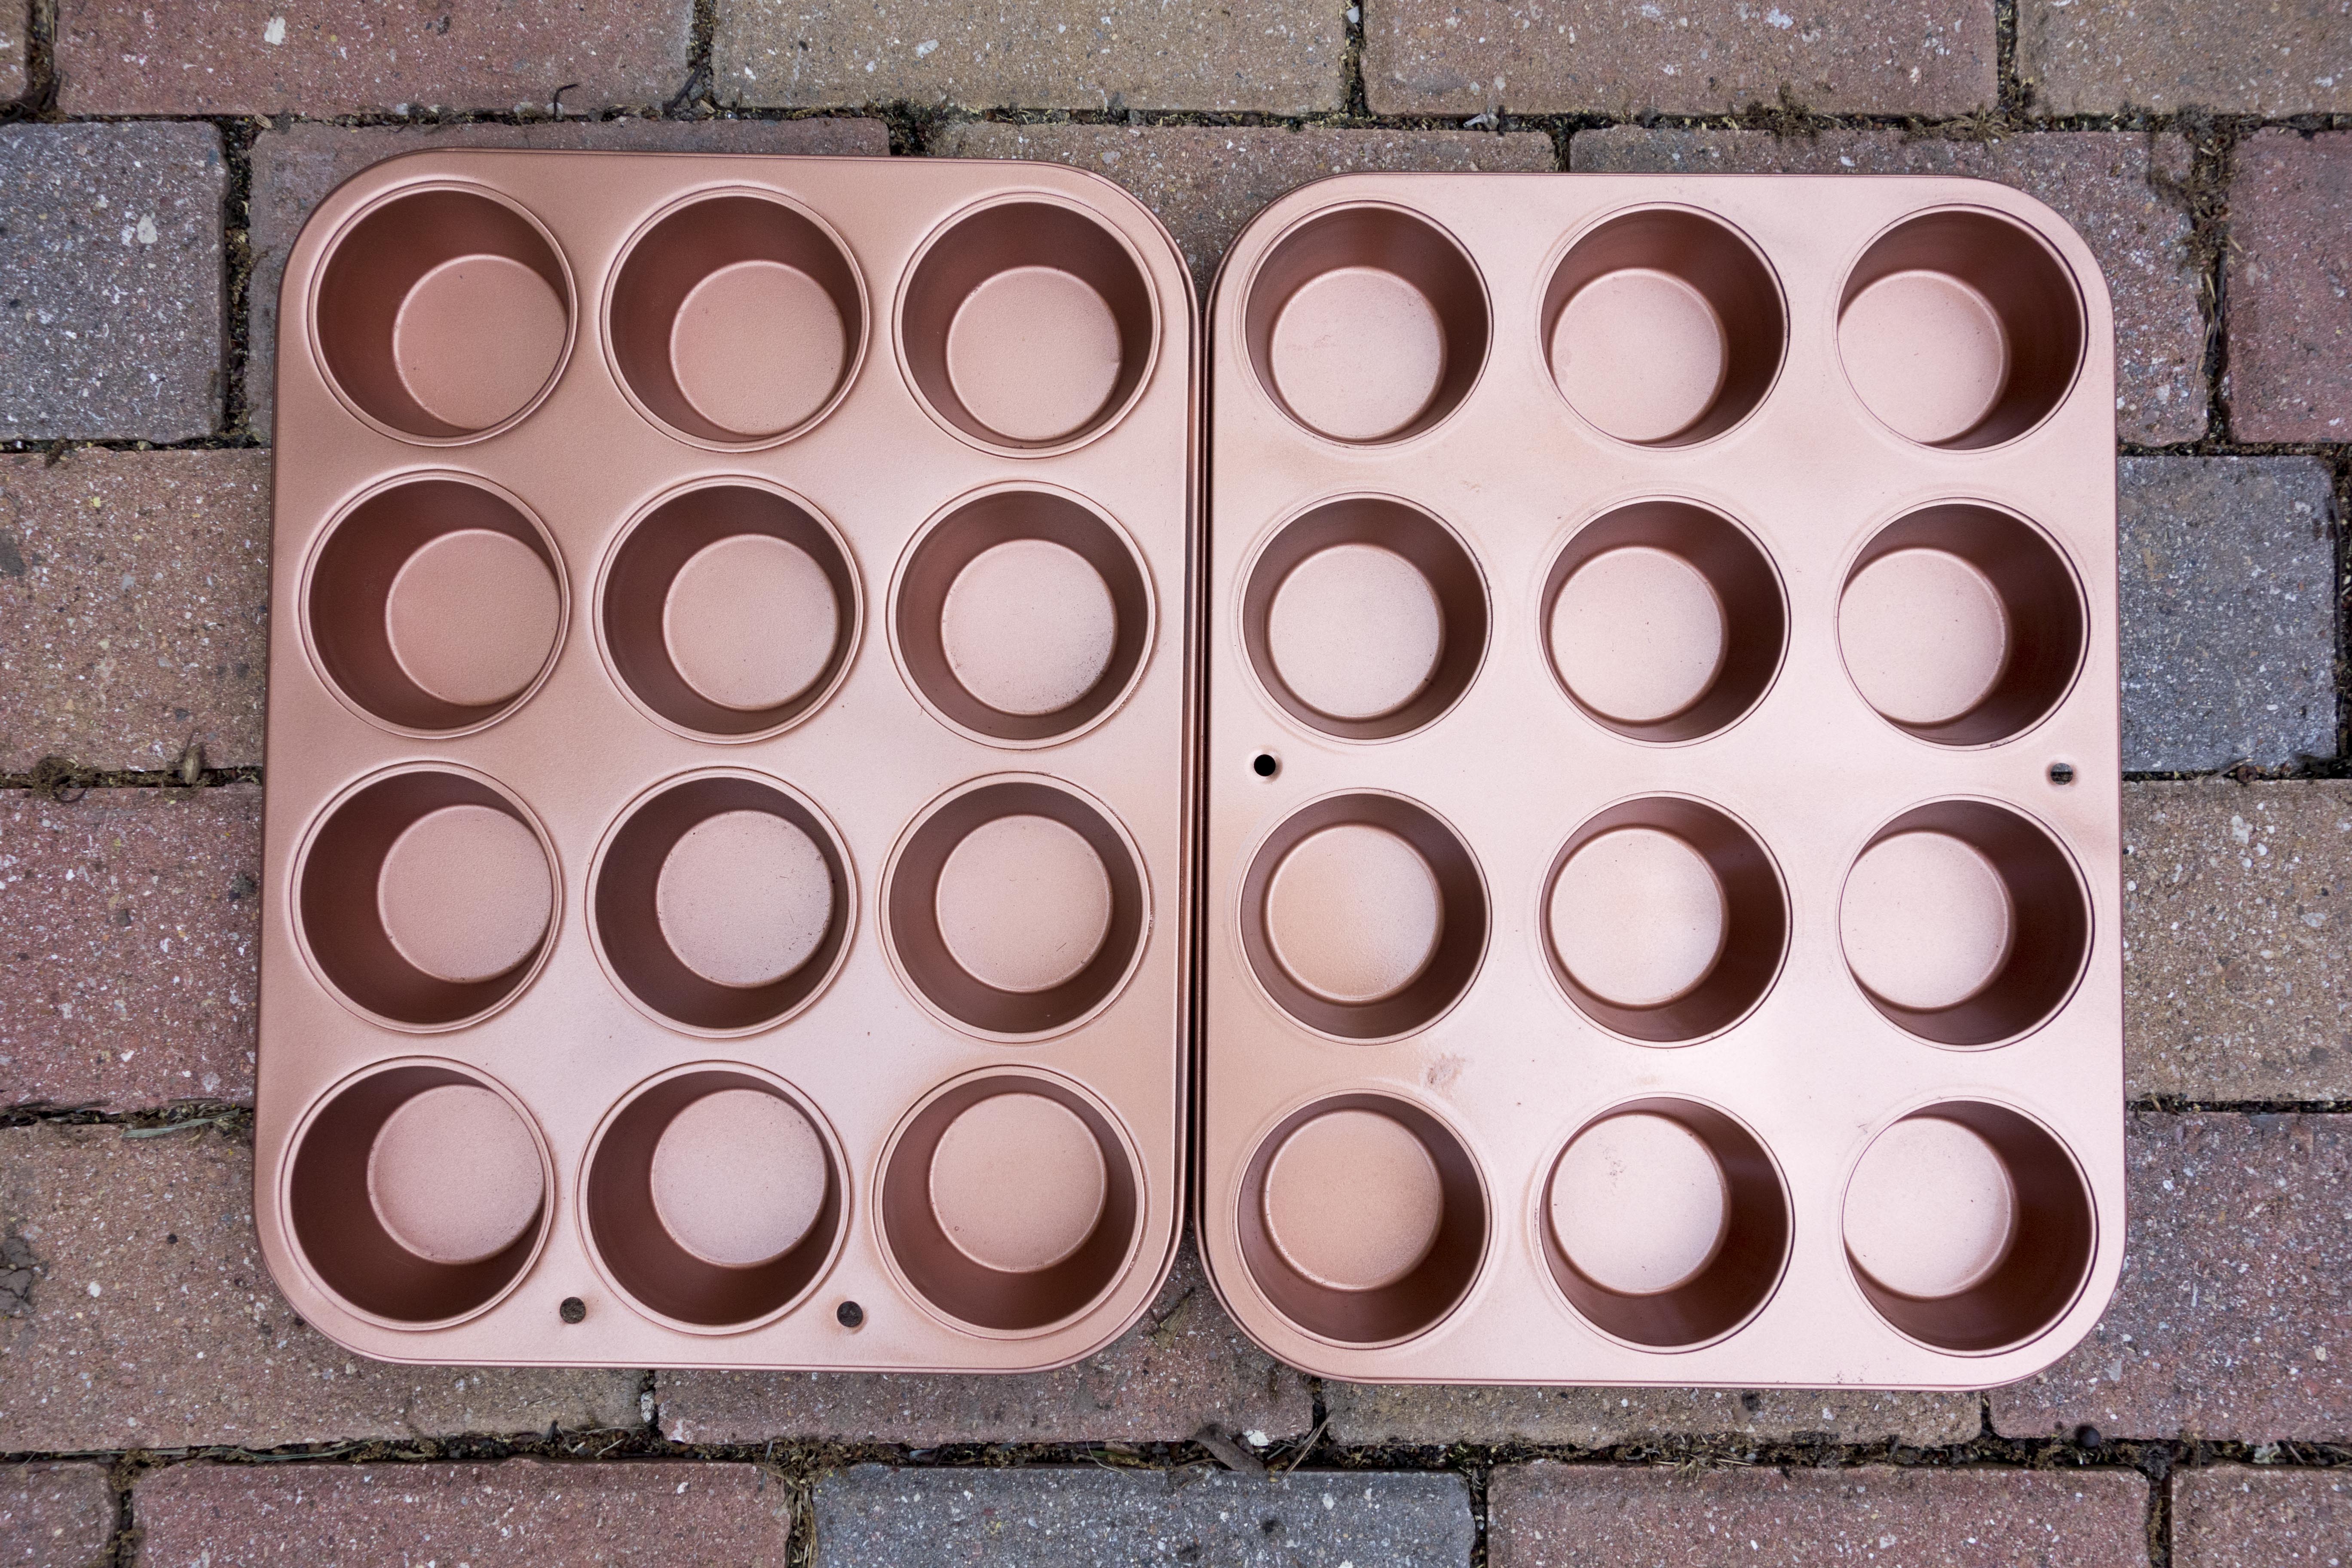
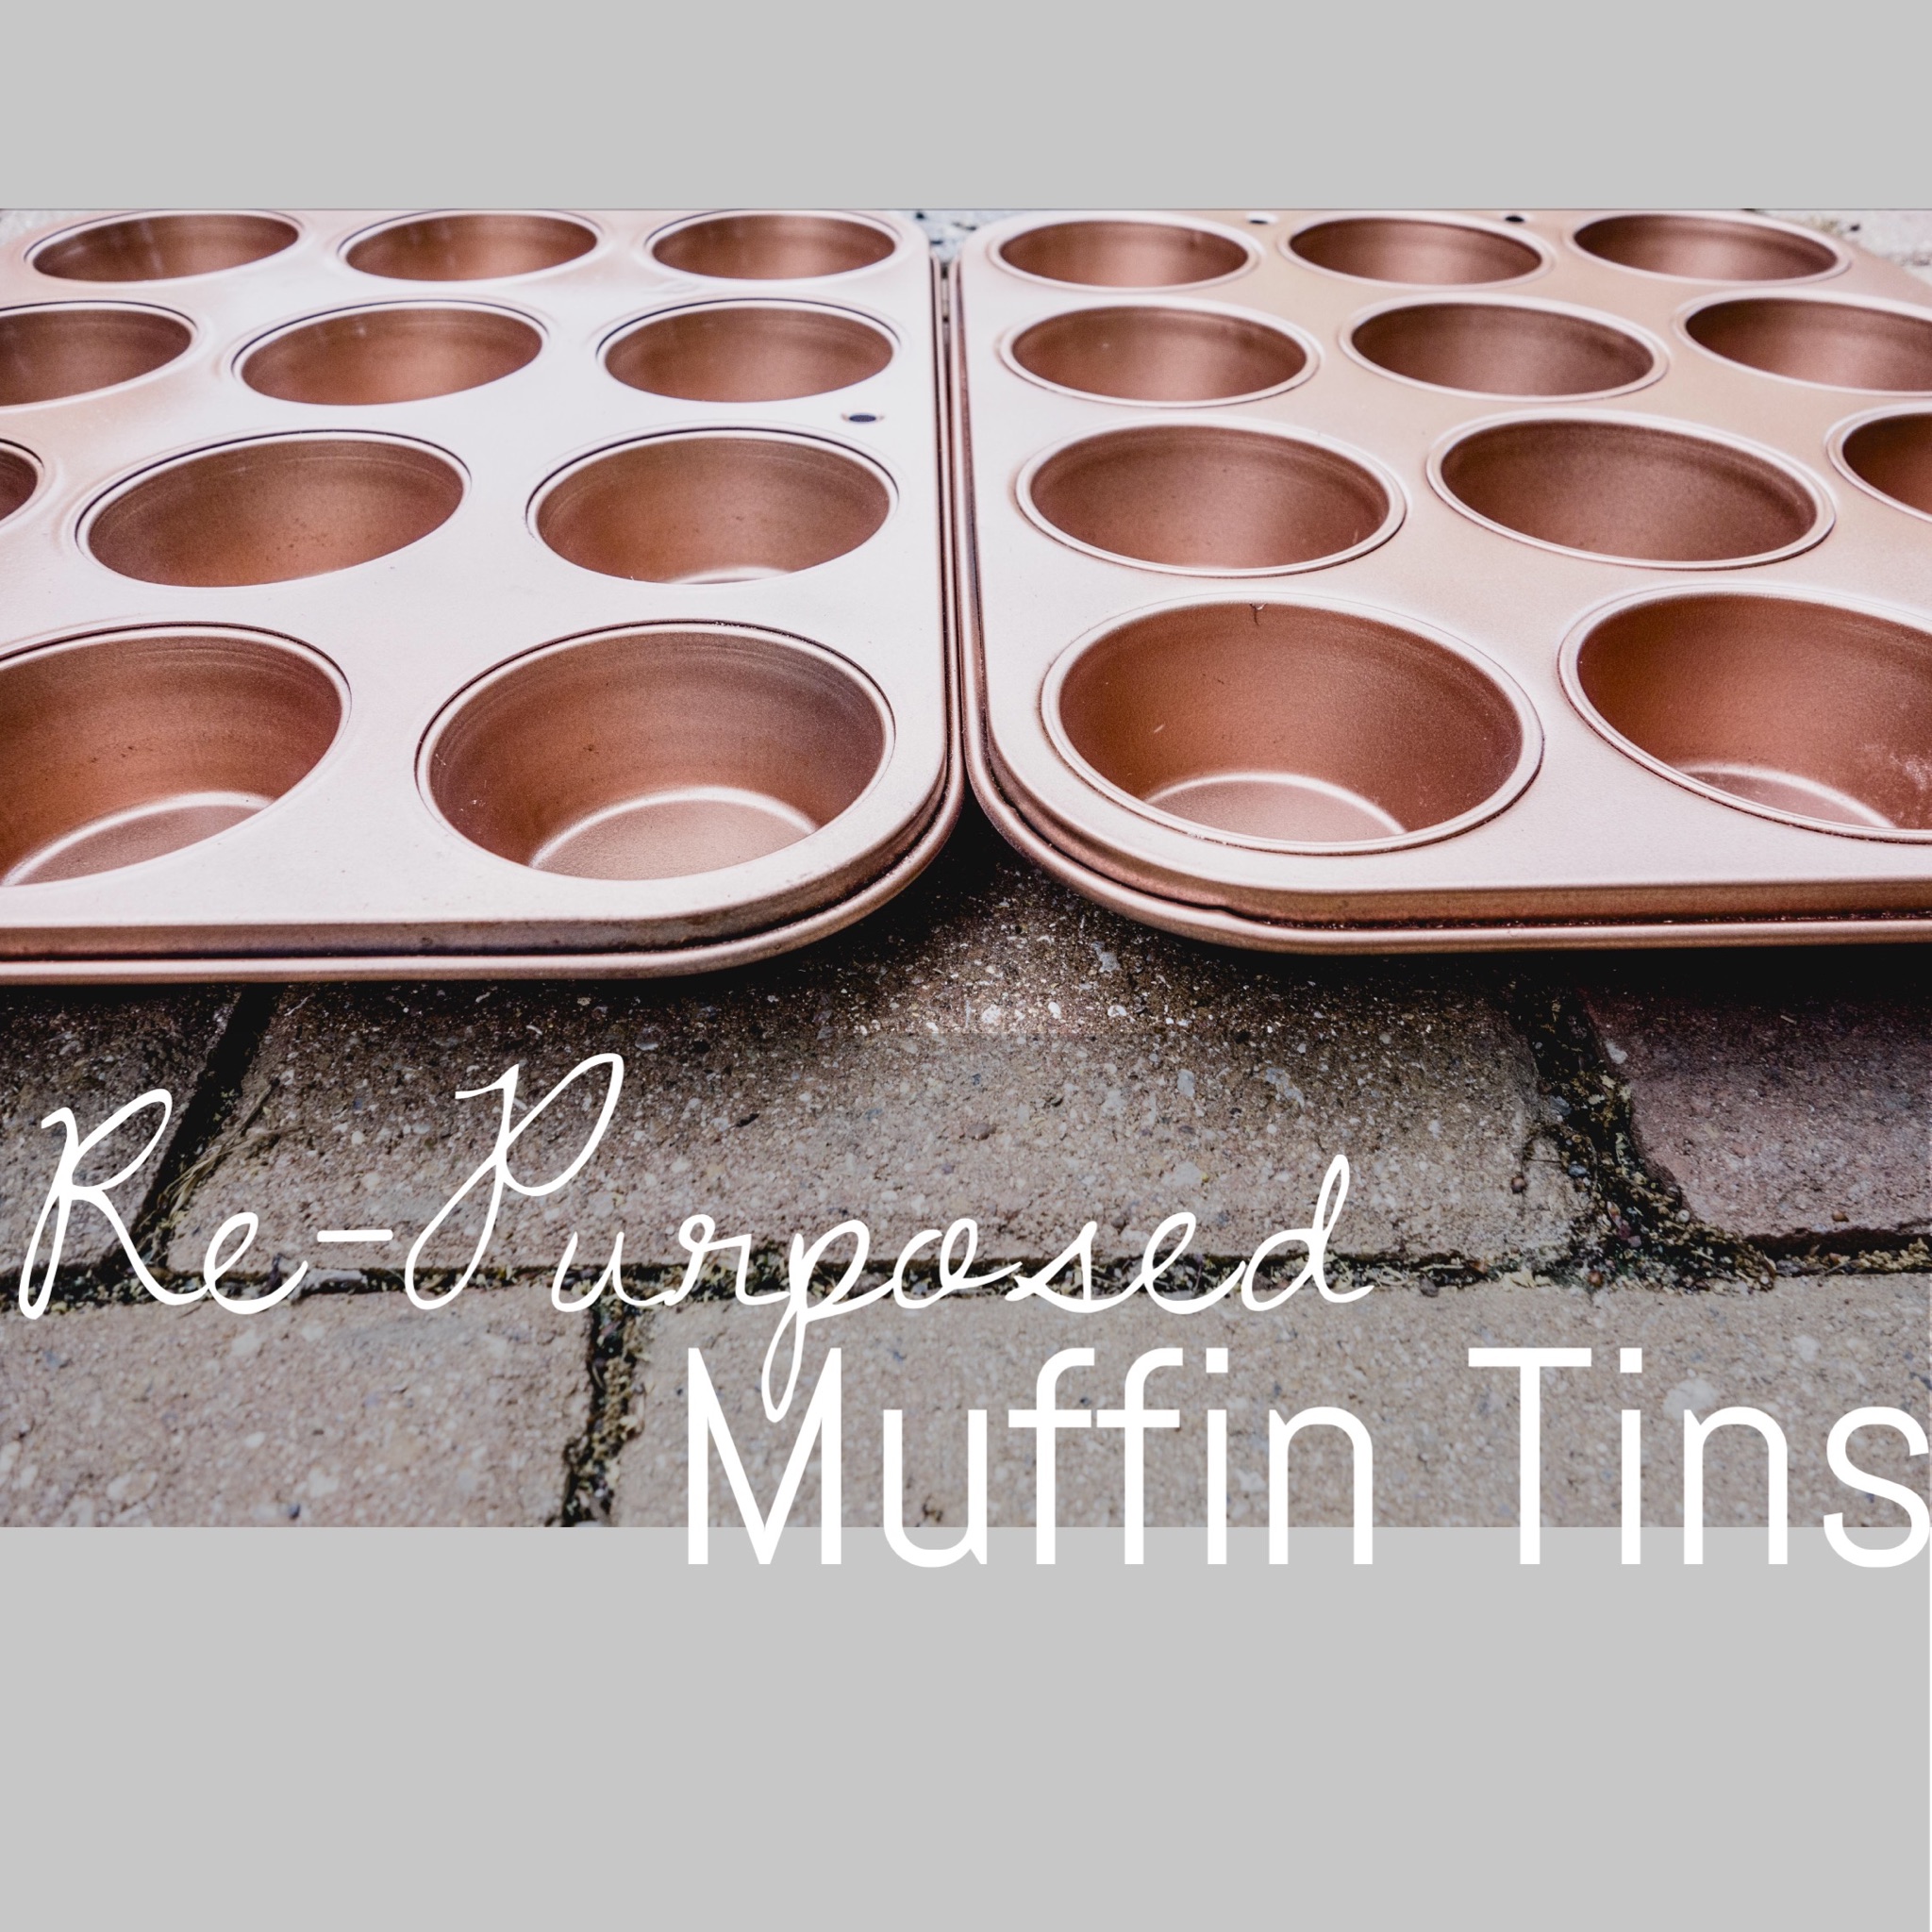
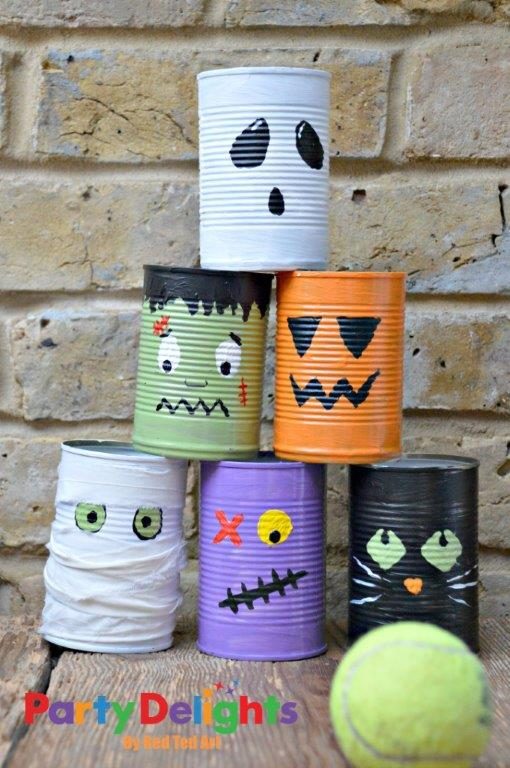
Here’s another project you can make out of scraps around the house. She turned them into a bowling game and I think they’d be cute as just decorations too! You could use them for candy, decorative twigs, flowers…you name it!

Source: Party Delights

diy-pumpkin-treat-bags
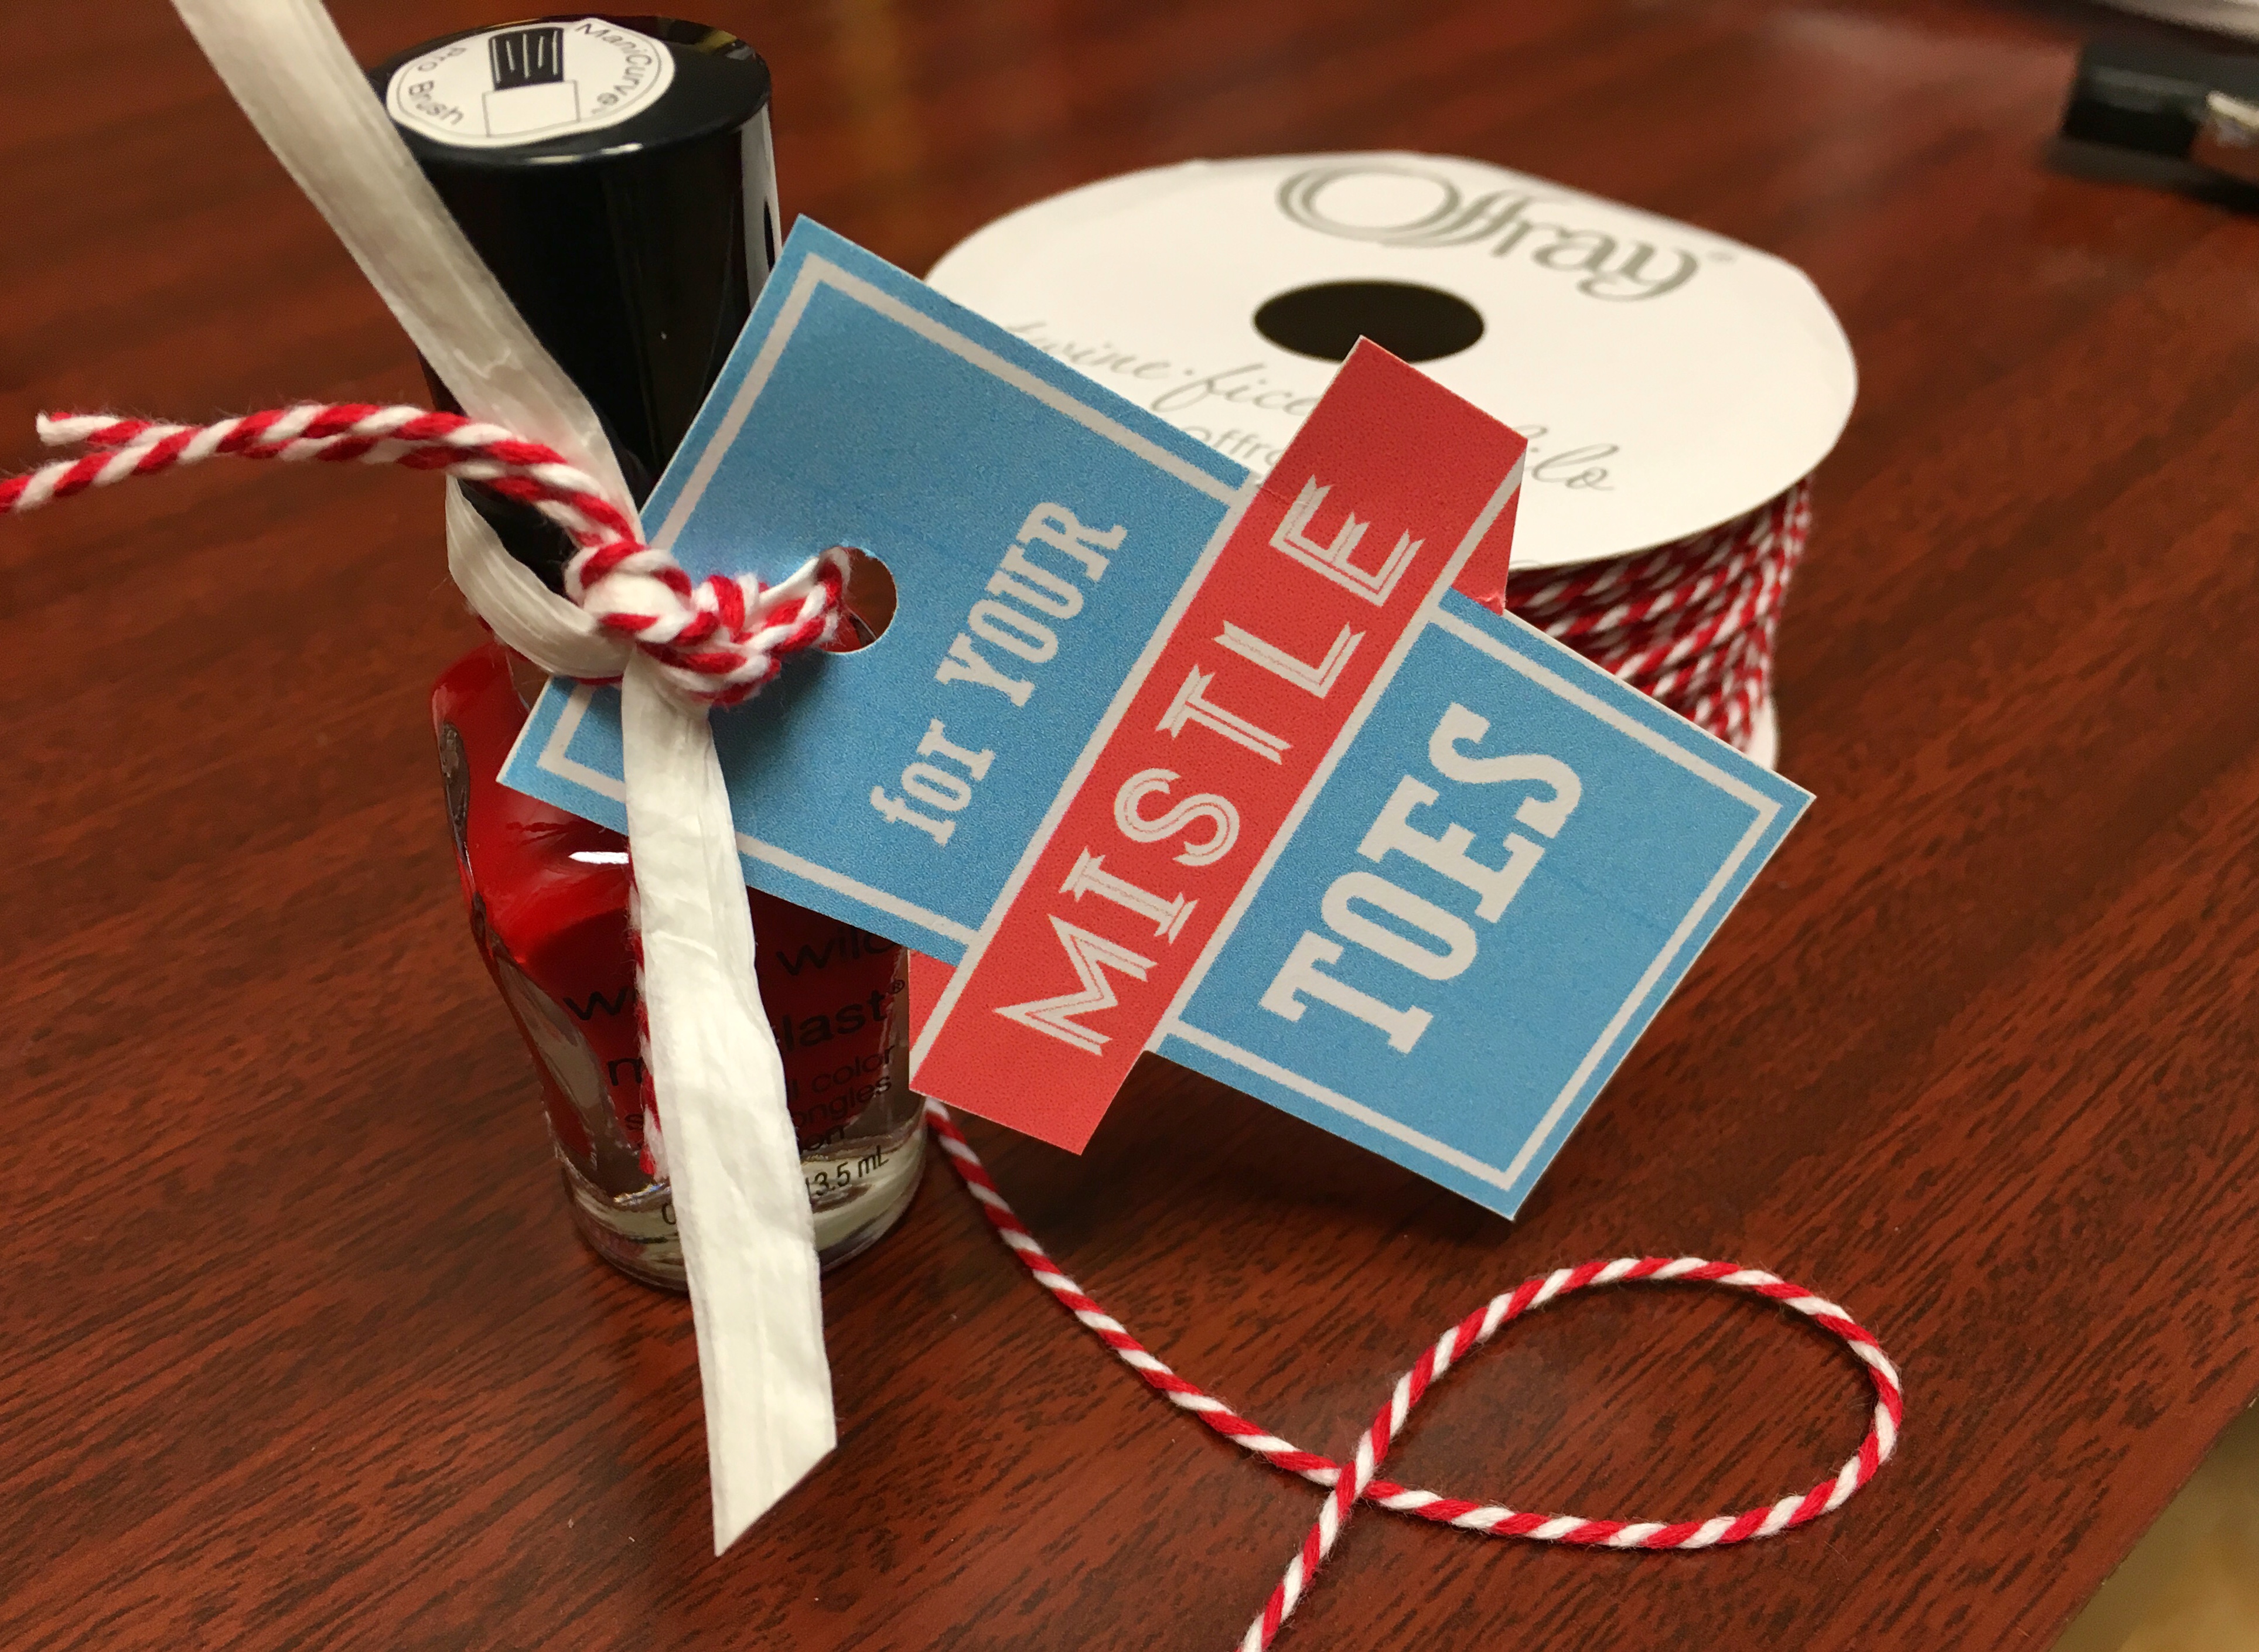
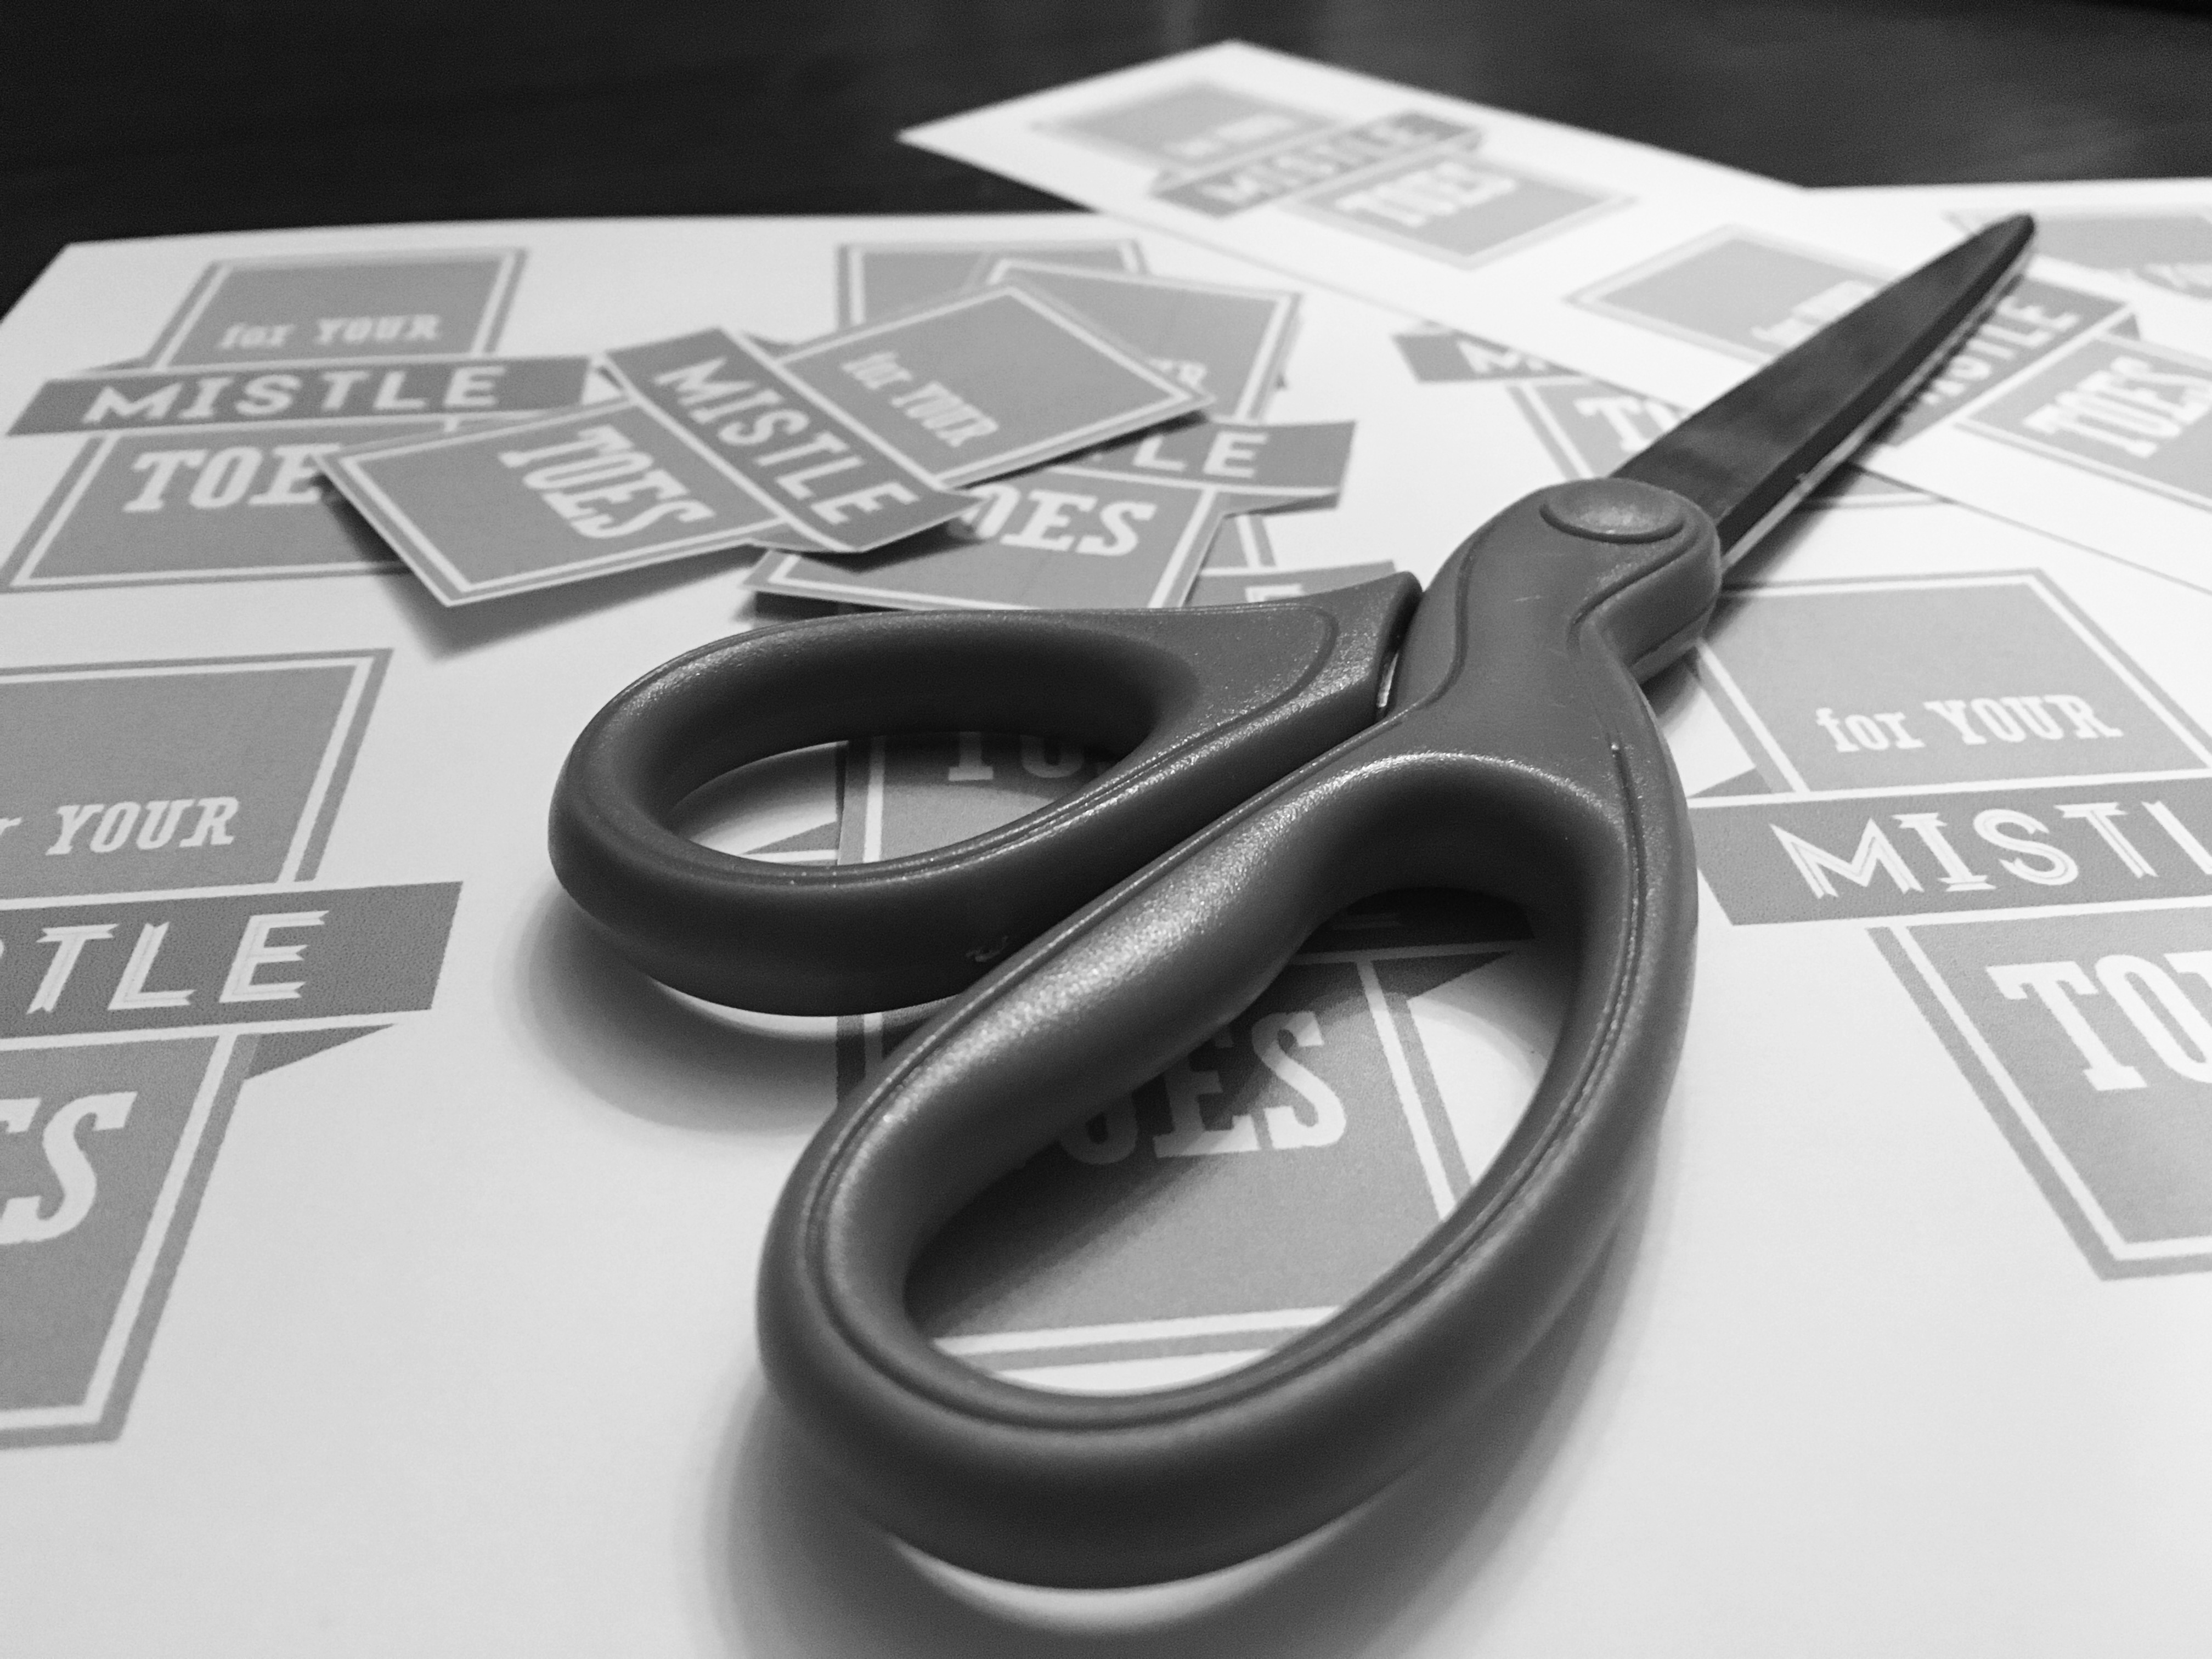
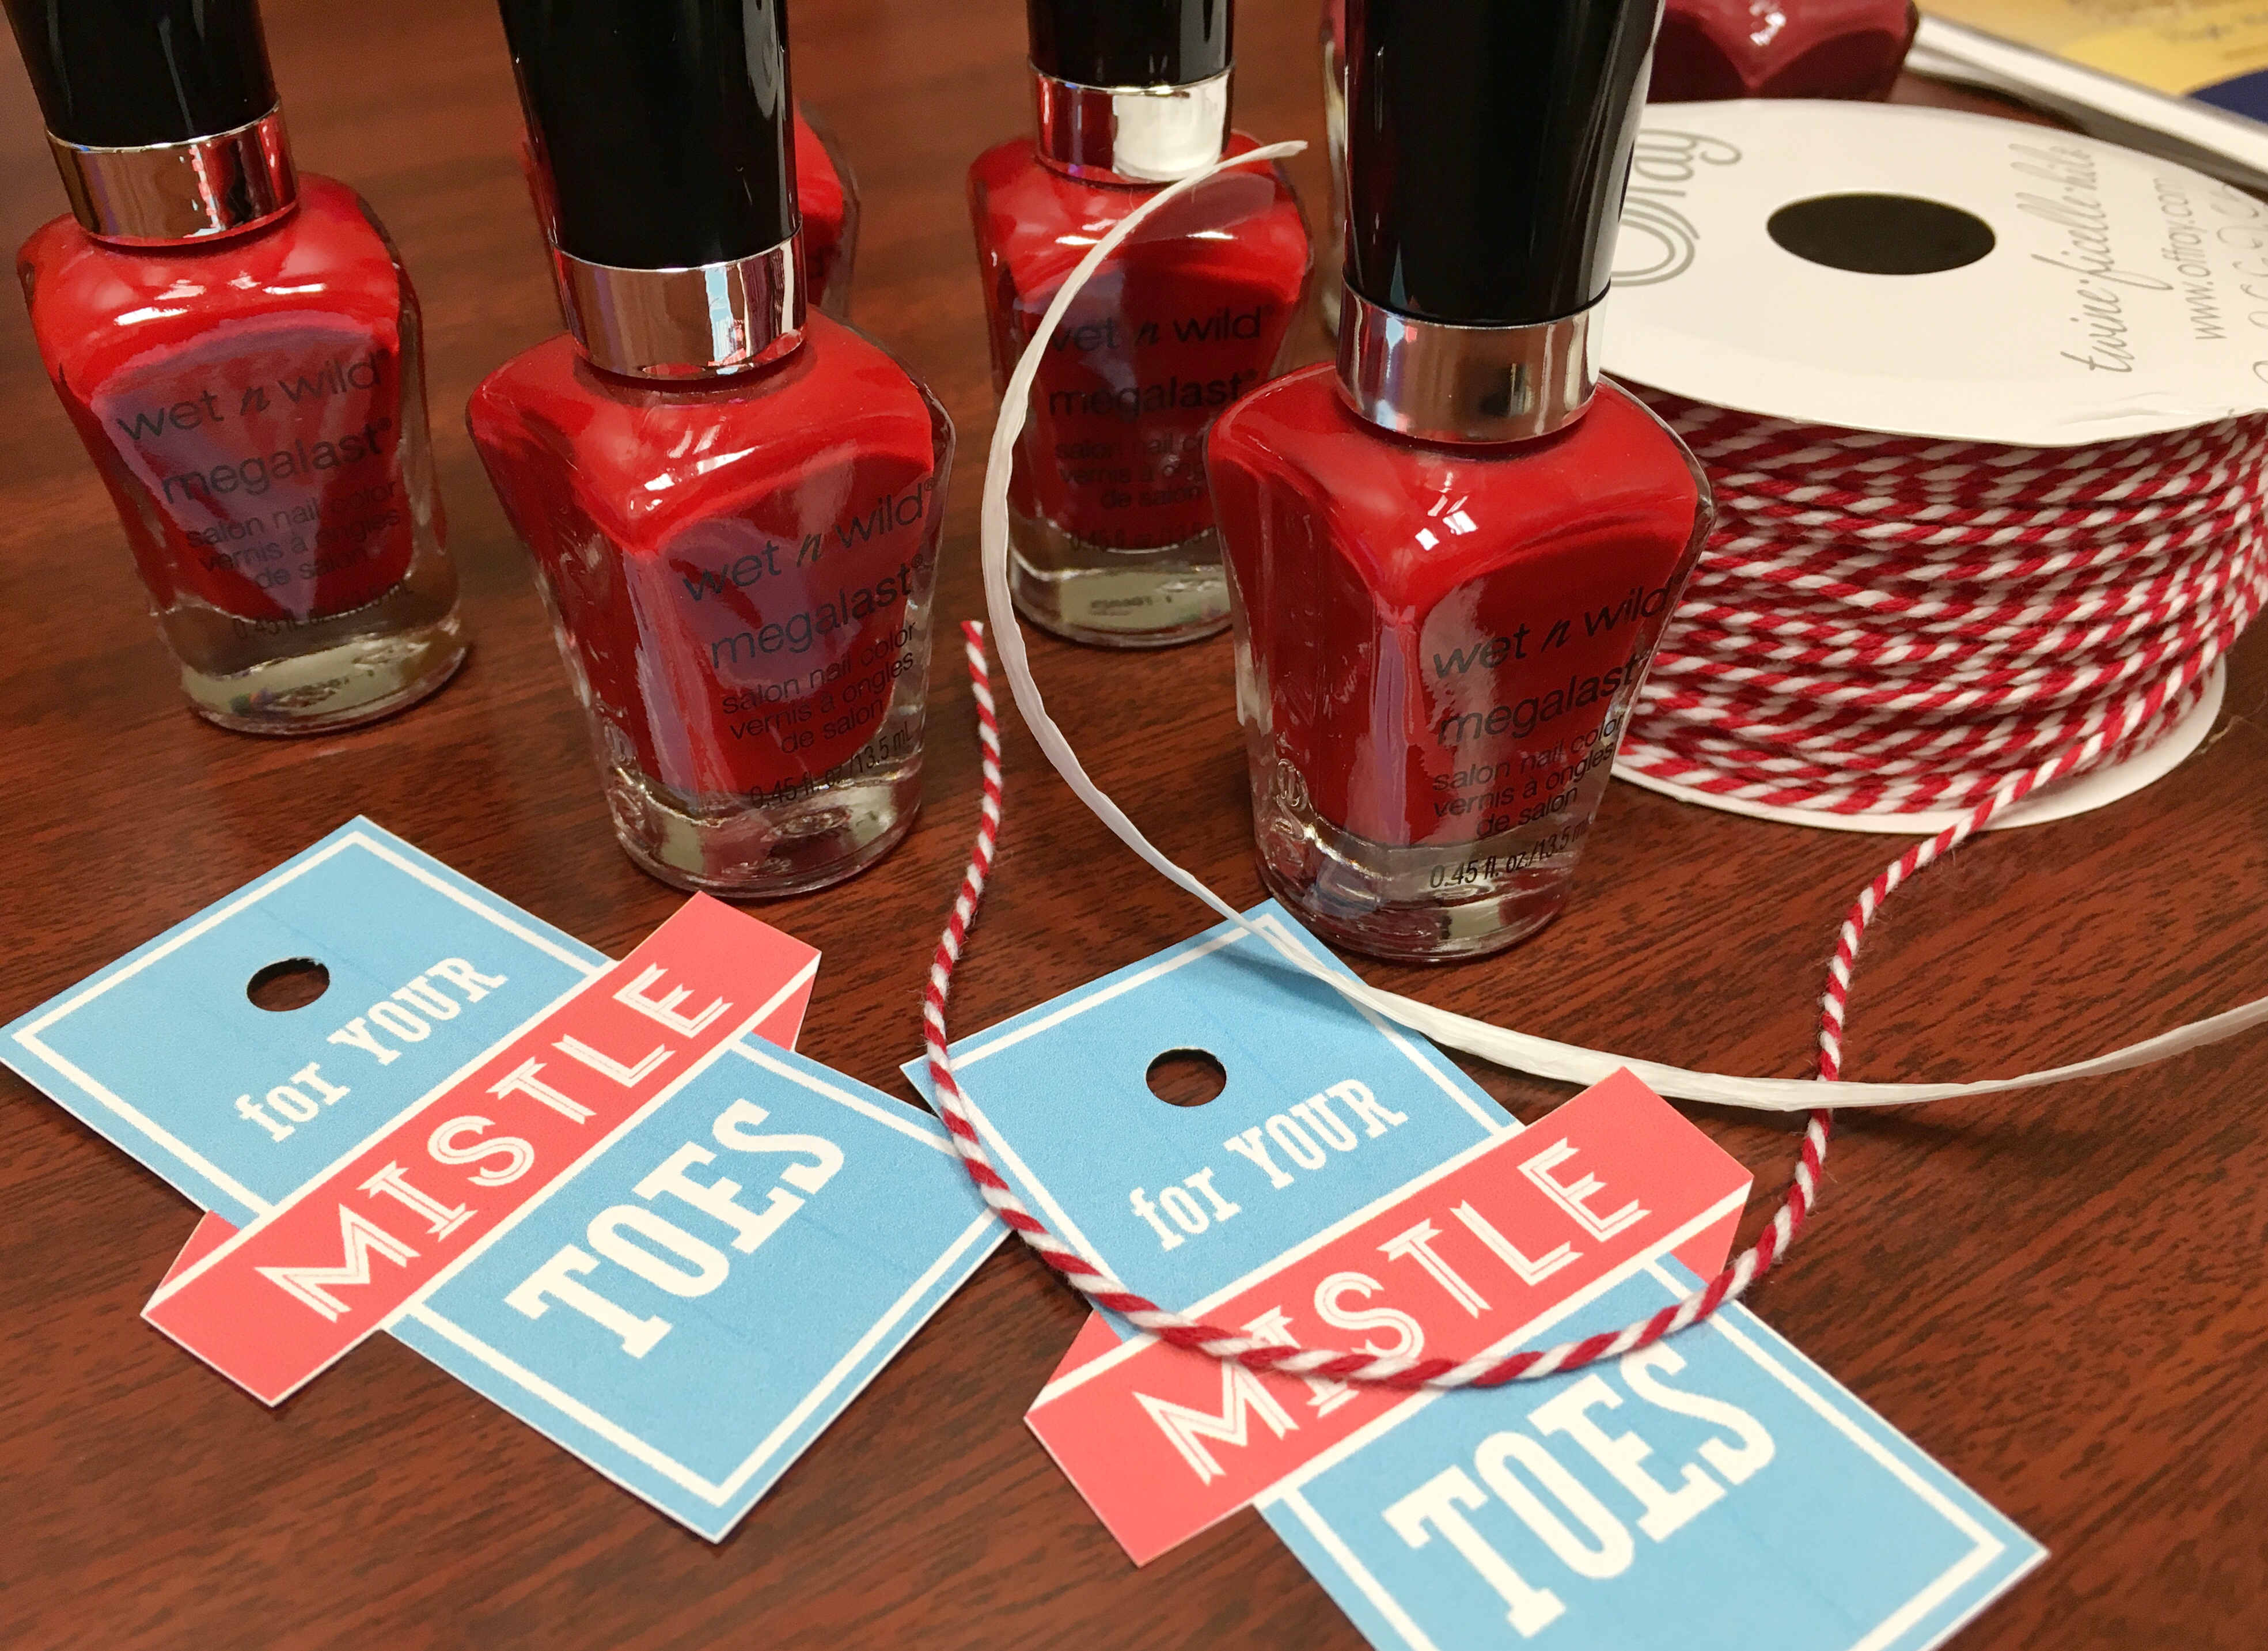
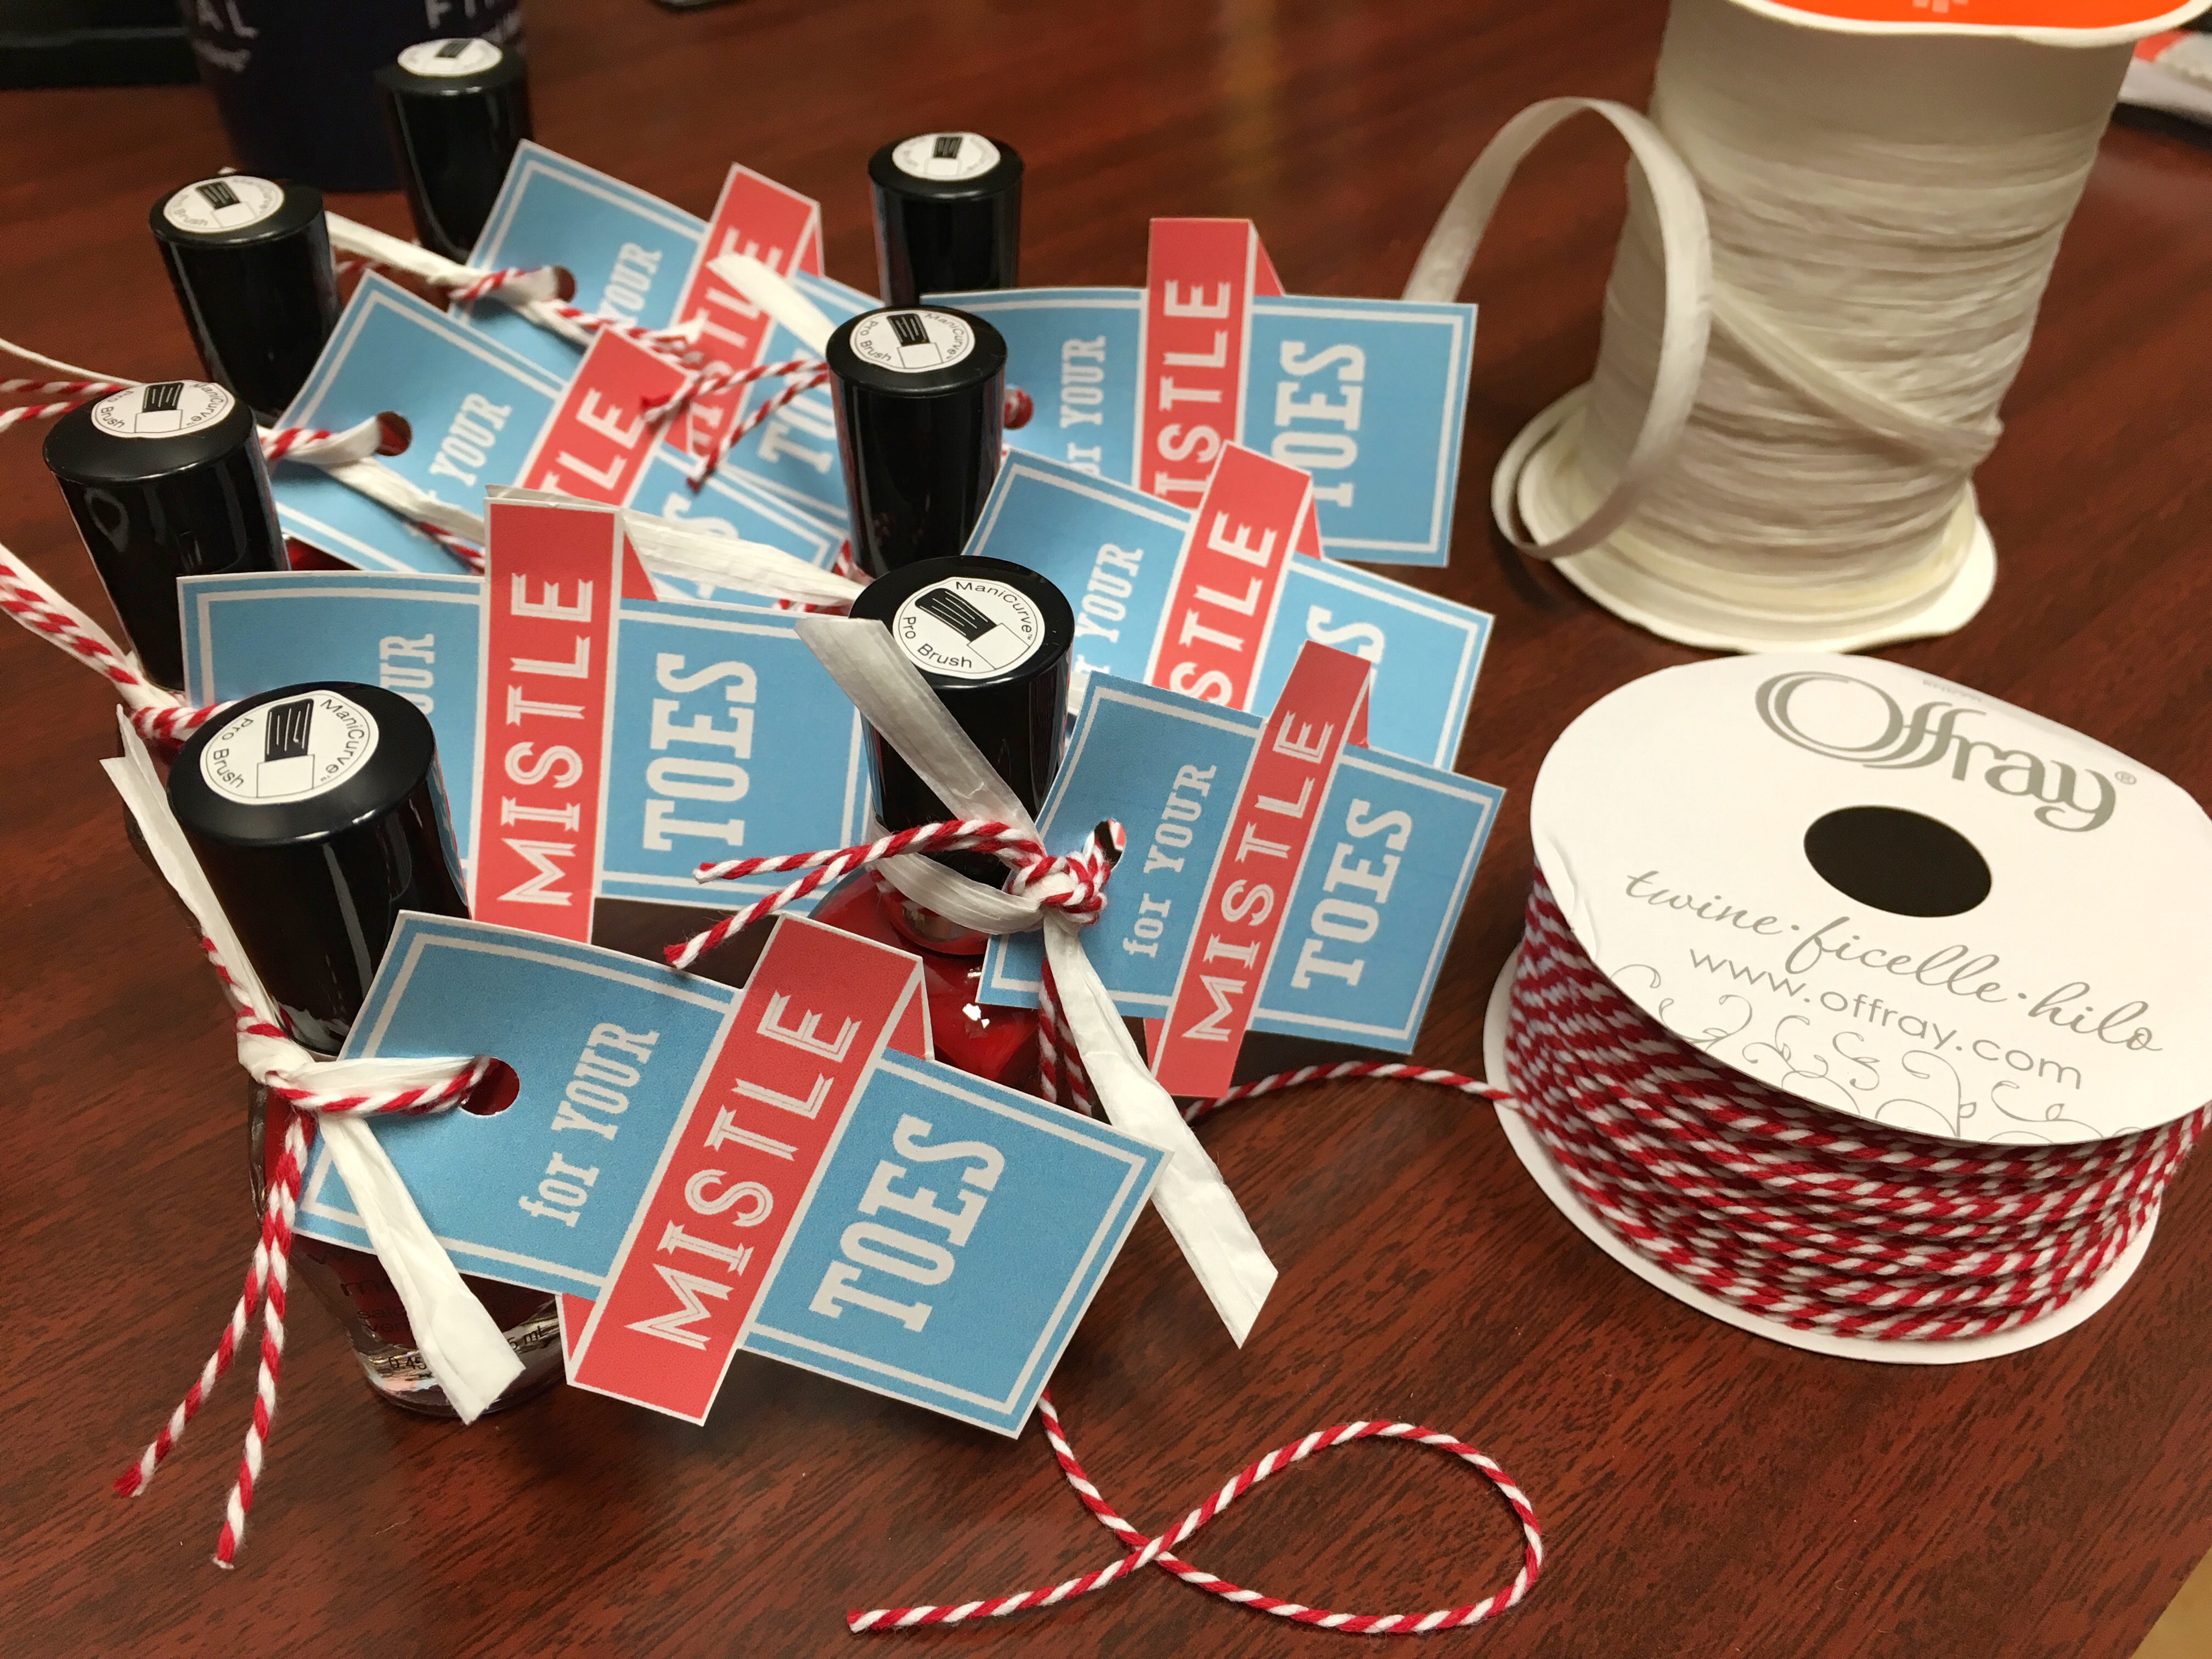
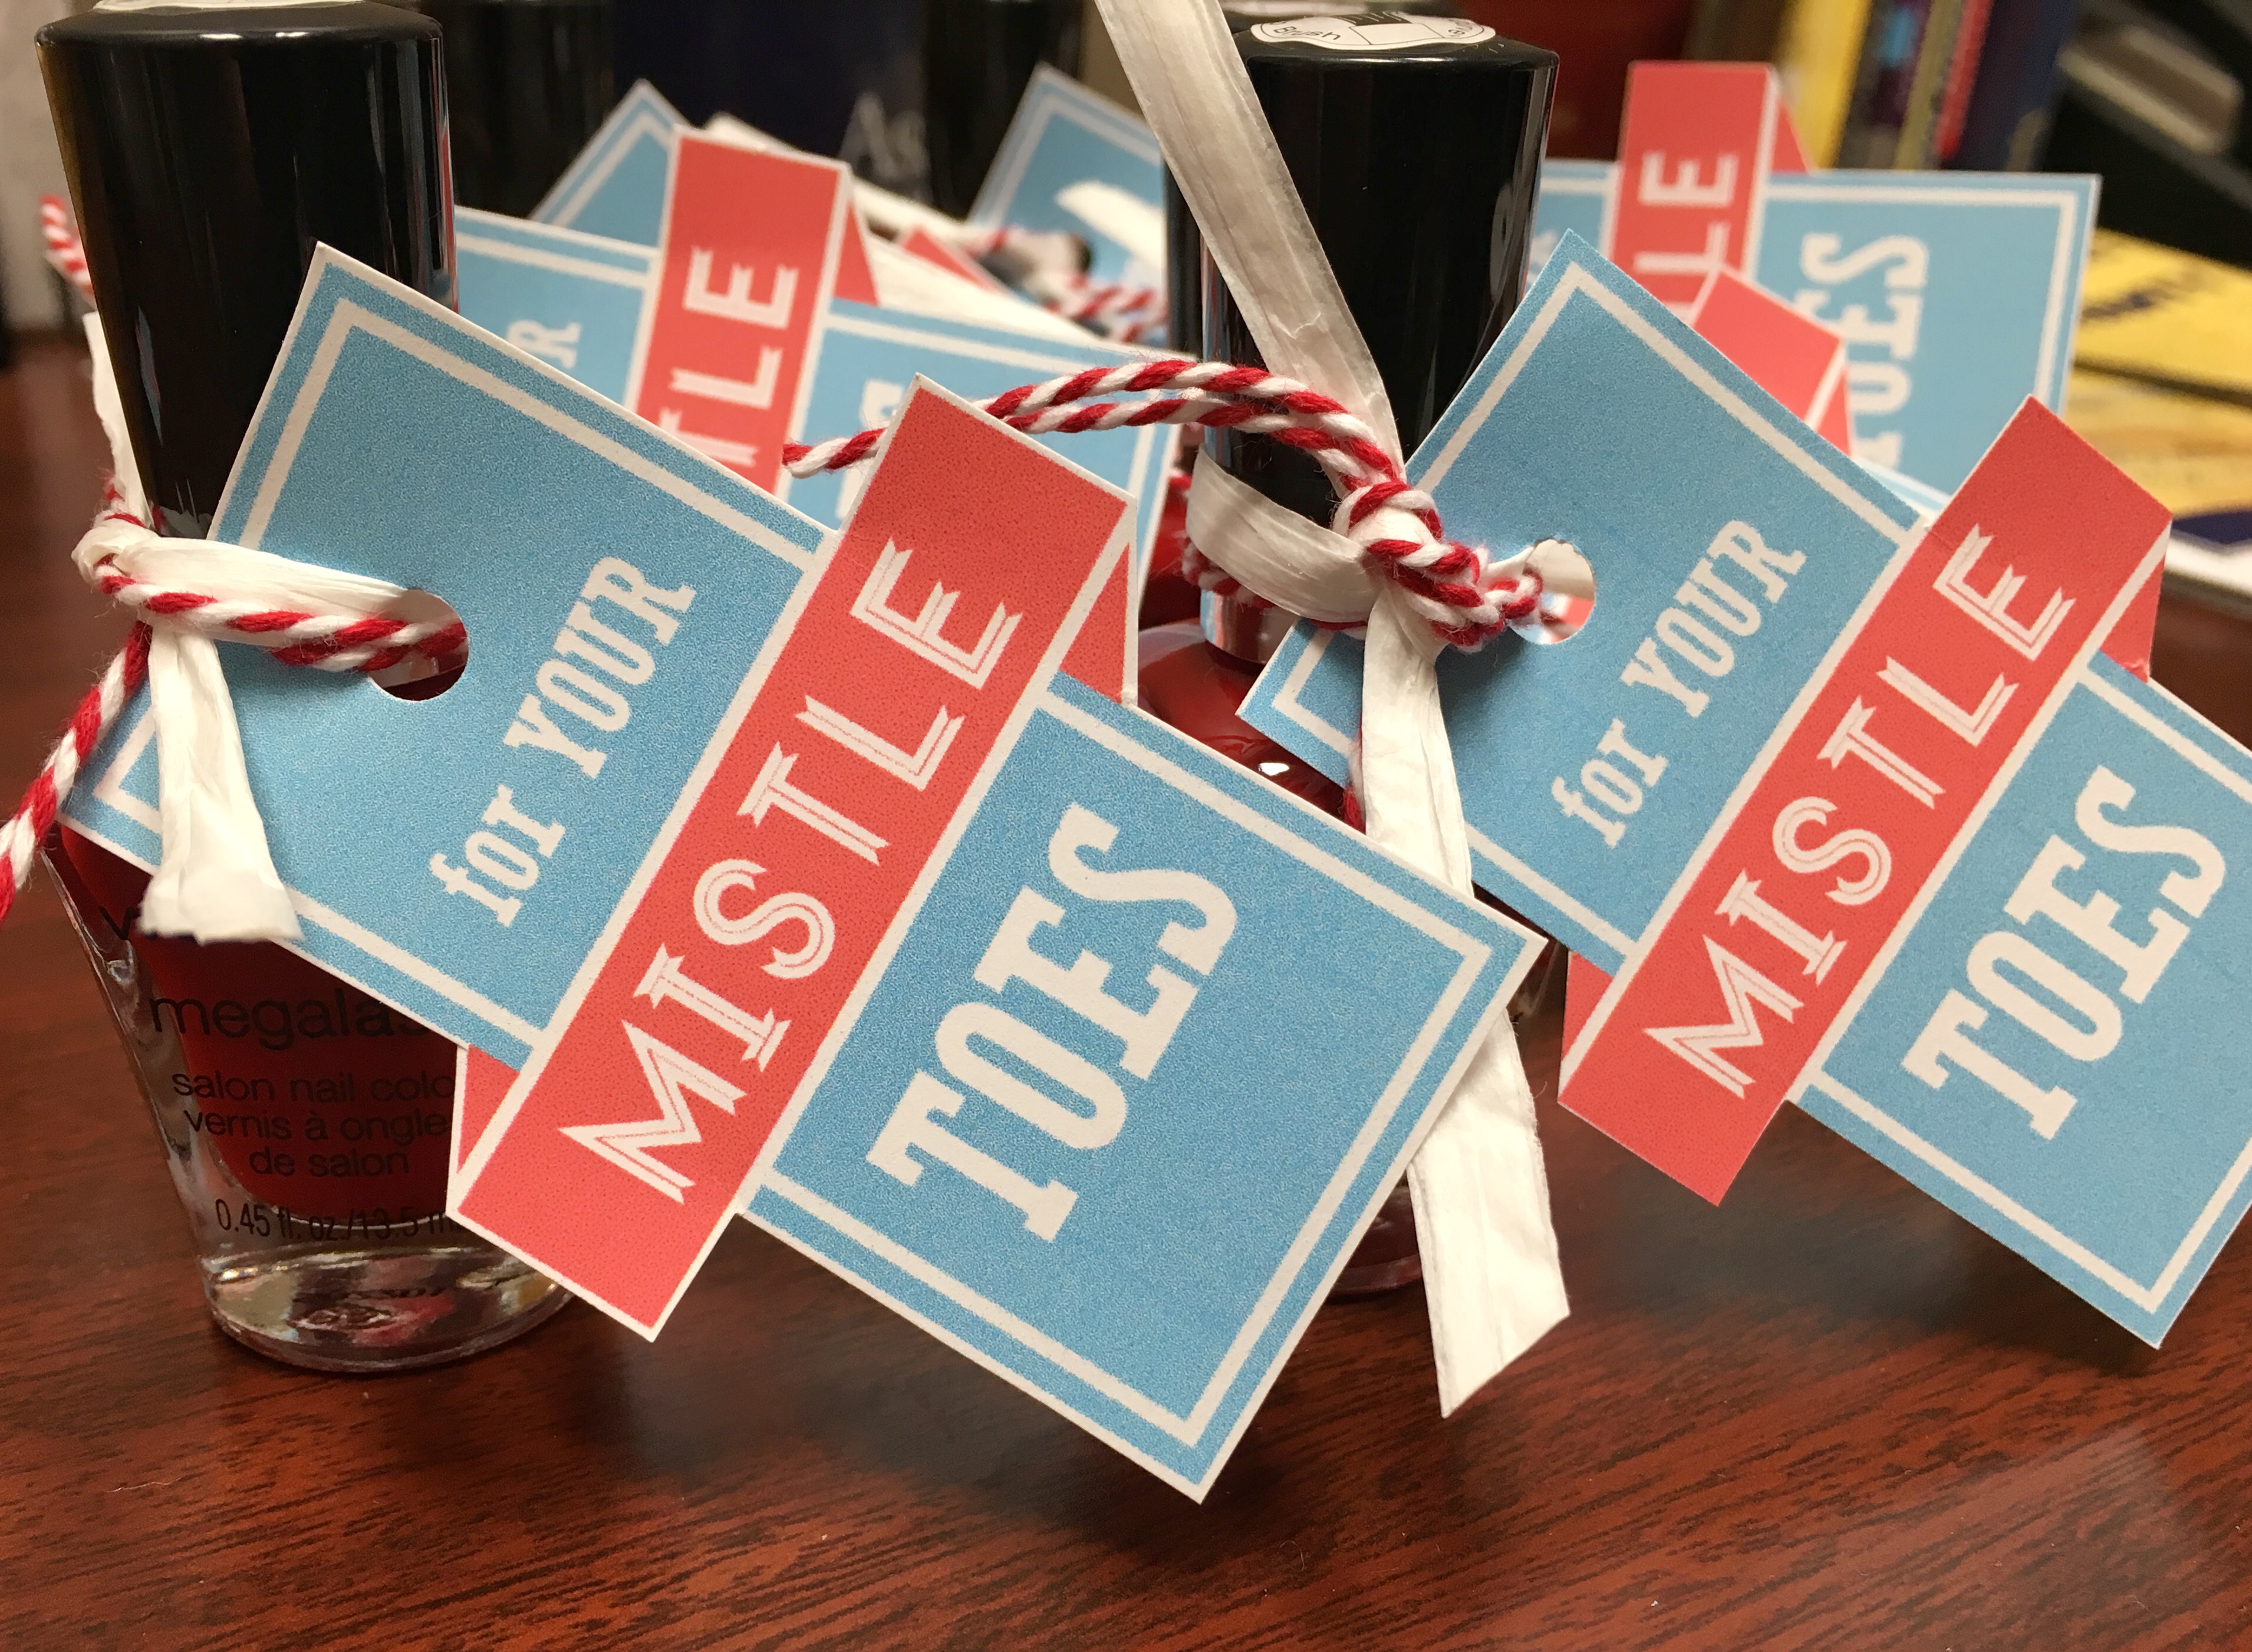
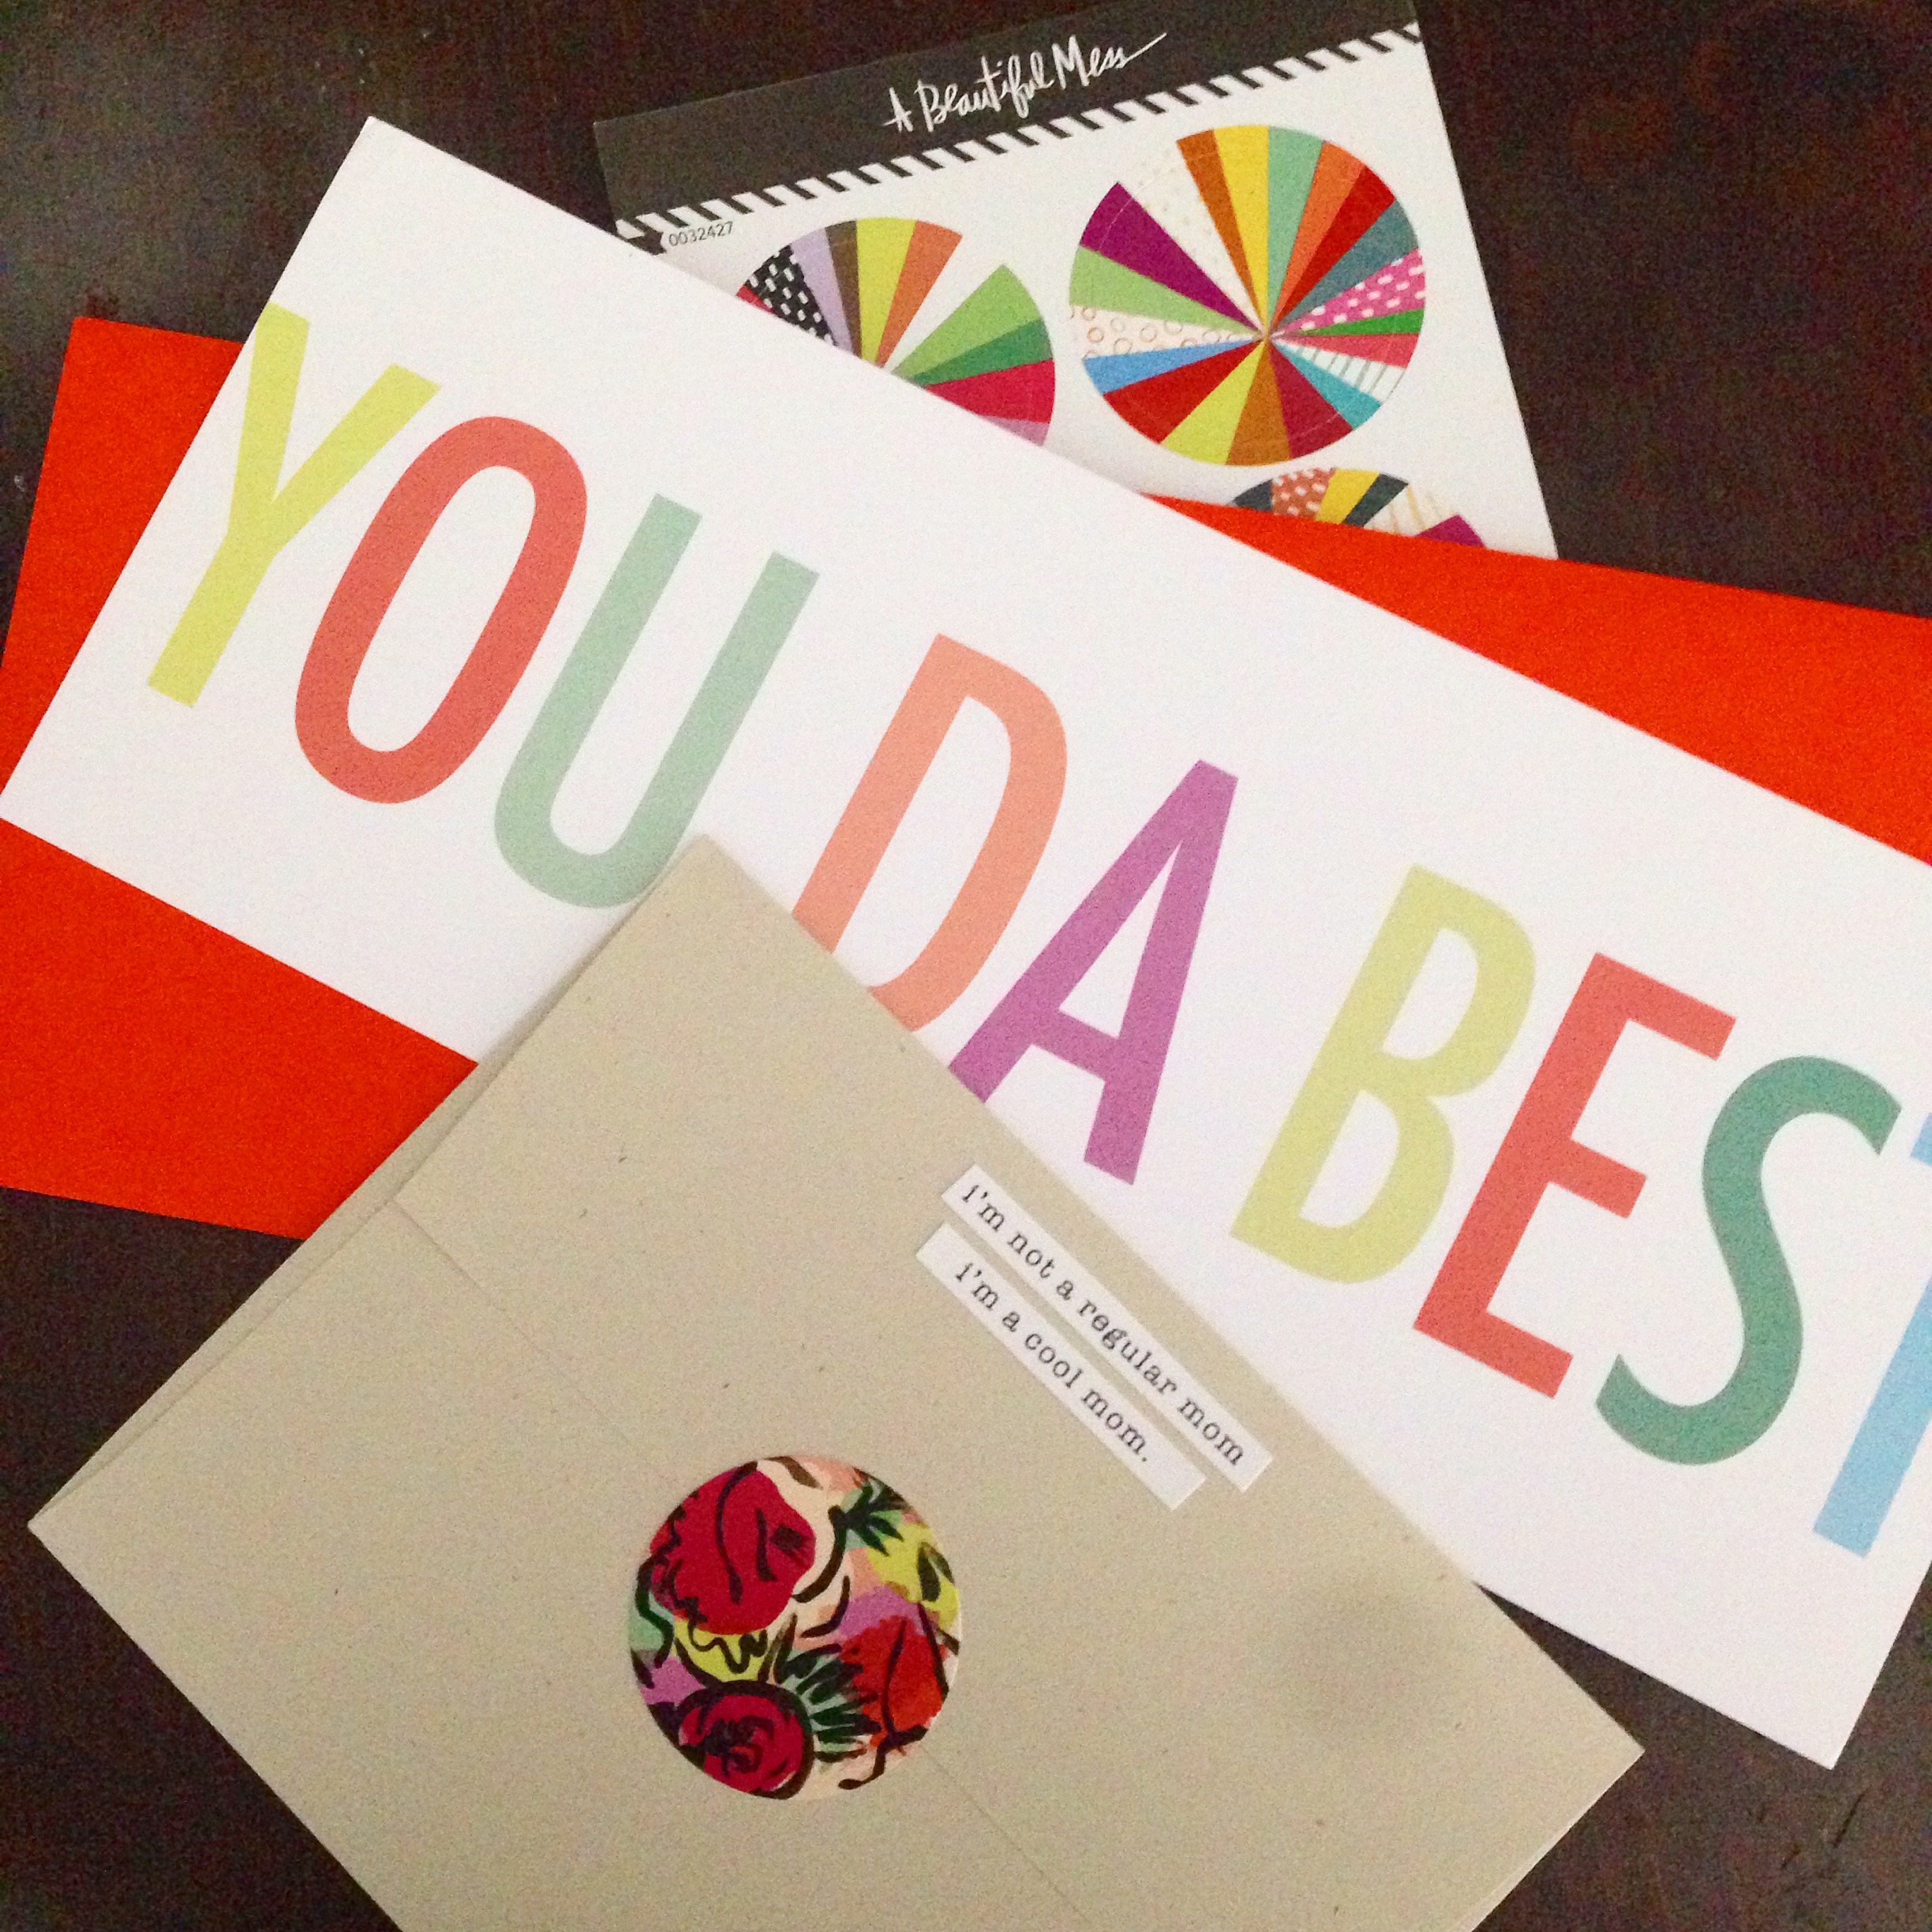
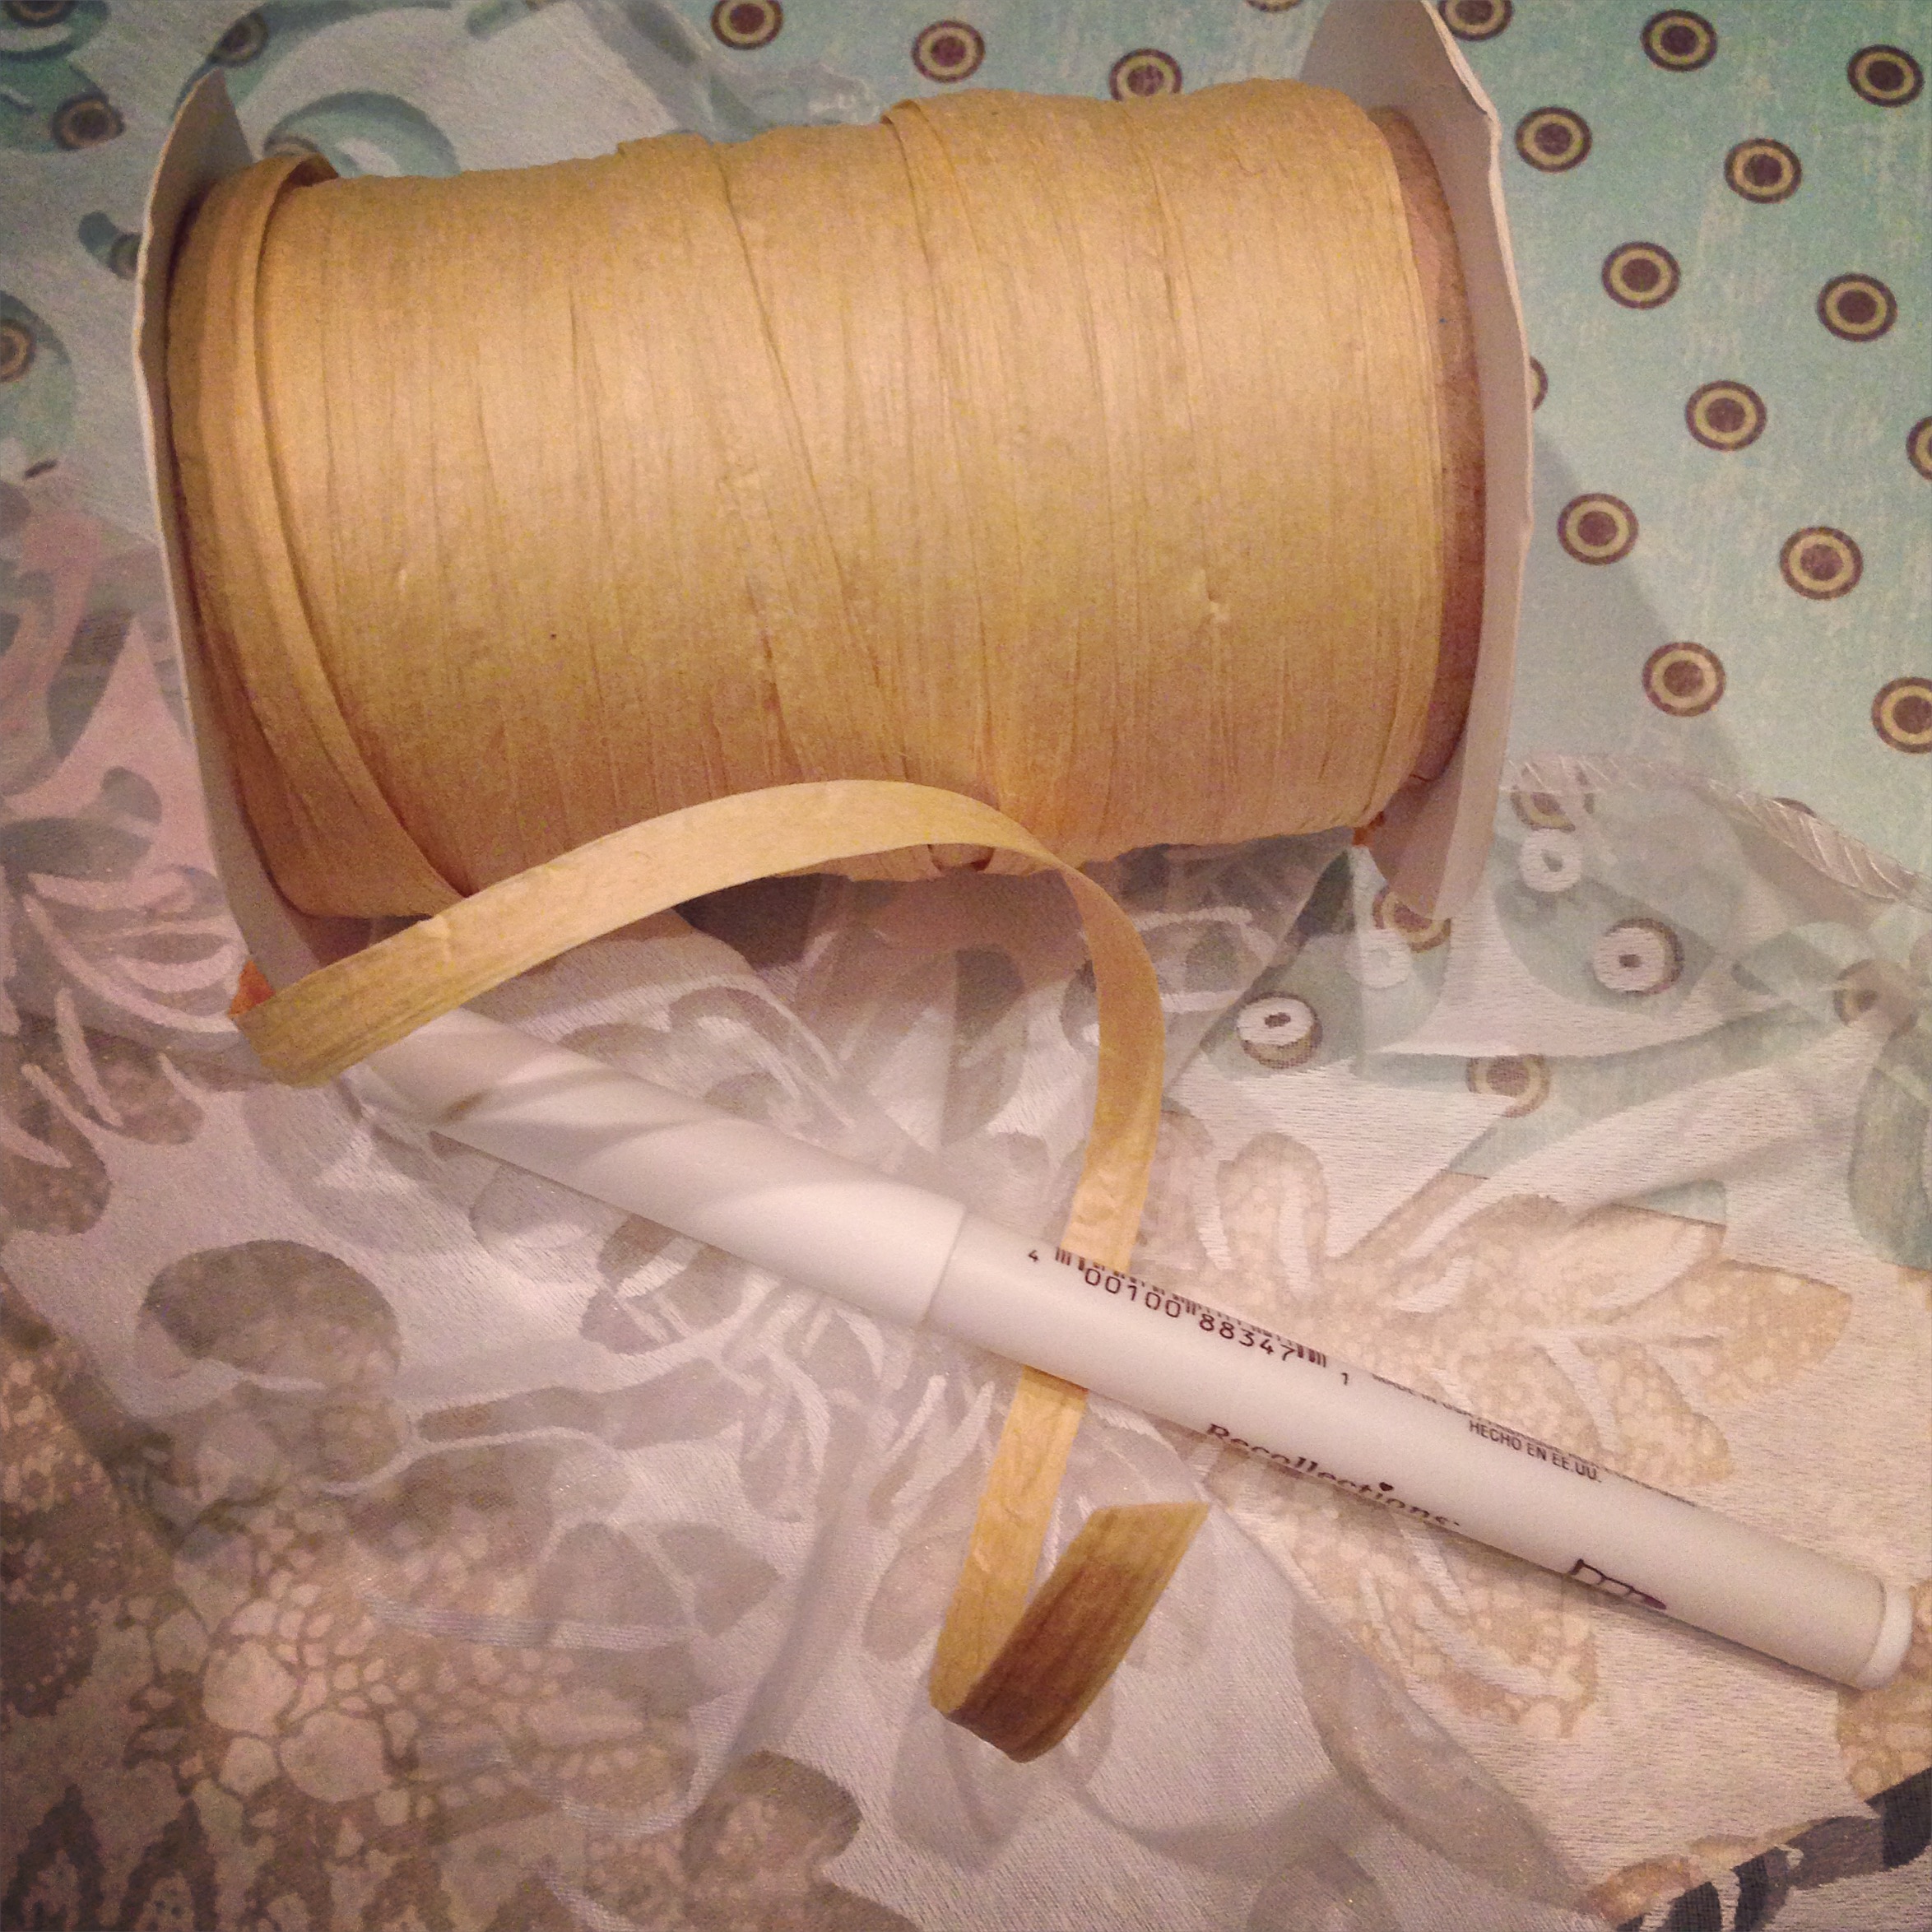
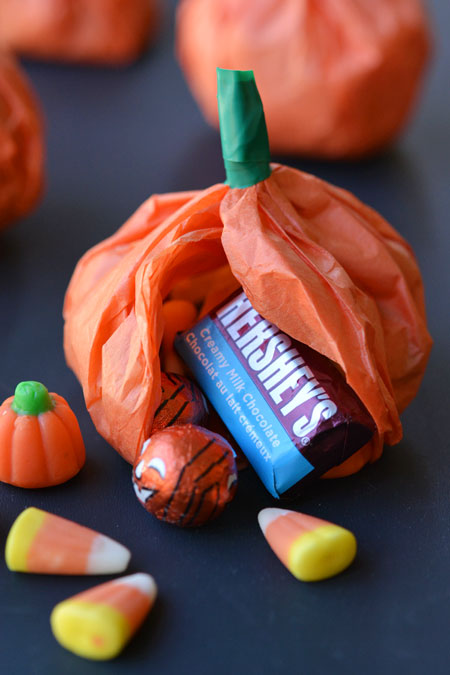
I’m always looking for creative ways to give little gifts, so it’s not surprising that this one caught my eye. I wouldn’t recommend this approach for your 1,000 trick or treaters, though it’d make a great little prize for folks around the office, teachers, etc. I will most likely be handing these out to someone this year…

Source: One Little Project

diy-halloween-yarn-garland
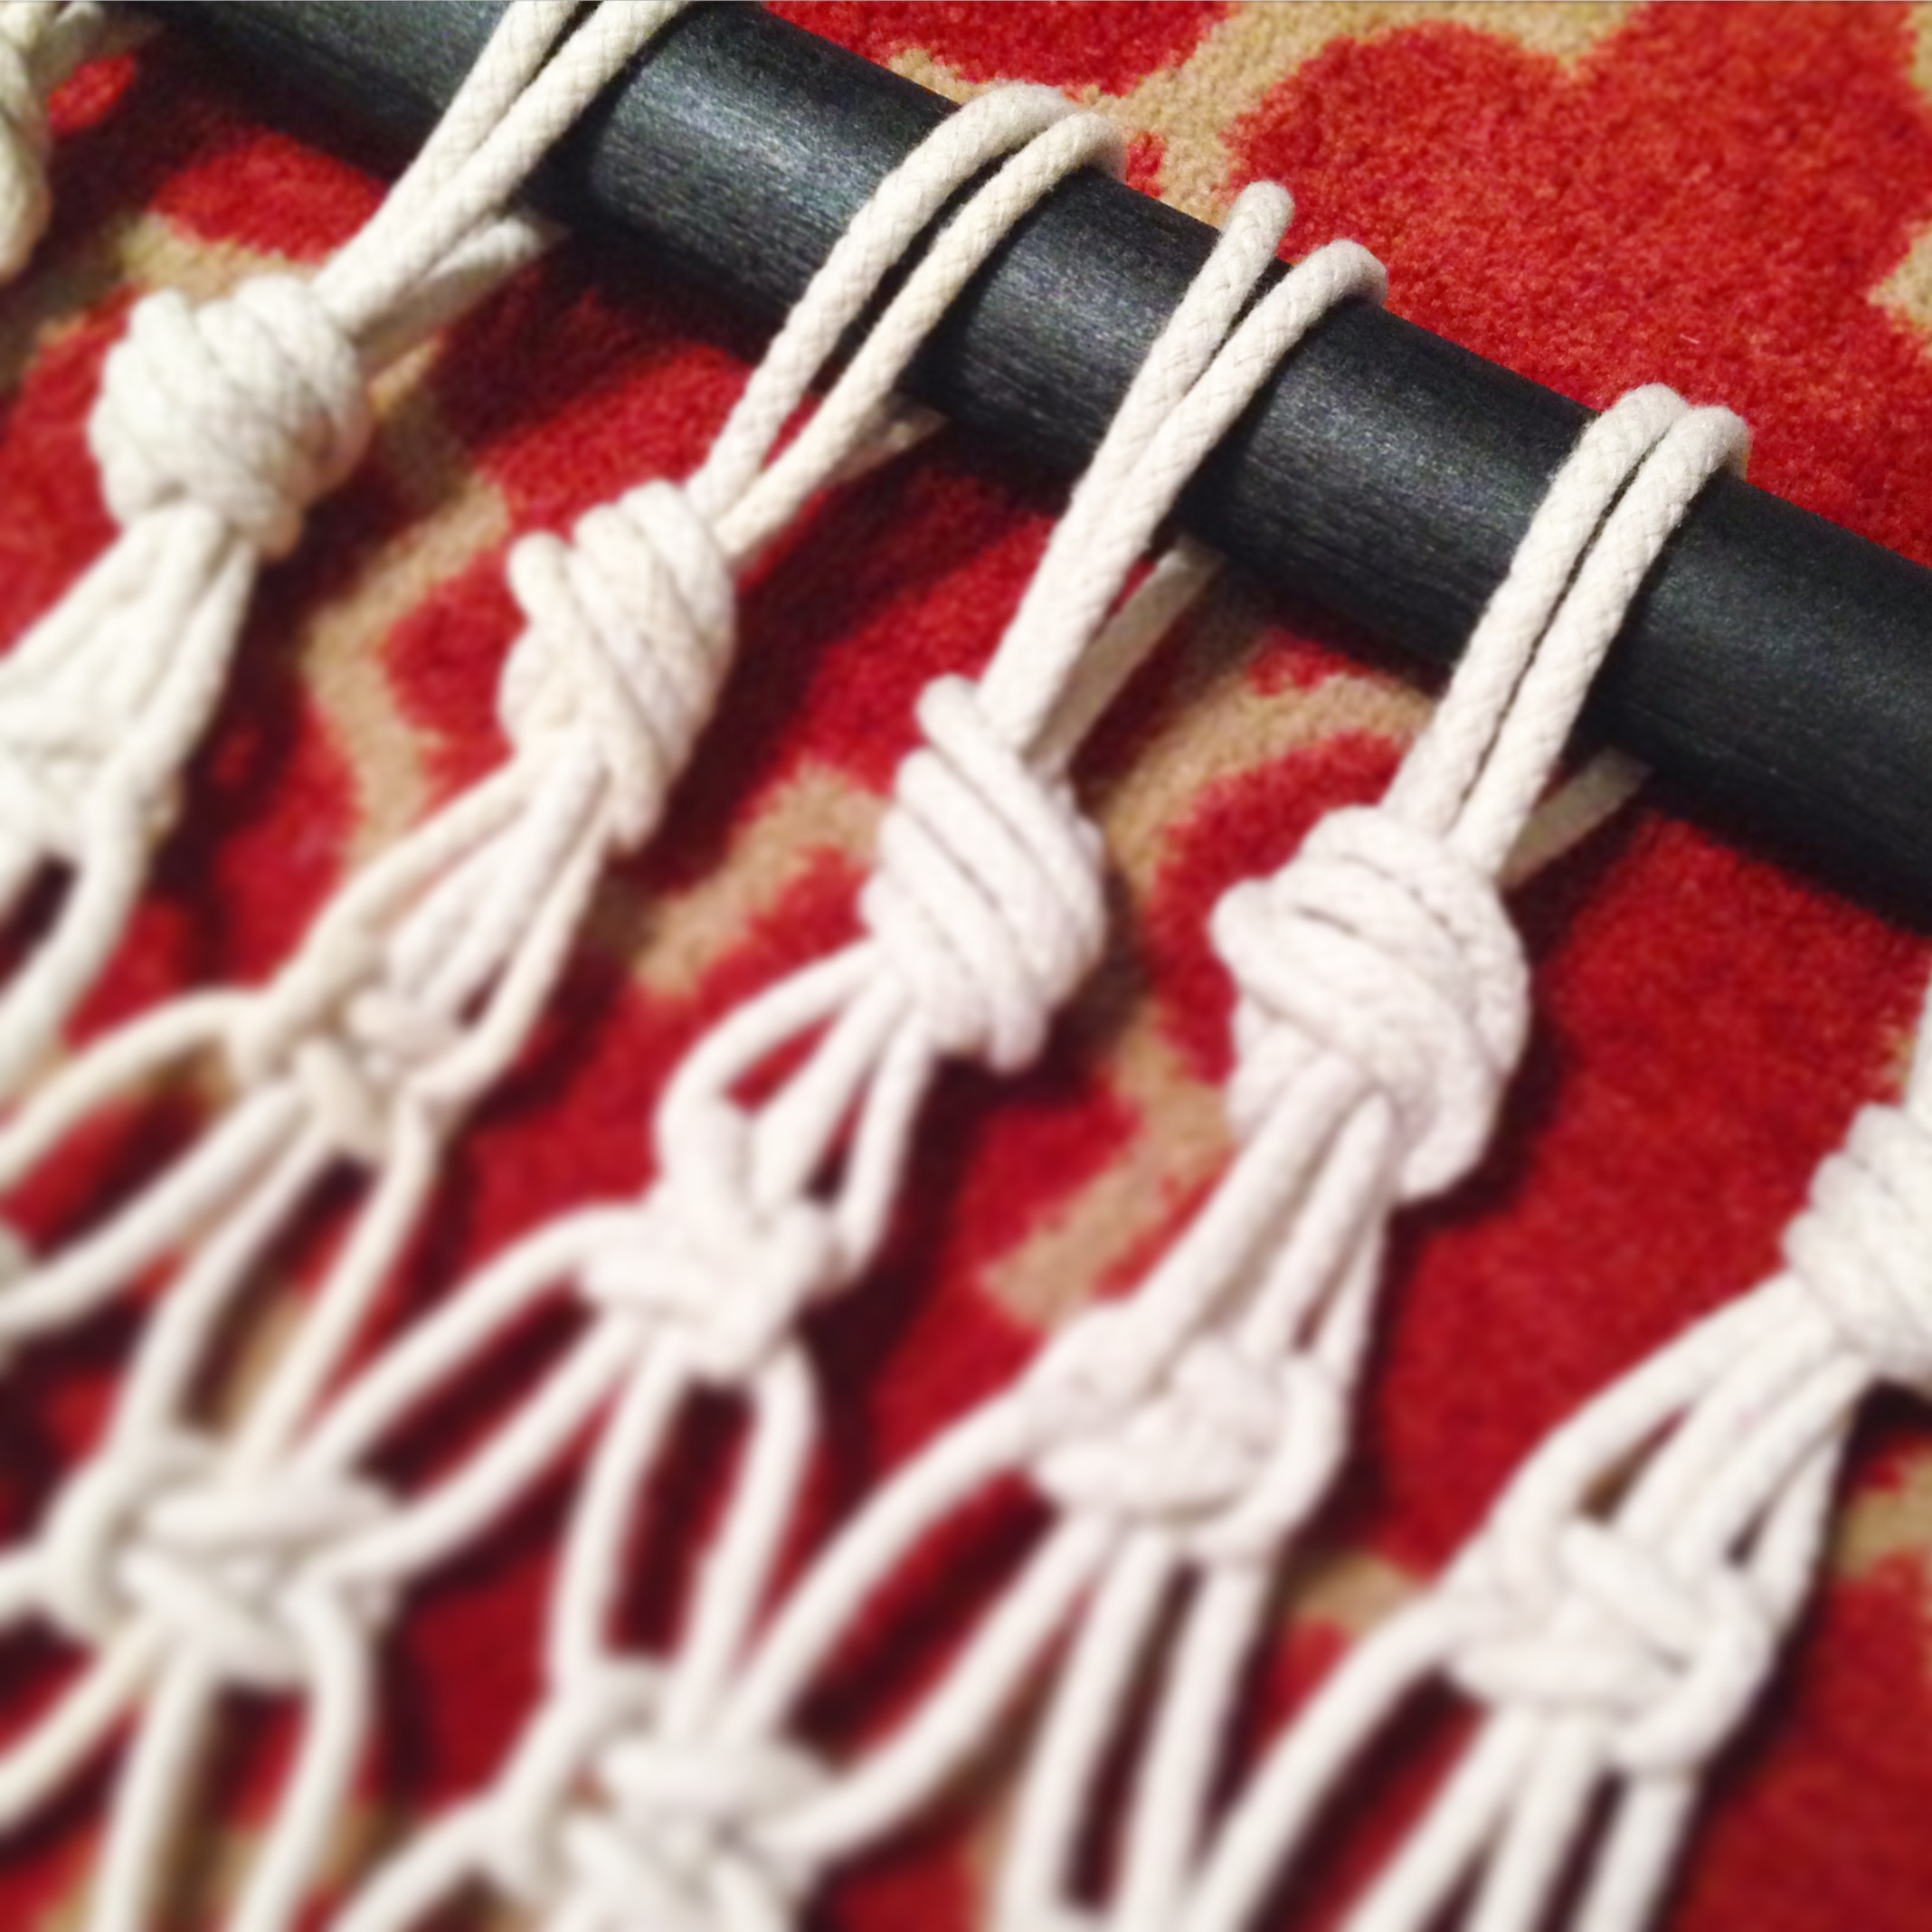
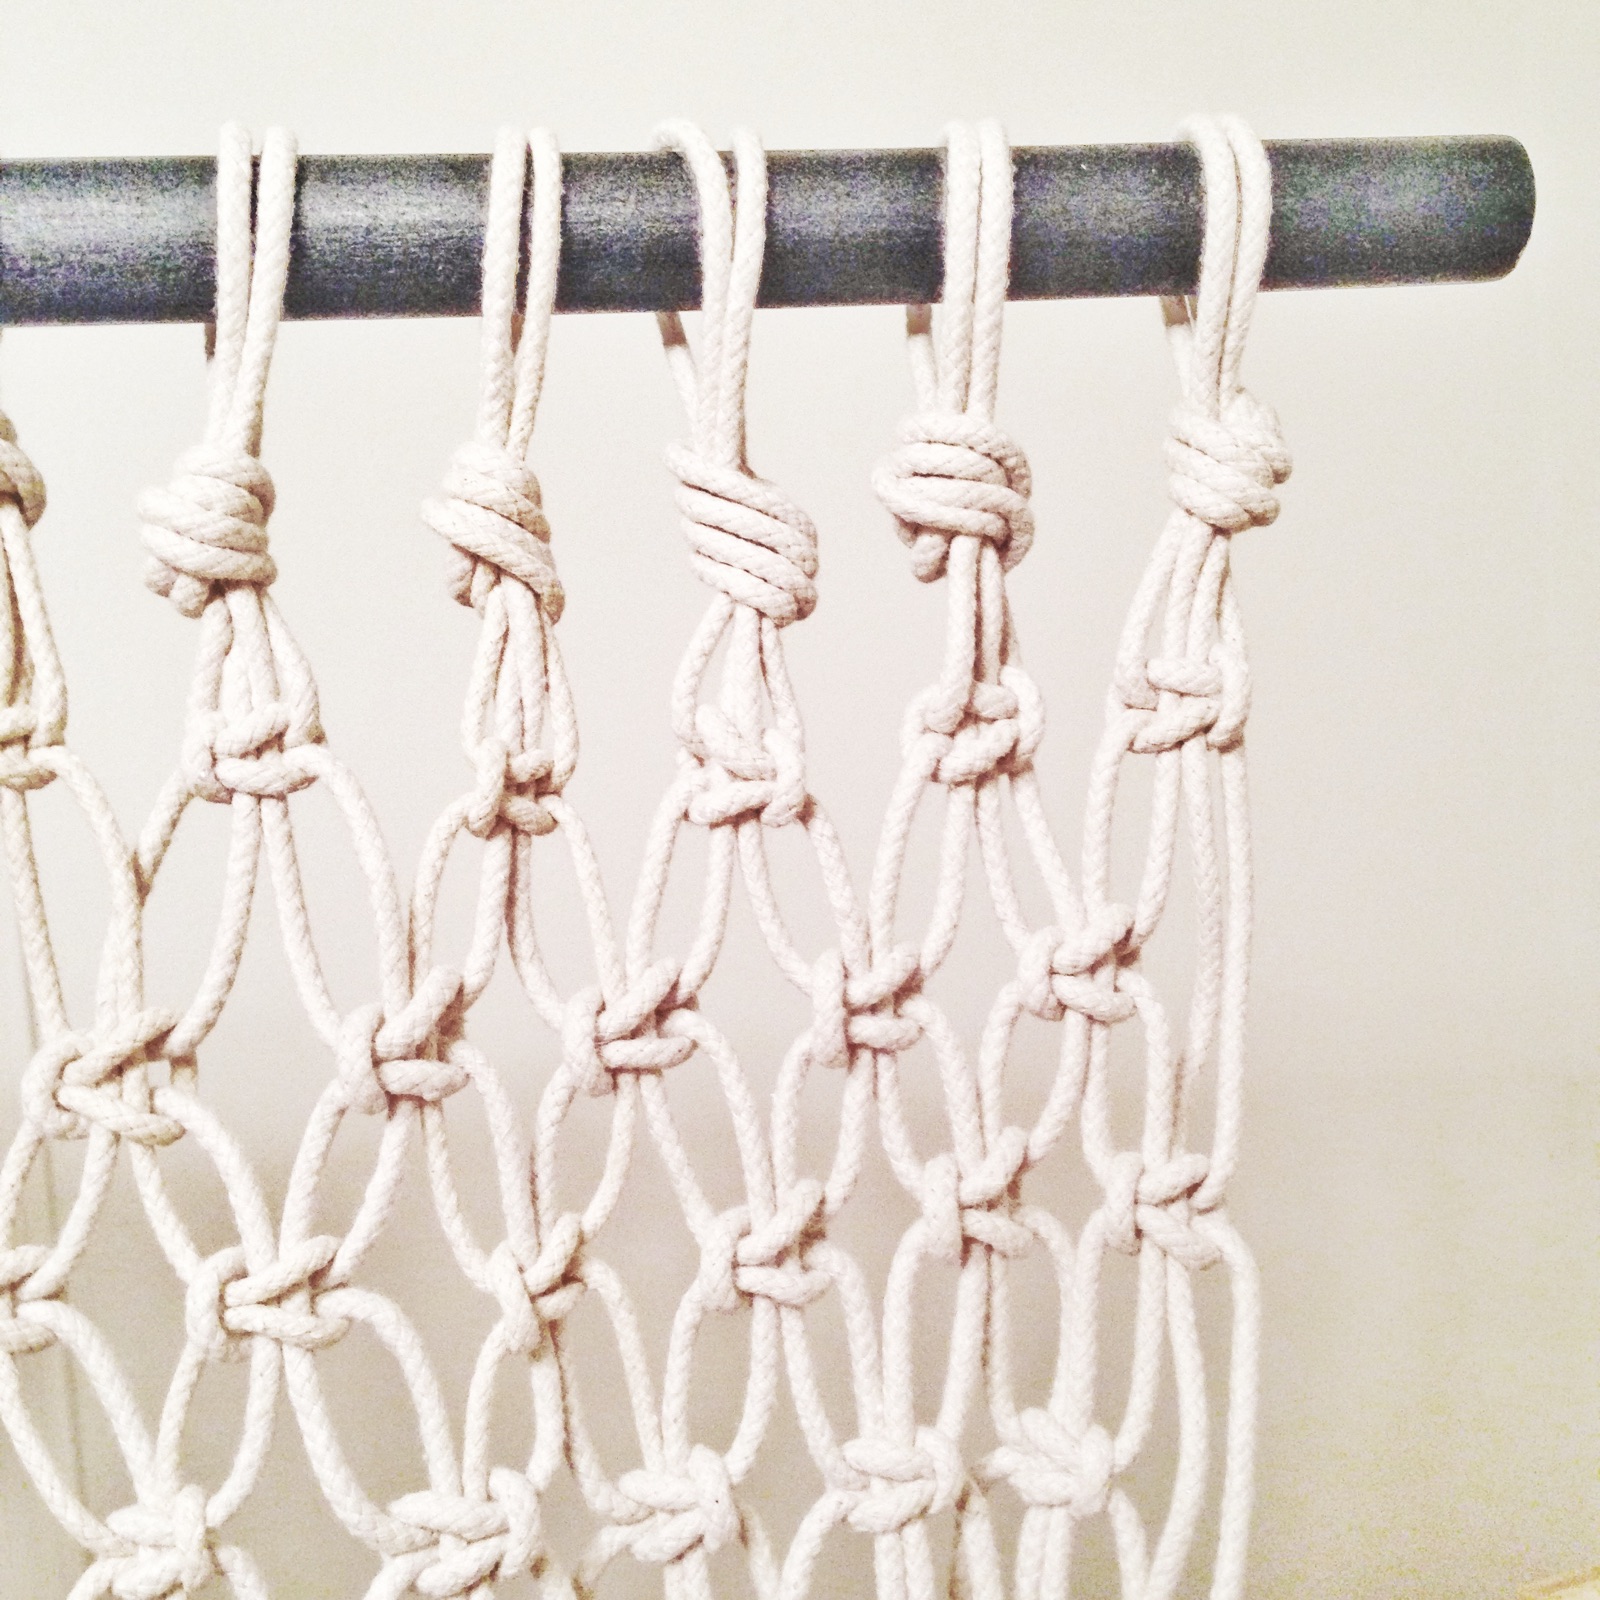
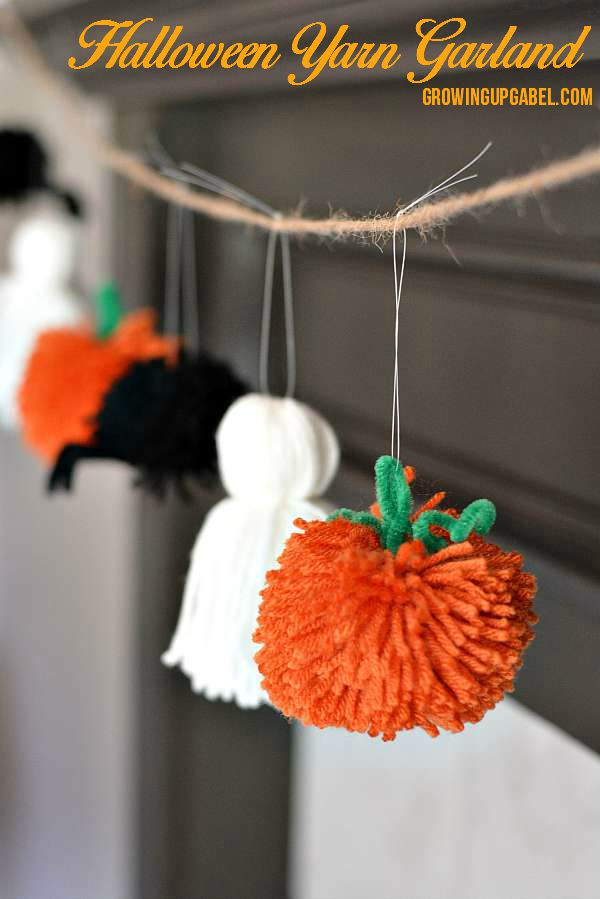
This is possibly one of my favorite projects because I love yarn. I love garland. And I love tassels! The tutorial shows you how to make each item, so it seems pretty simple!

Source: Growing Up Gabel

burning-spellbook-sculpture
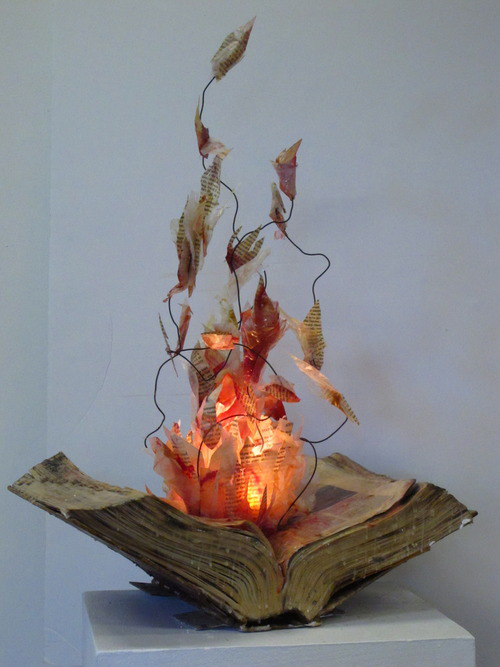
And finally, for those more crafty in nature and serious about their Halloween décor… (I’m looking at you, Meghan.) This burning spell book is simply stunning! Apparently the original source hasn’t been traced. It’s thought to have been a part of a college sculpture class. If this beauty is yours, let me know because you deserve some credit!

These few items should get you started on your fall crafting adventures. If you want more inspiration, go ahead and follow my Fall & Halloween board, or follow me on Pinterest altogether! (Right now, you’ll see lots of pumpkins, Christmas décor, and flannel. If those are your things, hop on over!)

Also, check the Halloween tag for a few more ideas. Have you seen any other cool ways of decorating lately?? I can’t wait to get started!

Quick & Easy DIY Holiday Gift

for your mistle toes at pamelapetrus.comI saw this idea on Pinterest back in the early days and I’ve filed it away in memory, hoping that I’d have a chance to use it someday. Yesterday (and today) I attended the ALC Retreat with a few of my peers and since it was so close to Christmas, I decided to bring along a little prize for everyone. (The Associate Leadership Council is similar to a board of directors at our local Keller Williams office in which you can be invited to join if you’re in the top 20% of the company. Yay me!) Of course, I didn’t have the idea until the last minute, so I needed something I could throw together quickly. As I was wrapping up the gifts, I decided to share it here with you guys because this little idea could come in handy if you need a quick and relatively inexpensive gift for upcoming holiday festivities.for your mistle toes at pamelapetrus.comfor your mistle toes at pamelapetrus.comAt first, I woke up and started designing my own tag and then I reminded myself, “Don’t recreate the wheel, Pamela.” With a quick google search, I stumbled upon this adorable printable for free! I printed two sheets of the tags on cardstock, and I was in business. I love the turquoise and red and that the designer left a spot for a hole punch at the top…good design gets me every time. Next, I simply purchased a few bottles of red nail polish and attached the tags with string!for your mistle toes at pamelapetrus.comfor your mistle toes at pamelapetrus.comVoila! You have a quick, adorable gift that doesn’t take much time or money. This idea would make a great stocking stuffer, teacher’s gift, or a happy for someone that you don’t know very well. Adding the customized and cheeky tag takes a simple gift up a notch and proves that you put some thought in to it.

Have you seen any other fun and simple gift ideas floating around lately? I’d love to have some other ideas to store away for later!

P.S. My apologies for the poorly lit photos. The lighting in my office is awful!

Kitchen Before and After + A Stenciled Wall

The Kitchen Before. See more at Pamelapetrus.comThe Kitchen After. See more at Pamelapetrus.comI bit the bullet and showed a house tour showing where we are in renovations a few weeks ago. One of the rooms that I’m most happy with and seems to have shown the largest transformation is our kitchen. When we were house shopping, the natural light pouring in to this area is one of the things that sold me on the home. It wasn’t my dream kitchen, yet it was 1,000x better than the kitchen we had in our rent house. Today, I’m sharing the progress of what we’ve already done and what we hope to do later. I hope you enjoy!

The first thing we did in the home was have the popcorn ceilings scraped and every. single. thing. repainted. As you can see in the before photos, the house was done in all warm tones which is the complete opposite of what I prefer. For the kitchen, I chose a light gray for the bottom cabinets and the ceiling and white for the top cabinets and walls. (Full disclosure: when I chose the colors, I thought the countertops were primarily gray. Turns out that the primary color is tan, so I’m working to mix the colors somehow.) I painted the walls white because I really wanted to enhance the brightness of this room. It’s true that people spend a lot of their time in the kitchen, so I wanted it to be as bright and happy as possible.

The Kitchen Before. See more at Pamelapetrus.comThe Kitchen After. See more at Pamelapetrus.comAt the last minute, I also asked the painters to slap a coat of paint on that tile backsplash. Most people think we replaced the tile, and we didn’t…that’s just a coat of white paint. It made a HUGE difference. We had plans to redo the backsplash, and I didn’t know exactly when that would be. It turns out that about 100 other projects were more important than a new backsplash, so I’m so glad I thought to paint it for now. The paint has held up tremendously and we’ve had no trouble with the coverup. Have an ugly tile backsplash you don’t like? I’d suggest trying some paint before spending the time and money to replace it.

The Kitchen After. See more at Pamelapetrus.comOne day this summer I woke up and decide to stencil a wall. I saw this wall and thought it would be perfect in my kitchen. I had been tossing around the idea of a fun wallpaper there and I decided the painted pattern would be quicker and easier to undo if we didn’t like it. The process was rather simple. I made a stencil from foam board and traced it with pencil on the wall. I do recommend tracing with pencil first because if you’re like me, a little bit of slightly off spacing would drive me insane. After I had the pattern set, I used a Liquitex pen in Neutral Gray 5 to freehand over the pencil lines. It took two pens to complete this project and I think that may have been because the first pen didn’t work quite as well as the second. Our walls are a bit bumpy (for lack of a better word) from the texture that’s on them, which made this project a bit more difficult. It’s very hard to draw a straight line over a bumpy surface. I didn’t even consider this at first, so if you’re thinking about doing something similar, you might want to consider the texture on your walls. If they are indeed textured, I wouldn’t avoid the project. Instead, just be prepared for a more organic look.

Is this wall perfect? Not at all. Are the lines straight? Hardly. Do I still love it? Yes. One of my new Instagram friends often talks about being a “recovering perfectionist.” That’s me! A previous version of myself would not have been able to live with the inconsistencies in this project. The new version can step a few feet back and agree that it looks just fine. Actually, I almost quit and painted over it after the first two lines. My lines weren’t straight and it was very hard to get a steady flow of paint from the pen because of the wall texture. However, I decided to keep going. I decided to see what the entire wall looked like before giving up, and I’m glad that I did! (Tip: If you need to erase any pencil lines, try using a Lysol wipe. It worked so much better than an actual eraser!)

After the wall, I hung those gray stripe curtains from Ikea and ordered that print from Etsy. Another change that I made to make our kitchen more functional is hanging the oven mitts there directly on the wall. They’re much easier to access there and it just works better. Now all that’s missing is an adorable Anthropologie apron! If you’re thinking of doing a similar wall, I say go for it! If you hate it, all you have to do is paint over it. No harm, no foul. If you decide to give it a whirl, tag me on Instagram. I’d love to see your projects!

The Kitchen Before. See more at Pamelapetrus.comThe Kitchen After. See more at Pamelapetrus.comFor the breakfast area, Matthew was going to make a window seat and then I remembered that I had this amazing bench in storage. It fits there PERFECTLY and has a bit of a story to tell. Right after Matthew and I were officially a couple, we went on a bit of a treasure hunting trip with my mom and sister. We found this gem at an antique store and scooped it right up. The intention was to sell it at Salt & Pepper, yet I started having trouble parting with it. Finally, I moved it to my office and then brought it with me when I sold the store. I love it here in the breakfast nook and it’s a nice reminder of the beginning of our journey together. The table was handed down to us from Matthew’s grandmother and the chairs are a temporary solution from IKEA. (It turns out that it’s hard to find chairs for this height of a table.) To the side of this breakfast area is an old catalog recovered from the family business, TP Outdoors, and it holds all sorts of goodies.

The Kitchen Before. See more at Pamelapetrus.com!The Kitchen After. See more at Pamelapetrus.com!Just changing the paint and floors alone, made a tremendous difference. (More about the floors here.) I honestly had forgotten how far we’d come until I looked at these photos side by side. I spent a bit of time being paralyzed by the amount of work that was needed and I’m happy to be coming out of that. I’ve recently found the courage to try some new things, even if I’m not 100% sure about them. Things feel like they’re coming together around here and I love that.

For now, what’s left in the kitchen remodel is a new light fixture, new appliances, and possibly new cabinet doors. I also still need cabinet knobs. I ordered some after the sink fiasco and they didn’t look as good as I’d hoped. Eventually we’ll have knobs. Maybe.

This is our kitchen progress in a nutshell. We’ve done a lot and it feels nice. We’ll continue to do more as time and funds allow. Maybe it’s the promise of fall creeping in or maybe it’s just the passing of time. Regardless of the reason, I’m happy to be feeling more at home here. Some of our larger projects are hopefully just around the corner too, so it’ll be even better soon!


#the100dayproject Progress Report

100 Days Project (12)Re-Purposed Muffin Tins100 Days Project (2)100 Days Project (3)100 Days Project (4)100 Days Project (5)100 Days Project (6)Business Owner100 Days Project (8)100 Days Project (9)100 Days Project (10)100 Days Project (11)

Day 4 – I used my ABM happy mail to send lovely lady letters to some fabulous friends!
Day 5- I re-purposed muffin tins to use for earring organization!
Day 6- I FINALLY painted the wooden rod for my DIY rope curtain.
Day 7- I framed a card (from elisejoy‘s packaging) & got it ready to complete a gallery wall.
Day 8- I did a bit of miscellaneous painting. 🎨
Day 9- I added a third coat + touch ups!
Day 10- I added a bit of sparkle and called it DONE!
Day 11- I doodled my BOLD law that I focused on for the week.
Day 12- I made these yummy pineapple mojito cupcakes!
Day 13- I quickly free-handed a 4×6 card.
Day 14-  Made another black & white painting (my fav)!
Day 15- Signed up for the Sew With Us e-course from A Beautiful Mess!

I’ve been participating in #the100dayproject for some time, and I’ve learned a lot already. Overall, I’ve done fairly well with the project. Although, I did fall behind early in the project and had to play catchup.

Here’s what I’ve learned so far:
1. Committing to something for 100 days is tough!! If I were being completely honest, I’d say that I have slight commitment issues. They pop up from time to time, and I think it stems from my fear of being locked down. I also struggle with the thought of having to do something (even something that I enjoy) repetitively. I need my day to look different each day and the thought of repetition makes me want to run for the hills! It was on day 8 that I realized how large of a commitment I’d made. Ultimately, I had agreed to do something every single day for 100 days. I felt trapped.

After the shock wore off, I realized that this commitment was a good thing. Sometimes I might regret it or fall behind. However, the finished product would be well worth it.

2. I can get so much done!! I am certainly not a lazy person and I don’t typically come home and waste time. However, I do tend to put off tasks until I have “plenty of time” to do them. For example, I wouldn’t have sat down on a random evening and made a bracelet or painted something. Instead, I would have waited until I had an entire day off with nothing else on the agenda. Do those exists?? Not usually. Therefore, I tend to seldom get around to those crafty projects that I’d like to do. Committing to this challenge has enabled me to get so many projects done! I force myself to make time for being crafty…even when I don’t really want to sometimes. In return, I’ve marked off several items from my list AND I’ve attempted new projects.

Take jewelry making, for example. I’ve never really had much of a desire to make jewelry (other than friendship bracelets when I was 7). However, I knew I needed a few quick and easy projects that I could knock out when I was short on time and energy. Voila! I attempted something new.

3. When it comes to crafty things, I’m not at all a perfectionist. In general, I’d say that I struggle a bit with the concept of perfectionism. (Read more about that here.) In practically every other area of my life, I’ll avoid a project until I have time to do it just right. There I go again! When it comes to craft projects, that perfectionist tendency goes right out the window. I’m a champion of good enough. Take these muffin tins, for example. They had chips here and there from debris sticking to the wet paint. Totally fine. Let’s say I’m making a pillow and the seams aren’t straight. Nobody cares. When it comes to handmade items, I’m perfectly ok with good enough. This project has made me even more evident of this and I’m quite proud of it.

I think that part of the beauty of tackling a large project is how much you can learn from it. It’s a certainty that you’ll learn something about yourself or the world around you. Even though I was secretly wanting to give up on day 8, I’m glad that I pushed through and I can’t wait to see what day 100 feels like.

Have you tackled a big project like this lately? I’d love to hear what you learned!

Re-Purposed Muffin Tins


IMG_2231


Have some old crusty looking muffin tins?? It turns out that these make great organizers for your earrings! I was just about to toss these pans when I realized I could likely re-purpose them.

Re-Purposed Muffin Tins

Re-Purposed Muffin Tins
Here’s how to do it:
1. Clean the pans. Be sure the pans are clean and free of debris. Any extra granules or particles will show up after they’re painted and cause the paint to not stick.

2. Spray the bottom of the pans. I used Rust-oleum for metal spray paint in copper for my pans. You’ll want a paint that’s designed for metal. Otherwise, the paint will flake off too easily. I recommend starting with the bottoms because if there’s overspray from the top, it won’t matter as much.  I did two coats on the bottoms.

3. Spray the top of the pans. I did 3 light coats of paint. You have to be careful to not overspray while trying to get the paint into the cups. I held the can 7-8 inches from the pans and kept it moving, which seemed to help achieve an even coat while getting into the crevices. (Be sure to let the paint dry between each coat.)

4. Spray the pans with polyurethane. Be sure the paint is dry before spraying. I used Minwax fast-drying polyurethane and did 3 medium coats. This step isn’t mandatory. Although, adding the extra coating will help keep the paint from chipping after excessive use. It will also protect the paint from too much damage from pointy earring backs. Again, be sure to let it dry between coats. (I did not seal the bottoms…just the tops.)

5. Fill with goodies! After the pans are dry, fill them with earrings, craft supplies, or whatever your little heart desires. The shallow cups allow you to sort smaller items while still being ableto see your options clearly.

Re-Purposed Muffin Tins
If you look closely, you’ll see that these aren’t done perfectly. It was a windy day, and I ended up with a bit of yard debris stuck to my wet paint. However, the important thing to note is that I could mark this project off of my list and that I ended up with a functional storage solution for my home. After all, “it doesn’t have to be perfect to be beautiful.”

Personally, I love seeing an everyday item repurposed into something more useful, especially when it was otherwise going to be trashed. Have you seen any other useful ideas lately? What else could these tins be used for? If you decide to re-purpose some old muffin pins, please share your finished product!

Side note: I’ve been planning this project for months and haven’t actually taken the time to do it. After joining #the100dayproject,I finally got it done! Happy crafting, everyone!

Sundays are the best days.

Easy Sundays

This past Sunday was something like what dreams are made of. Matthew was home studying for his NCLEX. While he studied, I worked on project after project. Amidst negotiating contracts, chatting with new clients, and addressing issues at an open house, I also got so much done at home and enjoyed the heck out of a sunny Sunday.

This Sunday’s activities included:

  • a 6 mile bike ride together
  • driving to pick up lunch with the windows down and music blaring
  • eating lunch on our patio, again with music blaring
  • working on this and that with the windows open and taking time to chat in between (Remember, opening all of the windows in my house is one of my favorite things.)
  • laundry…boo.

I also watched a lizard shed his skin AND THEN EAT IT. It was literally one of the most disgusting things I’ve ever seen.

IMG_0962

While Matthew studied, I got caught up on #the100dayproject. Friday and Saturday were so incredibly busy that I didn’t have a chance to do my daily activities. I made up for it on Sunday by doing three items in one day. I painted muffin tins (more on this later), painted the rod for a rope curtain I made (more on this later too), AND I framed an elisejoy promotional card to add to a gallery wall.

Rope Curtain

In addition to these fun projects, I did still have work to do. I answered phone calls, texts, and emails. I attended a bridal shower and showed a house on the way back home. Like I’ve said before, there’s hardly a such thing as a day off in my world. However, this Sunday was very close. I realized that these days are the ones that give me the energy to make it through the busy work days. They’re what keep me from going completely insane.

Elise Promo Card

At first, I didn’t want to share this post because I felt like no one should know that I stayed home and did fun things on a Sunday. Then I realized something more important, I deserve these days. I needed the rest. I needed the sunshine, and I needed the time at home with my husband. Here’s to hoping for many more of these days in the near future! I hope you, too, had a fantastic weekend. Now, I’m off to conquer a massive, two-page to-do list!

#the100dayproject

100 Days of Making

(photo via The Great Discontent)

When I saw details for #the100dayproject  (via EliseJoy),  I knew I had to participate! I’m always the first to get behind any sort of daily challenge. (I’m also probably the first to fall behind half way through…no judging!)

The premise behind this project is that you make something daily for 100 days. Can you just imagine what all you could get done by making something every day for 100 days?? I wasn’t sure if I wanted to make something or do something…I just knew I wanted to participate somehow.

#100DayProjectI actually had quite a bit of trouble deciding which project I wanted to tackle. I made a rather lengthy list and then deliberated for hours on what to do. By deliberated, I mean practically stressed over it and sent waaay too many text messages to Amanda for her opinion.

Nonetheless, I finally made a decision! I decided to go with 100 days of crafty things! I wanted something that had a bit of flexibility, so I left my topic a bit open ended. (I didn’t want to have to work on the same type of project every day.) As of right now, I envision my daily tasks being a variety of things. Some days I’ll paint. Some days I might finish decorating an area of my home, make something new, or learn a new, crafty skill.

Regardless of what actual task I complete each day, my focus is to actually do something fulfilling each day. Most days I am completely exhausted by the time I get home from work, and I tend to put off all of the fun projects I’d like to do. By participating in the 100 days project, I’m hoping to reserve a bit of time each day for creating/doing something fun.

gift wrappinghandmade braceletCinderella quoteWhat have I done so far?
Day 1: wrapped a wedding present and made a gift tag for it
Day 2: made a bracelet
Day 3: doodled a quote from Cinderella for my mirror
Day 4: I’m planning to work on some crafty Lovely Lady Letters!

Think you might like to participate? It’s not too late! Go to the site and register. The project continues until July 14, 2015. You can play catch up if you’d like, skip a few of the first days, or continue on past July 14….whatever your heart desires! If you do decide to participate, let me know! I’d love to follow along.

If you’d like to keep up with what I’ll be doing through this project, you can follow #100daysofcraftythings on IG (@pamelapetrus). Happy crafting!

DIY Painted Light Fixtures

Before and After

When Matthew and I purchased our current home, we had quite a hefty list of updates that we planned to do. (You can see some of the before photos here.) Some of the updates we envisioned were immediate, like painting and new floors. Others will come along later, like painting the exterior and bathroom overhauls. Light fixtures were one of the items that we knew we’d do rather quickly. However, I’ve had the hardest time finding decently priced lights that I like, so we’re still working on this one.DIY Light Fixture

DIY Light Fixture
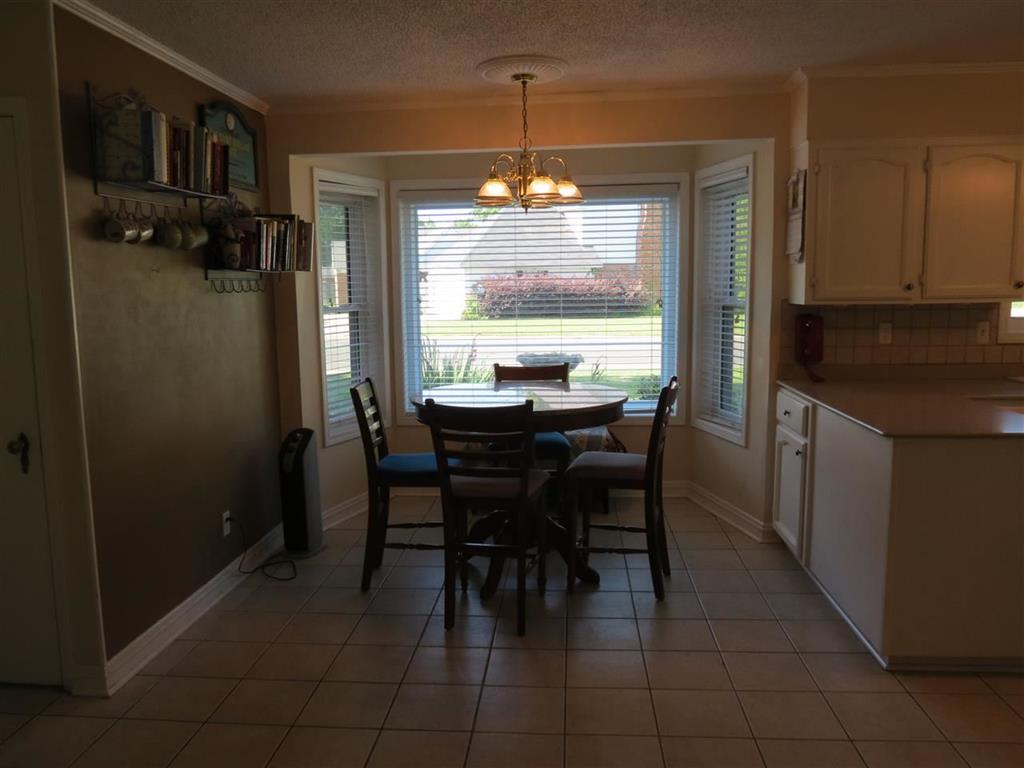
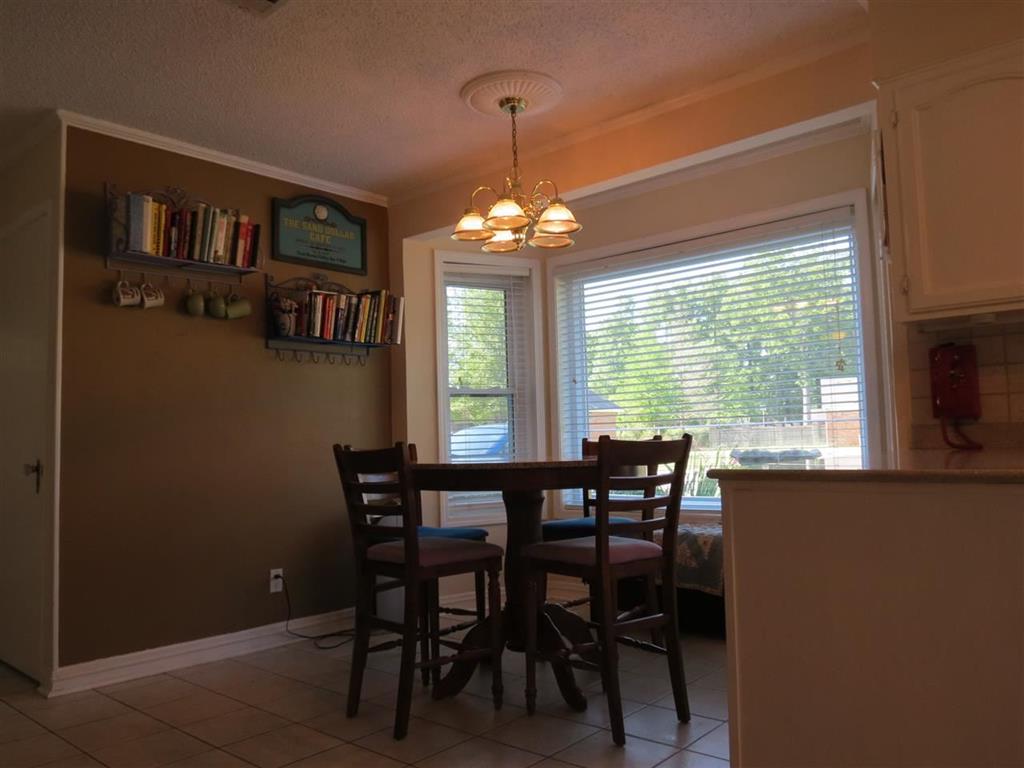
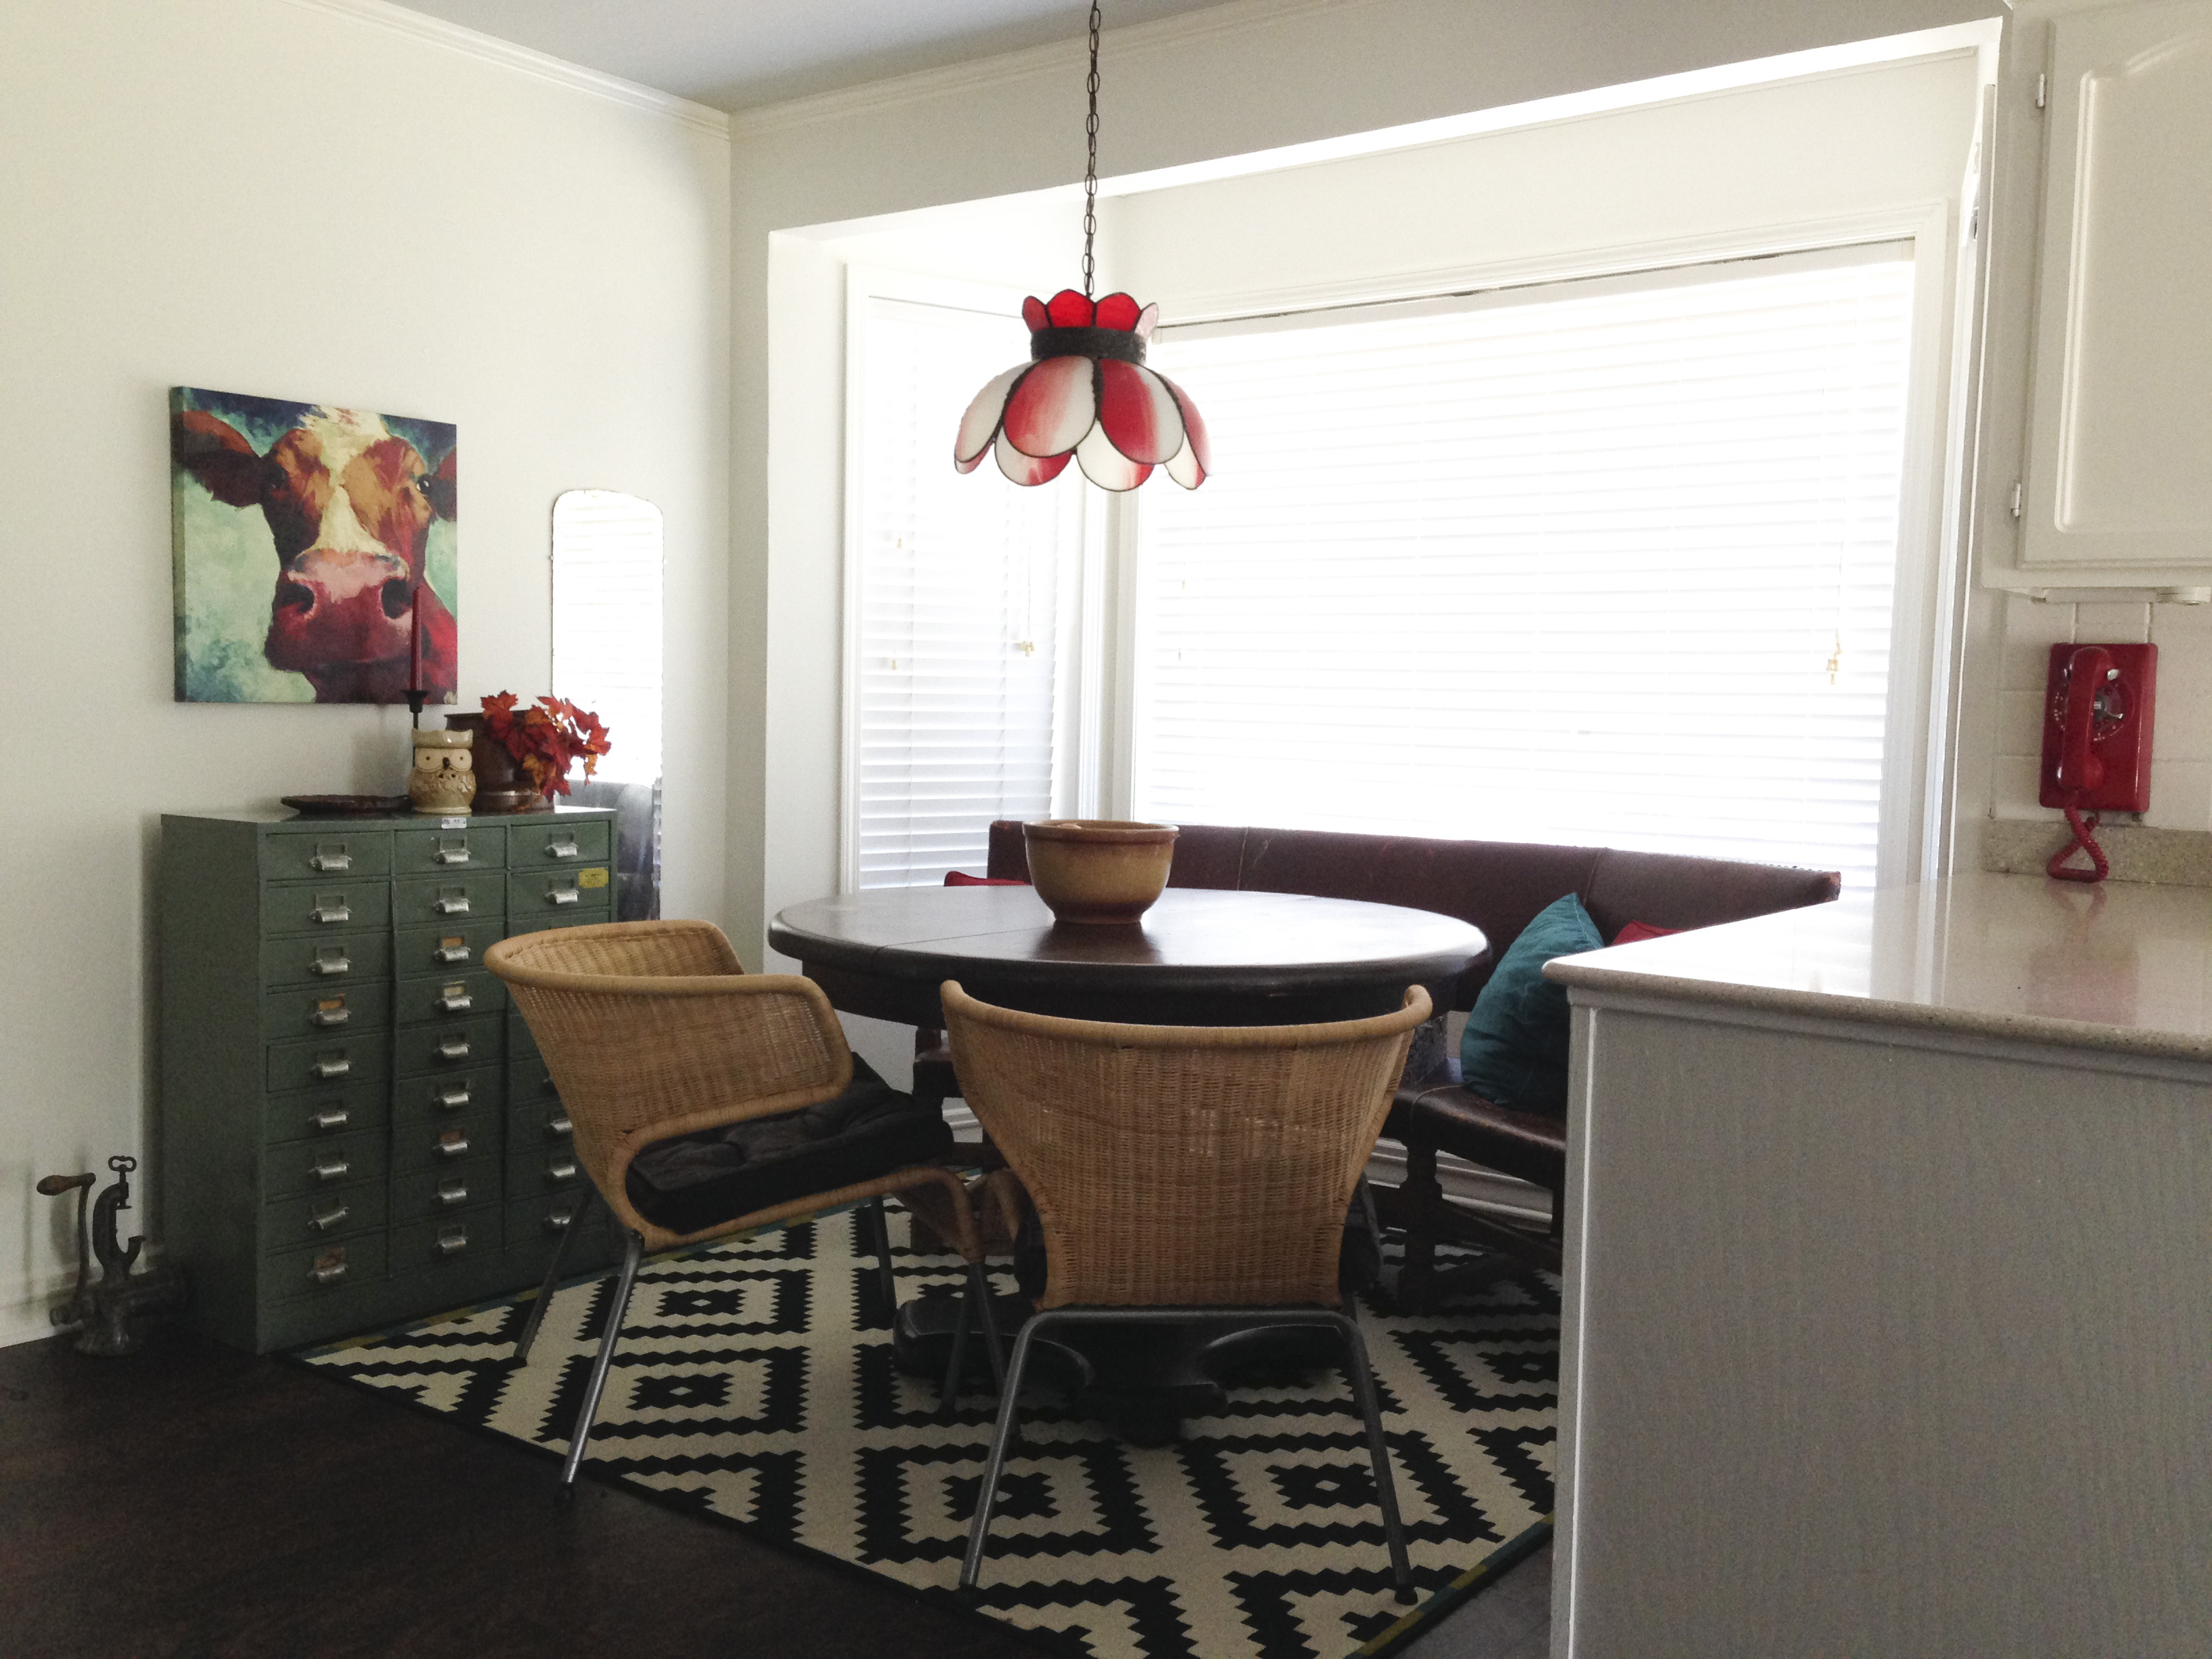
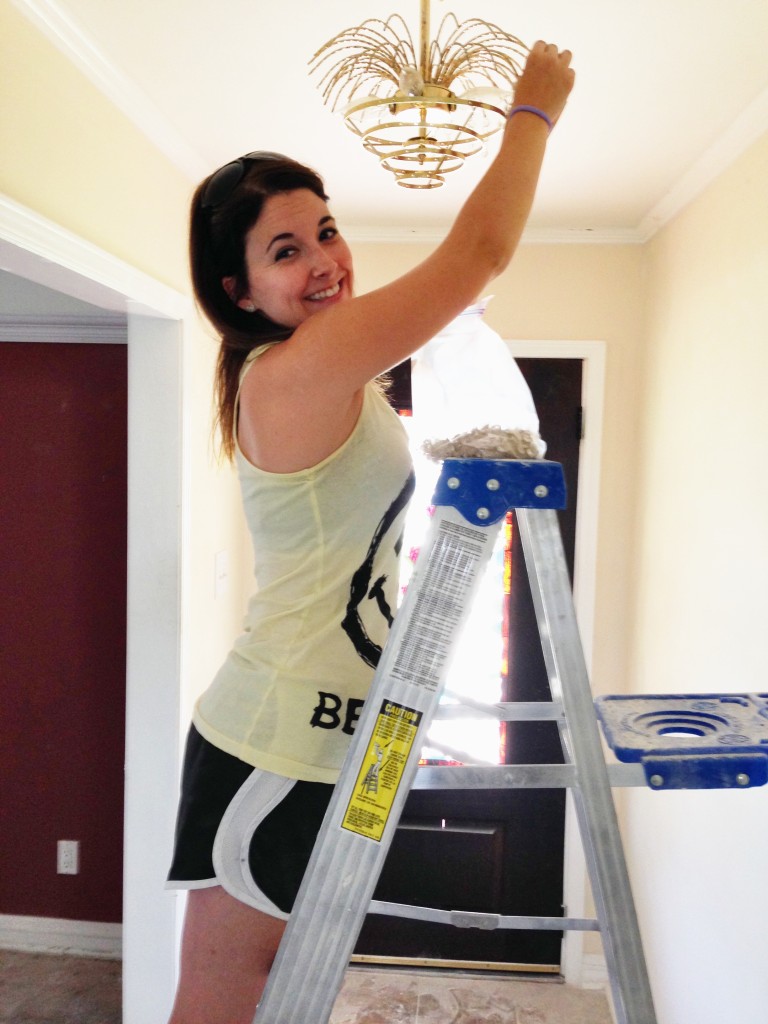
When we bought the home, there were only two light fixtures in the house that I even remotely liked…the dining room chandelier and the entry way light. All of the others were very dated or not at all my style. (The leaf fan, for example, doesn’t fit my décor style.) Our bedroom fan is also leaves. The kitchen had a ceiling fan, which Matthew could only barely walk under without risking decapitation. The rest of the fixtures were classic 1990s brass. The two fixtures that I liked were also brass, but the bones were good. Rather than replacing these two, I decided to give them a little facelift.

DIY Light FixtureDIY Light Fixture
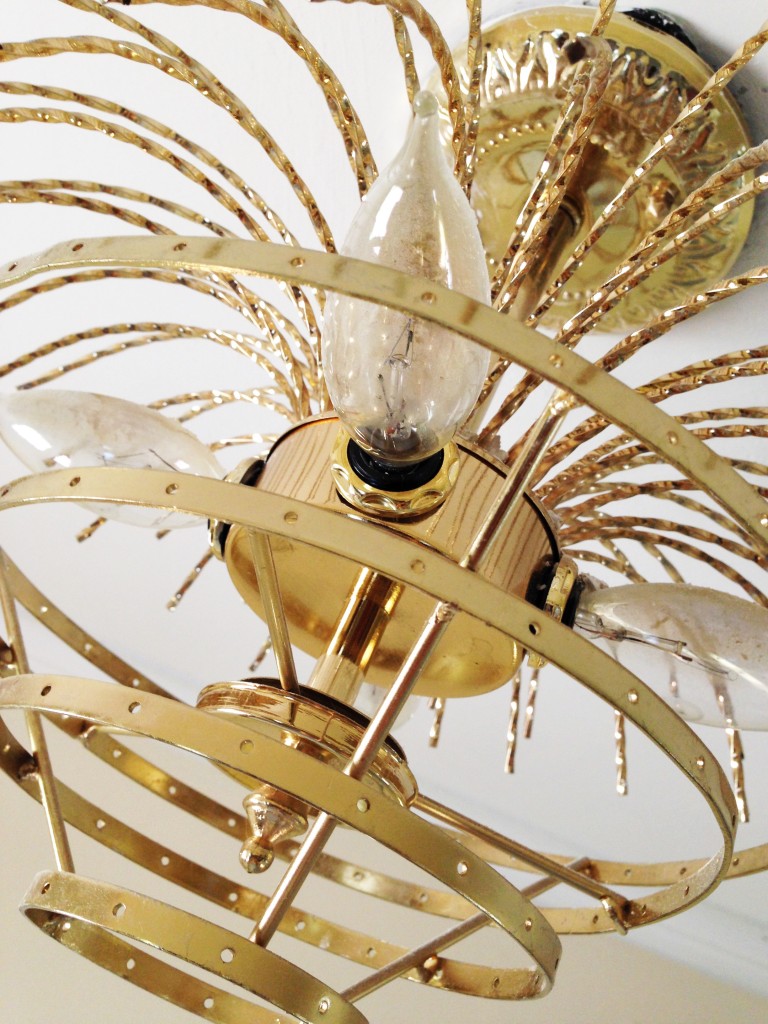
I haven’t tackled the dining chandelier yet, but I worked on the entry light pretty soon after moving in. I used Rust-oleum Hammered spray paint, and the process was rather quick and easy. Here’s what I did:

  1. Remove any crystals or globes. Luckily, the crystals on our entry light were attached with hooks instead of rings. I removed all of the crystals and cleaned them individually with a damp cloth. I didn’t want to submerge them in case it would cause a discoloration of the metal. Honestly, this was the most time consuming part of the process.
  2. Remove the fixture. Be sure to turn of the power before taking the fixture down!
  3. Clean the fixture well. You’ll want to be sure it’s free of dust and debris, especially if it’s an older fixture. Most of our lights (and every other square inch of the house) were covered in construction dust from having the ceilings scraped. Even after a professional cleaning, there was still quite a bit of dust in the crevices.
  4. Get to painting! I sprayed two coats of paint on our fixture, being sure to coat both the top and bottom of the fixture so that you didn’t see any traces of the old, brass color. Be sure to let it dry between coats. This was super quick and easy.
  5. Once the paint dries, hang the fixture back up and reattach any crystals or globes.

After Light FixturesSimple as that, you have a new fixture for less than $5. I’ve seen numerous tutorials online where people find dated fixtures at garage sales and thrift shops and paint them bright, fun colors. I went with a neutral color on our fixture because I wasn’t quite sure what décor I was going with yet. Whether you already have an old fixture or pick one up somewhere, using a little spray paint is a great, inexpensive way to update your lighting.

After Light FixturesNext up is the dining room chandelier. I have a bit of a different plan for it, but I’ll hopefully get to work on it soon. Have you ever used spray paint to update light fixtures in your home? I’d love to see your before and after pics!


DIY Paintings

imageIt’s been several months since we moved into our new home and even though I’ve made a conscious effort to get this place decorated quickly, there are still so many bare walls. This is partly because this house is a bit larger than our last, partly because we are trying to change our style up a bit, and partly because we have tall ceilings and huge, empty walls to fill.

I made a promise to share the progress of our home here on the blog. I have shared bits and pieces here and there,  but I haven’t really shared that much. The boxes are emptied, but if I were being honest, I’ve experienced quite a bit of frustration trying to get things pulled together. Decorating a new home from scratch while working full time and trying to have a social life is rather difficult, it turns out.

DIY PaintingWe need quite a bit of art to cover the big, bare walls here and finding enough pieces that are within our budget has proved to be impossible. Therefore, I decided it was time to do some DIY. I’ve done a little bit of panting in the past but I haven’t picked up a brush in a while. As a matter of a fact, I didn’t like the last few things I painted, so I decided to give it up. After a bit of a break, I realized that I just had to keep trying. (Listen to this two minute video if you need some encouragement in pushing through the ugly.) Once I got over this hump and picked up a brush, I actually loved the next thing I painted!

This post isn’t about teaching you to paint. Instead, it’s about encouraging you to just try. It’s about helping you to push through the ugly when you think you suck at something. Inevitably, you’re bound to eventually end up with something you like.

DIY PaintingFirst and foremost, I should say that I’m not a painter. Instead, I’m just a person that likes to paint. I’m someone who can splatter some paint on a canvas and call it good enough. I can fill my home with one-of-kind pieces that cover up empty walls. I’m not going to win any awards, but I can mark some items off of my to-do list.

My first painting that I did recently was the oblong circle painting. I took my inspiration from here, and ended up hating the result. I was getting ready to paint over it or add more circles, but Matthew insisted that we hang it as is. I’m still debating on whether it’ll stay or not.

DIY PaintingNext, I began the dot painting. I started with something like this in mind, but it ended up being a little more symmetrical. At first, I wasn’t quite happy with how it was turning out, but when I decide to add the light blue color, I fell in love. That was a different paint so the texture was a bit different, but it was what I had on hand. I ended up loving the difference in color and feel of the paint. (Lesson: don’t give up on something because you don’t like it immediately. Your big idea might be right around the corner!)

I was having so much fun with paint that day, that I decided to keep going. I didn’t have anymore canvases on hand, so I just pulled out some card-stock and made the black and white stripes and flowers. I didn’t really have anything in mind for these, but I ended up framing the striped one, and it’s one of my favorites!

DIY PaintingA few weeks passed after painting these four things, and I decided to keep going. I picked up some more canvases and went to town! (To be honest, my in-laws were coming into town for Matthew’s pinning, and I needed to cover these bare walls fast!) I saw an awesome wall mural covered in various black and white designs and fell in love. I hoped to show it to you, but I can’t find the link! My default is almost always black and white these days, and I knew that I’d love to create something similar. When I started those two paintings, I was using straight, sleek lines. Then, when I “messed up” the first time, I realized that I liked the rough look much better. Again, none of these projects are perfect, but they do cover wall space that was otherwise empty and bland. Plus, those bland walls would have likely stayed that way for many more months until I could commit to purchasing something else.

DIY PaintingIf you have bare walls and a small budget, I highly recommend creating some of your own art. The first several pieces might be terrible, but you’ll eventually get something you love. Besides, it’s a great creative outlet. If you’d like some more DIY painting suggestions, look here! Elise has done some great, DIY pieces in the past. Happy painting!

March Goals + February Review

A Beautiful Mess Planner_March GoalsBelieve it or not, we’re two full months into 2015! I’ll let that sink in for a bit…. If you’re like me, that blows your mind a little. Nonetheless, the show much go on. I didn’t set many goals for February, but I’m happy to report that I accomplished all three of them! *Cue the hallelujah chorus.* Here’s my happy report:

1. I attended Family Reunion and came home with several great ideas! I can’t wait to spend some time developing them and getting them into practice.

2. Matthew and I celebrated Valentine’s Day. Even though I almost backed out at the last minute, I pulled it together and made something happen. (By the way, we watched the full SNL 40th Anniversary together the next night, and I’m sort of counting that as an extension of our Valentine’s Day celebration.)

3. I hung MORE THAN three things on the walls!! I think I’m most excited about this one. We have several new things hanging here and there AND we installed a new gallery wall in our bathroom. I can’t wait to show you!!

I’m pretty pumped at how much I got done in February. I’ve even more impressed by the fact that I got so much done even though we had our fair share of wet, crummy, and cold weather. Isn’t it super easy to stay curled up under a blanket and read the internet when the weather is gross?? I’m giving myself two thumbs up for still being productive, despite the yucky weather.

What’s on the agenda for March, you ask? Quite a bit. Here are my basic goals for the month:

1. Spend lots of time with Matthew. Since he just wrapped up nursing school, I’m hoping that we finally get to spend some quality time together! We have a bit of time before he starts his new job, so I’m going to soak up as much husband/wife time as possible this month.

2. Travel to Dallas for the weekend. Matthew and I are planning a quick trip to Dallas, TX. This is mainly to get some items we need for the house, but it’s also for quality time together and to celebrate his graduation. Plus, we’re meeting some friends there…can’t wait!

3. Square away three areas of my home. Yes, this is a little vague. However, I want to leave some wiggle room. I’m not sure what all we’ll find on our trip to Texas, so I’m just hoping that whatever we come up with will complete at least three parts of our home. (To be clear, “parts” can even mean a corner or vignette…I’m being reasonable here!)

4. Paint three new paintings. Painting is my new thing. I’ve been SO excited about it lately. I’ve painted a few new pieces for the house, and I’m hoping to do three more this month! (More on this later this week!)

So there you have it! For me, March is going to be all about creative endeavors and quality time. What are you looking forward to this month? Whatever it is, do it big!