
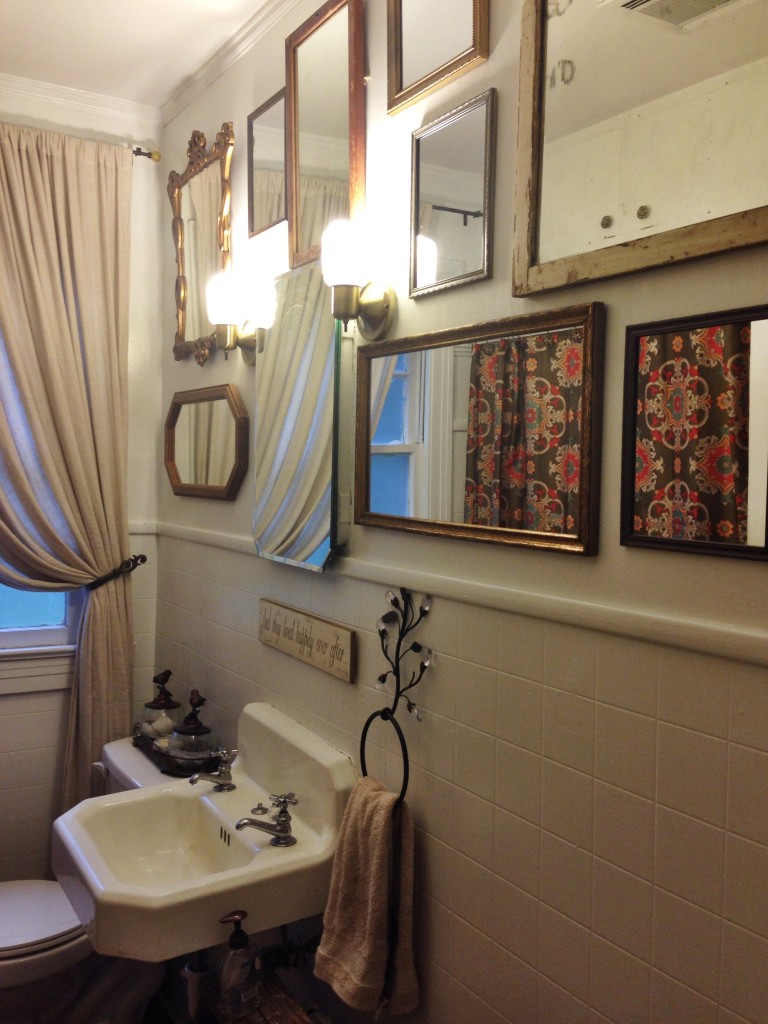
 It is no secret that I love a gallery wall. I’ve learned that I’m very far from a minimalist. Instead, I love a collection of several things together…in an organized and uncluttered way, of course. Ever since gallery walls started popping up on Pinterest, I’ve wanted to do one on every wall. I think it’s a great way to showcase multiple things you love, fill a large space, and add an ample dose of interest to your décor. Today, I’m showing you the wall I’ve done in our master bathroom.
 The master bathroom is one of those “big projects” on our renovation list that will likely be done in the year 2072. We did a few small things to make it work better for us, like taking out a closet in the sink area to add more standing room. I’ll show you the full bath eventually. Today, we’re just taking a peek into the shower/toilet area.
 While we wait on the bathroom remodel fairy to arrive, I needed some sort of plan for giving this small space a bit of personality. One way to add some pizzazz to a small space is through the paint color. I did neutrals (all shades of gray) throughout the house because I had no idea what colors I wanted and a limited amount of time to decide. I did a lighter gray (Sherwin Williams light french gray) in here because I wanted the room to feel as large as possible, especially since there are no windows. The basic light gray, though, left the room feeling pretty bland.
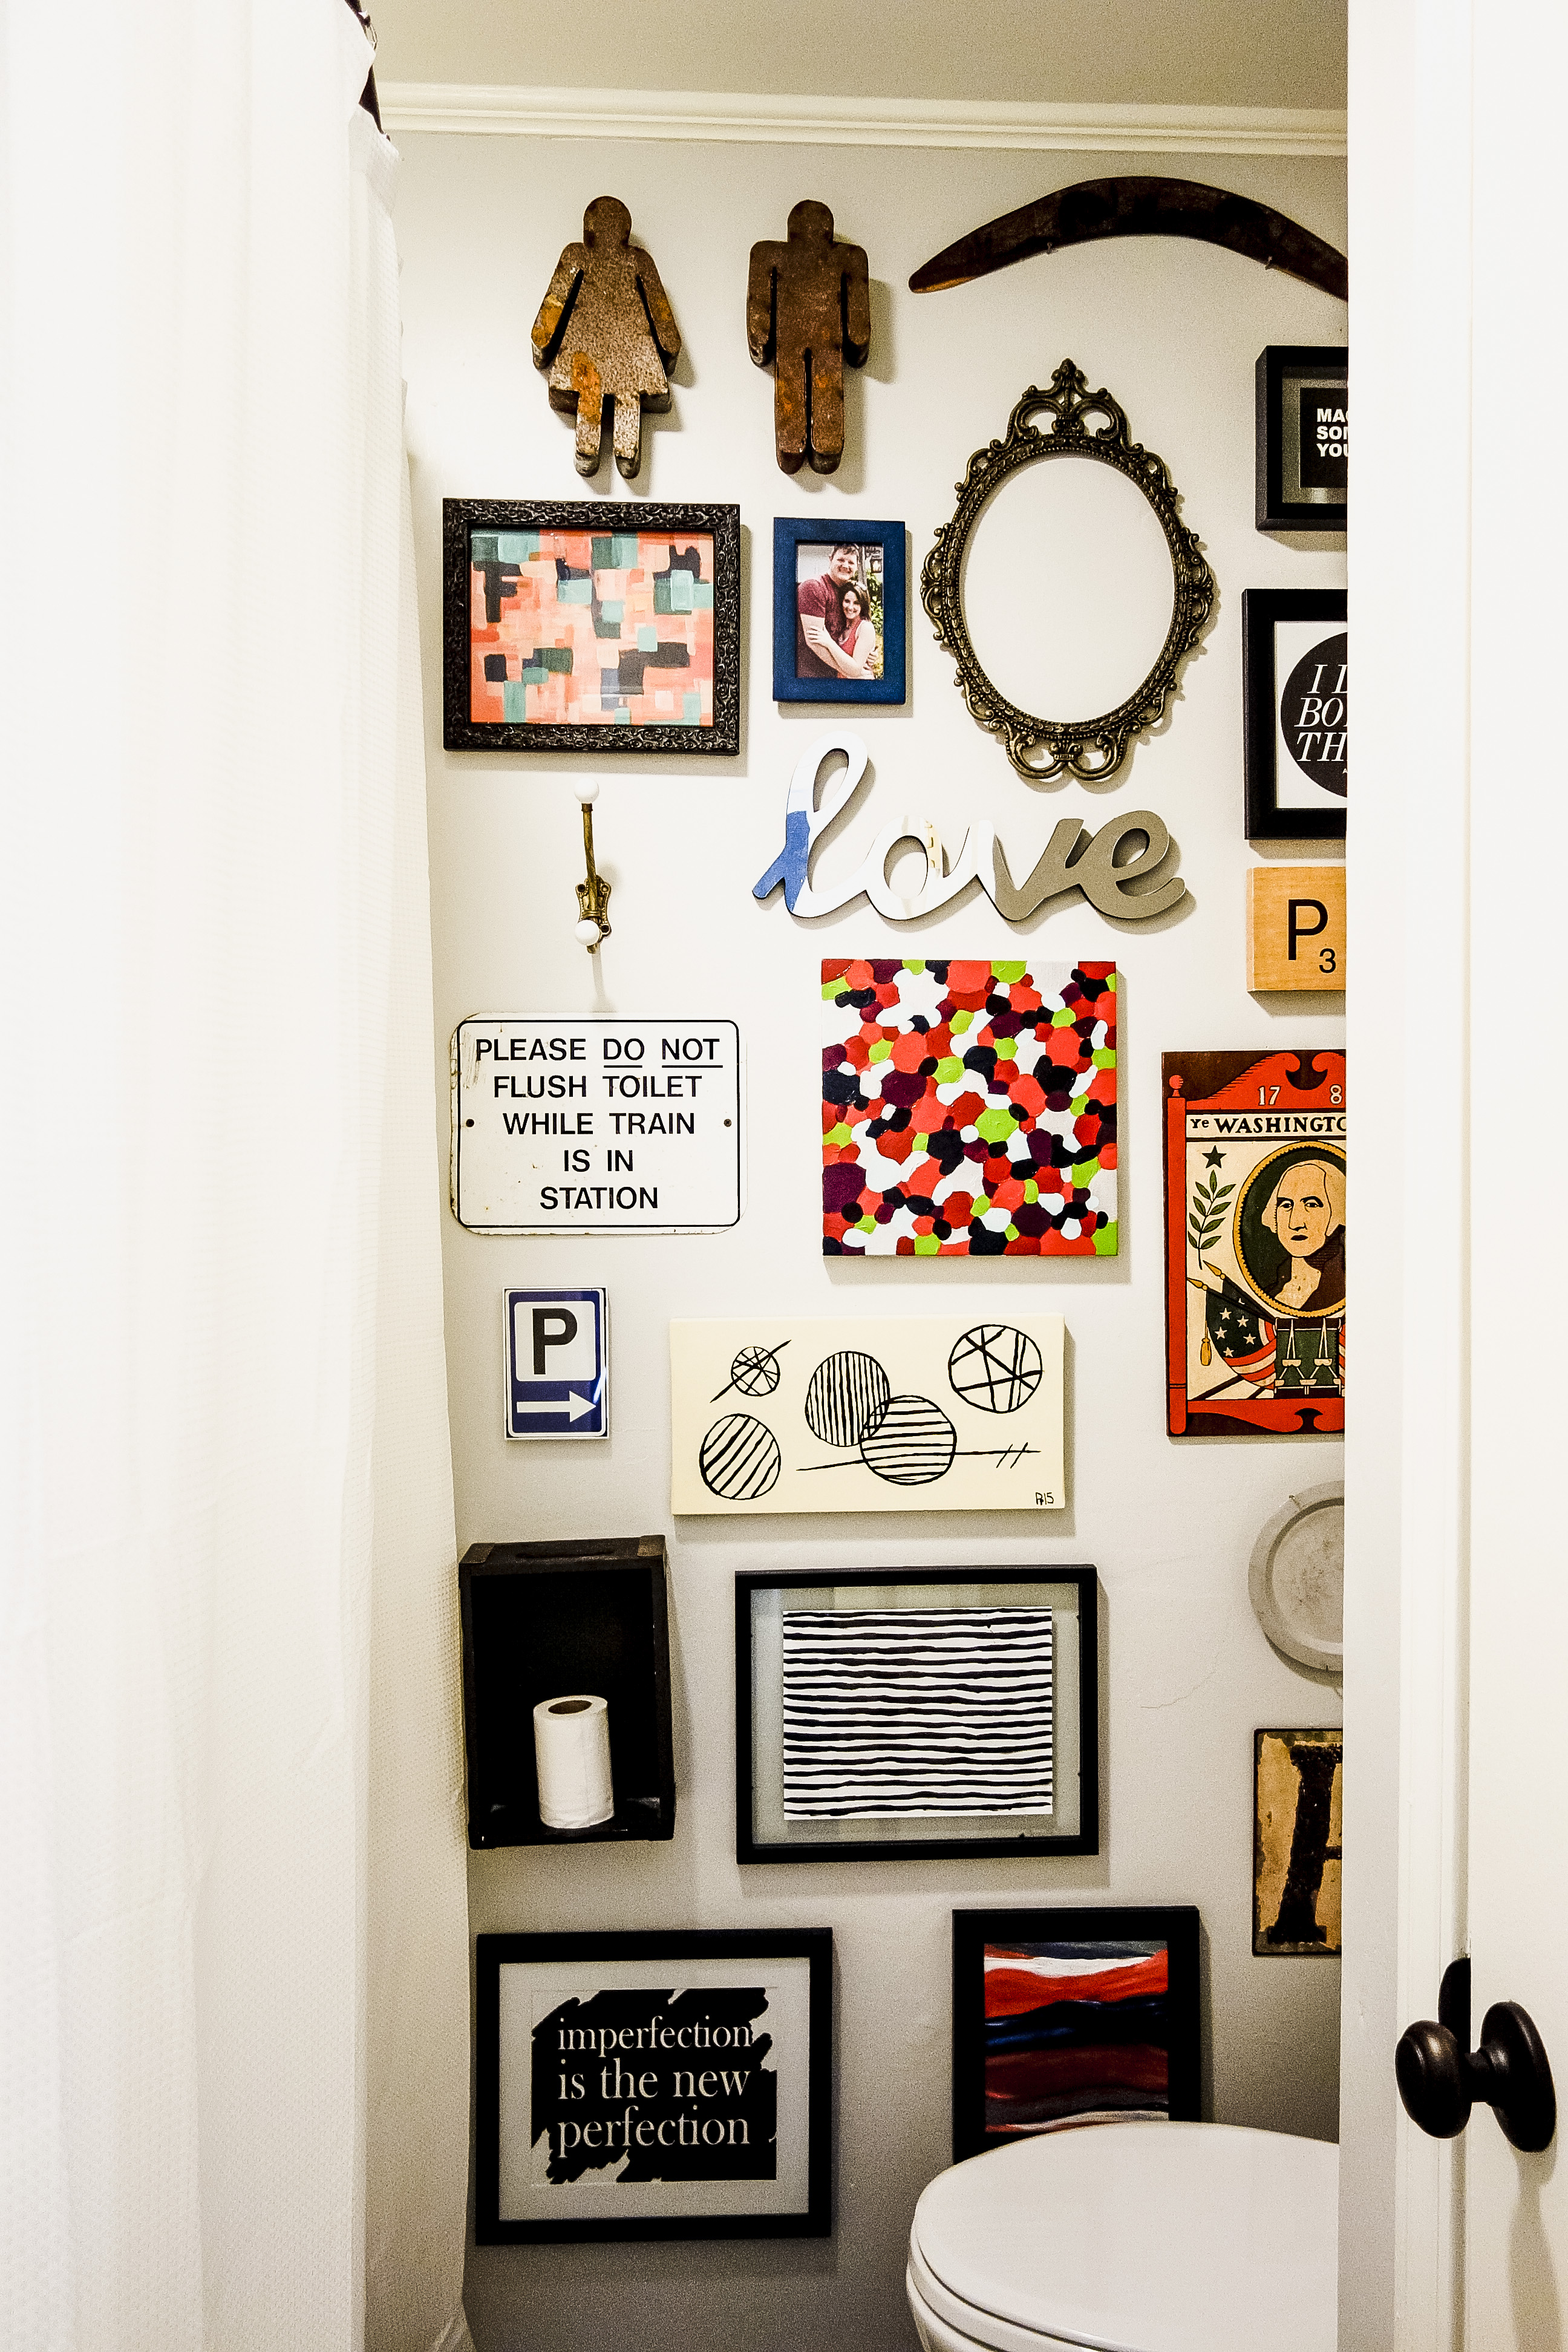
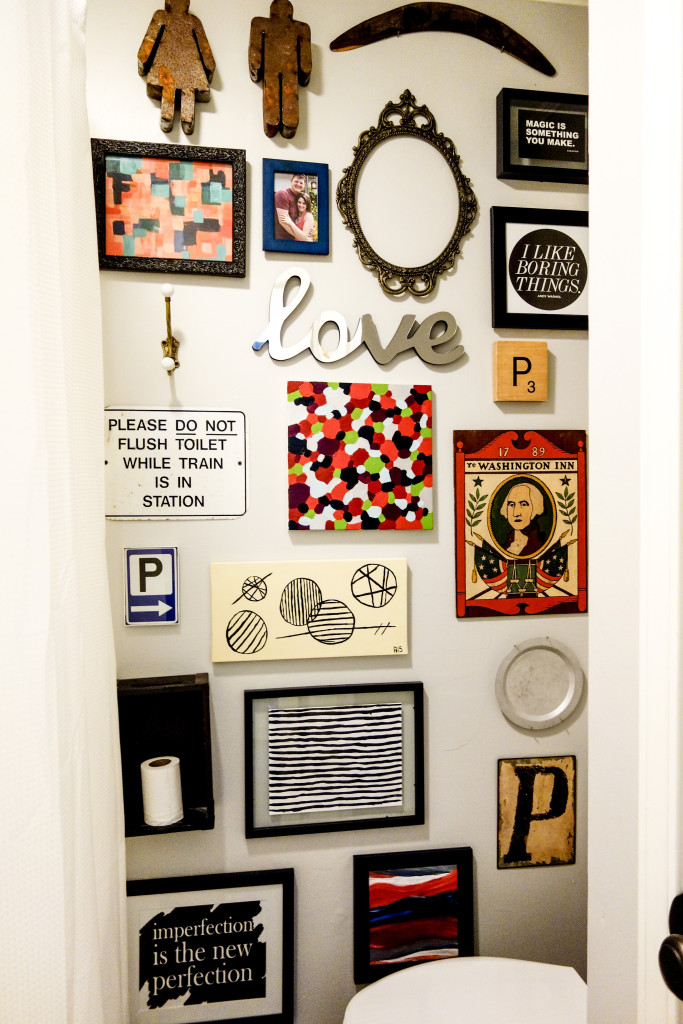
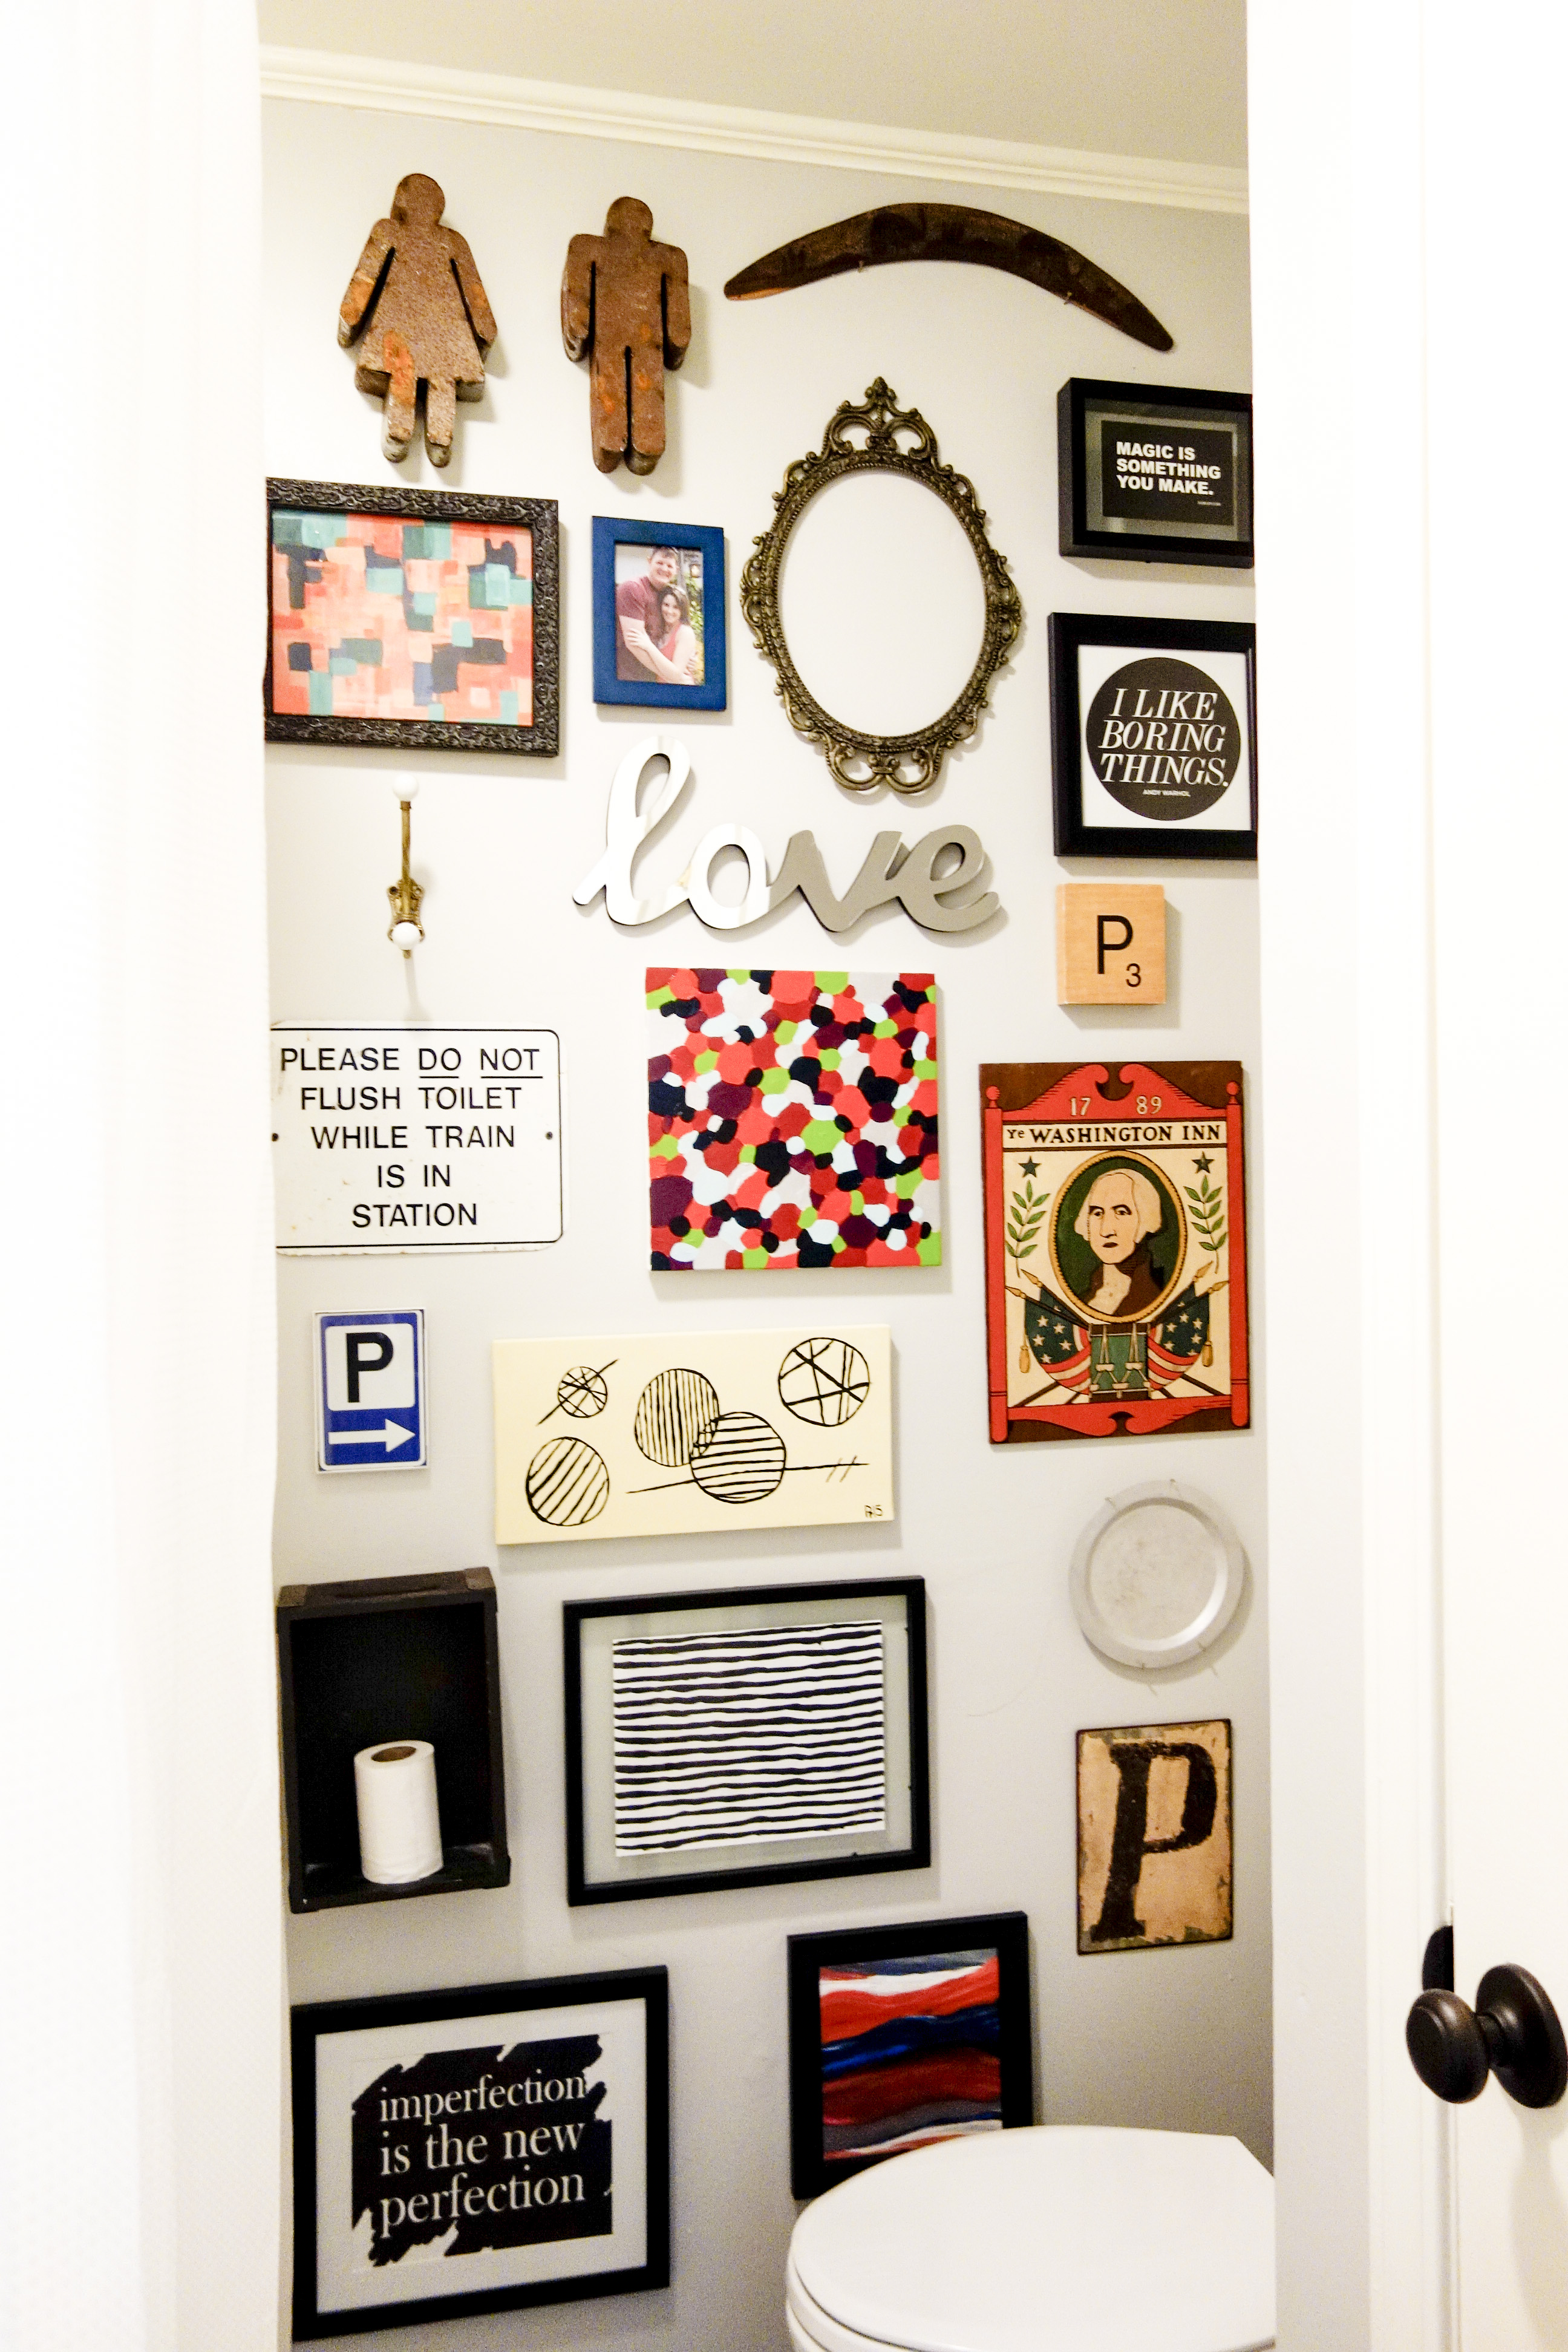
 For the first several months, this room only had the light gray walls and plain white shower curtain. (It turns out that extra-long shower curtains are hard to find! I caught this one on sale at target.com and thought it was that fancy waffle knit fabric. It’s totally not, yet has served its purpose until I find something different.) After months of using the bland bathroom, I knew I had to do something bold in there. I found the marbled rug at TJ Maxx and started pulling together items for the wall that matched the rug’s crazy colors.
The collection started with that George Washington board. From there, I pulled together items that I already had and only had to purchase a few small things to fill in holes. I also made or re-purposed several items. Immediately after getting so many colorful items on the walls, I let out a sigh of relief. The room feels so much more alive and inspiring now…just what you need when you’re struggling to wake up in the mornings. I’ve included a list of resources below in case you’re curious about a certain piece.
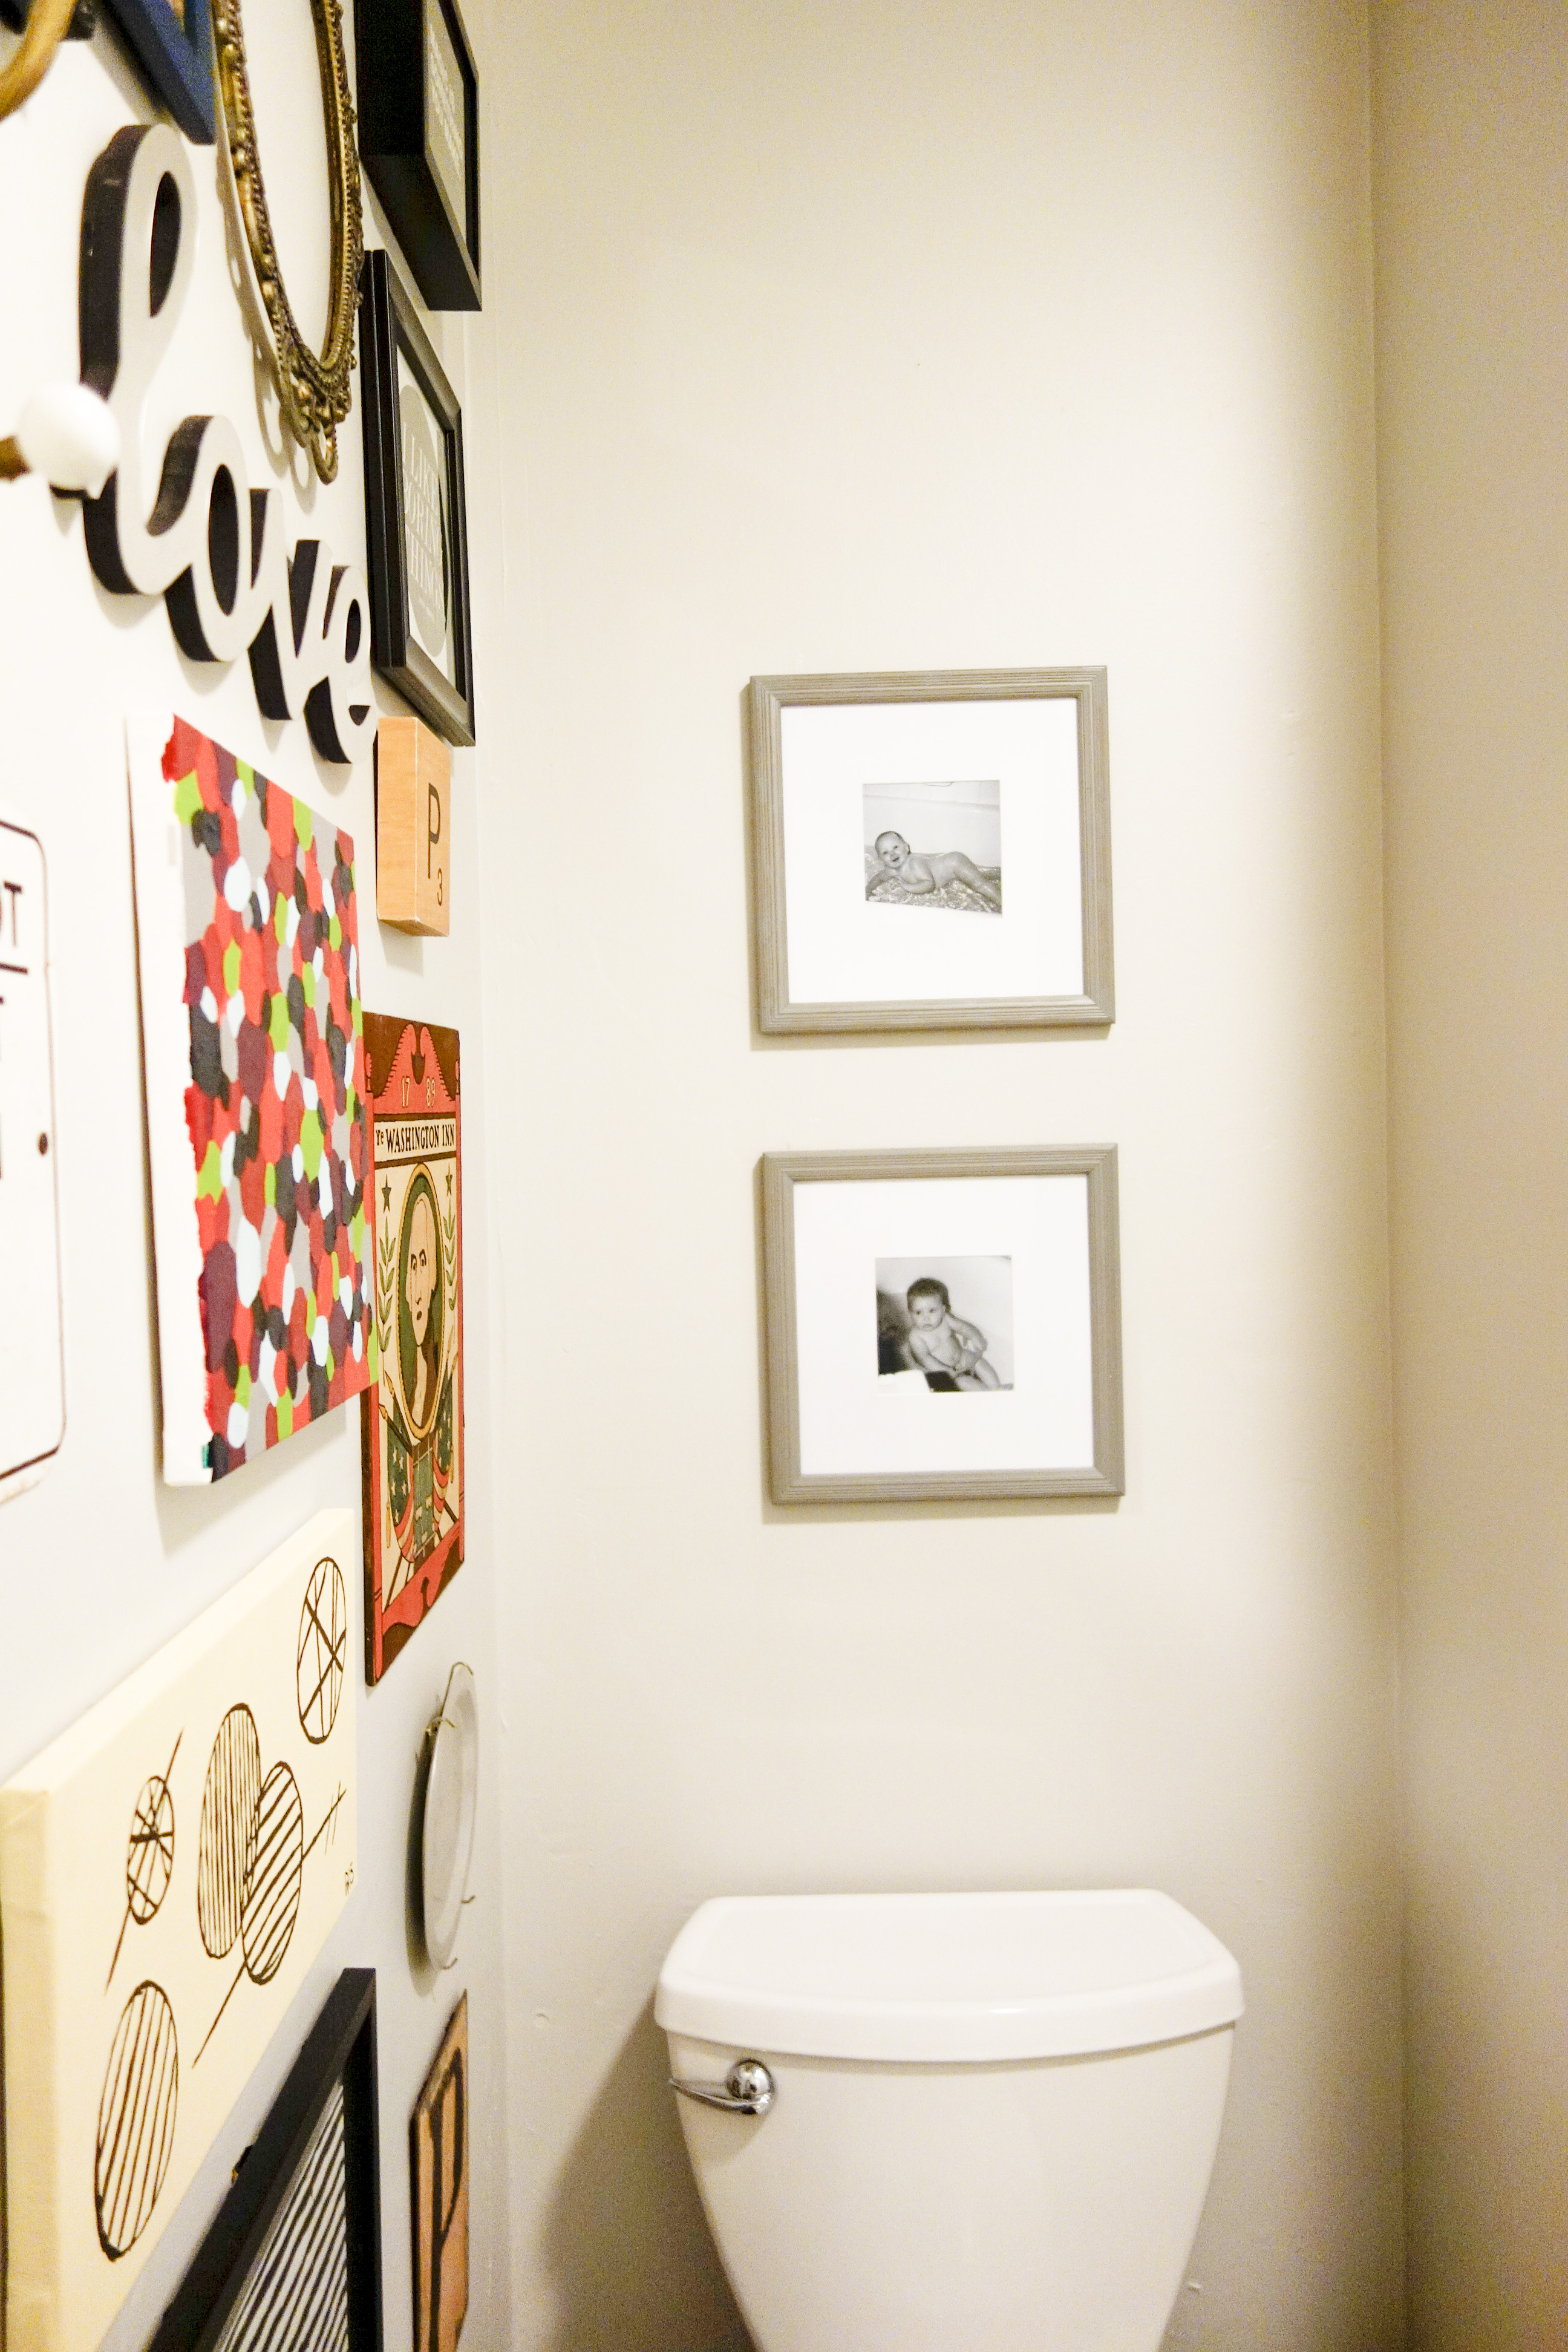
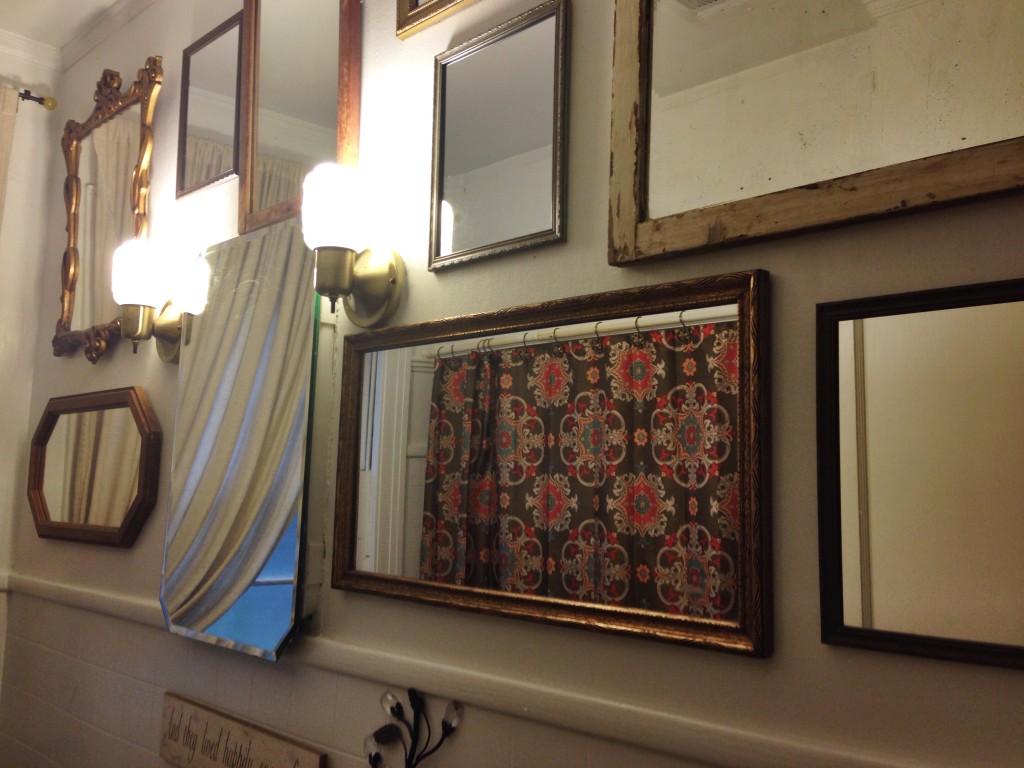
 In addition to adding the gallery wall, I also added photos of Matthew and me as babes in the tub over the toilet. I came across this idea in the early days Pinterest, and the link has since been removed. (If this was your original idea, Random Person on the Internet, here’s a high five for you!) I had the photos printed in black & white, because let’s face it, late 80s film photography isn’t known for its outstanding quality. I also decided to do them in light gray frames so that they wouldn’t take away from all of the color on the nearby wall. I didn’t want the toilet wall to be blank, and doing monotone art there would add something without distracting from the chaos on the adjoining wall. I must say, I absolutely love seeing our baby photos every day. I think it’s adorable, and I’m sure my husband is thrilled to have his naked bum on the internet. Shhhh…it’ll be our little secret.
 In other bathroom news, adding a curved shower rod made a huge difference in making the shower feel more spacious. It didn’t make the room feel smaller like I thought it would, and made the shower feel 100x bigger. The extra-long curtain also made a difference. Adding the extra height made the ceilings feel taller and gave the impression of extra space.
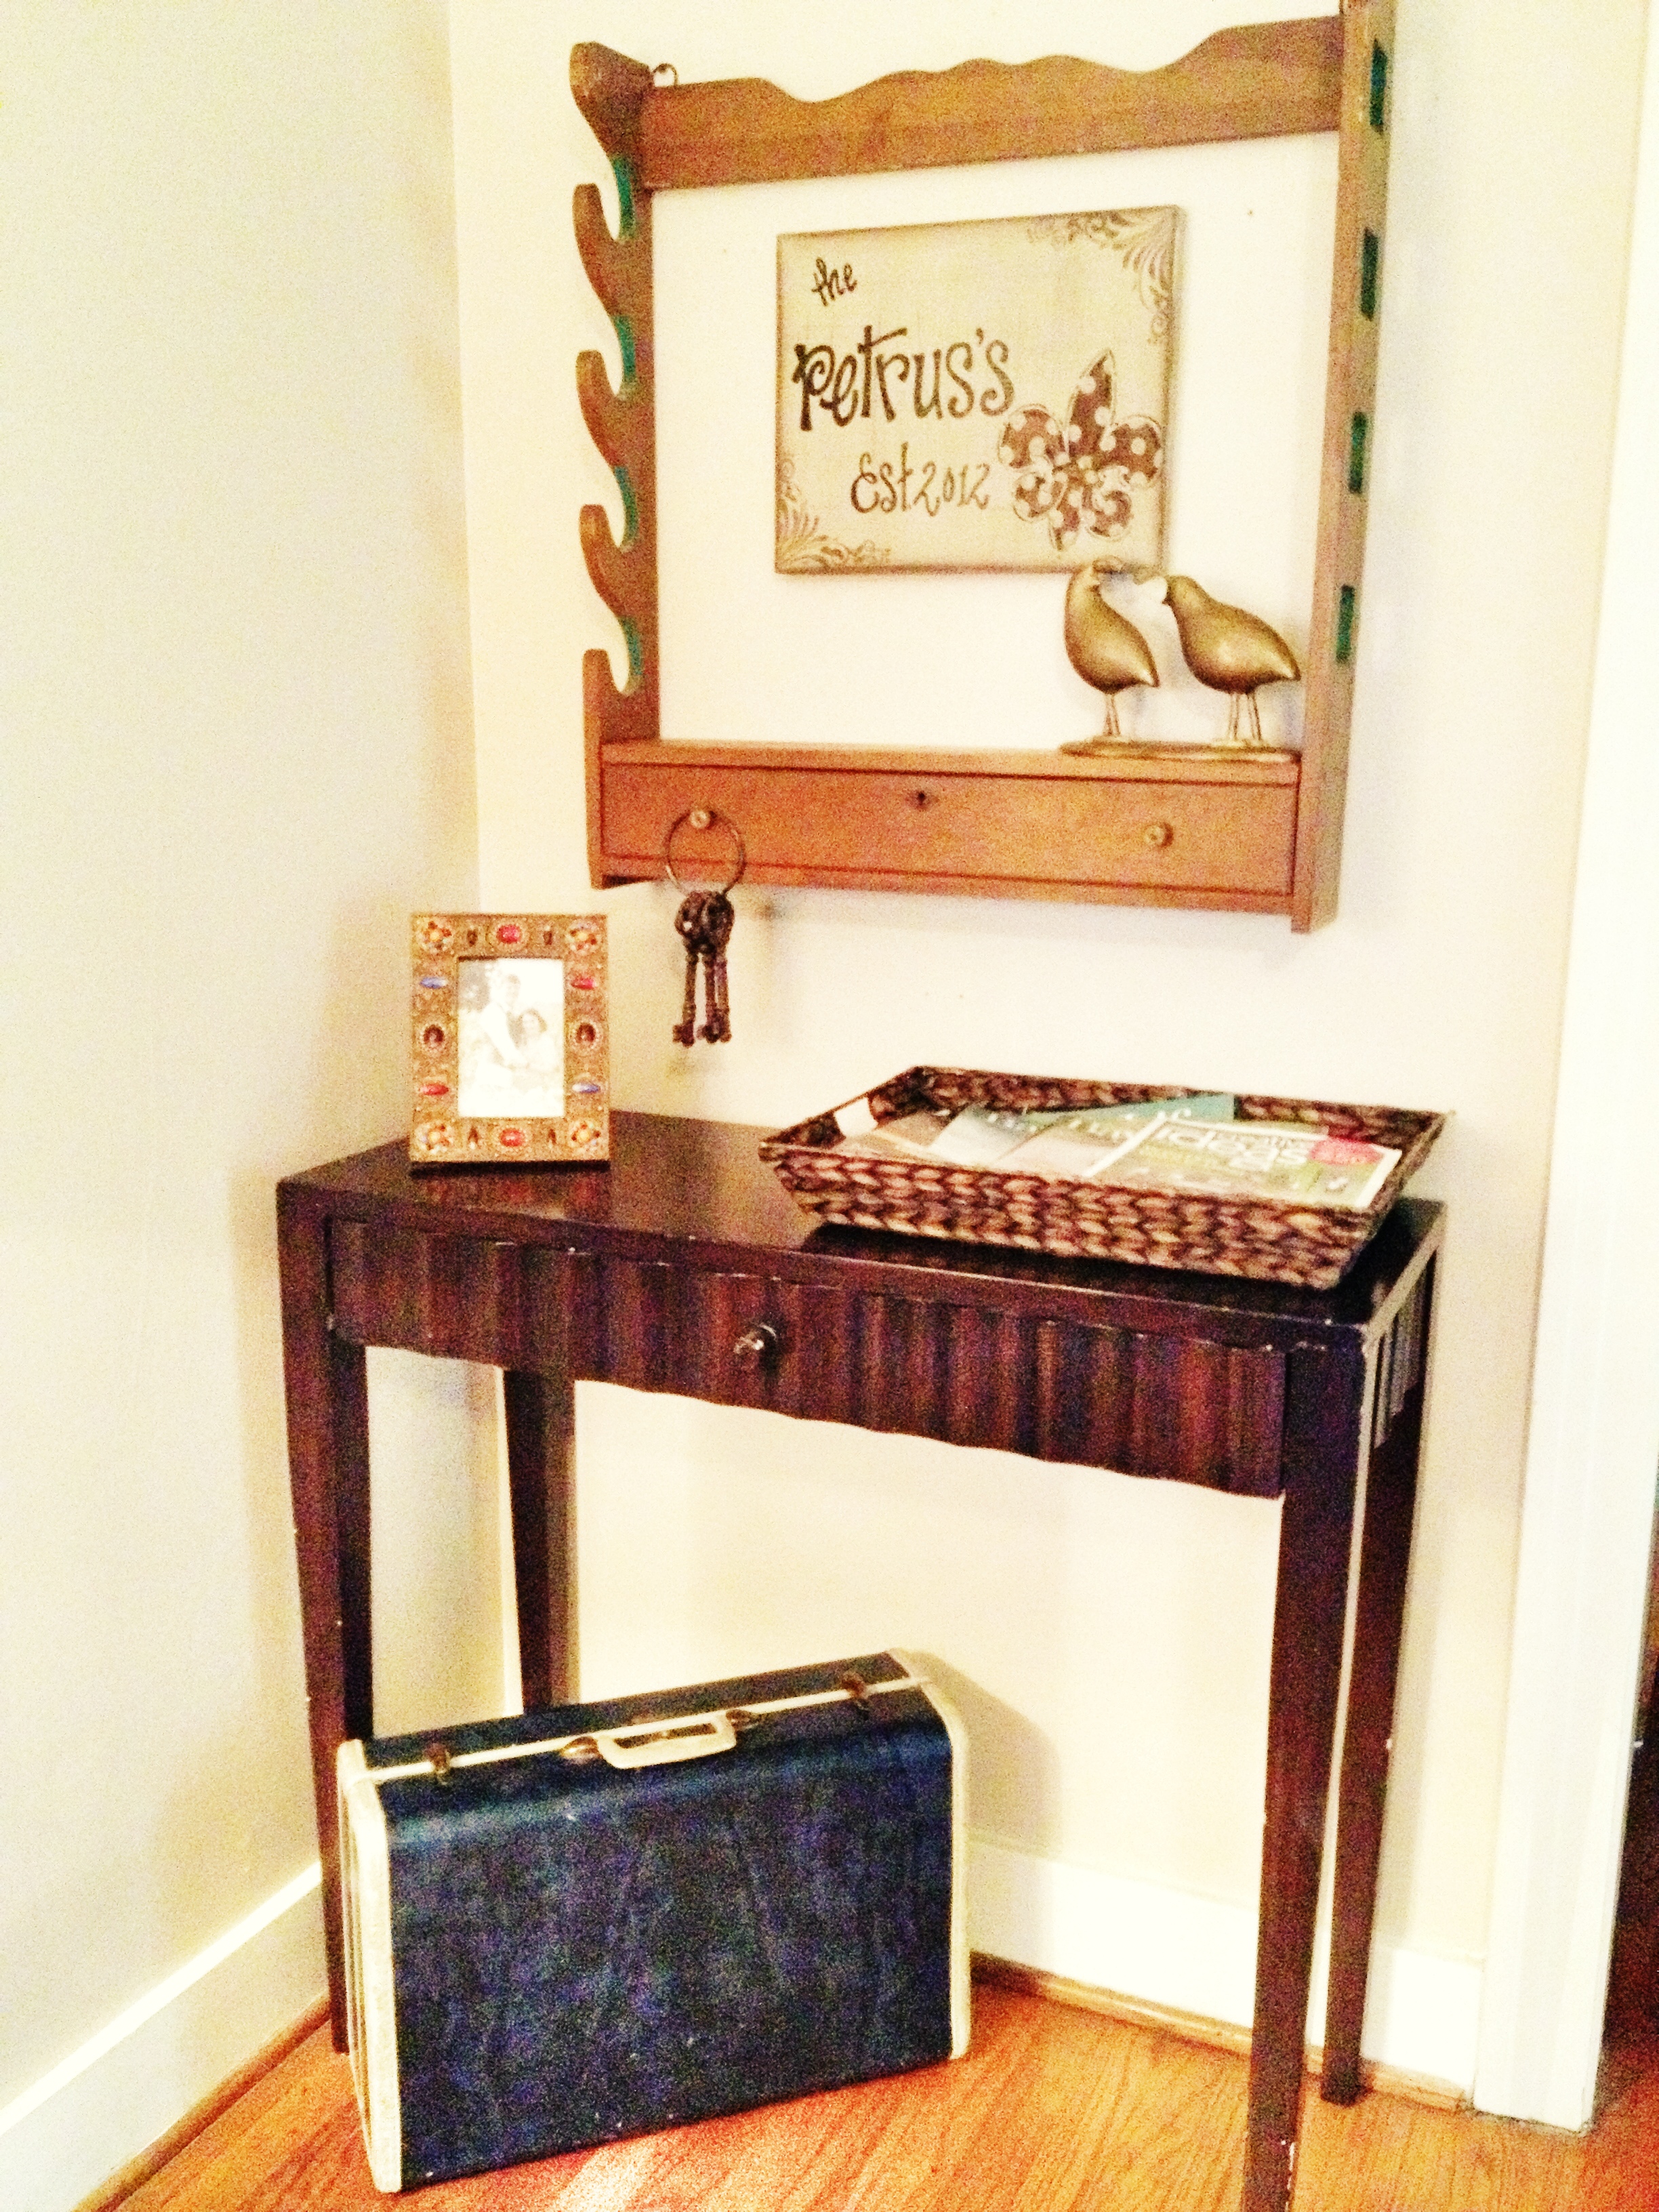
Overall, I’m pretty pleased with the outcome of the gallery wall. I’ll probably adjust some things here or there as time passes. For now, I’m happy with the outcome considering how little the project cost. If you’re interested in other walls I’ve done, check out my mirror wall and the small collection in my rent house living room. I certainly have more collections planned for this house and will share those as they’re completed!
Sources: 1. Nashville Flea Market 2. gift from Australia from Matthew’s grandmother. 3. Elise Blaha Cripe 4. frame – Hobby Lobby with our second photo ever taken! (I intended to replace the photo with something else and then decided it could stay.) 5. vintage 6. framed marketing piece from one of my Elise Joy purchases 7. my Mom’s house (I think.) 8. Hobby Lobby 9. free printable from the A Beautiful Mess newsletter 10. Hobby Lobby sale isle ($2!!) 11. TP Outdoors warehouse & it’s a favorite! 12. DIY painting 13. thrifted 14. Hobby Lobby ($2!) 15. DIY 16. Hobby Lobby 17. DIY & it’s a favorite. 18. thrifted 19. Hobby Lobby 20. DIY 21. Hobby Lobby (purchased right after this post)


 When we did our
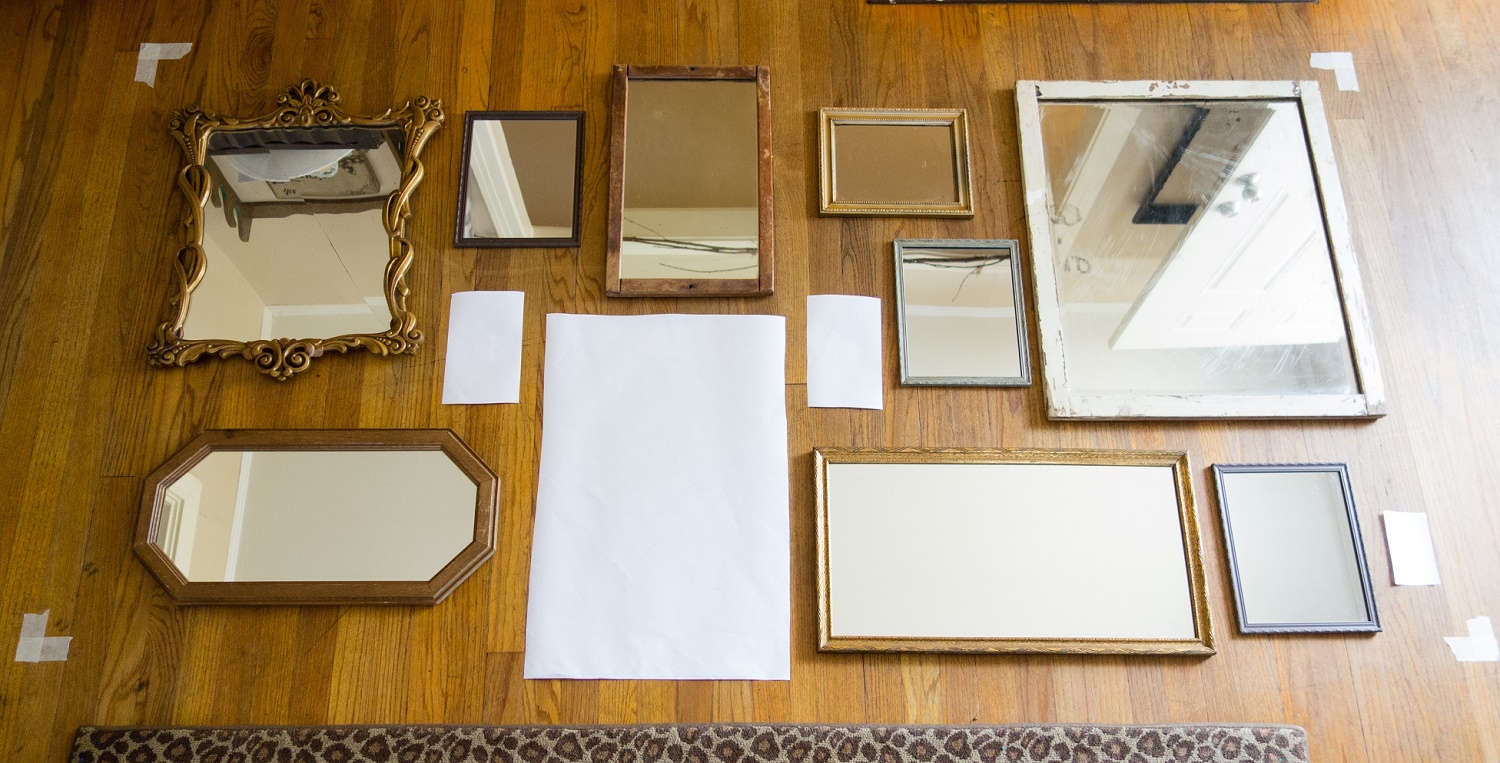
