Tag Archives: #mapfirsthouse

Living Room Inspiration: Pink + Black & White

Living Room Inspiration Photo by Kate Mills. I have recently fallen in love with this look that I’ve seen popping up around the internet. I’m loving it so much so that I’m thinking of abandoning my previous plans for my living room and heading this direction instead. I should probably go ahead and admit that I often create a “new plan” for a space and then simultaneously move on to something else before I ever even make that first plan a reality.

I have been planning to paint the fireplace wall in our living room and add wood from the mantle to the ceiling. I’ve been searching for a new coffee table and I intended to buy a new cowhide rug for underneath. Before this, I was going to replace the hodge-podge of colors I’ve been using with black/cream/mint/gold. This look never made it from my head to the room and it looks like my most recent plan might not either. That being said, this photo (and this and this) is a sample of the look that I’m most excited about right now – black and white with a touch of pink. I first saw the look on @katekillsit‘s Instagram. Since then, I’ve been drawn to every similar photo.

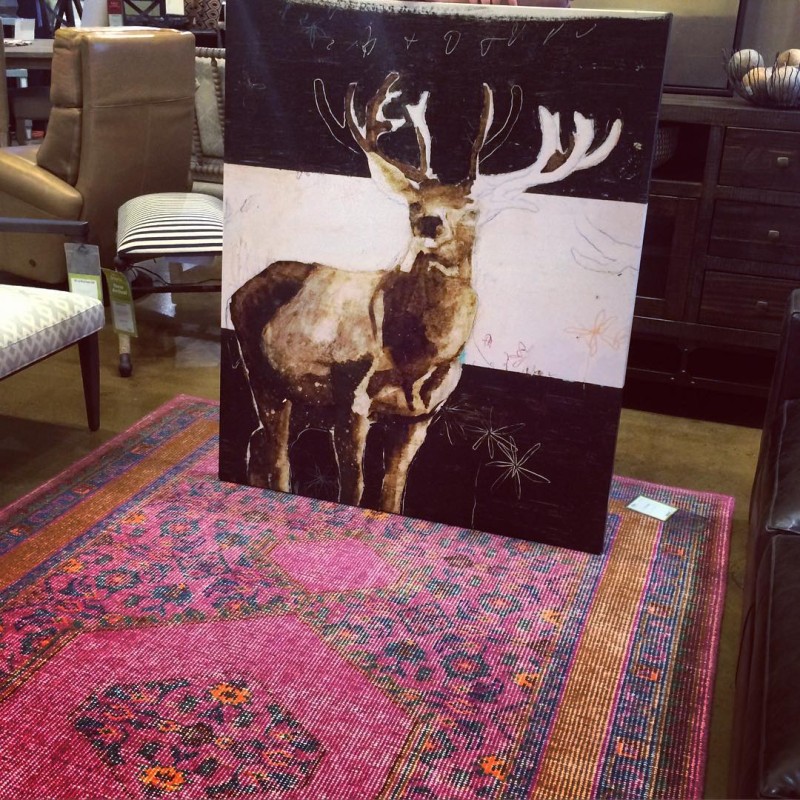
I’ve never been much of a pink girl. However, these bright pink rugs paired with black, white, and gold have really be catching my attention lately. I stumbled upon a few similar rugs at a furniture store in Dallas recently and I’m really considering jumping ship from my most recent décor plan. Our gray sectional takes up most of the room, so you will really only see a small portion of the rug. Nonetheless, I’m thinking that this little touch of pink might add some personality. Right now, our living room is the equivalent of talking to the guy at the party whose main interest is spreadsheets. I’d much rather it be like talking to the world-traveled artist who lived in Uganda for a bit. A pink rug would most likely transition the room from Boring Bill to Racy Raul, right??

For now, here’s what I’m thinking:

  • Bold rug, probably in the dark pink family
  • Black fireplace wall
  • White wood above the fireplace
  • Gold curtain rod with white flowy curtains
  • A collection of fun pillows (or all black & white)
  • Something fun and bold above the mantle (I’m seriously considering a picture of a goat.)
  • Lots of gold accents
  • Bold, fun light fixture

Clearly, I could just as quickly abandon this idea as I’ve abandoned the last few. I may even stick with the cowhide instead of the pink patterned rug…depending on what I can find. Even if these plans alter a bit, my goal is still to create a space that screams, “I’m perfectly put together, yet very fun.” The intention is that you’ll want to talk to my living room at a party…not that other silly room that picks his nose when he thinks no one is looking.

If you’d like to see more of my living room inspiration, check out my Pinterest board!

(Photo by Kate Mills.)

Clutter + the KonMari Method

Clutter + the KonMari Method. Read more at pamelapetrus.comMy quest to reduce clutter began when Matthew and I married in 2012. We had both lived on our own for quite some time, so in essence we were combining two full households. There were basically two of everything and to fit in our quaint rent house, we had to pare down. In addition to having doubles of things, it was also evident that Matthew had way less stuff than what I’d accumulated and that made me feel a little self conscious.

You see, I had an addiction to keeping everything. After doing a bit of self-exploration, I realized that most of this tendency came from a fear of not having what I needed. I was afraid that if I got rid of something and needed it later, I wouldn’t have the money or ability to replace it. I’ve also experienced my fair share of losing loved ones. This caused me to have boxes and boxes of sentimental items that I simply must keep because they originally belonged to someone that I loved. The reality is, most of these things were just given to me, not things that I actually chose for a reason. Shortly after Matthew and I were married, I purged so many things. We had an epic garage sale and the result made me feel pretty good about myself and our home.

My second voyage towards a clutter-free home came when we bought the new house. Even though I’d purged quite a bit from the rent house, there was still so much extra. When we moved, I was determined to not fill this new house with extras. The tall ceilings and ample windows made me really want an open, airy, and tidy home. We had another garage sale and donated so many things. I considered it great progress.

After these two large purges (and several small ones), things were looking up. There wasn’t nearly as much stuff, yet there was still more than we needed or used. Then, I picked up Marie Kondo’s book The Life-Changing Magic of Tidying Up: The Japanese Art of Decluttering and Organizing. Honestly, I did this primarily out of curiosity. The internet acted like this book was indeed life-changing and I read about it everywhere I turned. I figured that I’d read the book, maybe pick up a few new tricks, and then go on about my life. Instead, reading this book prompted one of the biggest purges of my entire life and has completely changed how I look at things in my home.

First, I immediately tackled my closet. Even though I’d thinned quite a bit in the other purges, I was still hanging on to so much extra clothing. My approach was to either hold on to it because “I might wear it again” or because “I’d not gotten my money’s worth out of it.” Therefore, even though I’d thinned and thinned, I still had a closet full of things I didn’t love or feel fantastic in. I had mentioned some tips for cleaning out your closet before, yet I still had so much extra that I “might wear under something one day.”

After just a few chapters of this book, I was filling garbage bag after garbage bag of items. It was like something clicked and finally gave me permission to get rid of those things I didn’t really want to keep anyway. Kondo’s approach is to take every single item that you own into your hand and ask yourself if it brings you joy. If it does not, then it’s just taking up space and it’s time to get rid of it. This approach alone was responsible for me purging over five large bags of clothing and shoes and 200+ writing utensils.

Not only has Kondo’s book helped me to make serious headway in a curated home, it’s also changed my approach to shopping. I no longer by things that I just barely like because it’s on sale or a good price. Instead, sometimes I pay a little bit more for things that I love. Overall, I’m spending less money and not bringing as many extra things into my home. Because of this book, I have a new outlook on how easy it is to have a clutter-free home full of only things that you love. If you’re even slightly concerned about having a home that you’re proud of, I recommend the book. It’s a no-nonsense approach to tidiness and you’re guaranteed to find at least a bit of insight as you read along.

Another way that I’ve been able to create a much more tidy home is by actually using my sentimental items. Rather than continuing to store box after box full of miscellaneous sentimental items, I got rid of the things that meant nothing to me and am now actually using the others. (There are still a few boxes of these items in the attic that I’m prepared to cull.) I read somewhere that our grandmothers would much rather us actually use their old wedding China than have it stored in a box in the attic where we never even see it. The risk of breaking a plate is worth it for the years of memories we’ll create using those plates and thinking of our grandmothers. Those family quilts should be draped across our couches and used for family movie nights instead of stuffed away in clear containers in the closet. You should wear your mother’s pearls instead of just seeing them in the jewelry box occasionally. I wish I could find the link to that post to share with you, because reading this made me realize that I was just storing things instead of using them. Even if a quilt becomes more tattered or a plate gets broken, I’d still rather have the memories with those items rather than my home being a storage unit for things we don’t touch. Beginning to use my sentimental items alone has contributed to less cluttered storage space, and using those items brings me joy now rather than the sadness I used to feel when opening a box and being flooded with forgotten memories.

There are a million and one strategies that you can use to reduce the clutter in your home and we can all have different approaches. Whatever method you use, I know that you’ll feel like a new person as you reduce the clutter because I certainly have. I found that by having less things stuffed in my home, I get to actually live rather than spending all of my time working on my things. There’s less to put away. We don’t need as big of a house. I don’t have to spend entire weekends trying to get things back in order. And most importantly for me, I don’t loathe putting away my laundry as much as I once did. Instead, I can tidy quickly and easily and the rest of my time can be spent exploring new hobbies or spending time with family and friends. There are still some areas and closets that I hope to tackle. However, the progress I’ve already made feels amazing.

Keep in mind that I’ve been working towards this goal for three years now, so don’t feel like you have to tackle everything in one weekend. Instead, start in one little area and do a bit as you can. And be sure to read the book. It very well could change your life.

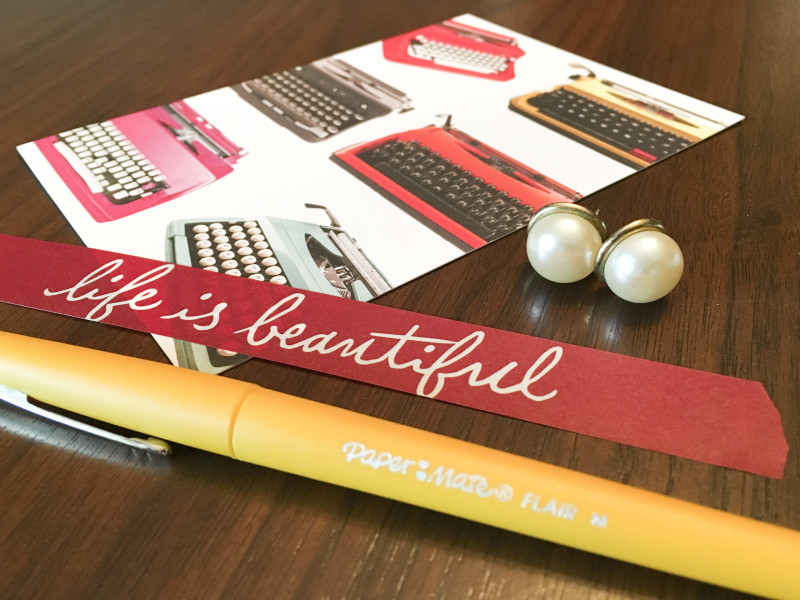
*The earrings pictured above belonged to my great aunt and I wear them often.*

Kitchen Before and After + A Stenciled Wall

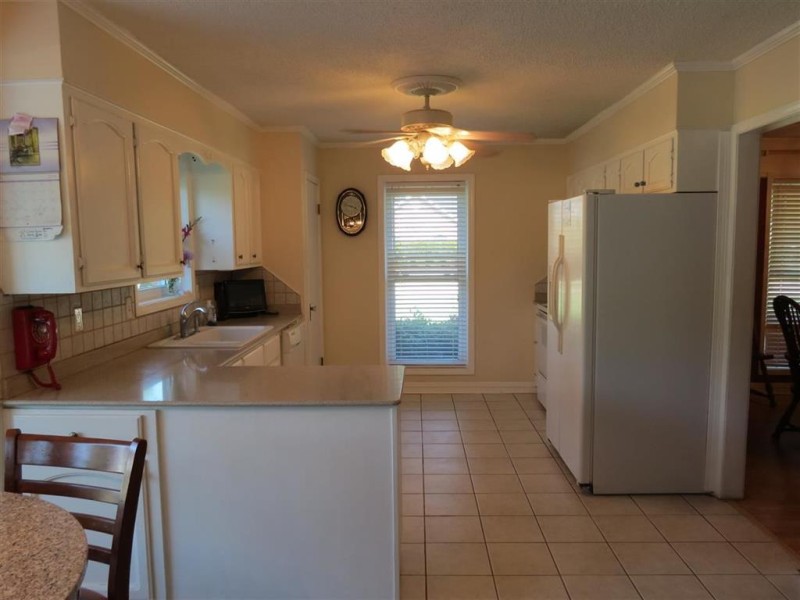
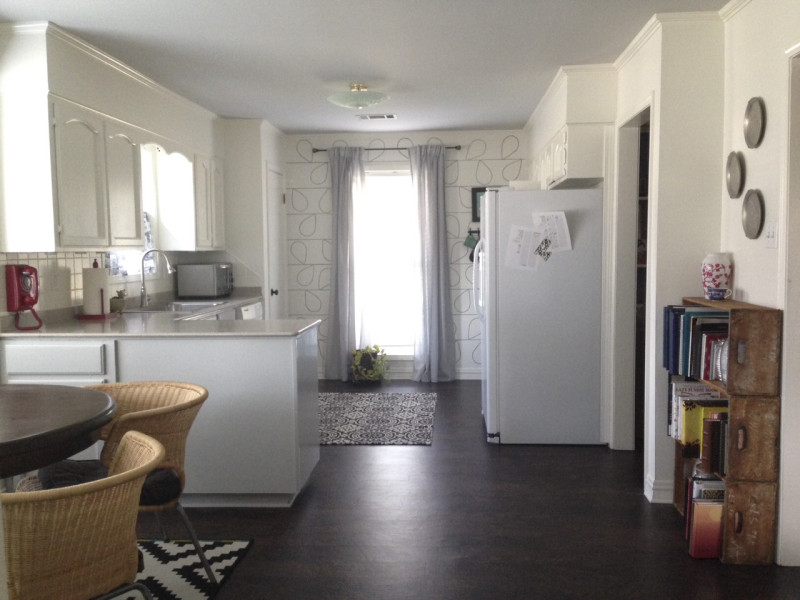
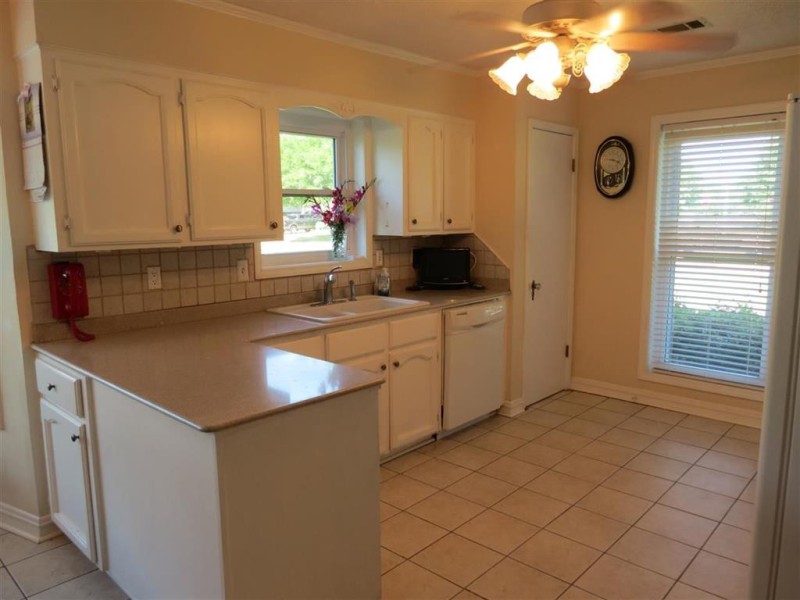
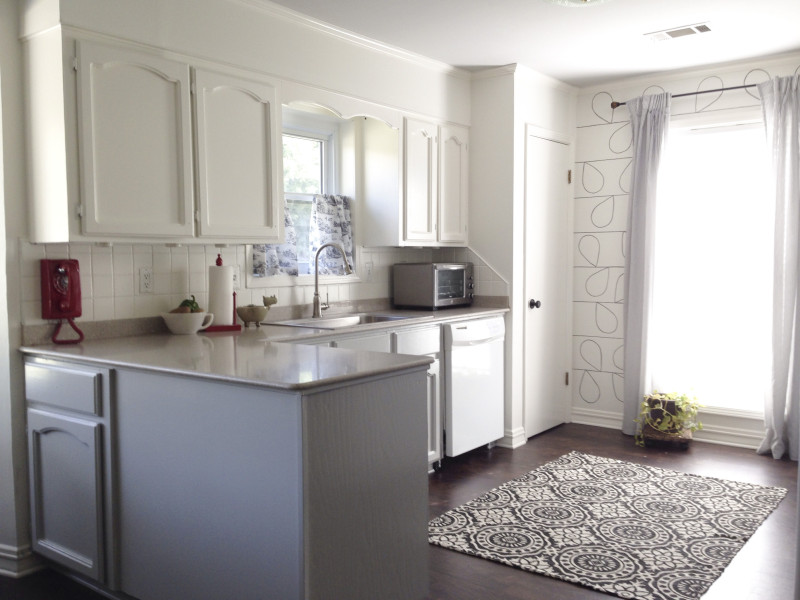
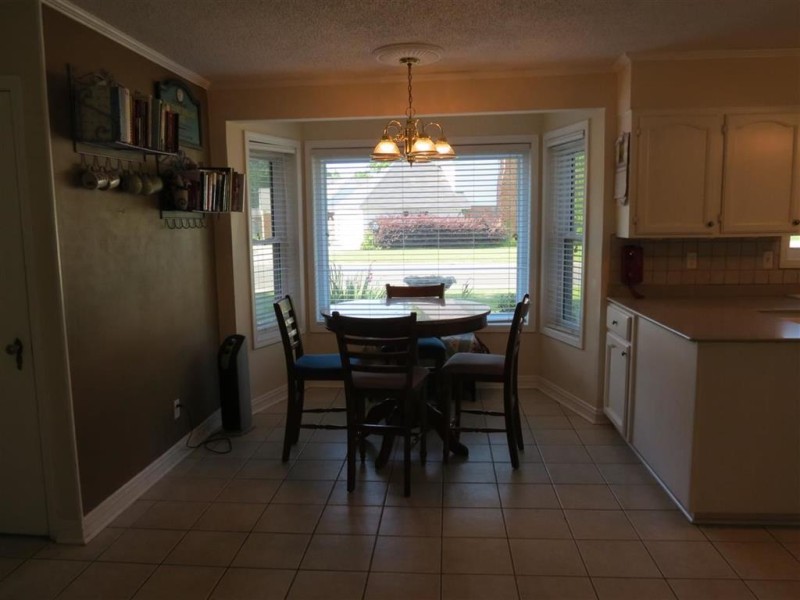
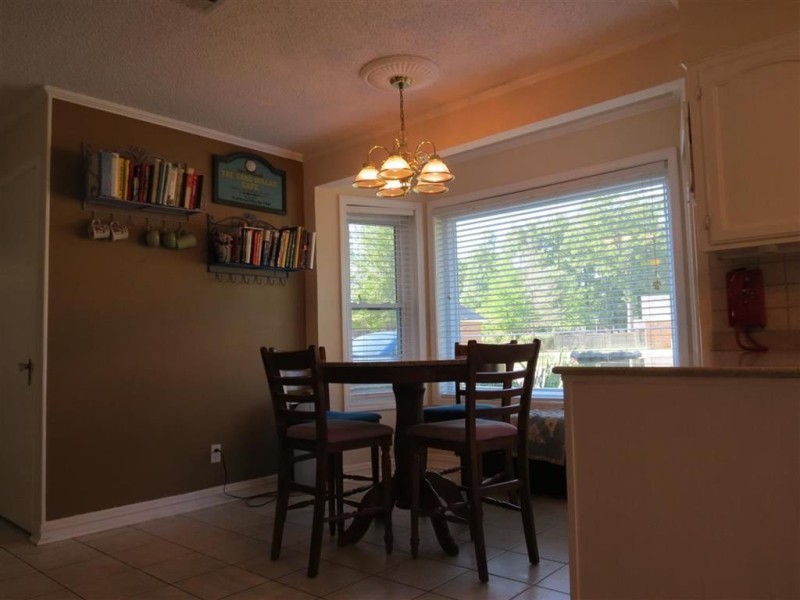
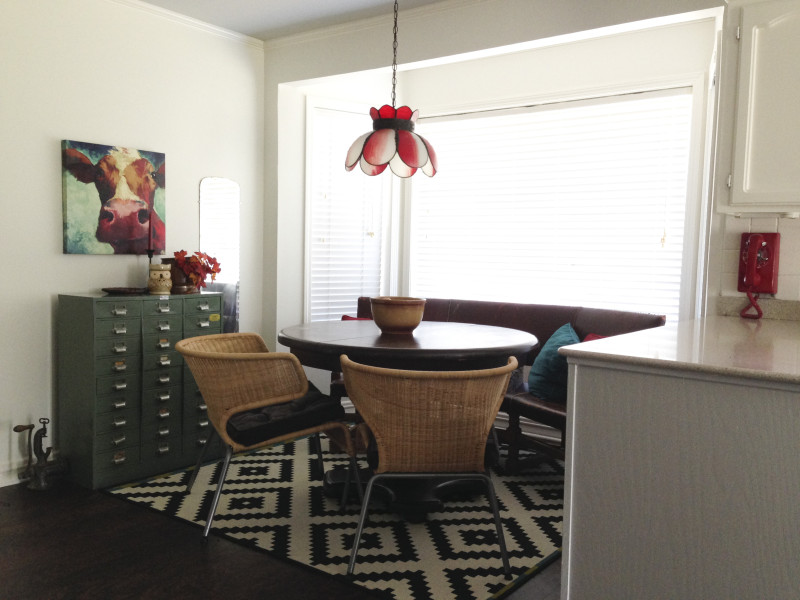
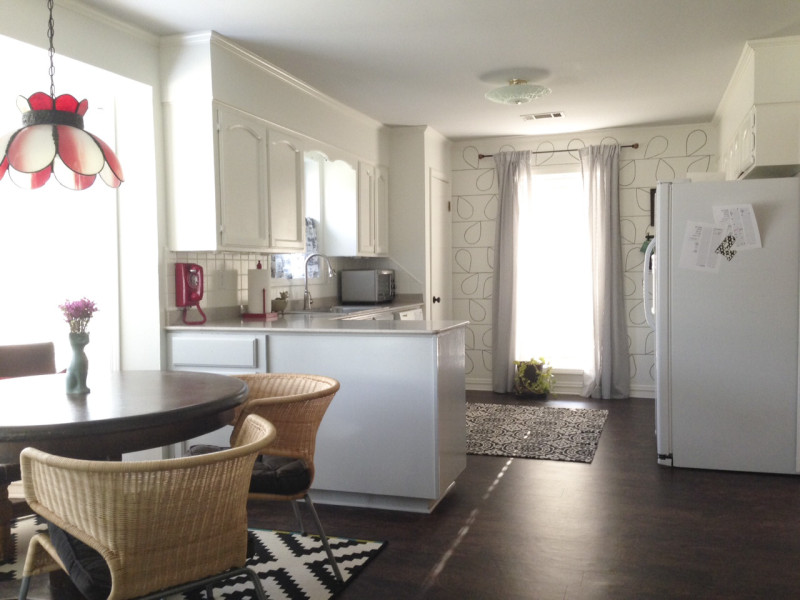
The Kitchen Before. See more at Pamelapetrus.comThe Kitchen After. See more at Pamelapetrus.comI bit the bullet and showed a house tour showing where we are in renovations a few weeks ago. One of the rooms that I’m most happy with and seems to have shown the largest transformation is our kitchen. When we were house shopping, the natural light pouring in to this area is one of the things that sold me on the home. It wasn’t my dream kitchen, yet it was 1,000x better than the kitchen we had in our rent house. Today, I’m sharing the progress of what we’ve already done and what we hope to do later. I hope you enjoy!

The first thing we did in the home was have the popcorn ceilings scraped and every. single. thing. repainted. As you can see in the before photos, the house was done in all warm tones which is the complete opposite of what I prefer. For the kitchen, I chose a light gray for the bottom cabinets and the ceiling and white for the top cabinets and walls. (Full disclosure: when I chose the colors, I thought the countertops were primarily gray. Turns out that the primary color is tan, so I’m working to mix the colors somehow.) I painted the walls white because I really wanted to enhance the brightness of this room. It’s true that people spend a lot of their time in the kitchen, so I wanted it to be as bright and happy as possible.

The Kitchen Before. See more at Pamelapetrus.comThe Kitchen After. See more at Pamelapetrus.comAt the last minute, I also asked the painters to slap a coat of paint on that tile backsplash. Most people think we replaced the tile, and we didn’t…that’s just a coat of white paint. It made a HUGE difference. We had plans to redo the backsplash, and I didn’t know exactly when that would be. It turns out that about 100 other projects were more important than a new backsplash, so I’m so glad I thought to paint it for now. The paint has held up tremendously and we’ve had no trouble with the coverup. Have an ugly tile backsplash you don’t like? I’d suggest trying some paint before spending the time and money to replace it.

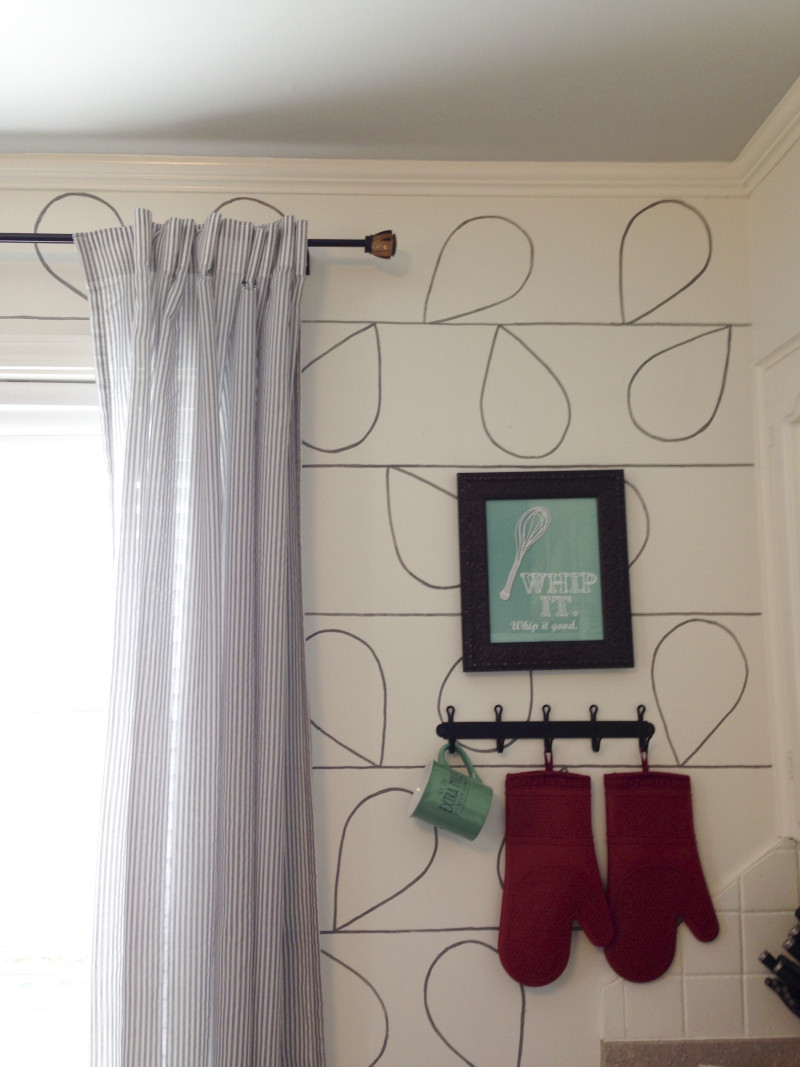
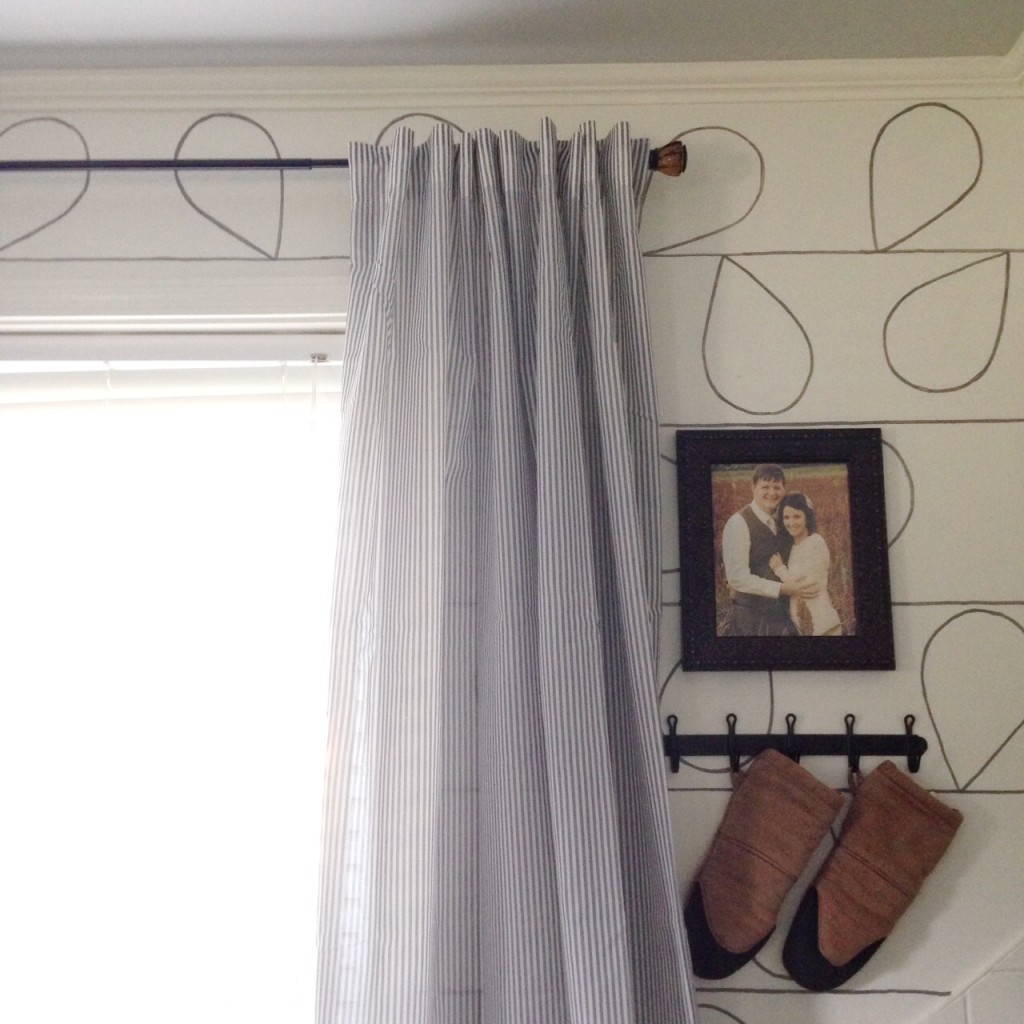
The Kitchen After. See more at Pamelapetrus.comOne day this summer I woke up and decide to stencil a wall. I saw this wall and thought it would be perfect in my kitchen. I had been tossing around the idea of a fun wallpaper there and I decided the painted pattern would be quicker and easier to undo if we didn’t like it. The process was rather simple. I made a stencil from foam board and traced it with pencil on the wall. I do recommend tracing with pencil first because if you’re like me, a little bit of slightly off spacing would drive me insane. After I had the pattern set, I used a Liquitex pen in Neutral Gray 5 to freehand over the pencil lines. It took two pens to complete this project and I think that may have been because the first pen didn’t work quite as well as the second. Our walls are a bit bumpy (for lack of a better word) from the texture that’s on them, which made this project a bit more difficult. It’s very hard to draw a straight line over a bumpy surface. I didn’t even consider this at first, so if you’re thinking about doing something similar, you might want to consider the texture on your walls. If they are indeed textured, I wouldn’t avoid the project. Instead, just be prepared for a more organic look.

Is this wall perfect? Not at all. Are the lines straight? Hardly. Do I still love it? Yes. One of my new Instagram friends often talks about being a “recovering perfectionist.” That’s me! A previous version of myself would not have been able to live with the inconsistencies in this project. The new version can step a few feet back and agree that it looks just fine. Actually, I almost quit and painted over it after the first two lines. My lines weren’t straight and it was very hard to get a steady flow of paint from the pen because of the wall texture. However, I decided to keep going. I decided to see what the entire wall looked like before giving up, and I’m glad that I did! (Tip: If you need to erase any pencil lines, try using a Lysol wipe. It worked so much better than an actual eraser!)

After the wall, I hung those gray stripe curtains from Ikea and ordered that print from Etsy. Another change that I made to make our kitchen more functional is hanging the oven mitts there directly on the wall. They’re much easier to access there and it just works better. Now all that’s missing is an adorable Anthropologie apron! If you’re thinking of doing a similar wall, I say go for it! If you hate it, all you have to do is paint over it. No harm, no foul. If you decide to give it a whirl, tag me on Instagram. I’d love to see your projects!

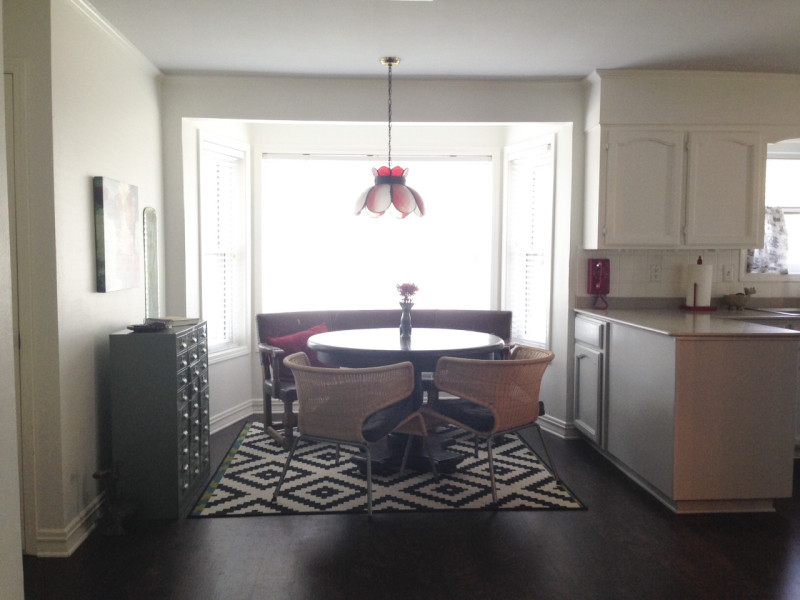
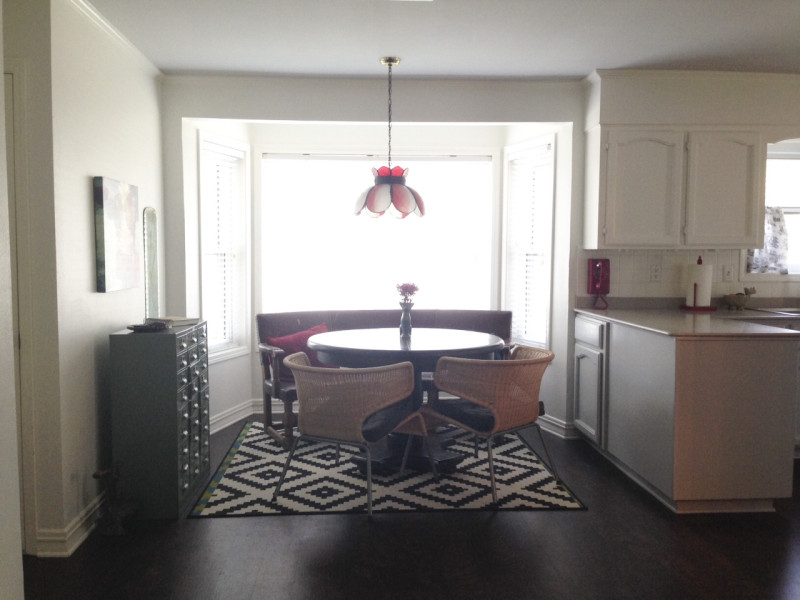
The Kitchen Before. See more at Pamelapetrus.comThe Kitchen After. See more at Pamelapetrus.comFor the breakfast area, Matthew was going to make a window seat and then I remembered that I had this amazing bench in storage. It fits there PERFECTLY and has a bit of a story to tell. Right after Matthew and I were officially a couple, we went on a bit of a treasure hunting trip with my mom and sister. We found this gem at an antique store and scooped it right up. The intention was to sell it at Salt & Pepper, yet I started having trouble parting with it. Finally, I moved it to my office and then brought it with me when I sold the store. I love it here in the breakfast nook and it’s a nice reminder of the beginning of our journey together. The table was handed down to us from Matthew’s grandmother and the chairs are a temporary solution from IKEA. (It turns out that it’s hard to find chairs for this height of a table.) To the side of this breakfast area is an old catalog recovered from the family business, TP Outdoors, and it holds all sorts of goodies.

The Kitchen Before. See more at Pamelapetrus.com!The Kitchen After. See more at Pamelapetrus.com!Just changing the paint and floors alone, made a tremendous difference. (More about the floors here.) I honestly had forgotten how far we’d come until I looked at these photos side by side. I spent a bit of time being paralyzed by the amount of work that was needed and I’m happy to be coming out of that. I’ve recently found the courage to try some new things, even if I’m not 100% sure about them. Things feel like they’re coming together around here and I love that.

For now, what’s left in the kitchen remodel is a new light fixture, new appliances, and possibly new cabinet doors. I also still need cabinet knobs. I ordered some after the sink fiasco and they didn’t look as good as I’d hoped. Eventually we’ll have knobs. Maybe.

This is our kitchen progress in a nutshell. We’ve done a lot and it feels nice. We’ll continue to do more as time and funds allow. Maybe it’s the promise of fall creeping in or maybe it’s just the passing of time. Regardless of the reason, I’m happy to be feeling more at home here. Some of our larger projects are hopefully just around the corner too, so it’ll be even better soon!


September Goals

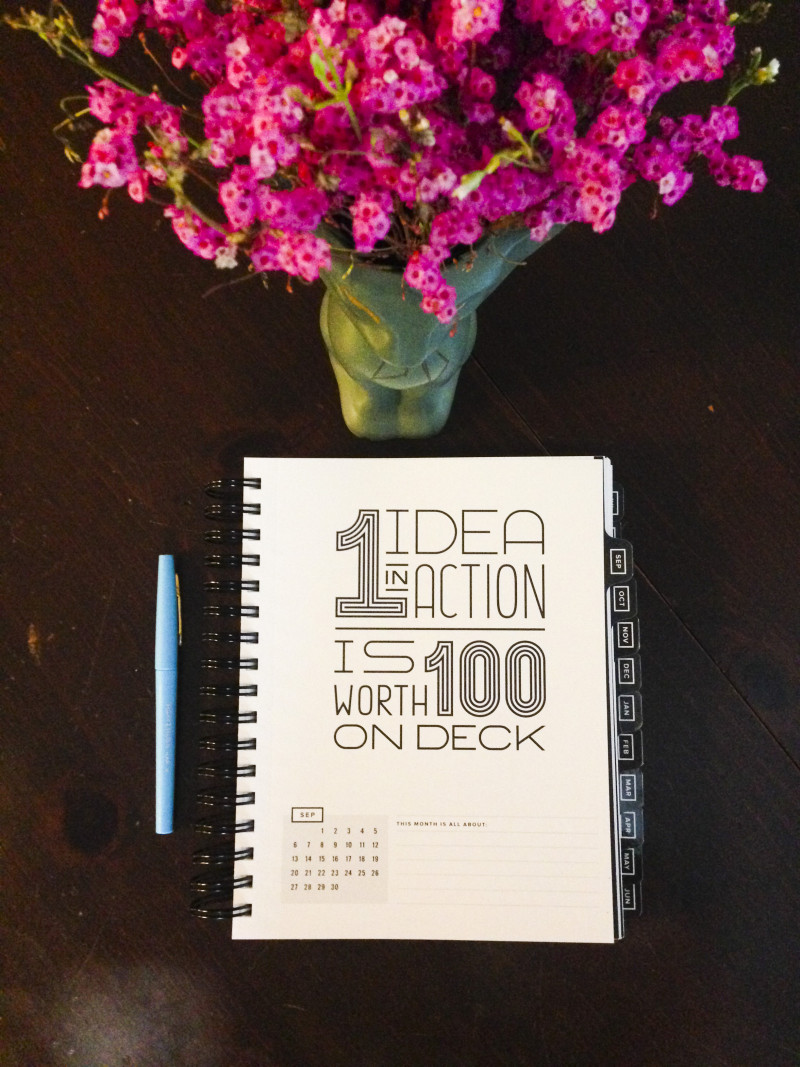
September GoalsSeptember’s page in my Get To Work Book  sums up my thought process for the month entirely. Since I can remember, I’ve let 1,000 ideas hinder me from accomplishing anything. I have a ton of ideas, get overwhelmed by them, and then do nothing. Last month, I hired a new assistant and with her help, I’m looking forward to finally making some of the ideas a reality. Therefore, on the work front, my main goal for the month is implementation. We’ve made a plan and now we’ll start tackling one project at a time until we reach world domination. Just kidding…sort of.

In addition to this large work goal, I’m hoping to take on a few personal items this month too.

  1. I want to be 100% present for girl time this month. I’m very fortunate to be looking forward to a bit of time with my cousin in Tennessee that I see hardly enough and to have a little, tiny girls trip planned for the end of the month. I get to spend so little time with these people that I love, that I really want to soak up the time that I’ll have this month.
  2. Complete 2 or 3 house projects. After sharing the home tour this week, I found a resurgence of motivation to make my ideas for this house come to life. I know from experience that I better take advantage of this inspiration while it’s here and actually do some of the things I have in my head. I don’t intend to ever be “finished” with this house. However, I do want to be in a place where I’m making little tweaks here and there rather than having a monstrous list of big projects.
  3. Review my 2015 goals. I abandoned most of these goals earlier this year and with good reason. However, I’d like to look back through them, think about what I’ve done so far this year, and decide if I want to pick any of them back up. After all, there are only 4 months left of this year!

All in all, my goals for September are fairly simple. I think the big idea is to just implement, both at home and at work. I’m working hard to break that habit of sitting on ideas until I have plenty of time, money, and resources…which never exists.

Looking back at August, I was pretty successful!

  1. I did quite a bit of watercolor practice!
  2. I played around with Periscope, even though it’s a bit nerve wracking for me. (You can follow me @pamelapetrus!)
  3. I did make an important business decision, even if I’m not exactly sure what it’s going to look like yet.
  4. I shared the home tour. It was at the last minute and scary, yet I did it!
  5. I am absolutely moving more slowly in the mornings and it’s made a HUGE difference. I switched my morning routine to have my coffee before getting dressed and it’s helped me take it more slowly and enjoy the moment more. I’m expecting this to make a big difference for me over time.

August was a great month and I’m thinking September will be pretty awesome too. I took a quick look at my goals from this time last year, and it’s amazing how much has changed in a year. That post seems like ages ago and I distinctly remember that feeling of overwhelm as we were drowning in boxes. I’m happy with how far we’ve come in a year, and I’m looking forward to a strong ending for 2015. I hope you are too. Also, I do still think September is my favorite month. How could it not be??

P.S. Those filler flowers from the August post are the same ones in today’s photo! You should buy them for every room in your house because apparently they live forever.

#mapfirsthouse- One Year Later

These are in no way “after” photos. However, it wasn’t until I looked through the before photos that I really realized how far we’ve come. Sometimes the slow progress towards my big ideas can be a bit discouraging. It feels like we’ll never finish everything or get it to a point where I can say it’s at least somewhat done. Now that it’s been a year since we’ve owned our first home together, I thought it would be nice to look at its current condition compared to where we started.

The kitchen

I think that you have to take a gander through the before photos to really appreciate the current state. I certainly did. While I felt a decent amount of anxiety of showing off my home in this awkward half way done stage, I’m thankful that I did. Honestly, if I wouldn’t have set it as an August goal, I would have continued to put it off! However, I do want to remember this stage. When I’m closer to finished, I’ll enjoy looking back and remembering this portion…the time when so much had been done and yet there was still so much left to do. If nothing else, forcing myself to share these photos inspired me to keep making progress. As I mentioned last week, we’d been at a bit of a standstill. With so much traveling, Matthew changing jobs, and no money tree in the backyard, it was hard to be inspired and find the time/money for house projects. However, I’m back in the game. I’ve started working on a few projects already, and I’m making a timeline for finally turning some big ideas into a reality.

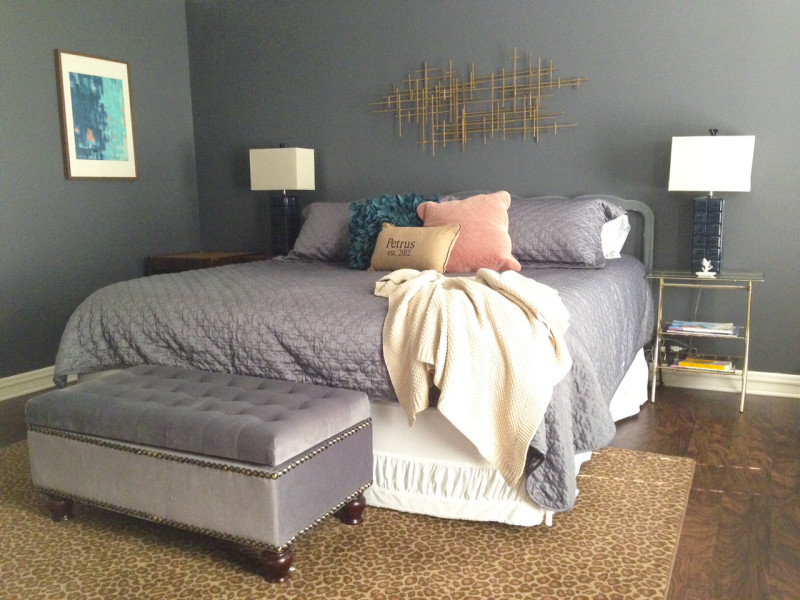
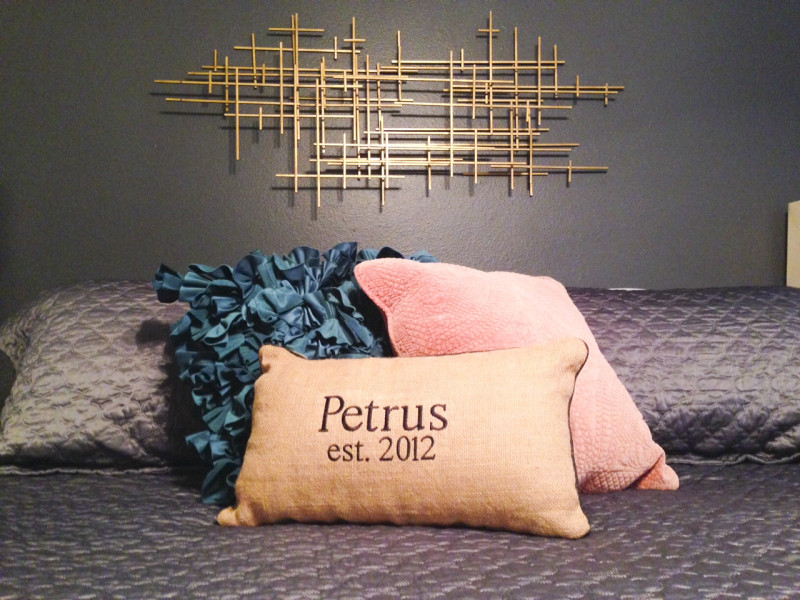
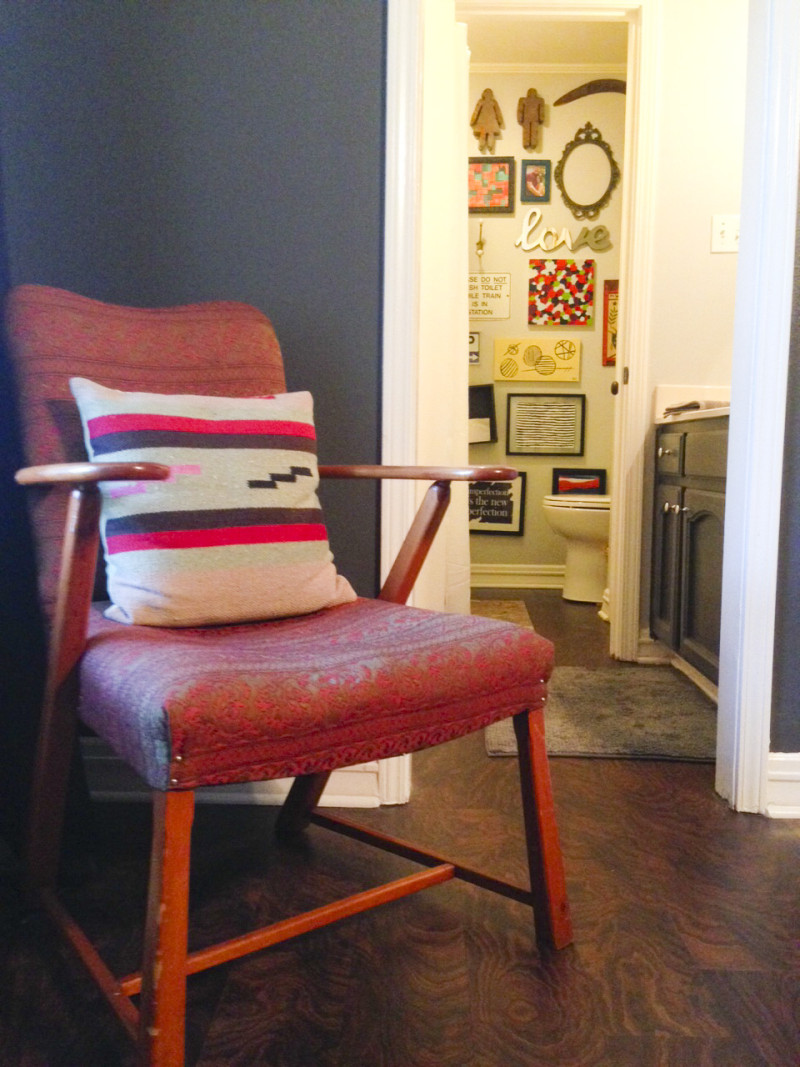
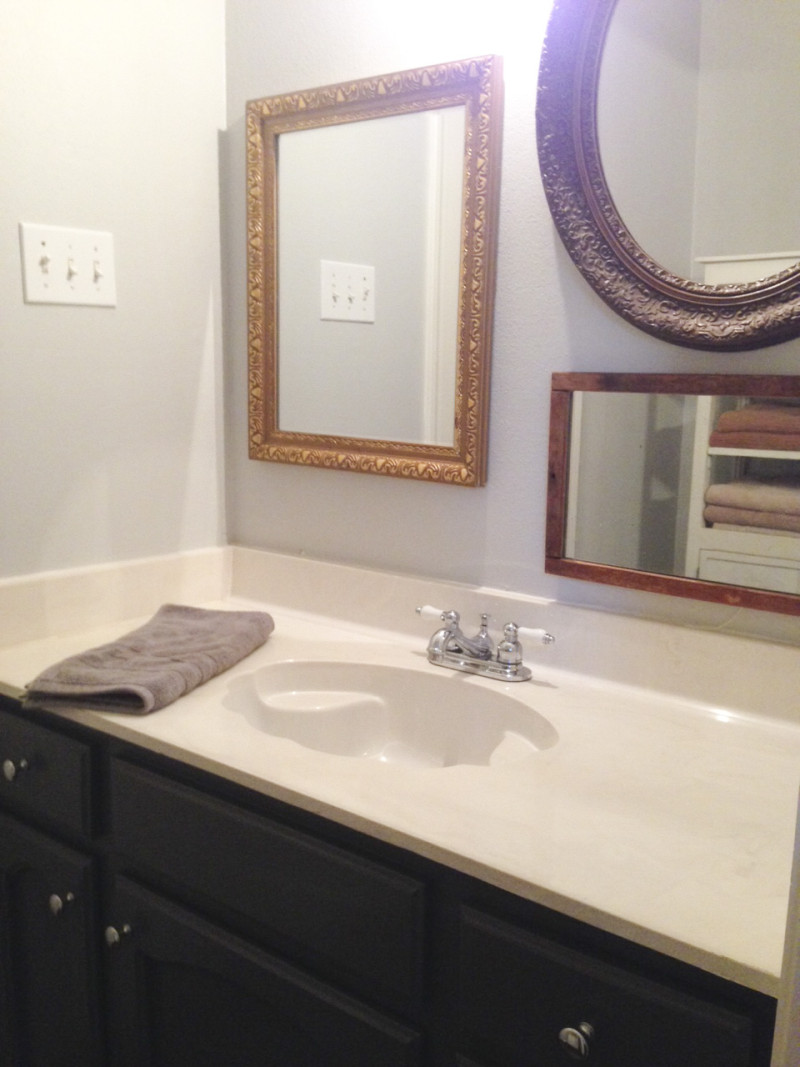
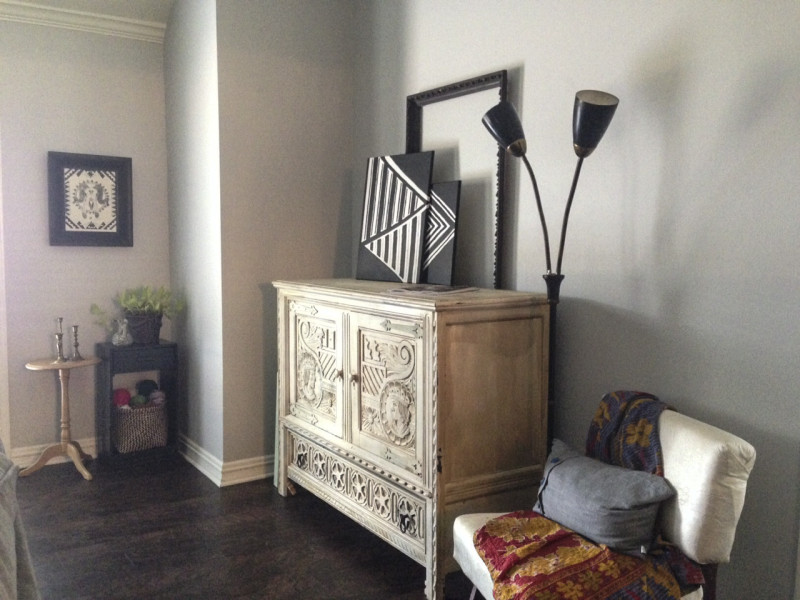
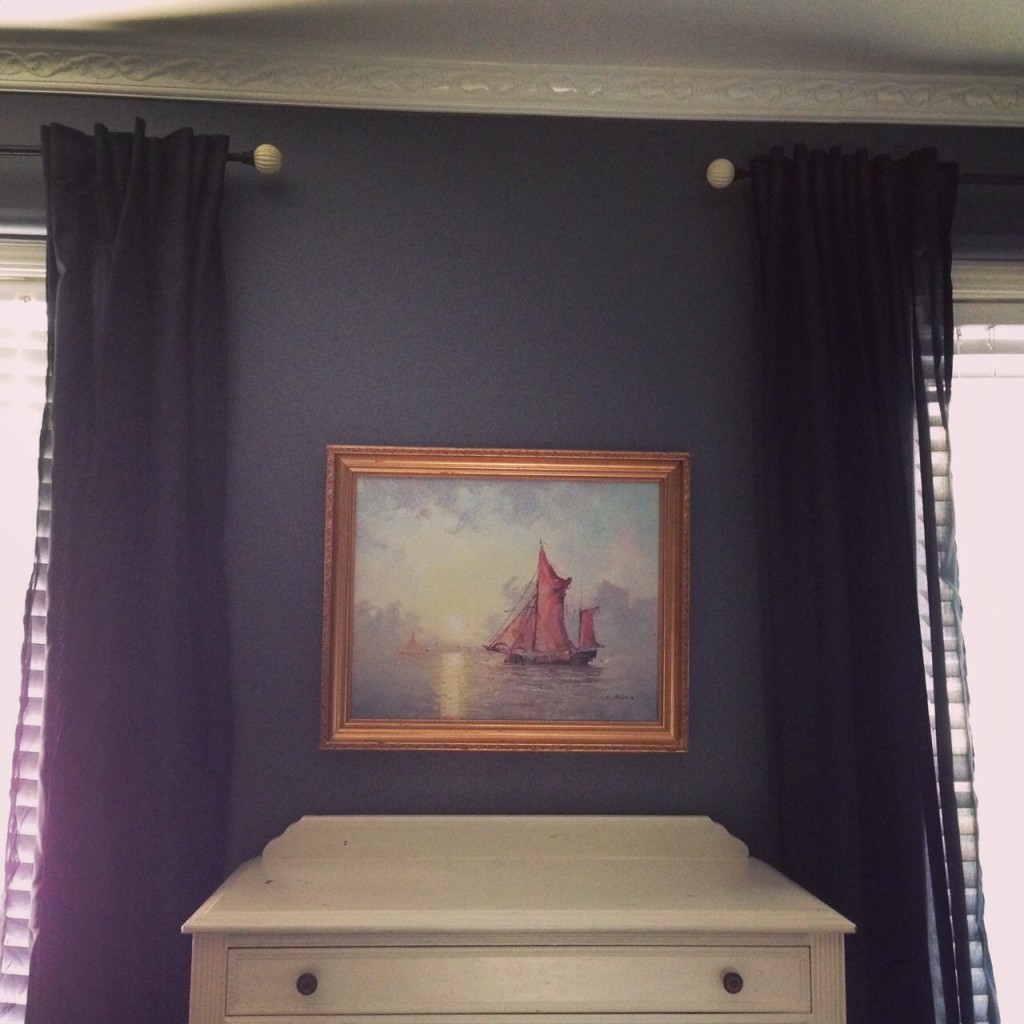
The master bedroomBedroom pillowsCorner chair in the master bedroom with a sneak peek into the master bathroomMaster bathroom sinkMaster bedroom fireplace

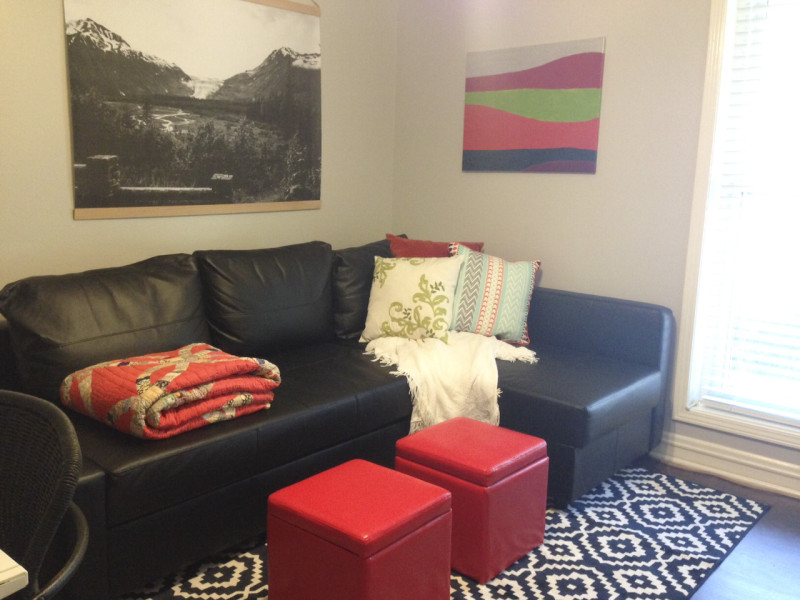
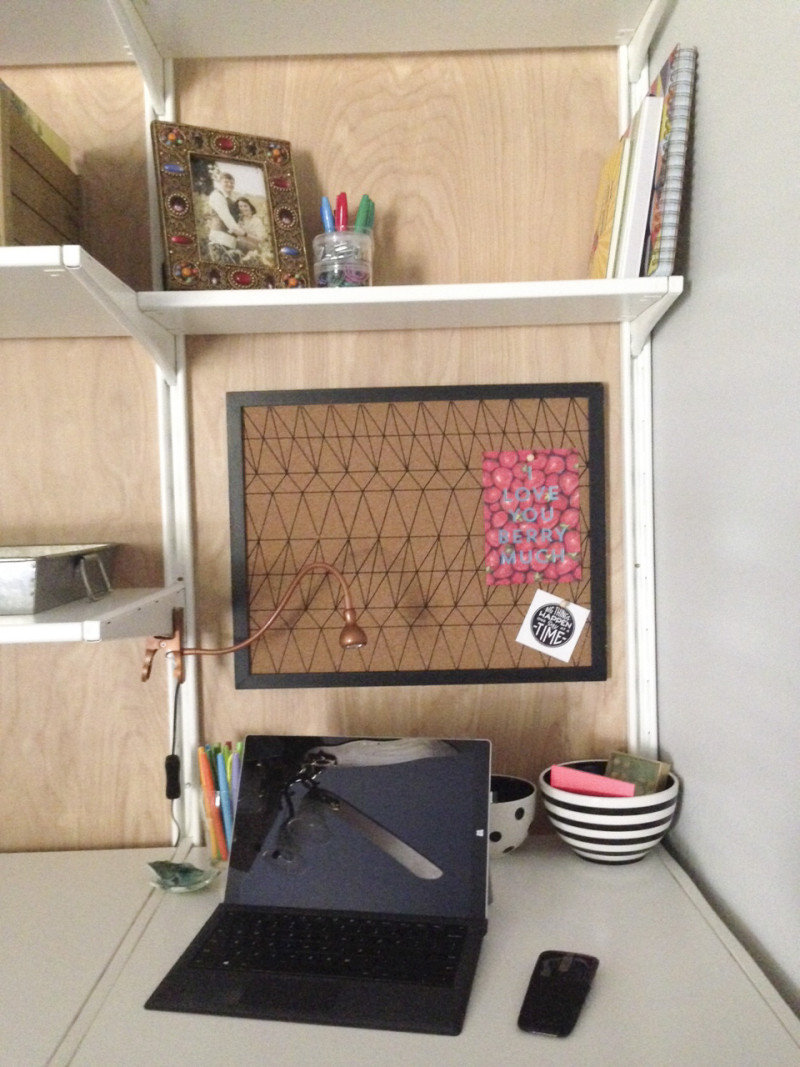
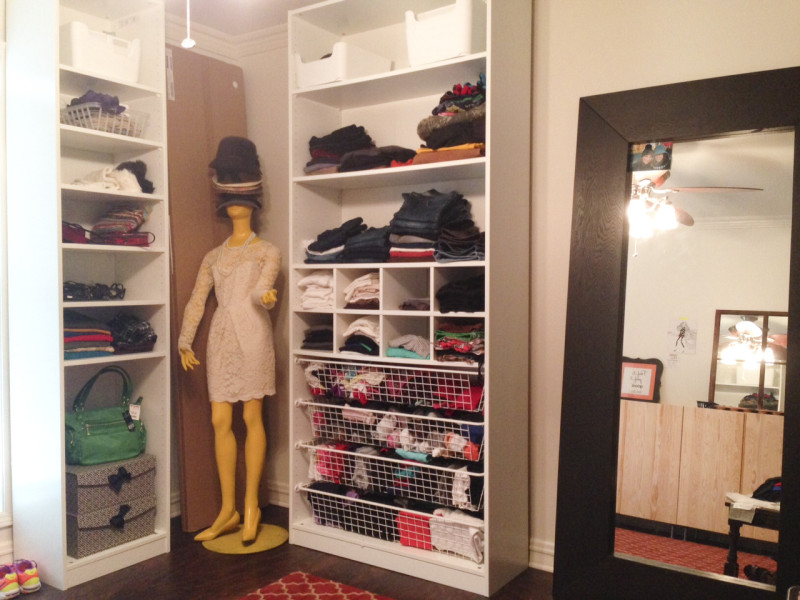
I mentioned lately that we’ve been working on a few big projects in the house. We’re in the process of turning our old guest room into a guest room/home office. We’re also FINALLY revamping my closet room to be more useful. This means you’re seeing strategic shots of my house right now. There are currently mattresses standing in the foyer until they make it to their new home. There are IKEA returns living in the corner of the dining room until we can make that 5 hour trip again. Speaking of IKEA, they were out of a portion of my new shelving system (that I’m so very excited about), so that project is only partially done too. The hallway to the bedrooms includes bags of clothes to be donated. The parts I’m showing you today certainly aren’t perfect. However, just remember you can make anything look decent from the right angle. (And with black and white photos.)
Home office in progress
Home office desk in progressCloset room progressCloset room progress

I really wanted to wait until everything was perfect to show you anything. (Shame on me.) I have to keep reminding myself that it doesn’t have to be perfect to be beautiful. I’m happy that I shared a progress report because it’s encouraged me to keep pushing forward. It also made me address those boxes of photos/memorabilia that were moved to the dining room from their safe little home under the guest bed (the one that’s now living in the foyer). It also reminded me how badly I want everything to have a place. I feel soooo much better when everything is tucked away nicely and neatly. I’m currently reading this book which is helping a ton with clutter…and is also the reason for the bags of donation items making a home in the hallway.
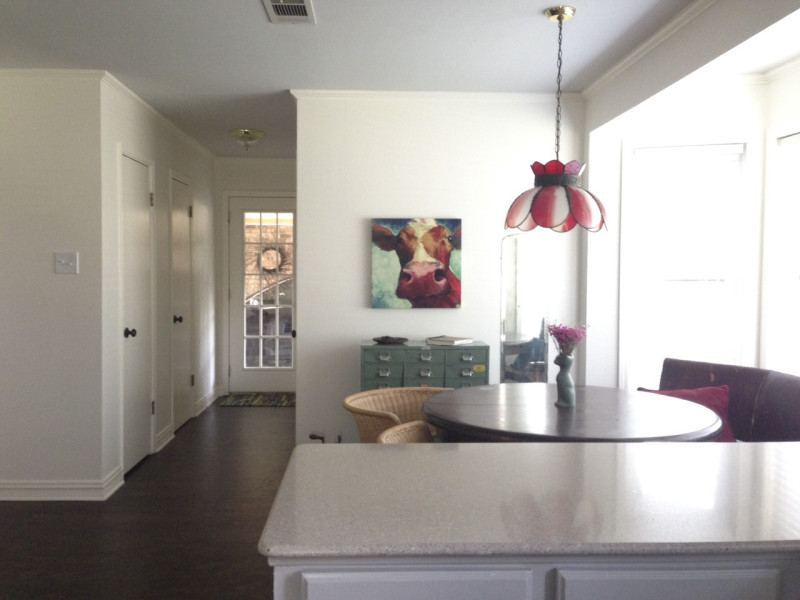
Carport hallway in progressCarport hallway in progressBreakfast area

So far we’ve scraped the ceilings, painted every single surface (literally not one single thing was left unpainted), replaced all of the flooring, and did what feels like hundreds of small projects.  Some of the big items still left to do are:

  • all new light fixtures (I salvaged one here.)
  • paint the fireplace brick and instal a wood header
  • paint a very big wall a very bold color
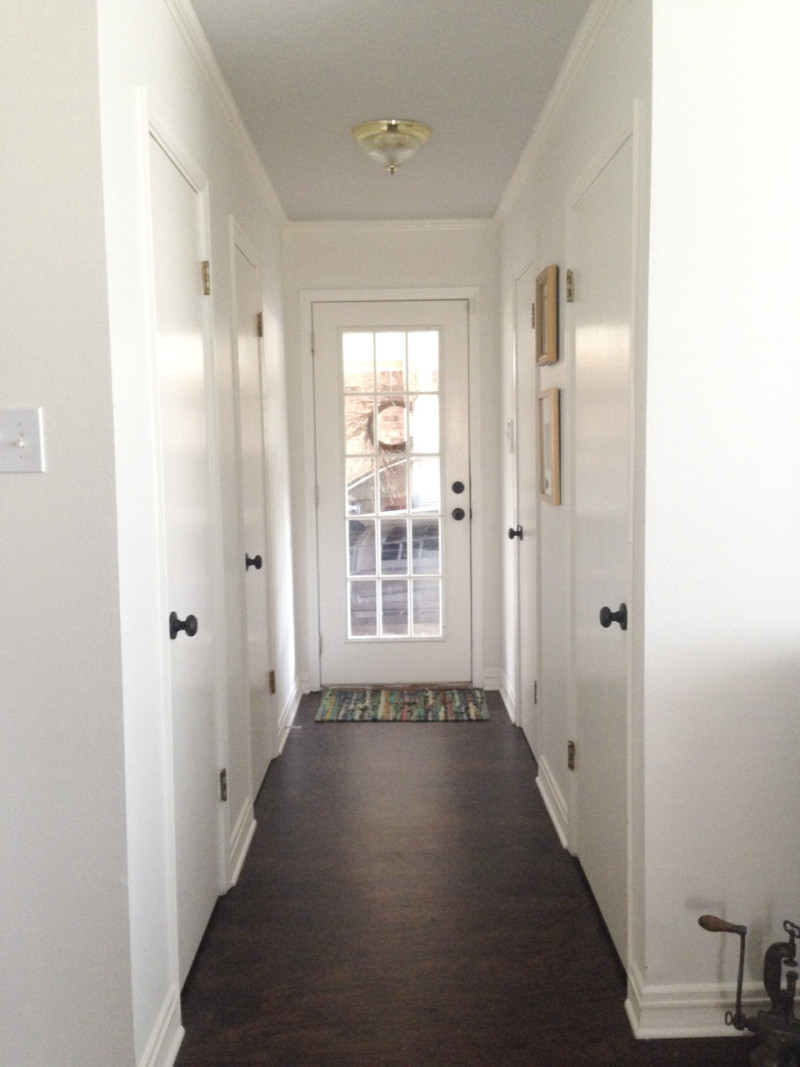
  • paint the hallway from the carport
  • add kitchen hardware (It’s been ordered!)
  • new appliances
  • bathroom upgrades – no more seashell sink!!
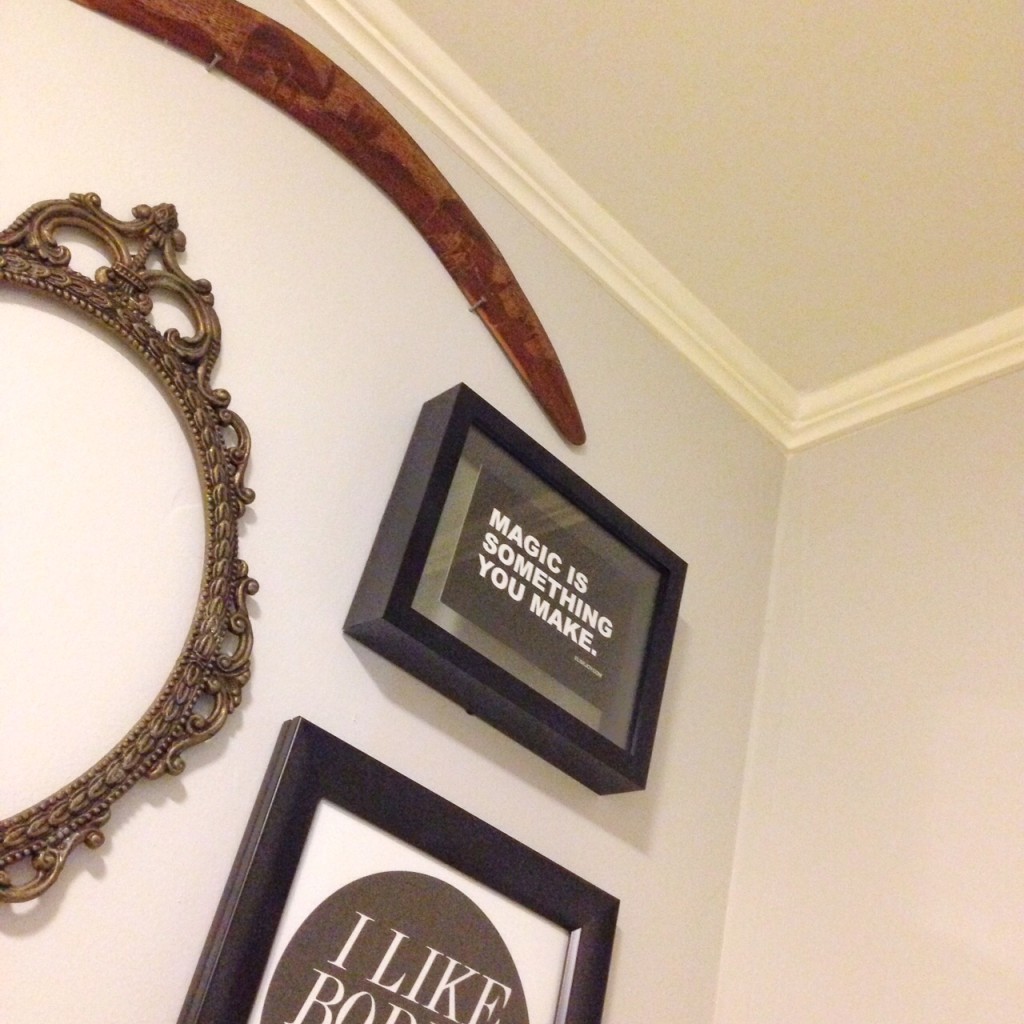
  • install my mirror gallery wall
  • all of the decorating everywhere – curtains, pillows, artwork…you name it!

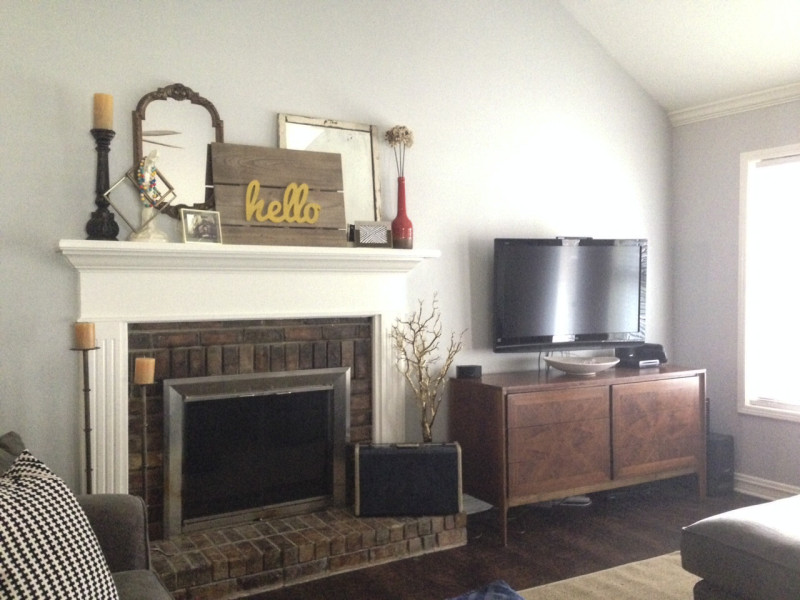
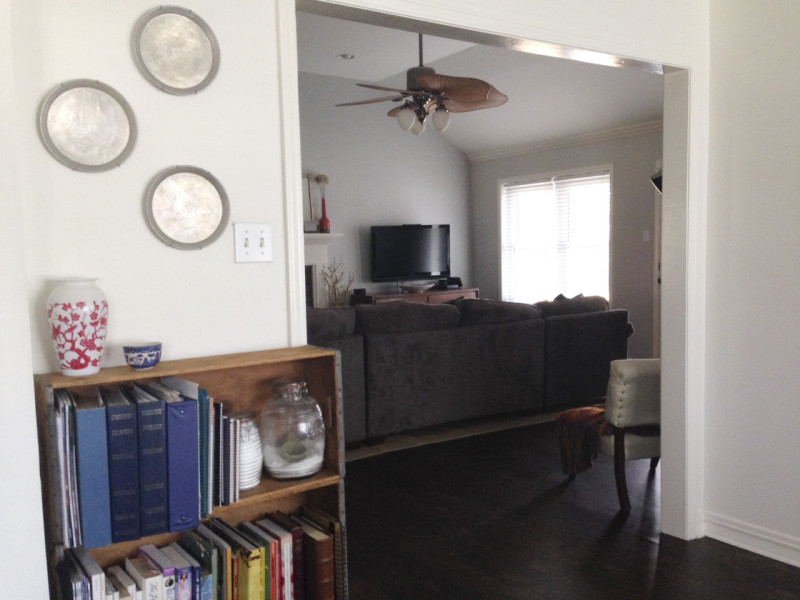
Living roomKitchen view of the living roomLiving room back wallAs I prepared for this post, I did make several decisions on different elements that I’ve been stewing over. This means I’m ready to make some magic happen again! I’ve decided that I’ll tackle these projects one little piece at a time. Waiting until I had all the money and all the time has obviously slowed down progress. Just like unpacking,  I’m going to start doing one thing at a time! Speaking of boxes, there are officially NO BOXES left in my house that are not intended to be there. Not even one little box hiding in a closet. That last box has been sent on its merry little way and that alone is something to celebrate.

Breakfast area and carport hallway from the kitchen

That’s a wrap for now. I’ll hopefully be sharing even more progress very soon! If you’d like to read more about the journey, check out our new couch, tips for changing flooring, and why I’m thankful for a new home.

Everything AND the kitchen sink.

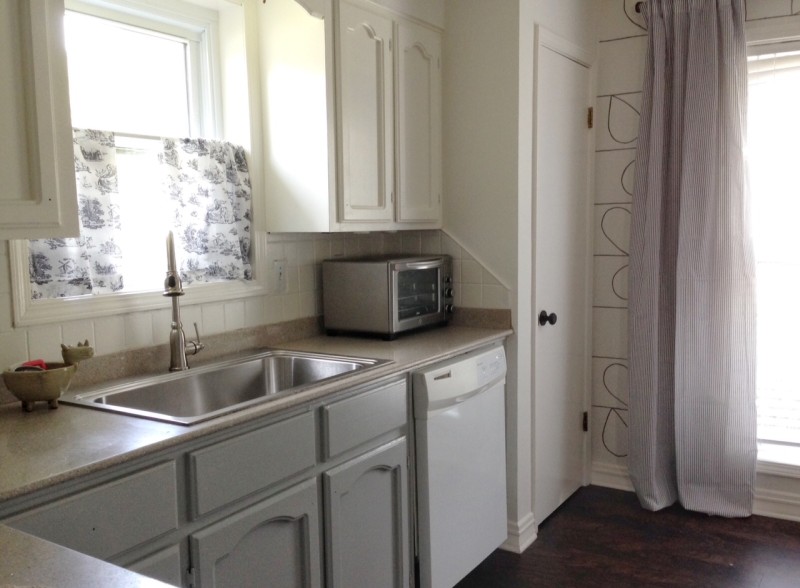
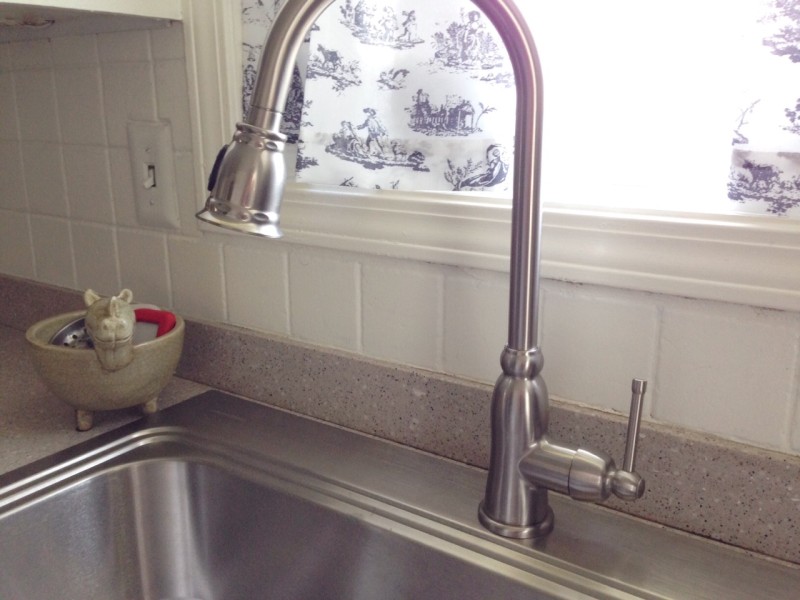
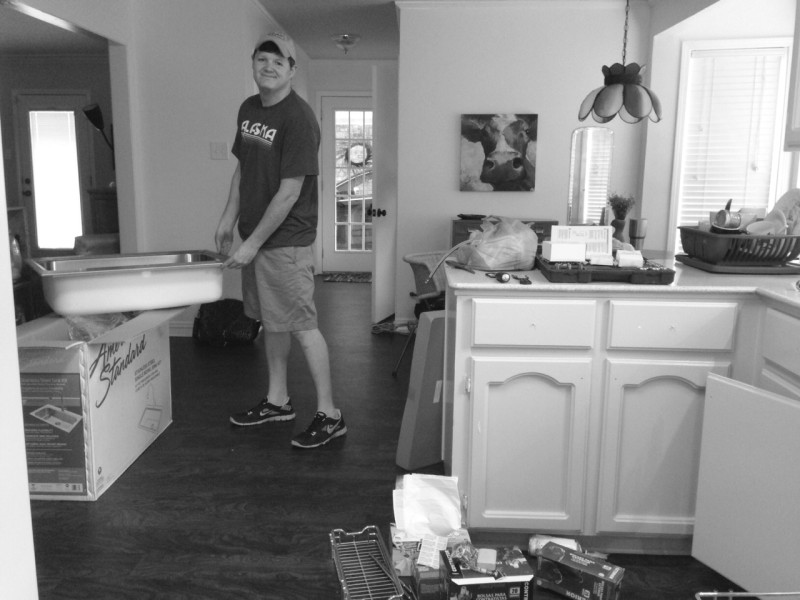
new sinknew sink faucetI’ve mentioned time and time again that we have a rather lengthy update list for our house. There really isn’t anything here that we haven’t already changed or plan to change later. The past few weeks, Matthew and I have been a bit discouraged by that ever-growing list. Last week on the patio, we talked about how we probably just needed to start doing some things here and there to make ourselves feel encouraged again. We’d fallen in to the trap of waiting until we had all of the money to do all of the things. Let’s get real…that’ll never happen. After chatting on the patio for a bit, we decided we needed to just bite the bullet and get back to working on the updates. I had no idea that we’d start so soon.

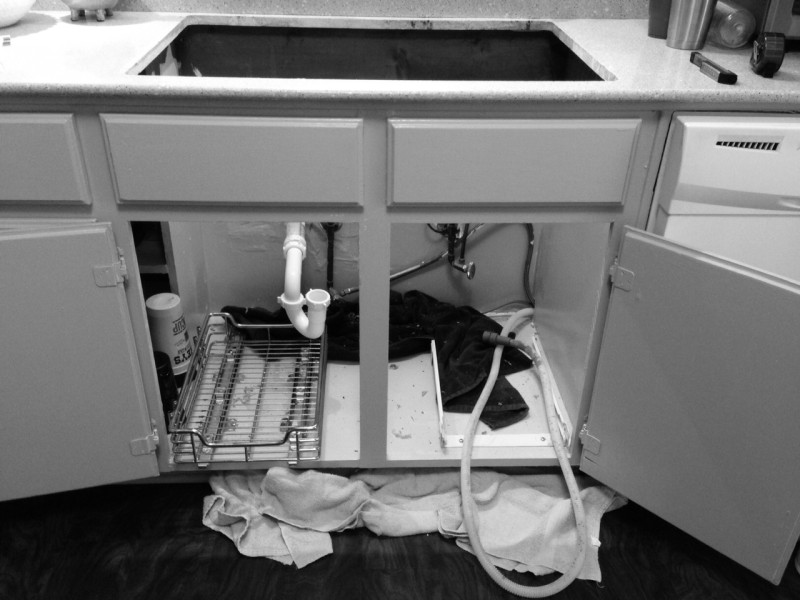
Saturday morning we discovered some puddling water on the kitchen floor. After a bit of exploration, we (and by “we” I mean Matthew) discovered a leaky faucet. After I showed a few houses, he and I headed off to Lowe’s to pick a new faucet. We decided that we’d “price” some sinks while we were there. The old saying goes “everything but the kitchen sink.” In the case of our renovations, we had hoped to replace “everything AND the kitchen sink.” We just weren’t planning to do it quite so soon.

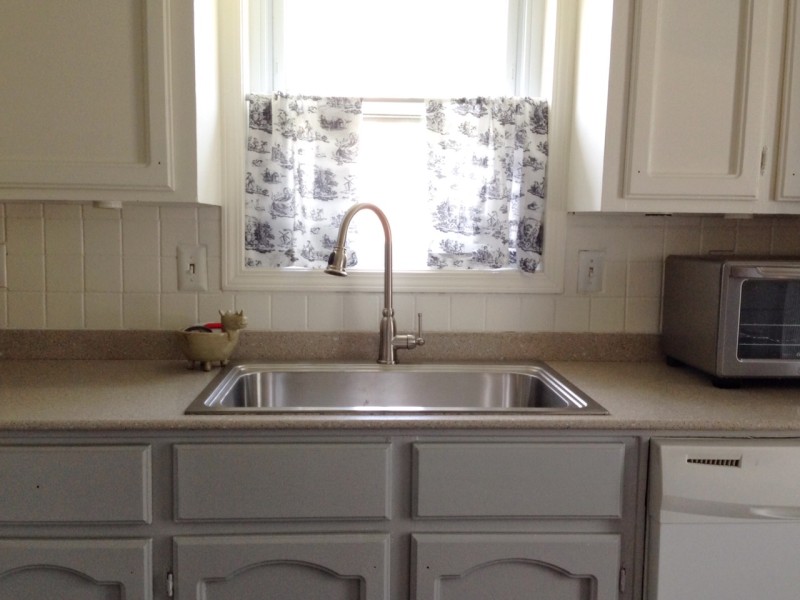
water leakAfter shopping our options, we decided to go ahead and replace the sink while we were working in the kitchen. I practically loathed the one that we had, and while it wasn’t my top priority, we’d save a bit of money (and time) by doing it all at once. We said we needed to start somewhere. I guess the sink would be our jumping off point. In an ideal world, I’d have some lovely farm sink built into my cabinets. Since that’s not in the cards, this one-tray stainless option will have to do.

While we were at Lowe’s I browsed the hardware section and picked a few options for our cabinet knobs. (We haven’t had knobs since we’ve moved in. Don’t judge.) If nothing else, having to replace our kitchen sink and faucet, got me back in the mood to get things finished. (I use that term lightly.) I came home and pinned 100 light options on my Pinterest and started dreaming of the possibilities. (I also did a bit of housekeeping over on Pinterest, so if you’re not already following me there, you should!) While I’d absolutely love an unlimited budget to do everything I want at once, I also know that having to do things one at a time and as economically as possible has some value.

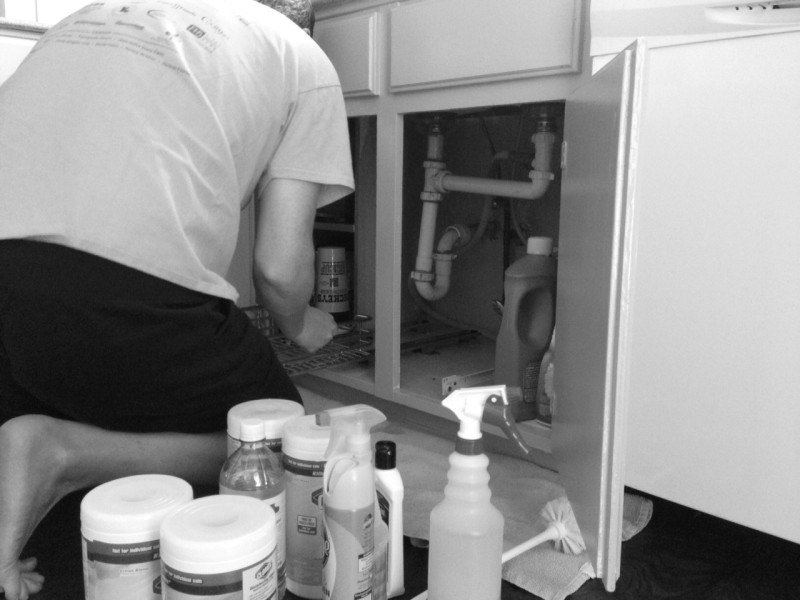
what a mess! handy husband In addition to getting re-inspired, this little project also gave me the opportunity to think about my marriage a bit. You see, I learned early on to let Matthew have the reins on projects like this. For most women, that wouldn’t be a problem. For me though, it was a bit difficult. You see, I grew up with a mom who knew how to (and did) fix/repair/change/build/update everything herself. I feel pretty confident in my ability to do most minor fixes and updates around the house. I certainly won’t argue that I’d do everything perfectly. However, I do feel like I could make it work. When Matthew and I married, there was a bit of a standoff on who would be the one to handle these sorts of things. I definitely wanted him to fix things; I just had a bit of an opinion on how it should be done. Marriage is absolutely about a give and take between spouses. I decided the common DIY would be the area where I gave. That’s why I sat patiently and explored Instagram while Matthew selected what supplies we needed. He gives me the reigns sometimes and I hand them off to him sometimes. Today that means that I’ll search for amazing light fixtures while he determines how to best caulk the new sink. It’s a win, win for everyone.

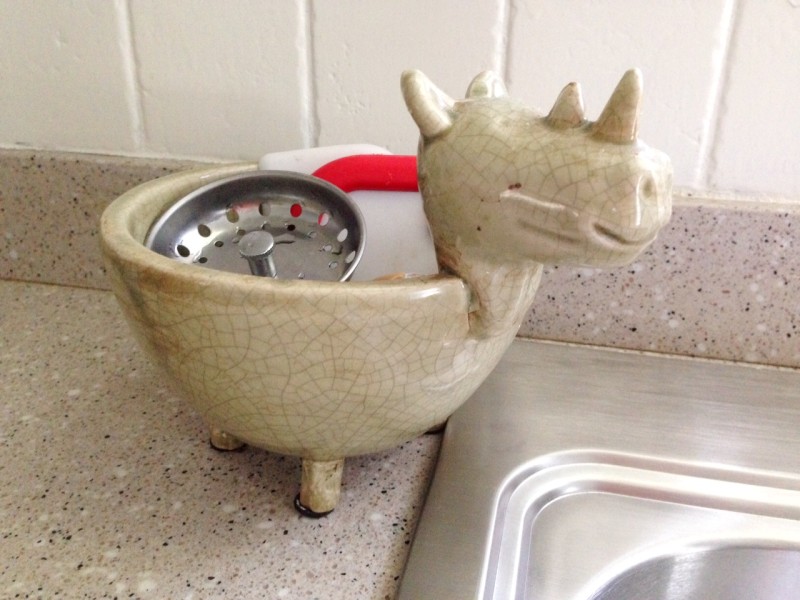
Use a cute bowl to collect miscellaneous items by the sink! // pamelapetrus.comnew sink!Up next on Matthew and Pamela Very Slowly Update a House from Top to Bottom…..who knows. I guess we’ll see what breaks next. On a serious note, I promised you guys a house tour this month. I’m going to need for things to stop breaking in order to make that happen!

P.S. Don’t look too closely. Neither of the curtains pictured in this post are hemmed. That’s on the agenda for another day.  I’m planning a before/after post (including details about that stenciled wall) once those curtains are hemmed and a few other items are marked off the list. Hang in there!

Bathroom Gallery Wall

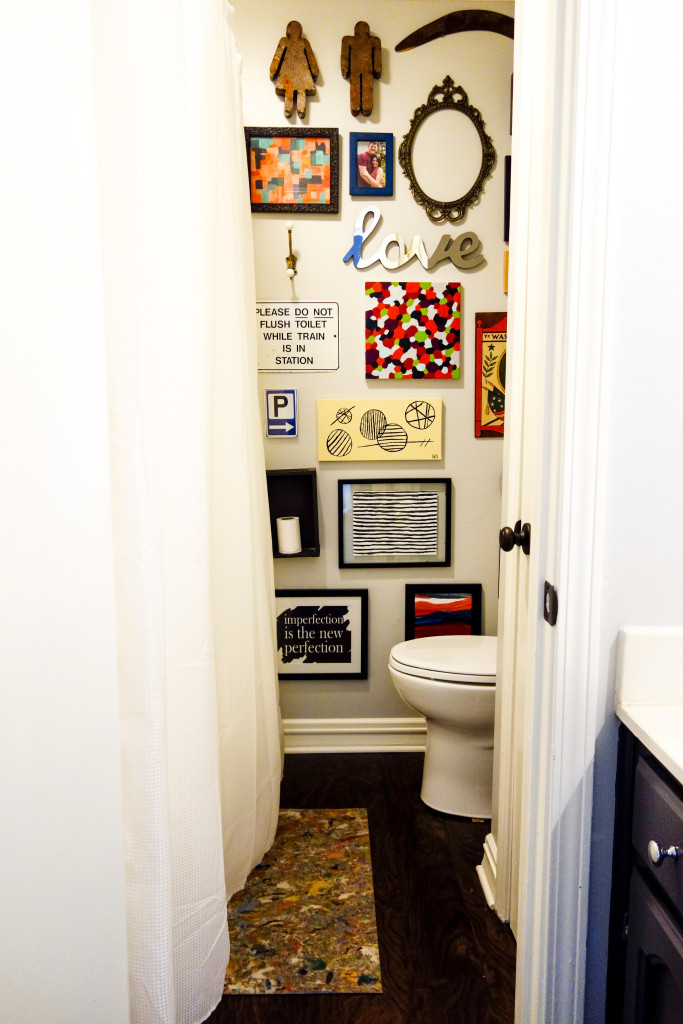
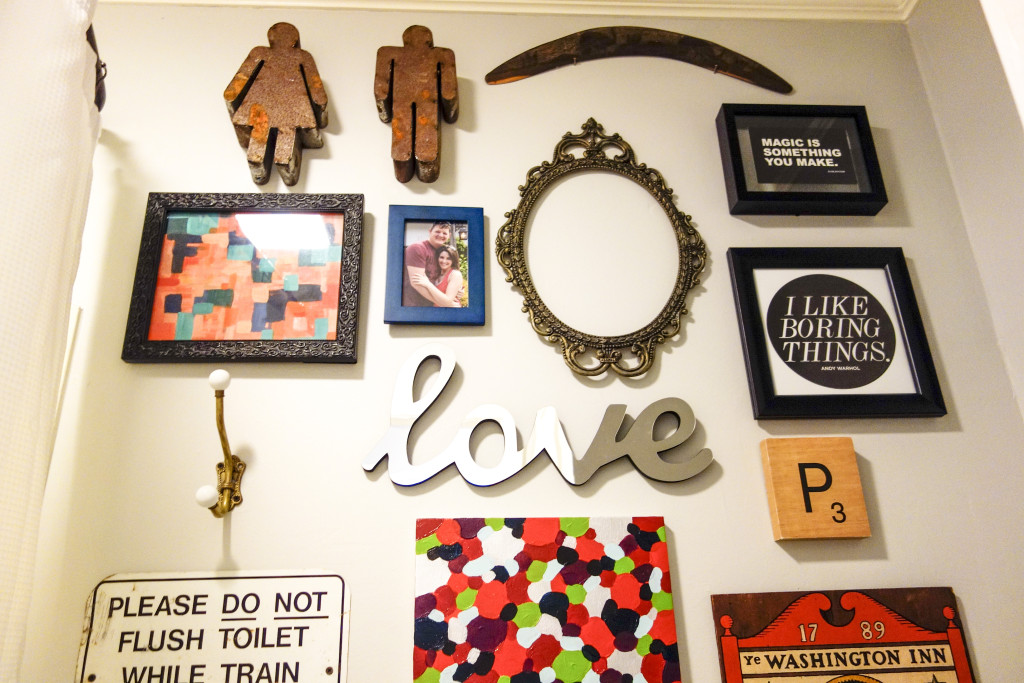
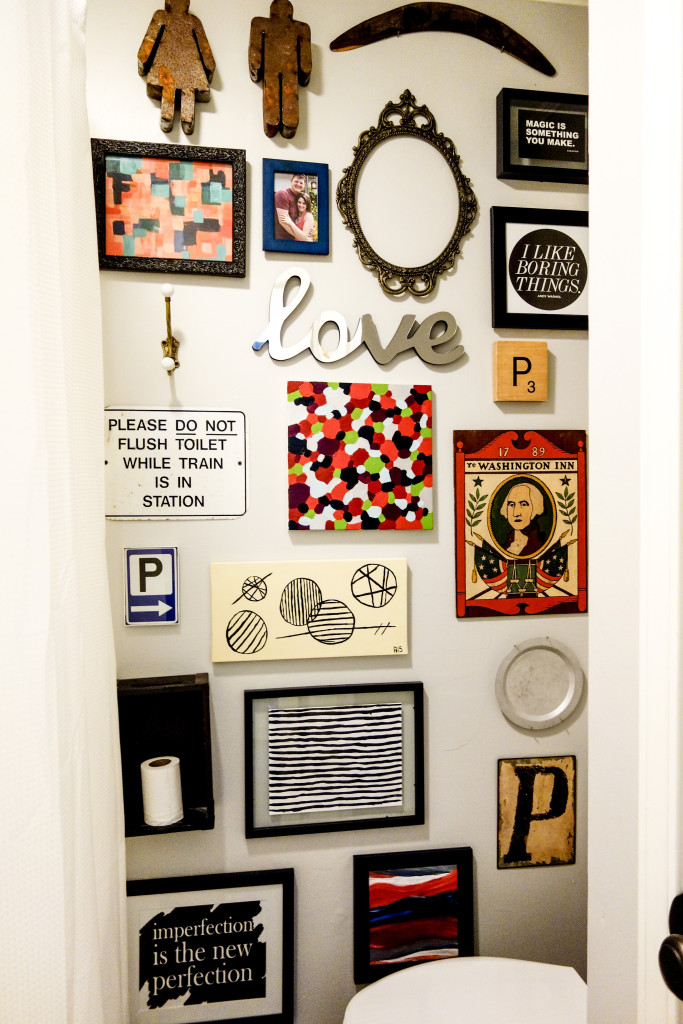
Bathroom Gallery Wall (9)It is no secret that I love a gallery wall. I’ve learned that I’m very far from a minimalist. Instead, I love a collection of several things together…in an organized and uncluttered way, of course. Ever since gallery walls started popping up on Pinterest, I’ve wanted to do one on every wall. I think it’s a great way to showcase multiple things you love, fill a large space, and add an ample dose of interest to your décor. Today, I’m showing you the wall I’ve done in our master bathroom.
Bathroom Gallery Wall (12)The master bathroom is one of those “big projects” on our renovation list that will likely be done in the year 2072. We did a few small things to make it work better for us, like taking out a closet in the sink area to add more standing room. I’ll show you the full bath eventually. Today, we’re just taking a peek into the shower/toilet area.

Bathroom Gallery Wall (10)While we wait on the bathroom remodel fairy to arrive, I needed some sort of plan for giving this small space a bit of personality. One way to add some pizzazz to a small space is through the paint color. I did neutrals (all shades of gray) throughout the house because I had no idea what colors I wanted and a limited amount of time to decide. I did a lighter gray (Sherwin Williams light french gray) in here because I wanted the room to feel as large as possible, especially since there are no windows. The basic light gray, though, left the room feeling pretty bland.
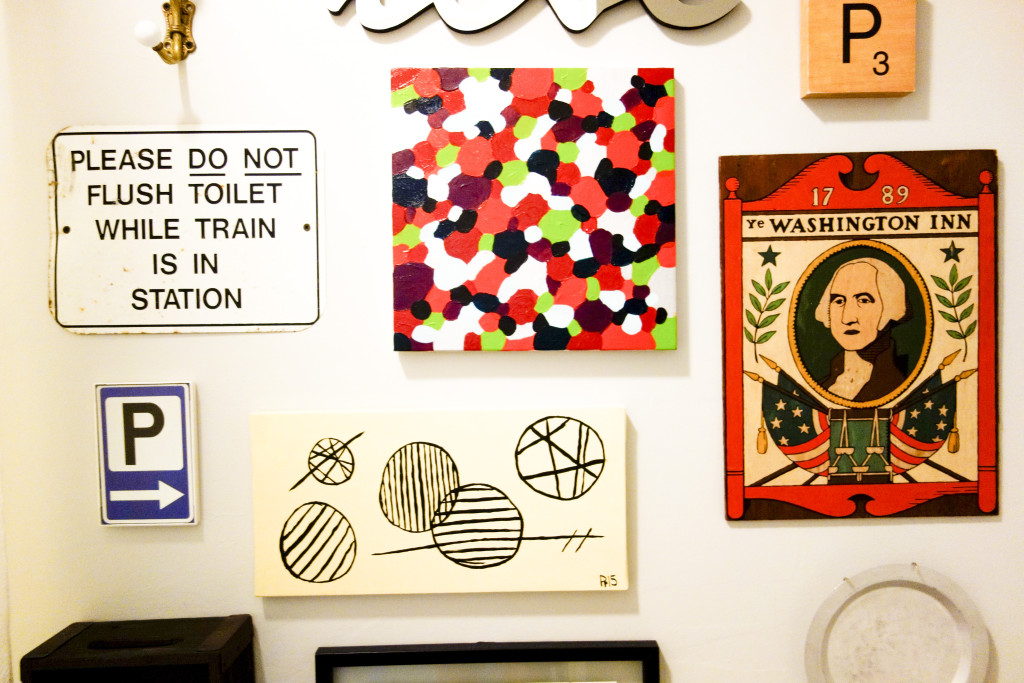
Bathroom Gallery Wall (13)For the first several months, this room only had the light gray walls and plain white shower curtain. (It turns out that extra-long shower curtains are hard to find! I caught this one on sale at target.com and thought it was that fancy waffle knit fabric. It’s totally not, yet has served its purpose until I find something different.) After months of using the bland bathroom, I knew I had to do something bold in there. I found the marbled rug at TJ Maxx and started pulling together items for the wall that matched the rug’s crazy colors.

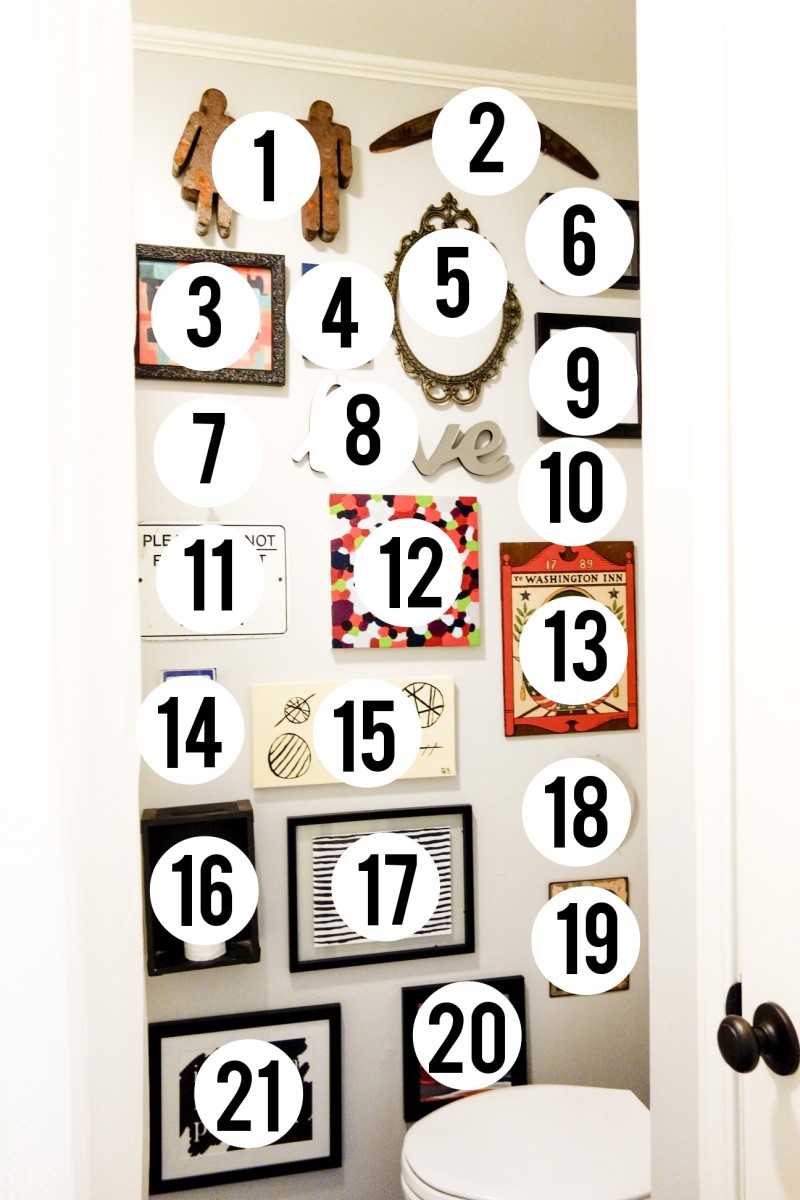
The collection started with that George Washington board. From there, I pulled together items that I already had and only had to purchase a few small things to fill in holes. I also made or re-purposed several items. Immediately after getting so many colorful items on the walls, I let out a sigh of relief. The room feels so much more alive and inspiring now…just what you need when you’re struggling to wake up in the mornings. I’ve included a list of resources below in case you’re curious about a certain piece.

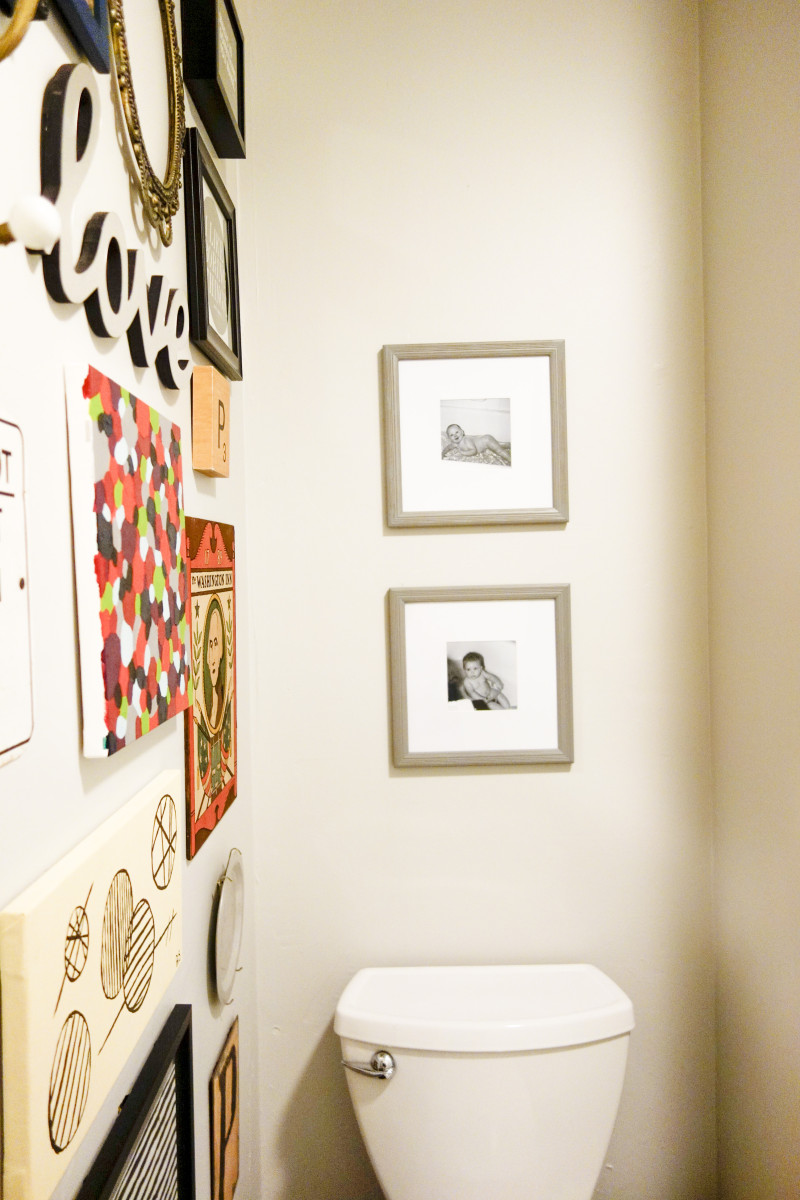
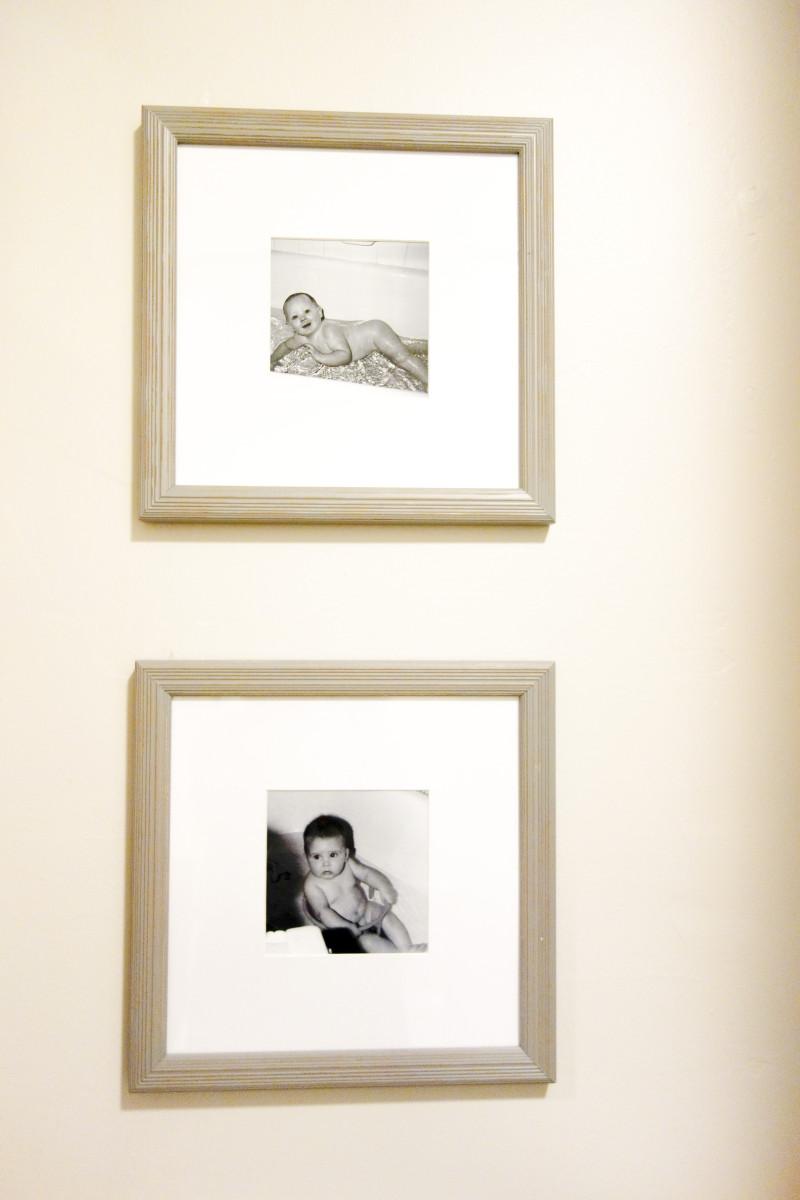
Bathroom Gallery Wall (5)Bathroom Gallery Wall (7)In addition to adding the gallery wall, I also added photos of Matthew and me as babes in the tub over the toilet. I came across this idea in the early days Pinterest, and the link has since been removed. (If this was your original idea, Random Person on the Internet, here’s a high five for you!) I had the photos printed in black & white, because let’s face it, late 80s film photography isn’t known for its outstanding quality. I also decided to do them in light gray frames so that they wouldn’t take away from all of the color on the nearby wall. I didn’t want the toilet wall to be blank, and doing monotone art there would add something without distracting from the chaos on the adjoining wall. I must say, I absolutely love seeing our baby photos every day. I think it’s adorable, and I’m sure my husband is thrilled to have his naked bum on the internet. Shhhh…it’ll be our little secret.

Bathroom Gallery Wall (16)In other bathroom news, adding a curved shower rod made a huge difference in making the shower feel more spacious. It didn’t make the room feel smaller like I thought it would, and made the shower feel 100x bigger. The extra-long curtain also made a difference. Adding the extra height made the ceilings feel taller and gave the impression of extra space.

Overall, I’m pretty pleased with the outcome of the gallery wall. I’ll probably adjust some things here or there as time passes. For now, I’m happy with the outcome considering how little the project cost. If you’re interested in other walls I’ve done, check out my mirror wall and the small collection in my rent house living room. I certainly have more collections planned for this house and will share those as they’re completed!

Sources: 1. Nashville Flea Market 2. gift from Australia from Matthew’s grandmother. 3. Elise Blaha Cripe 4. frame – Hobby Lobby with our second photo ever taken! (I intended to replace the photo with something else and then decided it could stay.) 5. vintage 6. framed marketing piece from one of my Elise Joy purchases 7. my Mom’s house (I think.) 8. Hobby Lobby 9. free printable from the A Beautiful Mess newsletter 10. Hobby Lobby sale isle ($2!!) 11. TP Outdoors warehouse & it’s a favorite! 12. DIY painting 13. thrifted 14. Hobby Lobby ($2!) 15. DIY 16. Hobby Lobby 17. DIY & it’s a favorite. 18. thrifted 19. Hobby Lobby 20. DIY 21. Hobby Lobby (purchased right after this post)

Hanging all the things.

chalkboard artSunday was my only day off this week. This means I had one million personal items that needed to be done on Sunday, including not setting an alarm and slowly drinking my coffee…you know, the important stuff. Somehow amidst trying to squeeze in enough rest to make it through the upcoming week, I made quite a bit of progress on the home front.

I’ve mentioned before that hanging things on the wall gives me a bit of anxiety. After writing this post (and reading that fantastic book), I made a tremendous amount of progress with decorating. I was inspired and encouraged and even a bit fearless with making things happen. Then I hit a wall. Several months have passed where I’ve done very little decorating at all. The ideas were still coming, yet I was overwhelmed and not actually doing anything. I seemed to have hit that decorating paralysis where I was too afraid to do anything until I was certain. Or until I had a perfect plan.

gallery wallThankfully, I snapped out of that over the weekend. I mentioned that one of my August goals is to share a home tour, showing my home in its current state. (I feel my blood pressure rising just typing that sentence.) Even though we’re not even close to finished, we have made a ton of progress with our renovation. Knowing that I want to share a progress report this month, has forced me to really think about the unfinished portions of my home. In addition to the one million projects we haven’t started, there are also one hundred projects that just need to be finished. With our busy schedules, it’s easy to put off finishing things because we actually need time to rest or spend time with family/friends.

bedroom artWe’ve also started several new projects lately. We are currently in the middle of turning our guest room into a guest room/home office. This means we have mattresses standing in our foyer…totally normal. All of the items that were safely hidden under the guest bed are piled in my dining room. We’re also FINALLY making some progress in my closet room. We purchased a new storage system from Ikea that I’m so very excited about. However, some of the pieces were out of stock, so we’re at a standstill on that project too. This means there are piles of clothes here and there that don’t have somewhere to live just yet.

kitchen wallStarting two new, major projects while I still didn’t feel settled in the other rooms has made me feel a bit crazy. Sometimes, I’ve wanted to throw my hands up and quit. Or move. There has been a certain amount of chaos around our home lately that hasn’t been very conducive to progress for me. (Just imagine folded laundry piled up not far from the protruding mattresses.) I know that you have to start somewhere and tackle a bit at a time. However, sometimes I reach a point where I just can’t think that rationally. Finally, I started chipping away at the chaos today. I started in a corner of the dining room and worked through things one piece at a time. Shortly after squaring away a few items, I began feeling inspired to hang some things. I’d had a few lingering ideas lately and had not had the time (or the courage) to actually start putting nails in the walls. I recruited Matthew to come along, and we hung several new things here and there. It transformed my entire day and my outlook on our home.

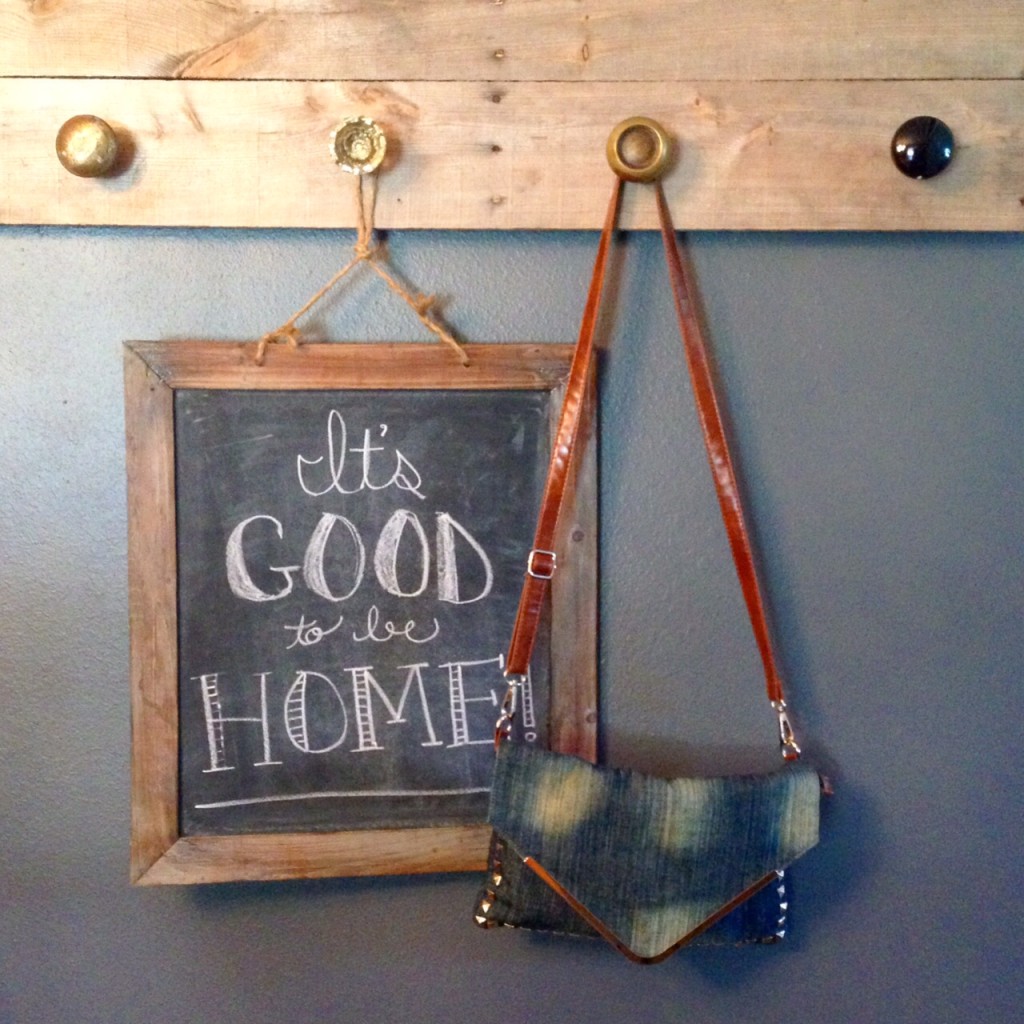
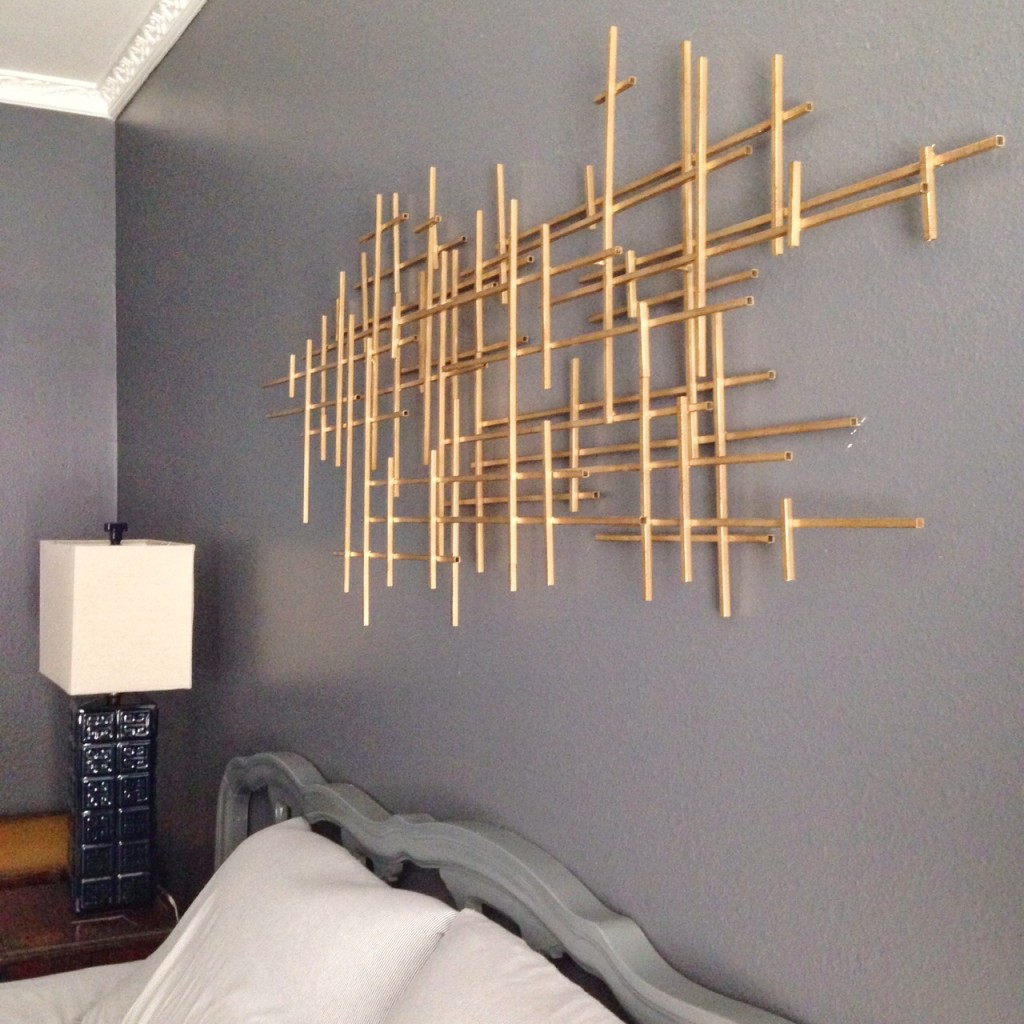
First, we hung a new (and slightly dangerous) Hobby Lobby find over our bed. We finished my bathroom gallery wall that I’ve been working on for months. We hung two sets of curtains (!! – even though one is just temporary). We hung the pallet hanger that Matthew made for me for our second Christmas, and I played with chalk on an old chalkboard to hang there. I also ordered a print for the kitchen from Etsy and hung a frame to put it in.

bedroom curtainsAfter so long of a creative funk, it felt amazing to make some progress. Several of the projects still need some attention or are temporary, yet it still feels great. I am reminded that I CAN get this home looking how I’d like and that I WILL eventually be happy with it. I never intend to be “finished.” However, I want it to feel good enough. After yesterday’s progress, I’m feeling much better about the possibilities. I’m also wanting to paint everything deep, bold colors. (Thanks, Pinterest.) I’m fairly certain that at least a wall or two will become this green color. Brace yourselves! If you haven’t seen a home tour here by the end of the month, you might need to prod me a bit. I’ll probably be hiding in a corner somewhere…next to something that most likely doesn’t belong there.

(P.S. These aren’t the best photos, because I was running out of daylight. Please forgive me.)

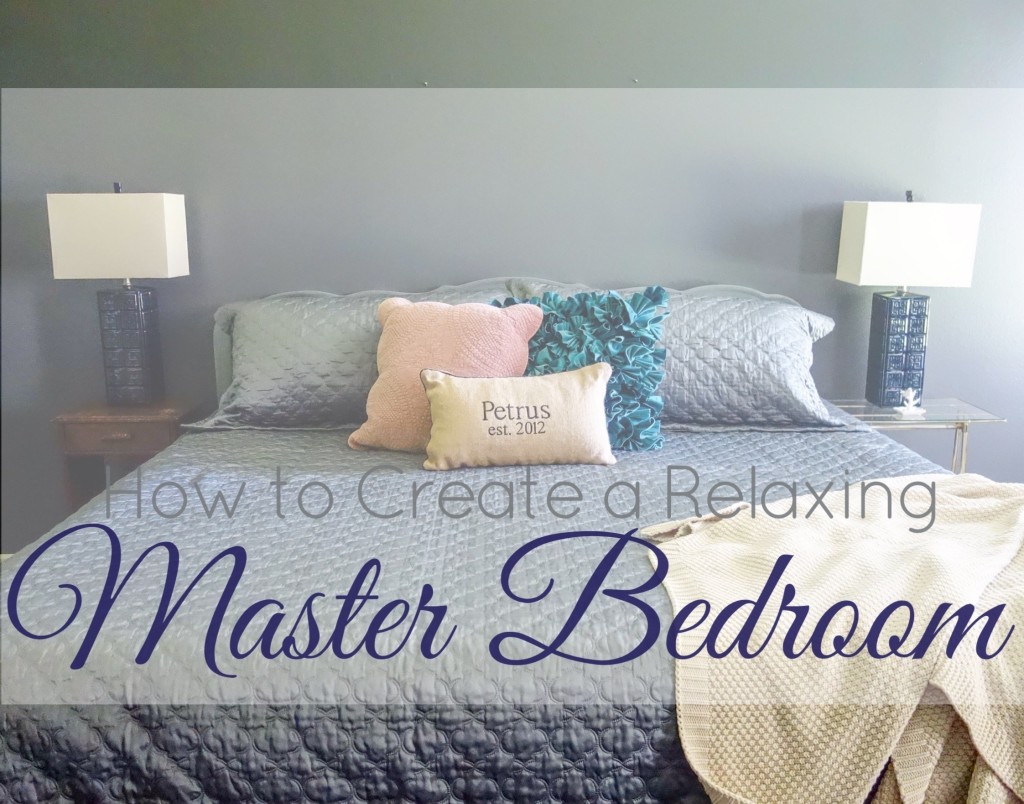
How to Create a Relaxing Master Bedroom

a relaxing master bedroomThere are so many theories on what a master bedroom should be like. I like to think that I have my own set of theories and that they’re likely a combination of the massive amount of rules out there. There’s also a chance that they’re complete, polar opposites and totally contradict the “rules.” Doesn’t matter.

Here’s what I think a master bedroom should be like. It should be calming and relaxing. It should be a safe haven to hide away in. It should either be filled with light or dark and moody…whichever you prefer most. It should be free of clutter and distraction, and it should be a private, comfortable, functional space where you can easily wind down.

Our last bedroom was none of these things. I never “finished” that room (or really even got a good start) . I was immensely stifled by the horrible beige walls, and I had no motivation or inspiration for the space. We had so much extra crap in there and nothing really made any sense. I HATE thinking about that room. I loved it’s beautiful corner windows. That’s it though…nothing else.

master bedroomWhen we moved to this house, I knew I’d pick a dark color for the master. I wanted the room to feel dark and moody…the total opposite from the rest of the house. If you browse my inspiration board on Pinterest, you’ll get an idea of the look I was going for. I finally chose a deep, gray paint color (Sherwin Williams Peppercorn), and I think this is the color that my dreams are made of. I think it’s 100% perfect for a master bedroom (It’s also in our dining room.), and I absolutely love it.

I made a commitment when we bought this house that I’d finish our bedroom first. Practically everything you read says that in a time of transition, you should stabilize your bedroom first. It gives you a haven from the madness and ensures that you still sleep well. Besides, we had lived with a chaotic bedroom for so long that I desperately wanted a nice space.

As we began getting squared away, it felt like the master bedroom wasn’t coming together liked I’d hoped. Other rooms were feeling more put together than this one, and I felt like I was slipping into that same messy-bedroom trap. I’ve learned that I absolutely cannot force inspiration, so I just had to be patient and wait for things to come together in my mind. It turns out that our bedroom still ended up being the first room that I felt was complete! I am so, so happy about that.

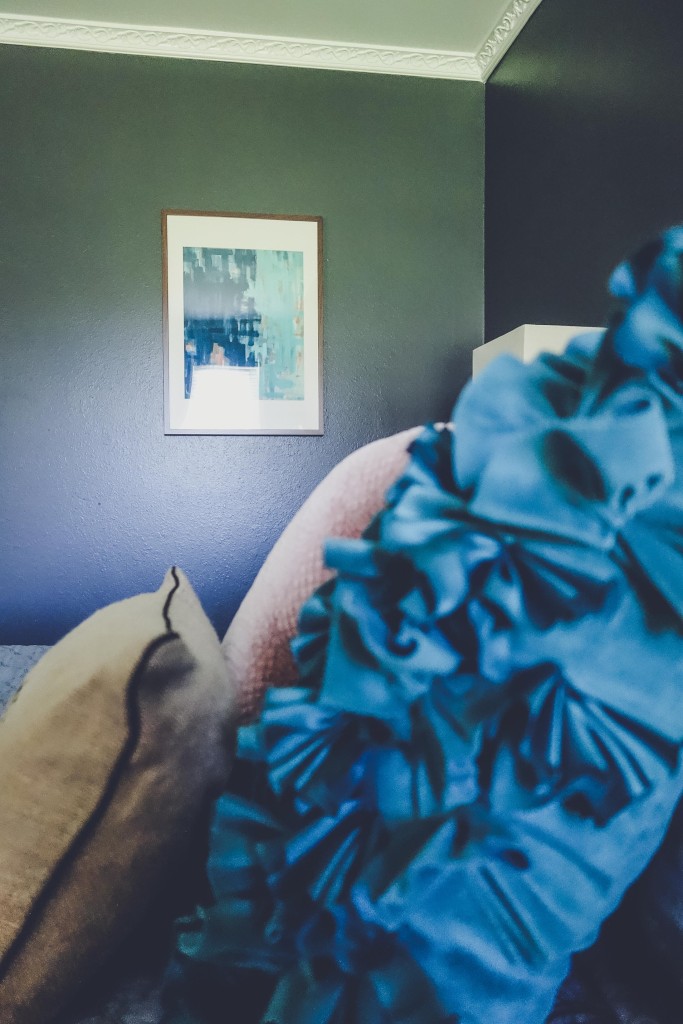
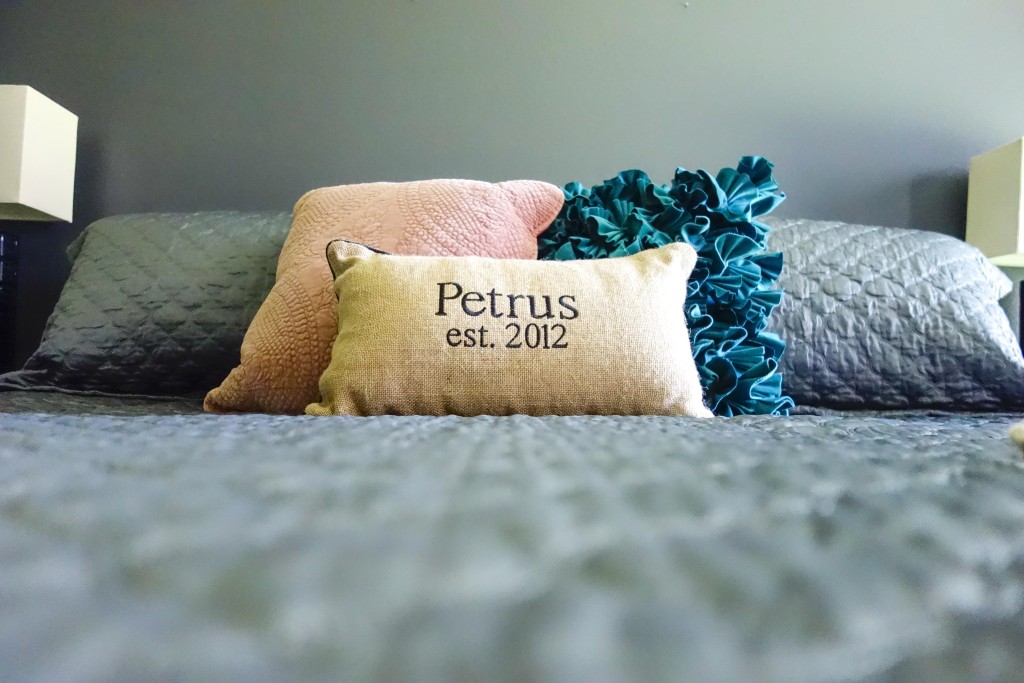
master bedroom pillowsI’m only moments away from sharing the full room tour, as there are just a few finishing touches that I want to complete first. For now, enjoy these sneak peaks! If you’re feeling like your bedroom is the exact opposite of a safe haven, consider these few items:

  1. Remove any unnecessary clutter. Try not to stack thing in corners or on tops of dressers. Clean corners and surfaces, provide a much more relaxing space.
  2. Fold laundry somewhere other than the bedroom! Baskets of clean (folded or unfolded) clothes spilling over onto the floor, create the feeling of chaos. The first choice wood be to go ahead and put the clothes away (obviously). If that’s not an option, consider storing the clothes baskets in another room until you can handle them.
  3. Use lamps instead of overhead lighting. The light of a lamp or two provides a much more calming environment than harsh, overhead lighting. I almost never use the ceiling light in our bedroom. Lamps are much more relaxing (and romantic!).
  4. Decorate with your favorite items. Some “rules” say to keep things minimal in a bedroom. While that’s an option, I don’t think it’s mandatory. Instead, I say surround yourself with things that you love. Use your favorite pieces and highlight the things that make you the happiest.
  5. Choose a good paint color. As with any room, the paint color can either make it or break it. Like I said before, the awful beige of our last bedroom sucked the life right out of me. I don’t believe that your room color has to follow the traditional guidelines. Instead, choose whatever color relaxes and inspires you the most. I simply love our dark gray walls, and I couldn’t be happier with the color.
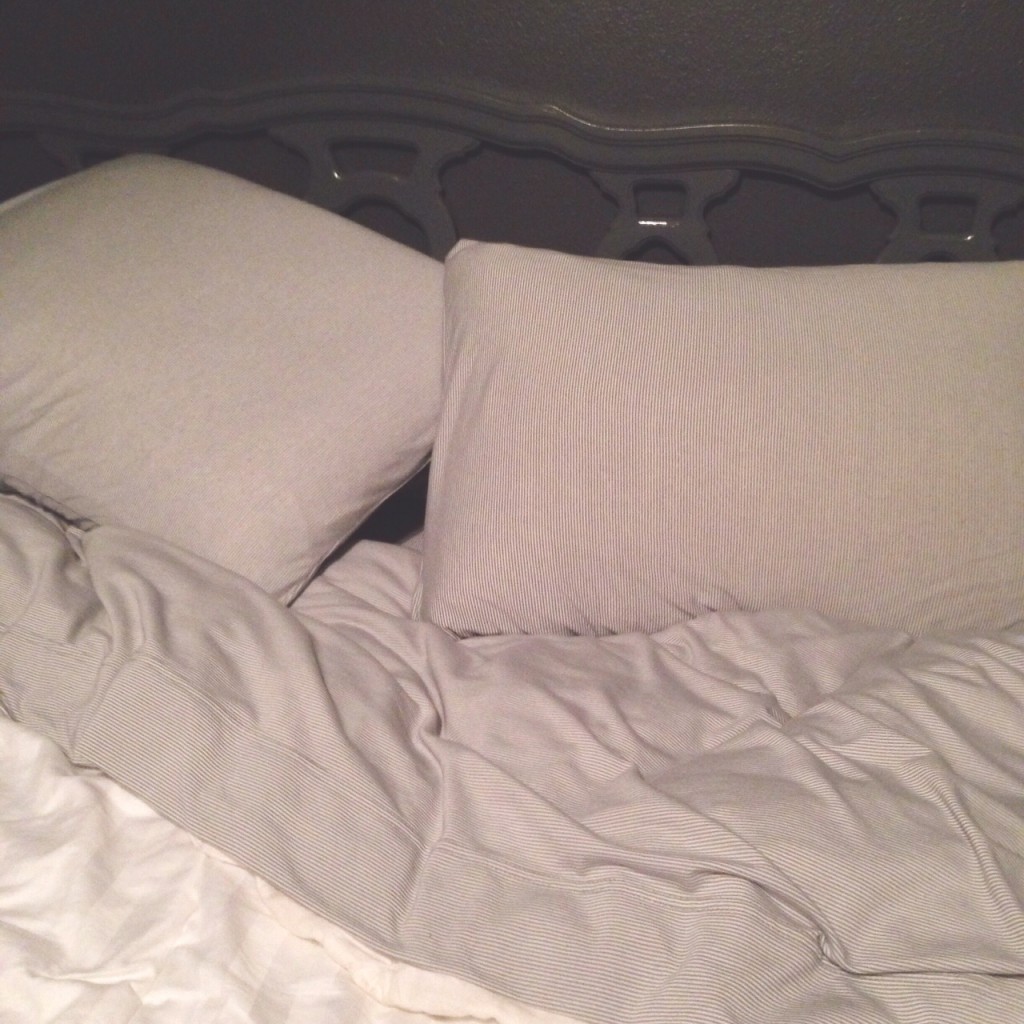
  6. Choose good bed linens. Regardless of the style of your room, having comfortable, appealing linens makes a huge difference in how the room looks/feels AND how well you sleep. If you’re going to splurge on anything, choose a good mattress and nice sheets. (Read how much of a difference our new sheets made in last month’s post, and they weren’t even expensive!)

Again, the actual style or color scheme that you choose for the room isn’t as important as how the room makes you feel. The ultimate goal is that you end up with a space that you can retreat to and relax. Our best night’s sleep come from a space in which we feel totally comfortable.

If you’re feeling overwhelmed by creating a relaxing space, start small. Remove a few items or tackle one small project at a time. Ending up with a space that you love usually doesn’t happen overnight. However, if you don’t start somewhere, you’ll never reach the finished product. What one, small thing can you do today to work towards a happy space? What one, small thing could you do tomorrow? That’s all you have to focus on….one tiny task at a time.

What will you do today to get started?

New Sheets

30New SheetsI’ve written before about trying to live a beautiful life, and I’ve made a diligent effort towards slowly replacing the less-beautiful things with items that are more fulfilling and inspiring. I didn’t realize, though, that new sheets were going to be part of this quest.

Matthew and I purchased our first new bed several months ago and we’d still been using the hand-me-down sheets that came with our old bed. We only had one lonely set (other than a flannel set that we can only use when it’s freezing), so we always had to strip the bed down, wash the sheets, and put them right back on. These golden yellow sheets were super comfy, yet they’ve never matched our bedroom. They didn’t match in the new house or our previous rent house.

In keeping with my don’t-replace-it-because-it-works-just-fine mentality, I continued using these comfy, gold sheets that didn’t match. I actually wanted to have a second set of sheets and never purchased any because I couldn’t commit to a color theme.

coffee and new sheetsThen finally it happened, our beloved hand-me-downs ripped straight down the middle. I’d be lying if I said I didn’t consider trying to patch them or sew up the tear. I had SO MUCH anxiety over buying new sheets. I’m not even sure where it came from. I guess it boiled down to the fact that sheets are expensive (!!), especially for a king bed. I was so afraid that I’d drop a ton of money on new sheets and then switch the color scheme of the room or hate the quality of them. (Part of the problem was also that I really, really wanted fun, patterned sheets, yet most of the pretty ones felt a bit like cardboard.)

Whether I was plagued with anxiety or not, the reality was we had to have new sheets pronto. I finally made a decision at Bed, Bath & Beyond and had to take a nerve pill at the checkout (kidding!). I spent 45 minutes making a decision only to get them home and they not fit the bed. Turns out, our fancy, new mattress is only 15″ deep and most new mattresses are 18 or 20-something inches. So…back to the store we go and we came home without new sheets.

One glorious morning I ordered a second pair online, thinking they were the right size. We waited for over a week for them to be delivered, while still sleeping on ripped sheets. Guess what? They didn’t fit. Finally, on a quick trip to Target, I was determined to leave with sheets or something of the sort. Our options were limited since most of the nicer sheets have deeper pockets, and we made a decision and left the store.

We ultimately decided to give a jersey knit sheet a shot. (I’ve always been a fan. Matthew…not so much.) We were concerned about them being hot, yet that hasn’t been much of a problem. Adjusting to the jersey feel has taken some time. However, the important part is, we have sheets that aren’t ripped!! Plus, these were a fraction of the cost of the ones I’d bought earlier.

New SheetsThe purpose of this post isn’t really about shopping for sheets though. Instead, it’s about how I unintentional brought more beauty in. Without realizing it, those gold sheets had been taunting me. Seeing them was a constant reminder of something I hadn’t marked off of my list…buying new sheets. The gold color stood out like a sore thumb against the rest of the room and as silly as it sounds, they sucked the beauty right out of the place.

Within moments of replacing the sheets, the room felt quiet and put together. Every time I crawl into bed, I feel relaxed and accomplished. I may still be adjusting to the feel of jersey, yet I’m very well adjusted to the “look.” As a matter of fact, it almost makes me happy to look over and see a scattered, unmade bed with these new, lightly patterned sheets peeping out at me. Without realizing it, I had replaced something good-enough with something great.

I do still need a second pair of sheets. For now, though, I’ll relish in the accomplishment of finding one new set. (If you know of somewhere to get good, quality sheets with a 15″ pocket that aren’t a full million dollars…please share!)

If you sit and think for a moment, you can probably think of a few things that you could replace with something more beautiful/functional/inspiring. The fact of the matter is, what we surround ourselves with controls our overall mood. What do you have around you that could be tweaked to create a more inspiring space? Making little changes here and there can certainly make a big difference!