
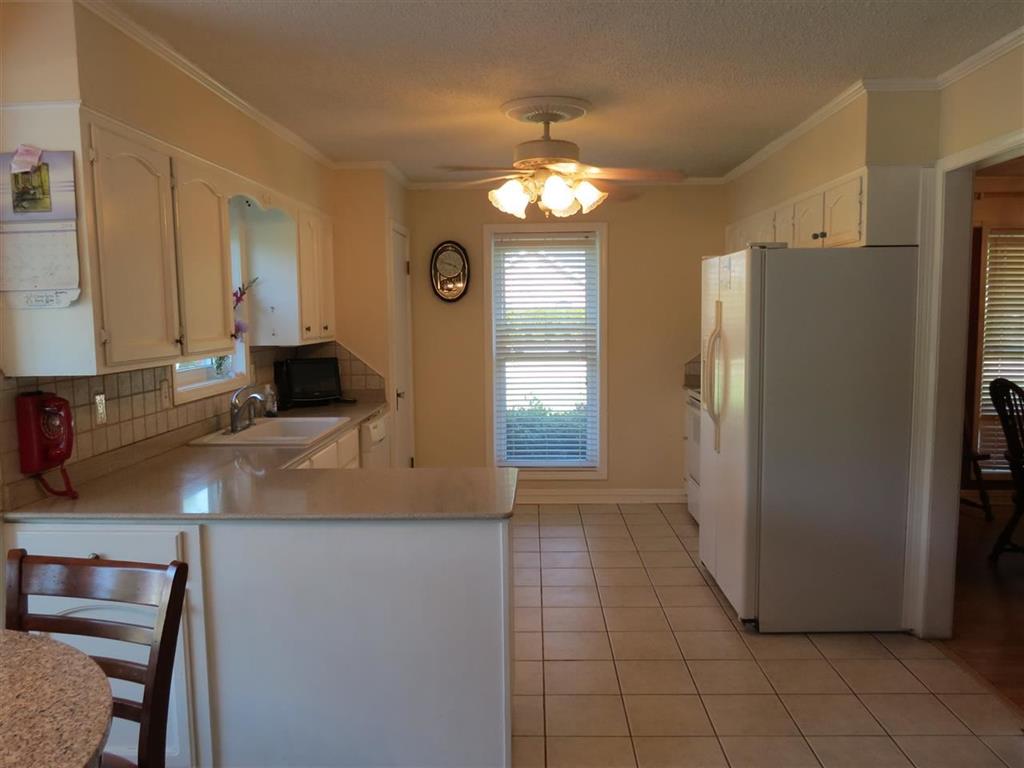
 I bit the bullet and showed a house tour showing where we are in renovations a few weeks ago. One of the rooms that I’m most happy with and seems to have shown the largest transformation is our kitchen. When we were house shopping, the natural light pouring in to this area is one of the things that sold me on the home. It wasn’t my dream kitchen, yet it was 1,000x better than the kitchen we had in our rent house. Today, I’m sharing the progress of what we’ve already done and what we hope to do later. I hope you enjoy!
The first thing we did in the home was have the popcorn ceilings scraped and every. single. thing. repainted. As you can see in the before photos, the house was done in all warm tones which is the complete opposite of what I prefer. For the kitchen, I chose a light gray for the bottom cabinets and the ceiling and white for the top cabinets and walls. (Full disclosure: when I chose the colors, I thought the countertops were primarily gray. Turns out that the primary color is tan, so I’m working to mix the colors somehow.) I painted the walls white because I really wanted to enhance the brightness of this room. It’s true that people spend a lot of their time in the kitchen, so I wanted it to be as bright and happy as possible.
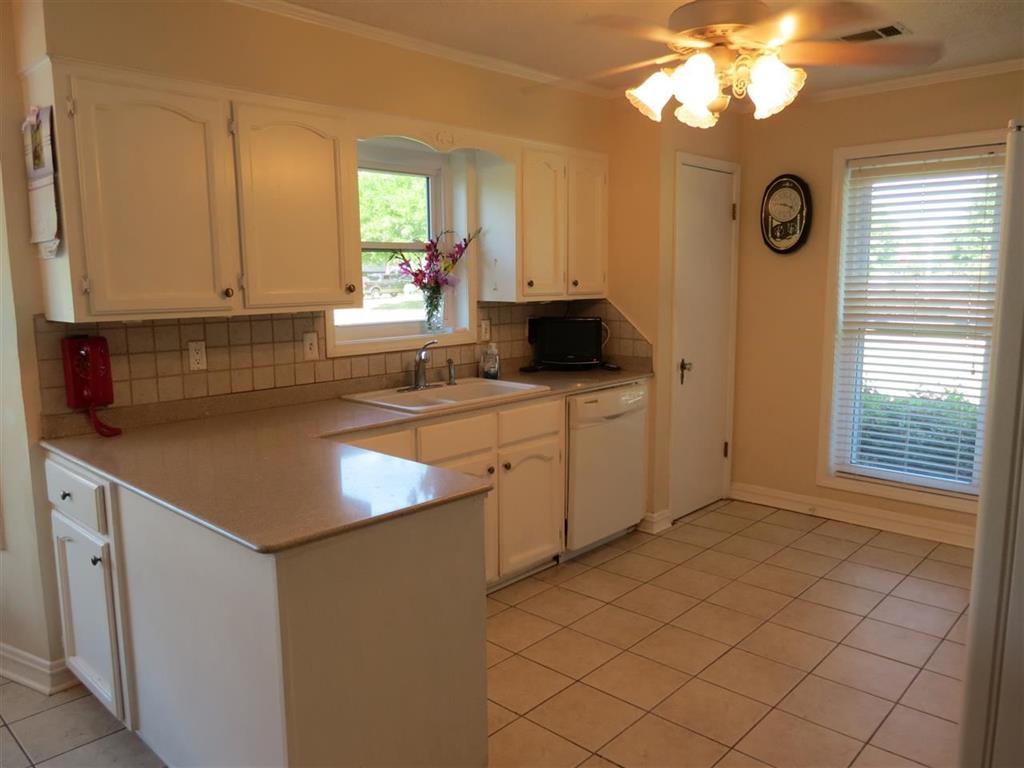
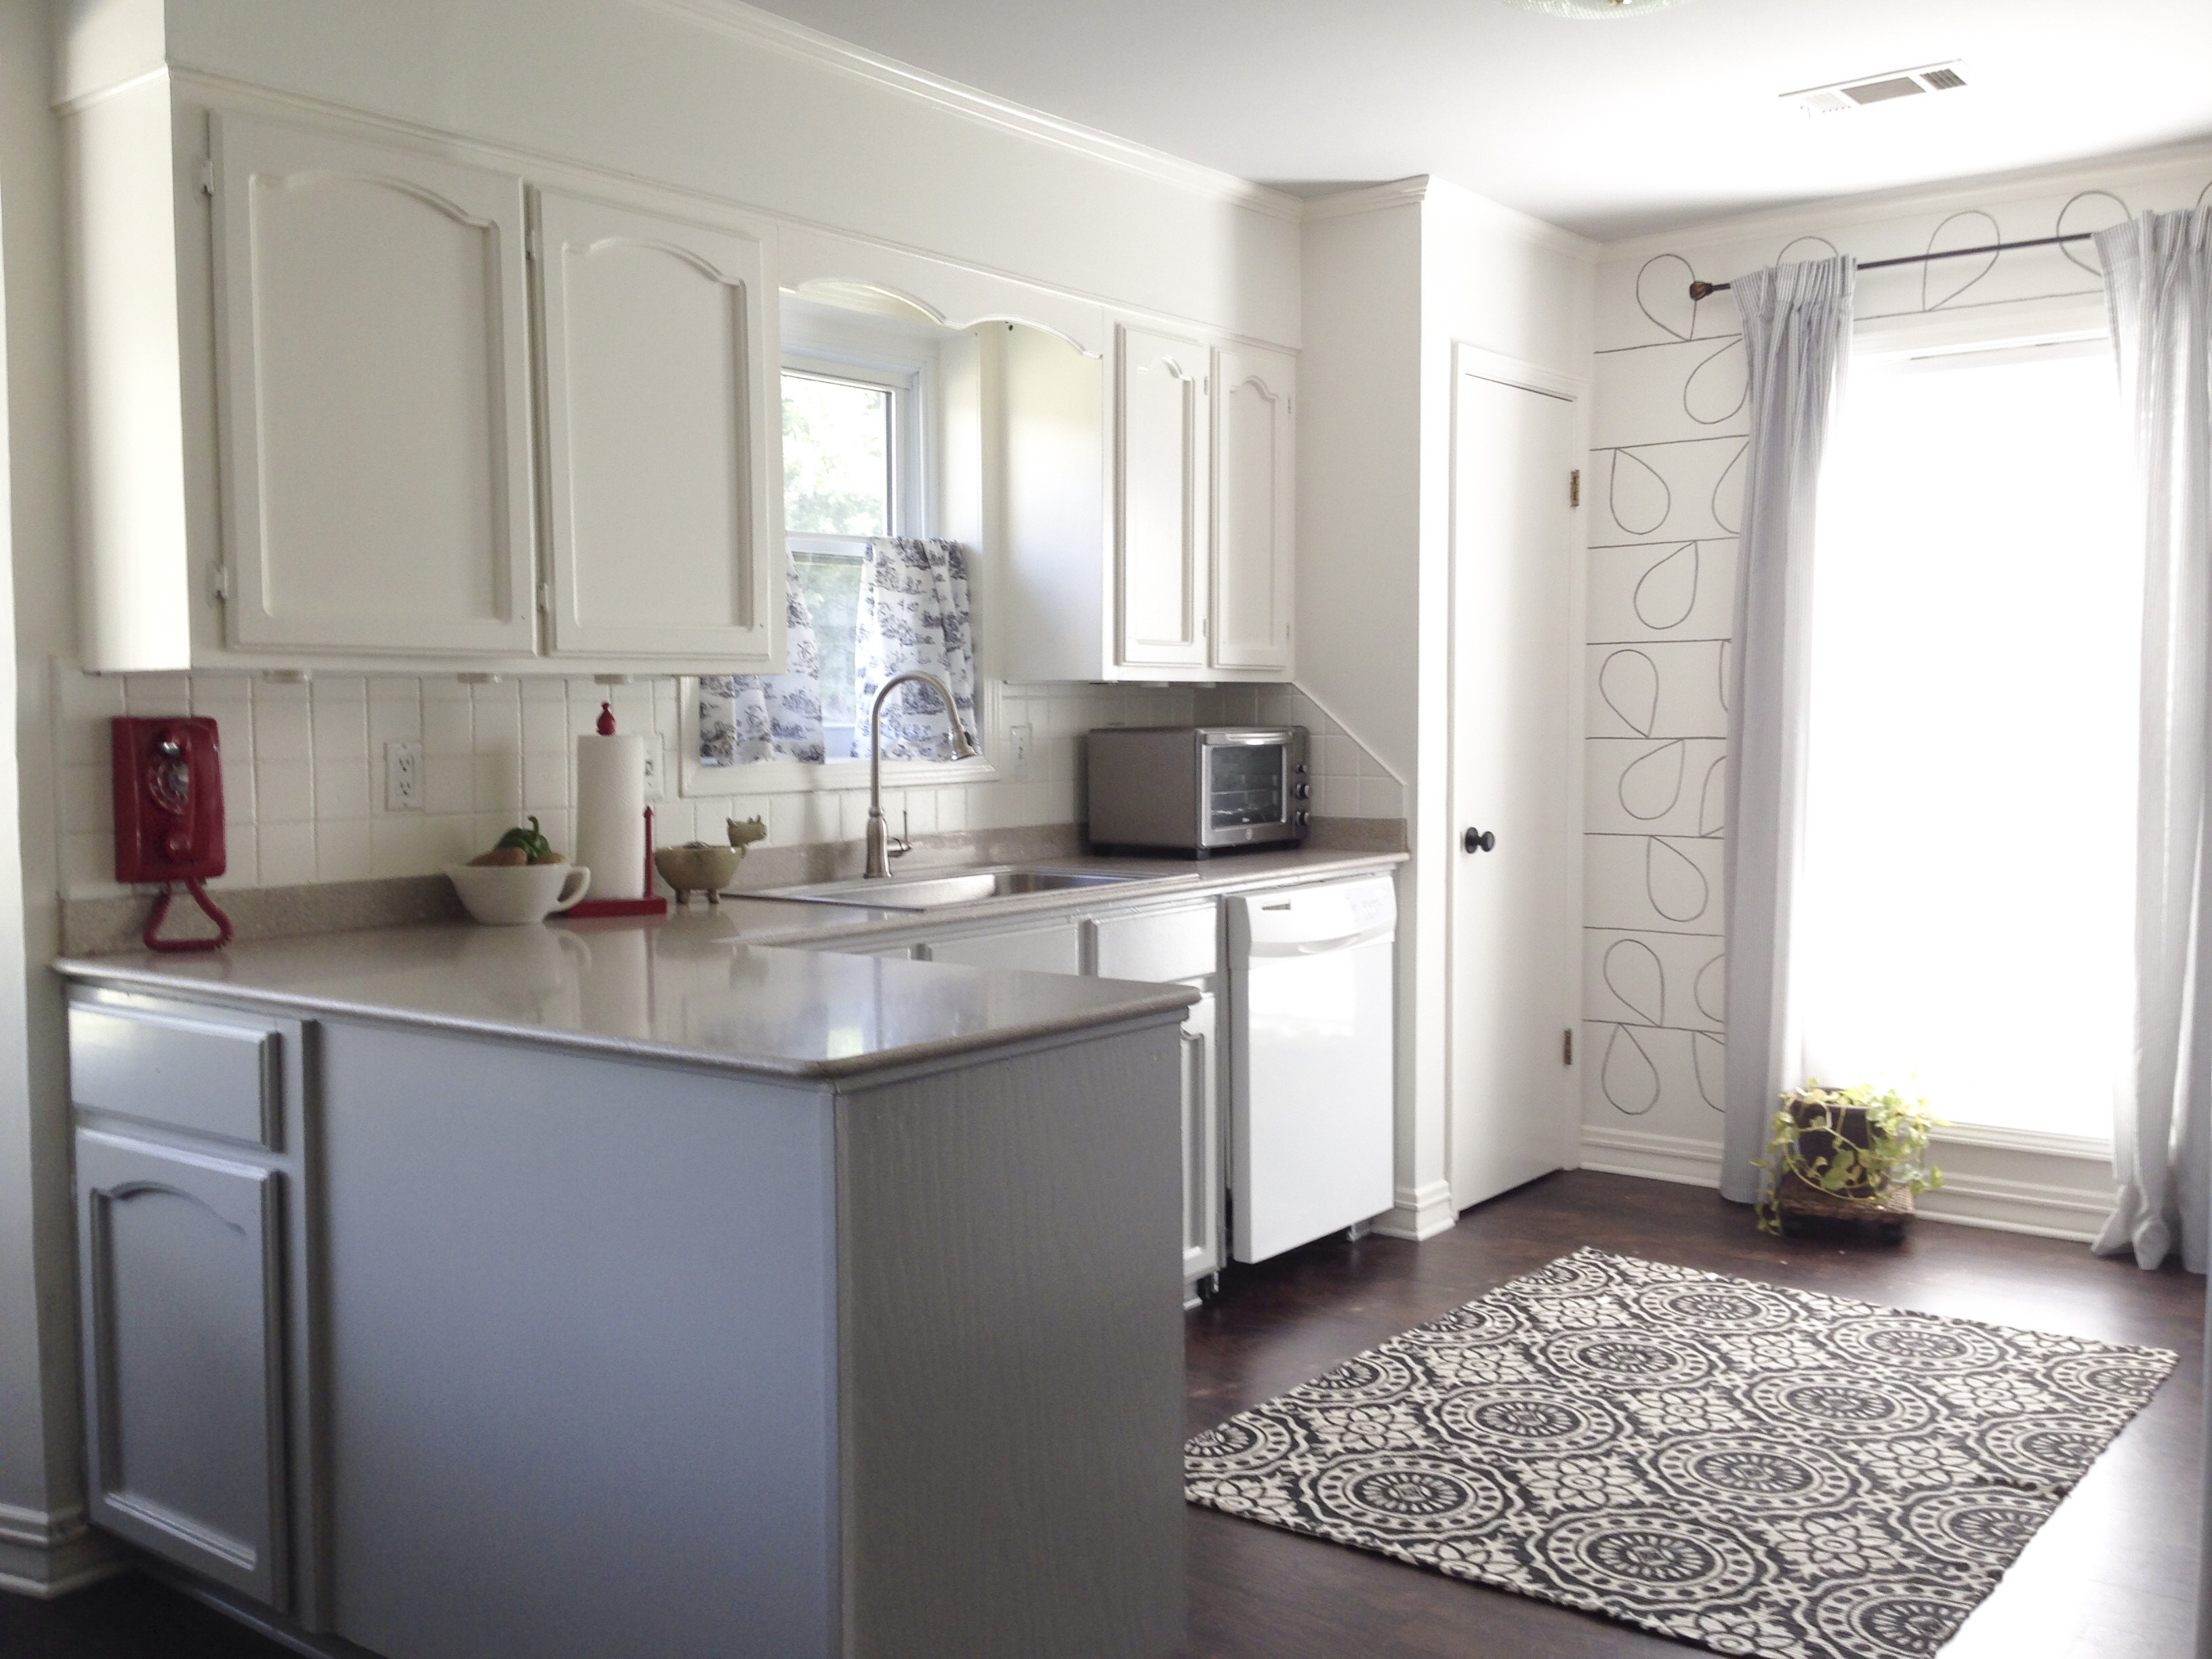 At the last minute, I also asked the painters to slap a coat of paint on that tile backsplash. Most people think we replaced the tile, and we didn’t…that’s just a coat of white paint. It made a HUGE difference. We had plans to redo the backsplash, and I didn’t know exactly when that would be. It turns out that about 100 other projects were more important than a new backsplash, so I’m so glad I thought to paint it for now. The paint has held up tremendously and we’ve had no trouble with the coverup. Have an ugly tile backsplash you don’t like? I’d suggest trying some paint before spending the time and money to replace it.
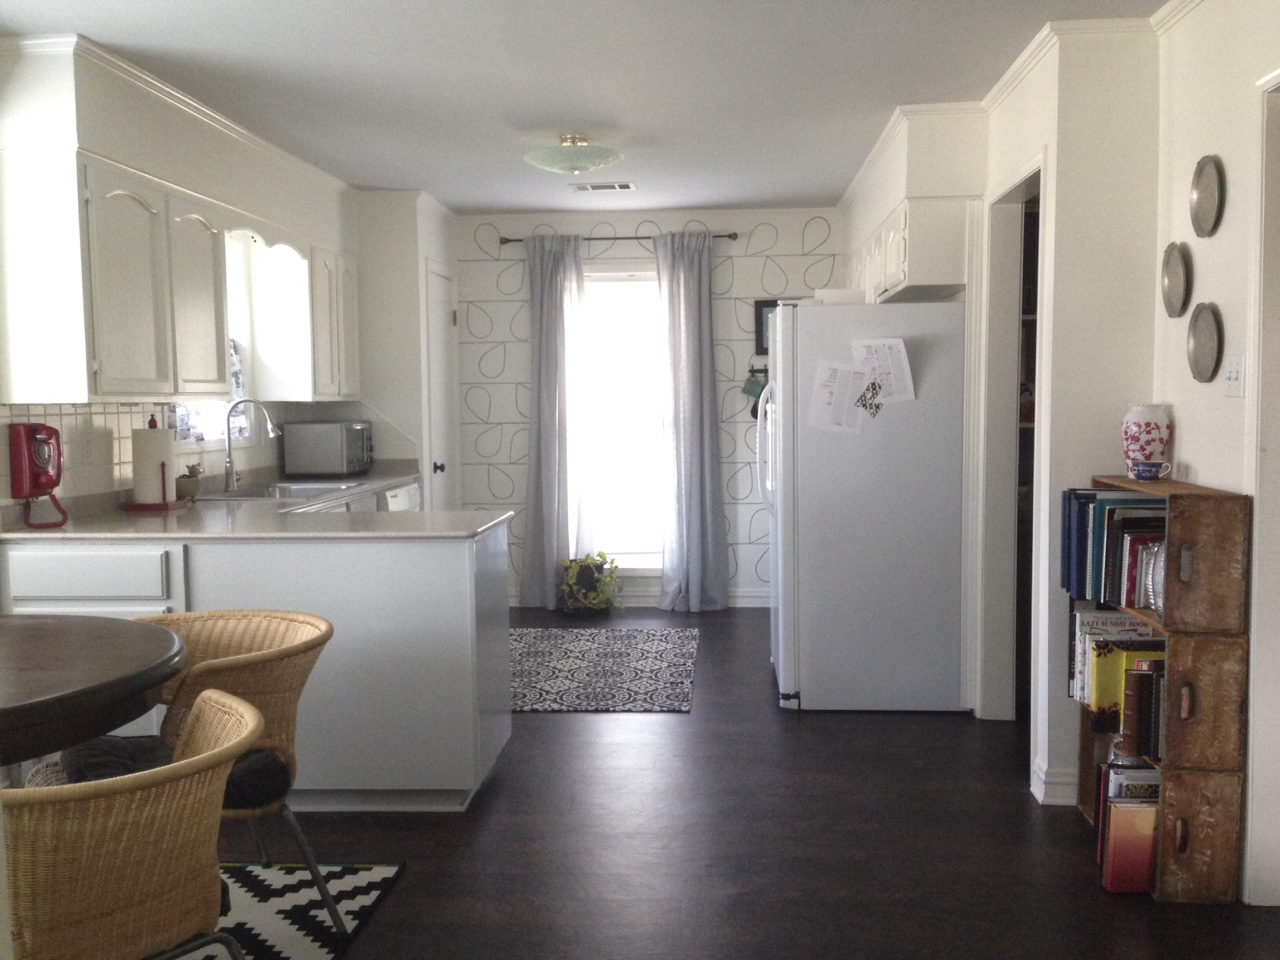
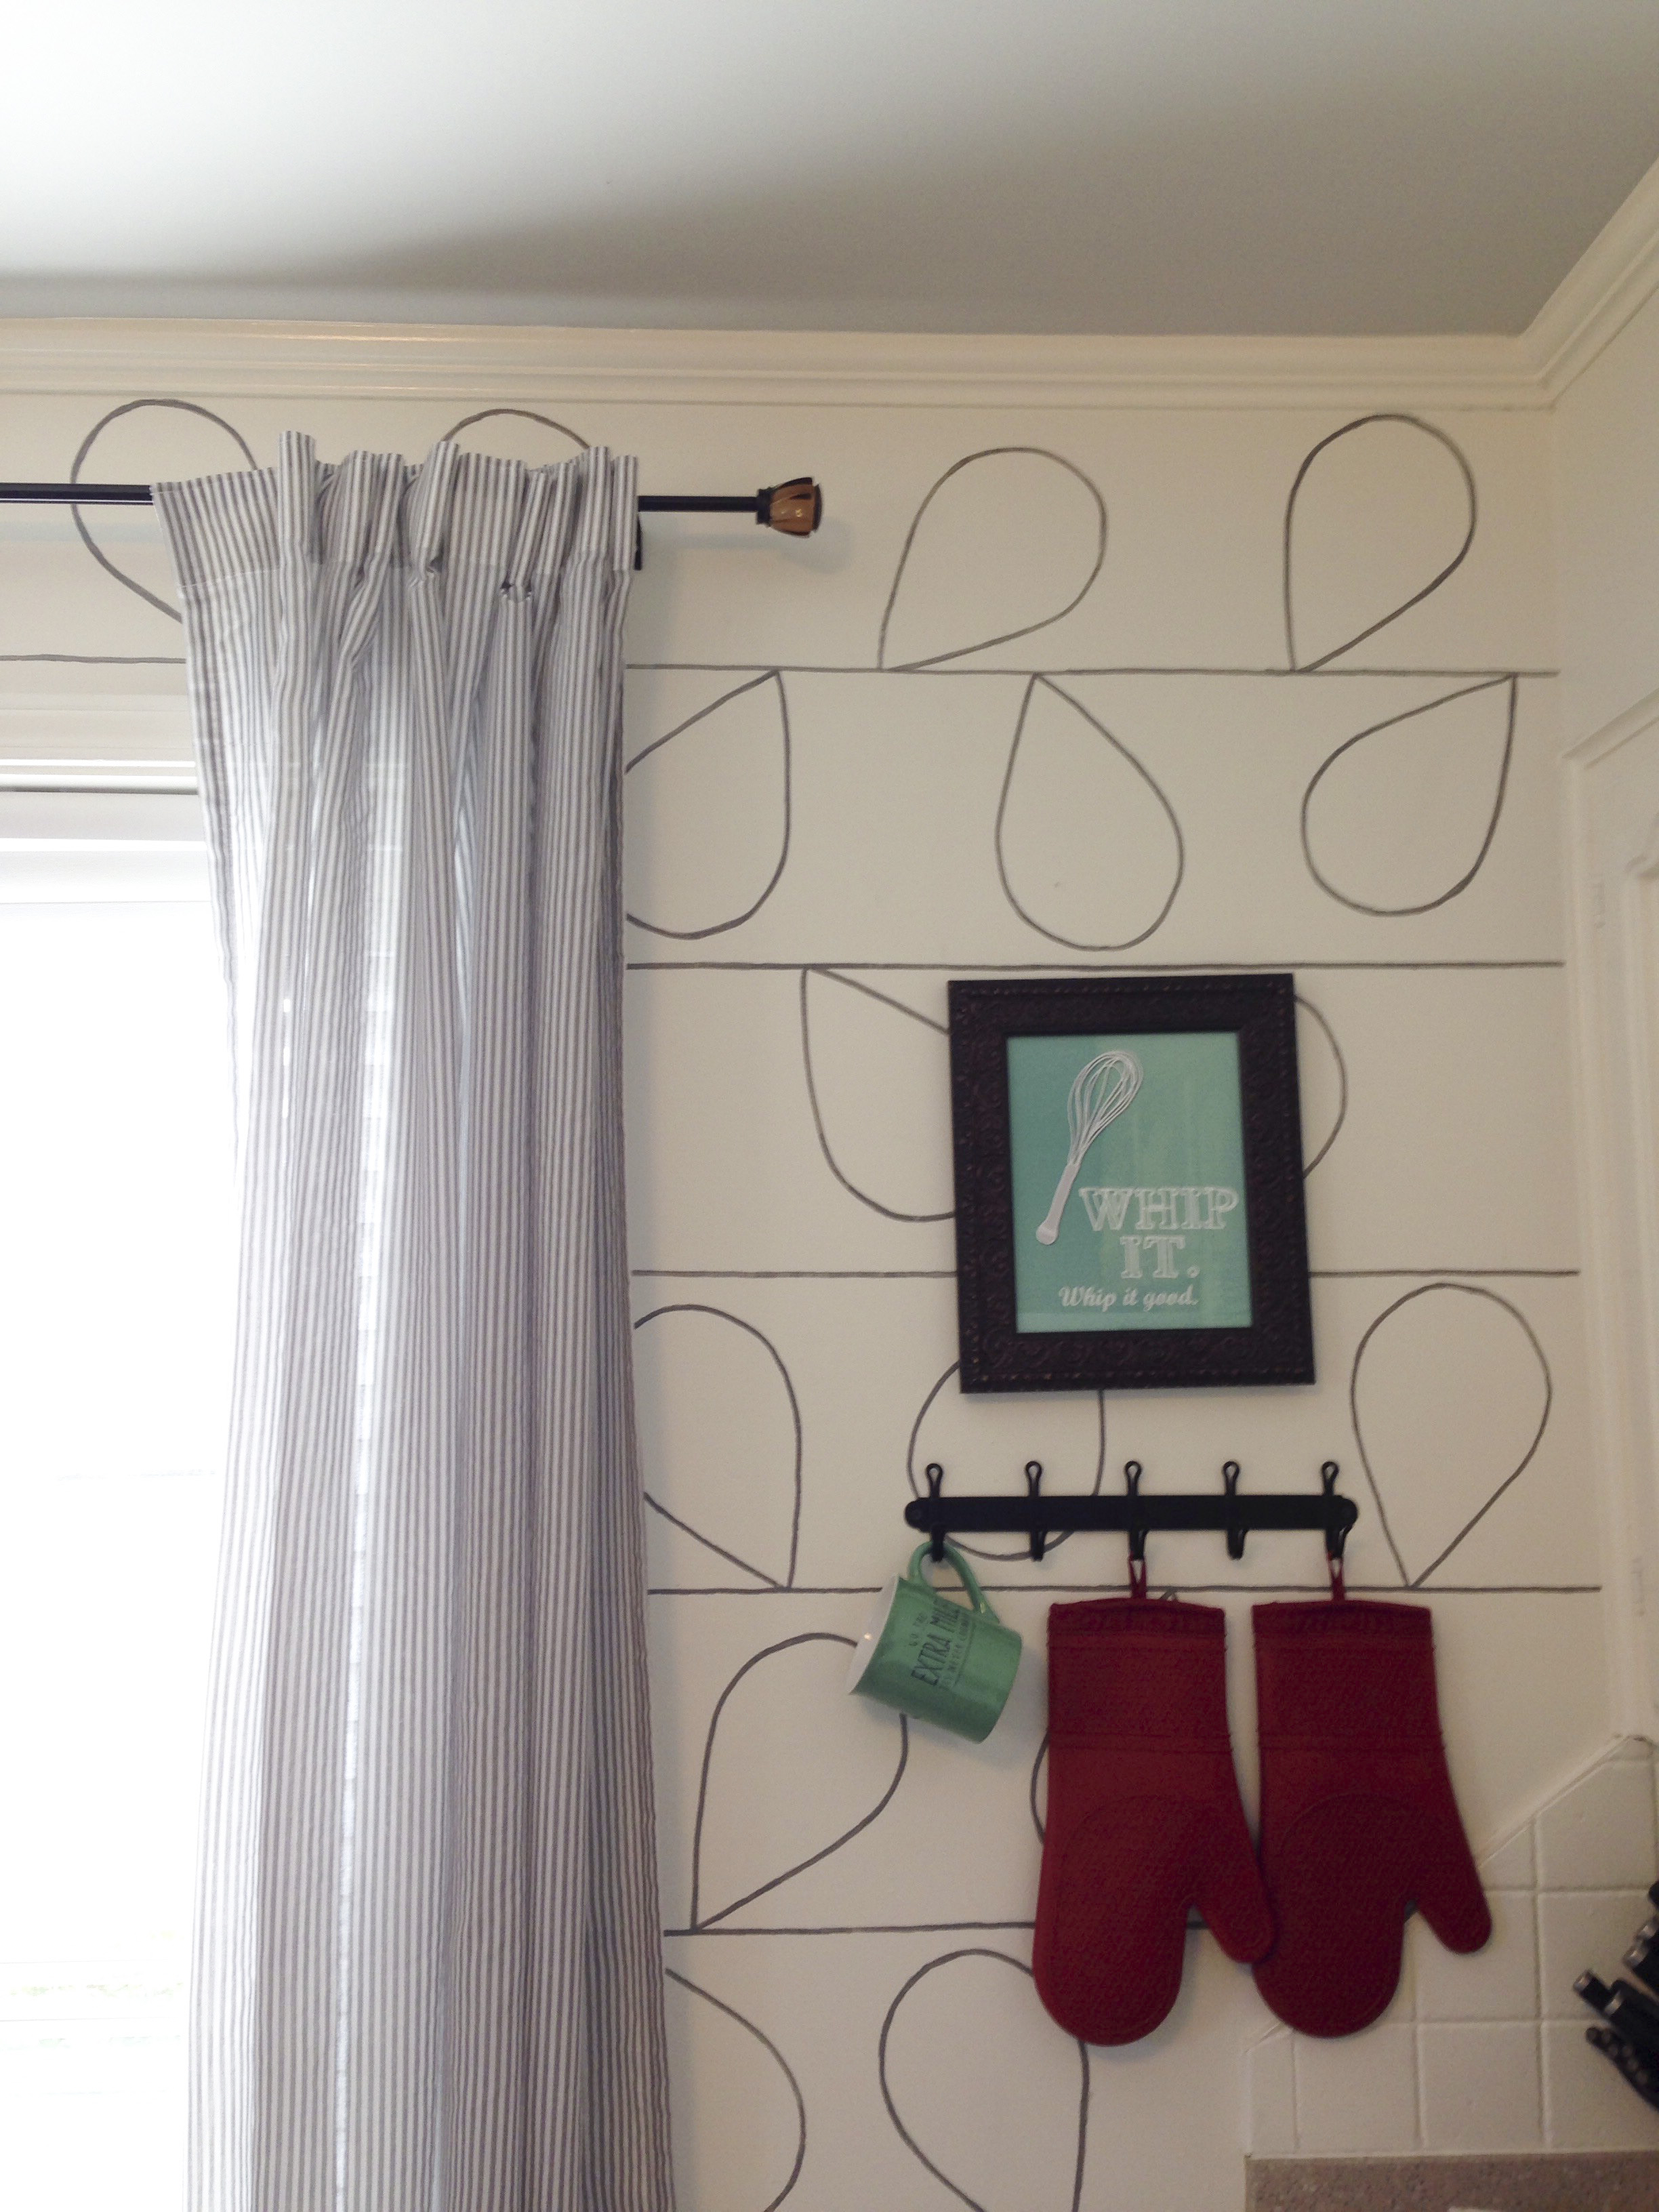 One day this summer I woke up and decide to stencil a wall. I saw this wall and thought it would be perfect in my kitchen. I had been tossing around the idea of a fun wallpaper there and I decided the painted pattern would be quicker and easier to undo if we didn’t like it. The process was rather simple. I made a stencil from foam board and traced it with pencil on the wall. I do recommend tracing with pencil first because if you’re like me, a little bit of slightly off spacing would drive me insane. After I had the pattern set, I used a Liquitex pen in Neutral Gray 5 to freehand over the pencil lines. It took two pens to complete this project and I think that may have been because the first pen didn’t work quite as well as the second. Our walls are a bit bumpy (for lack of a better word) from the texture that’s on them, which made this project a bit more difficult. It’s very hard to draw a straight line over a bumpy surface. I didn’t even consider this at first, so if you’re thinking about doing something similar, you might want to consider the texture on your walls. If they are indeed textured, I wouldn’t avoid the project. Instead, just be prepared for a more organic look.
Is this wall perfect? Not at all. Are the lines straight? Hardly. Do I still love it? Yes. One of my new Instagram friends often talks about being a “recovering perfectionist.” That’s me! A previous version of myself would not have been able to live with the inconsistencies in this project. The new version can step a few feet back and agree that it looks just fine. Actually, I almost quit and painted over it after the first two lines. My lines weren’t straight and it was very hard to get a steady flow of paint from the pen because of the wall texture. However, I decided to keep going. I decided to see what the entire wall looked like before giving up, and I’m glad that I did! (Tip: If you need to erase any pencil lines, try using a Lysol wipe. It worked so much better than an actual eraser!)
After the wall, I hung those gray stripe curtains from Ikea and ordered that print from Etsy. Another change that I made to make our kitchen more functional is hanging the oven mitts there directly on the wall. They’re much easier to access there and it just works better. Now all that’s missing is an adorable Anthropologie apron! If you’re thinking of doing a similar wall, I say go for it! If you hate it, all you have to do is paint over it. No harm, no foul. If you decide to give it a whirl, tag me on Instagram. I’d love to see your projects!
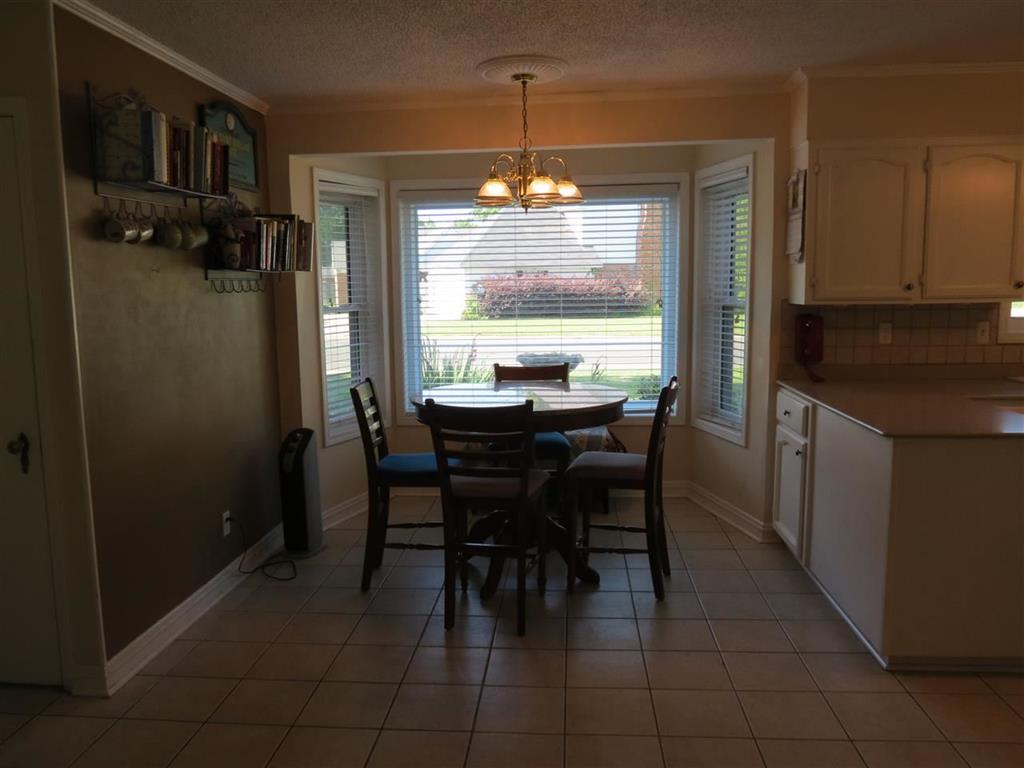
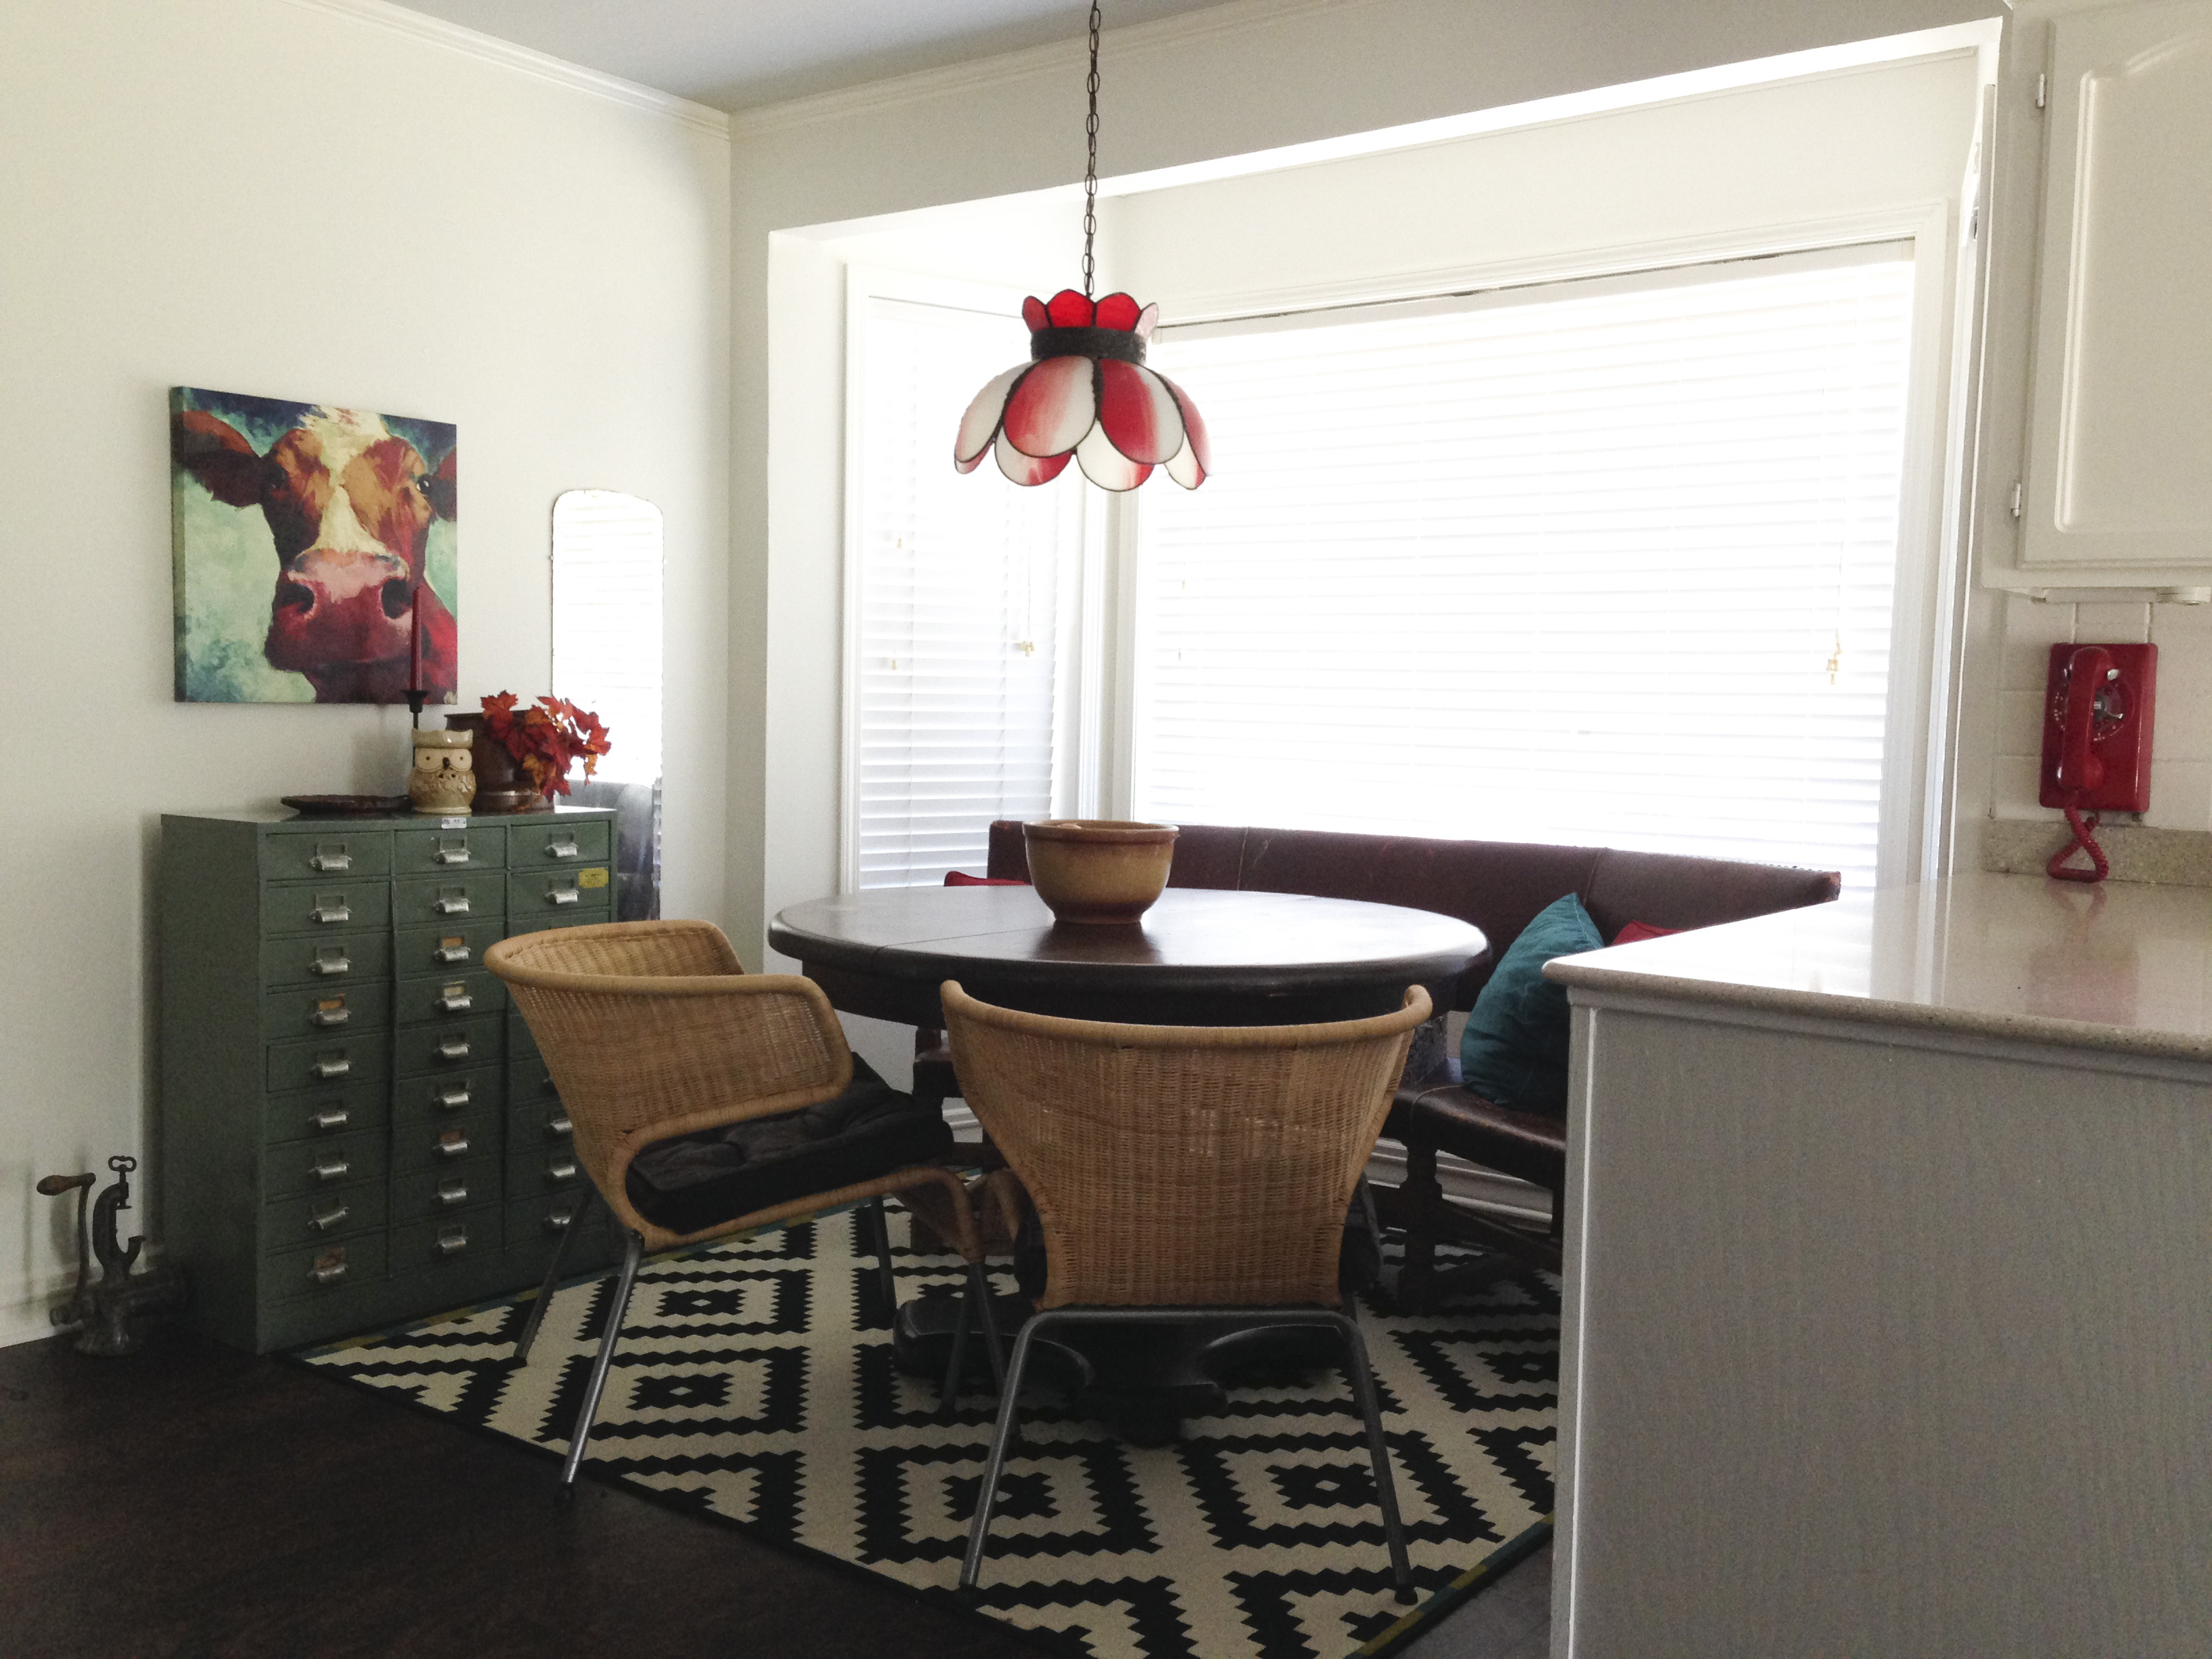
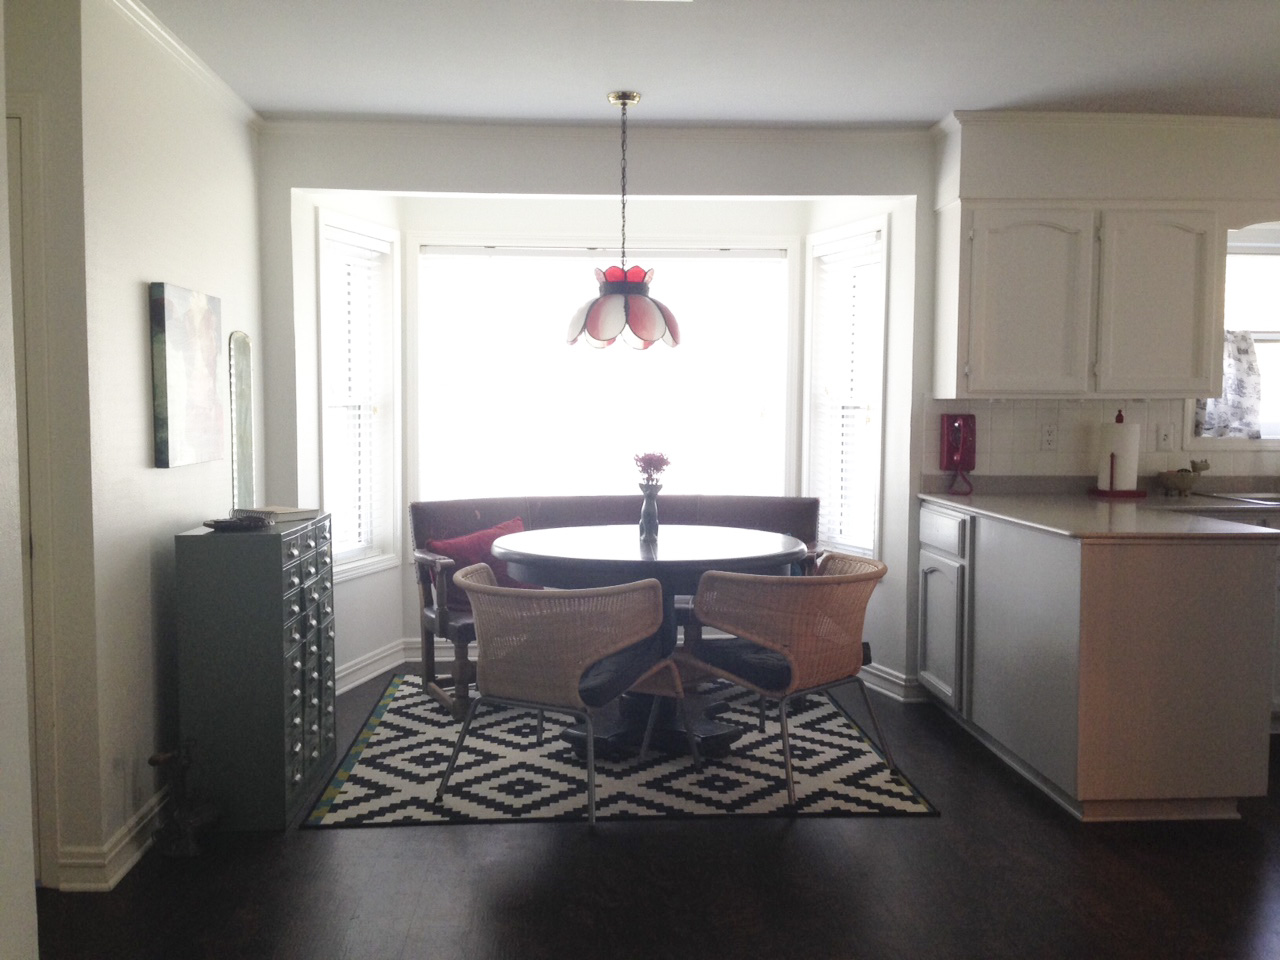 For the breakfast area, Matthew was going to make a window seat and then I remembered that I had this amazing bench in storage. It fits there PERFECTLY and has a bit of a story to tell. Right after Matthew and I were officially a couple, we went on a bit of a treasure hunting trip with my mom and sister. We found this gem at an antique store and scooped it right up. The intention was to sell it at Salt & Pepper, yet I started having trouble parting with it. Finally, I moved it to my office and then brought it with me when I sold the store. I love it here in the breakfast nook and it’s a nice reminder of the beginning of our journey together. The table was handed down to us from Matthew’s grandmother and the chairs are a temporary solution from IKEA. (It turns out that it’s hard to find chairs for this height of a table.) To the side of this breakfast area is an old catalog recovered from the family business, TP Outdoors, and it holds all sorts of goodies.
 Just changing the paint and floors alone, made a tremendous difference. (More about the floors here.) I honestly had forgotten how far we’d come until I looked at these photos side by side. I spent a bit of time being paralyzed by the amount of work that was needed and I’m happy to be coming out of that. I’ve recently found the courage to try some new things, even if I’m not 100% sure about them. Things feel like they’re coming together around here and I love that.
For now, what’s left in the kitchen remodel is a new light fixture, new appliances, and possibly new cabinet doors. I also still need cabinet knobs. I ordered some after the sink fiasco and they didn’t look as good as I’d hoped. Eventually we’ll have knobs. Maybe.
This is our kitchen progress in a nutshell. We’ve done a lot and it feels nice. We’ll continue to do more as time and funds allow. Maybe it’s the promise of fall creeping in or maybe it’s just the passing of time. Regardless of the reason, I’m happy to be feeling more at home here. Some of our larger projects are hopefully just around the corner too, so it’ll be even better soon!
