Category Archives: Home

Home sweet home!

Closet Room – Shoe Shelves

Shoe Wall
Anyone who knows me, knows that I have quite the shoe collection.
My last count was over 150 pair, and that number has certainly grown since then. The problem with having so many shoes is how to store/display them.

If you read my last post about shoe storage you know that I found an awesome new strategy for storing my out of season shoes. While that set up is still working wonderfully, my in-season shoes weren’t as accessible as I’d like. During the spring and summer months, my old shoe shelves worked ok and everything fit on the shelves decently. However, there was simply no way to fit all of my winter shoes/boots on those shelves. (See my earlier post to see what shelves I was using.) Last year I used a second shelf for tall boots, but I didn’t like having to rearrange the room to bring in another shelf just for boots. Besides, we sold that old shelf in the garage sale. (What better way to force yourself to come up with a better solution that to sell your current method in a garage sale?!)
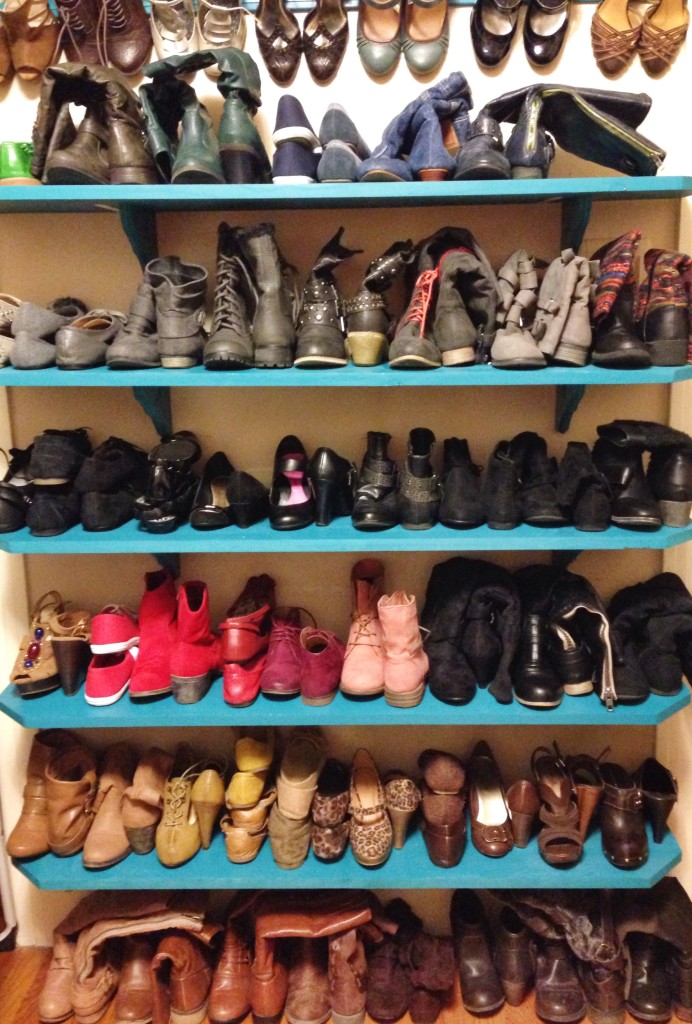
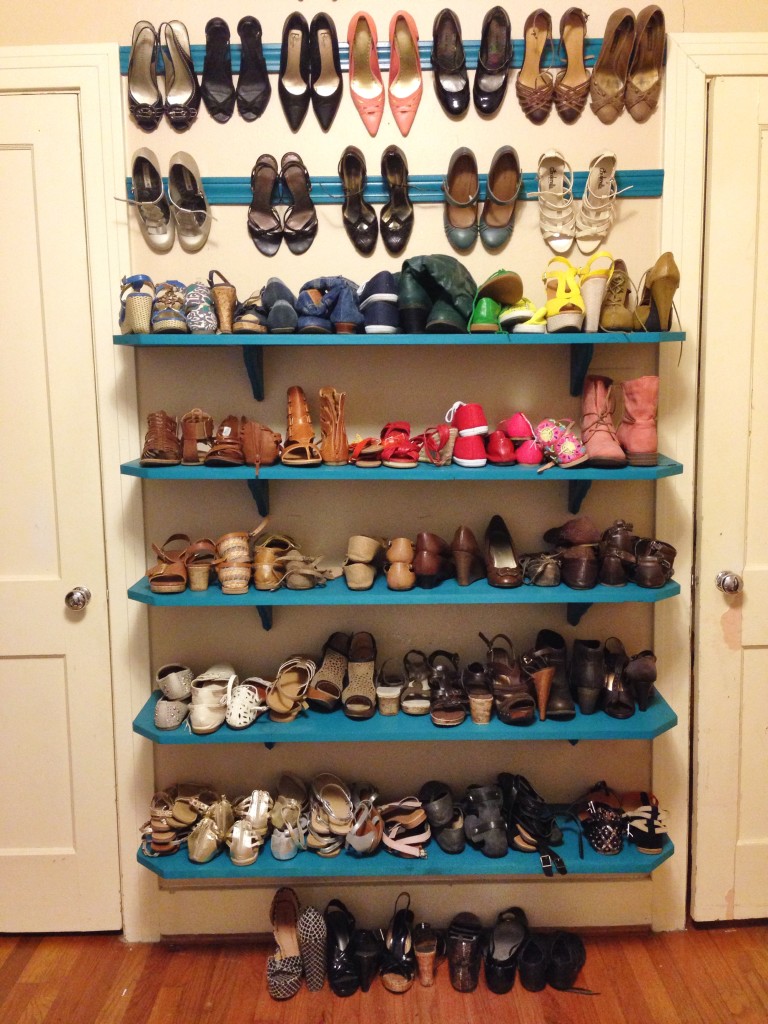
Winter Shoe WallI am so very lucky to have a handy husband who agreed to build me some custom shoe shelves. By making the shelves go from door frame to door frame, we added room for more shoes. Plus, by spacing the shelves farther apart, I can fit all of my shoes there, including my tall boots. We used the Pinterest-popular molding trick for heels and even ran the molding above the doorways for more storage. (I use one of those grabber thingys to get those down.) The molding isn’t working quite right, but it’ll do until we can investigate other solutions.

I’m not offering a full tutorial here because these were your basic shelf design…except for better because my wonderful husband built them. Matthew purchased the wood and ready-made brackets from Home Depot. He cut and rounded the corners of the shelves so I wouldn’t break my hips from running in to them…it’s bound to happen. He attached the brackets, sanded the wood, and I painted them this cool teal color. I wanted the color to be a tad darker, but I wasn’t going to argue with the grumpy old paint man in Lowes. (By the way, if you or someone you know needs a Lowe’s coupon, let me know. I have discounts that I can email to my clients/friends.)

I had to fight to fit all of my winter shoes out, but my summer shoes fit pretty well. During my last closet organization spree I mentioned getting rid of extra lounge pants to make them fit in just one drawer. I had to do a similar thing with boots. While I wasn’t ready to part with any of them, I had to put a few pair back in their containers to have enough room for my favorites. If I couldn’t remember wearing them even once last year, I figure they’ll be fine to leave in the top of the closet. After all, I can get them down if I decide to actually wear them this year. The reality is, I only wear those black cowboy boots to country music concerts. They can hang out up top with a few other not-regularly-worn friends until it’s time to “go out with my boots on.” I did the same thing with some summer shoes that aren’t worn often.Shoe Wall
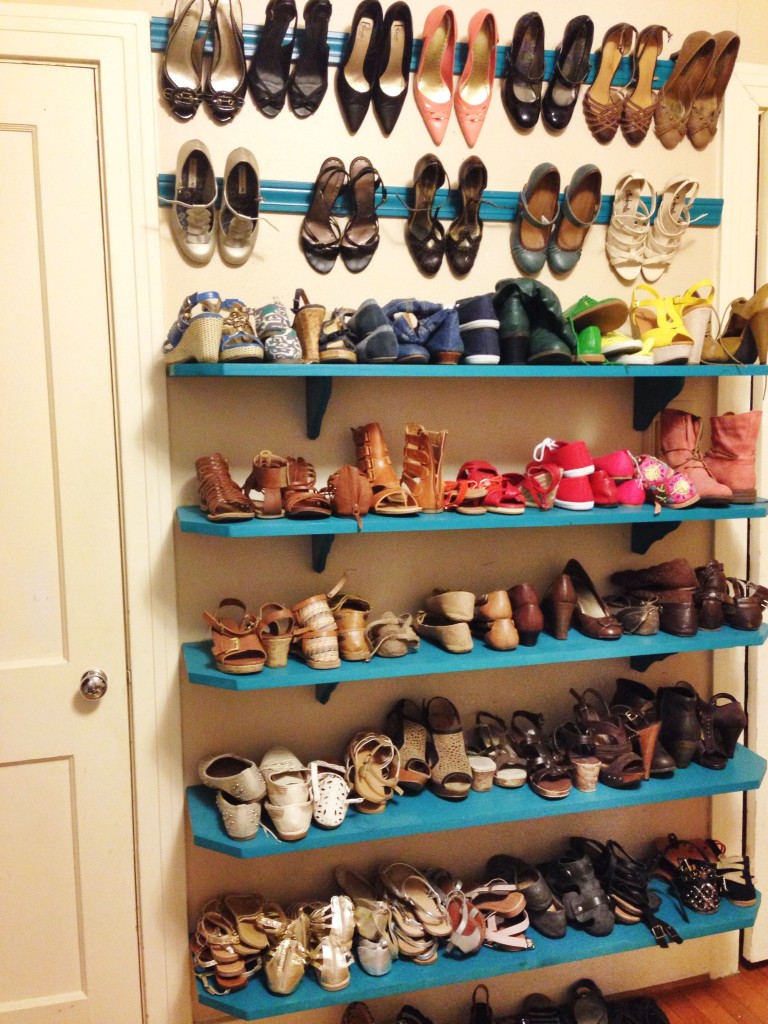
What do you think about the new shelves? Didn’t Matthew do a wonderful job?? I love getting to shop these shelves while getting dressed in the morning. It’s like having my own personal department store! I hated to have to take the shelves down when we moved last week, but I’m already working on ideas for the new house!


New Floors + Tips on Changing Flooring

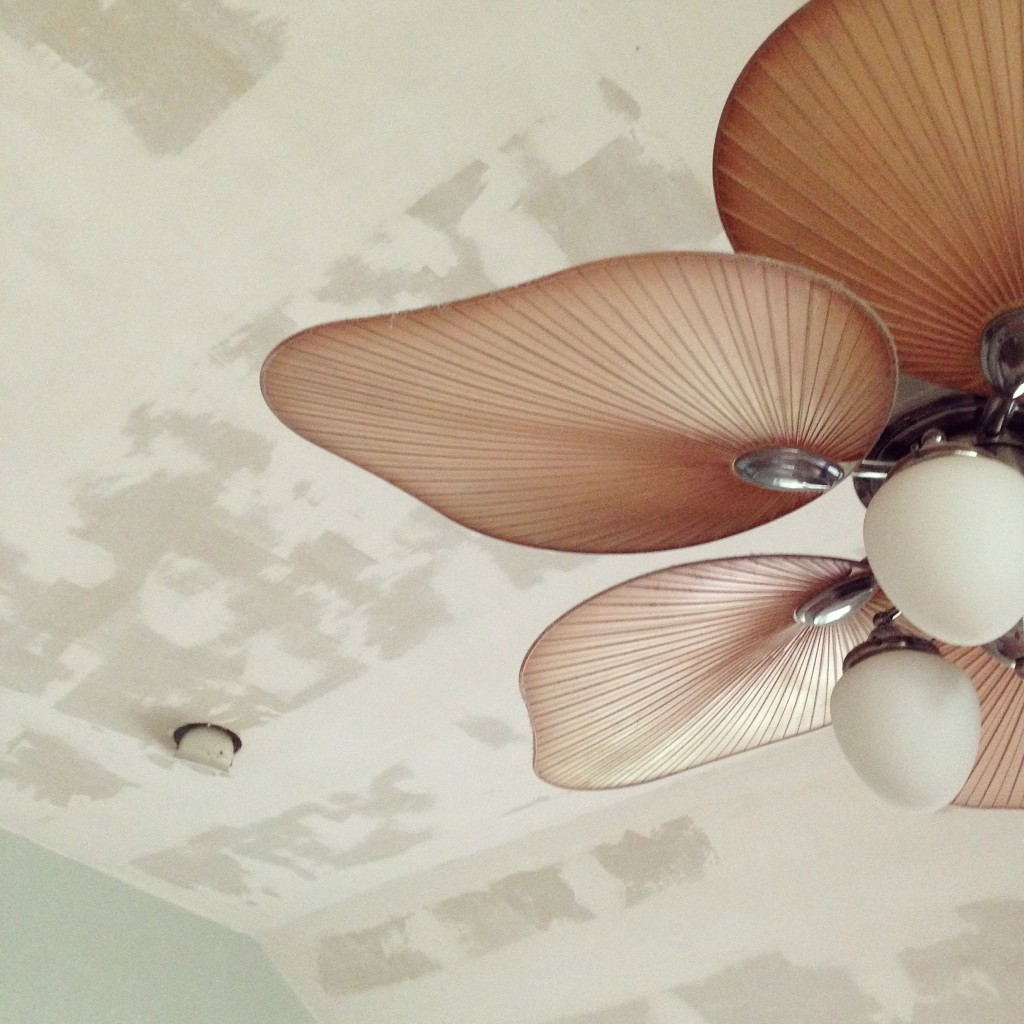
New FloorsOur new floors throughout the entire house are finally done! We’re getting closer everyday to finally being able to move into our new home. Having the popcorn ceilings scraped made a huge difference in the look of the house, and the new floors make it feel more like home.

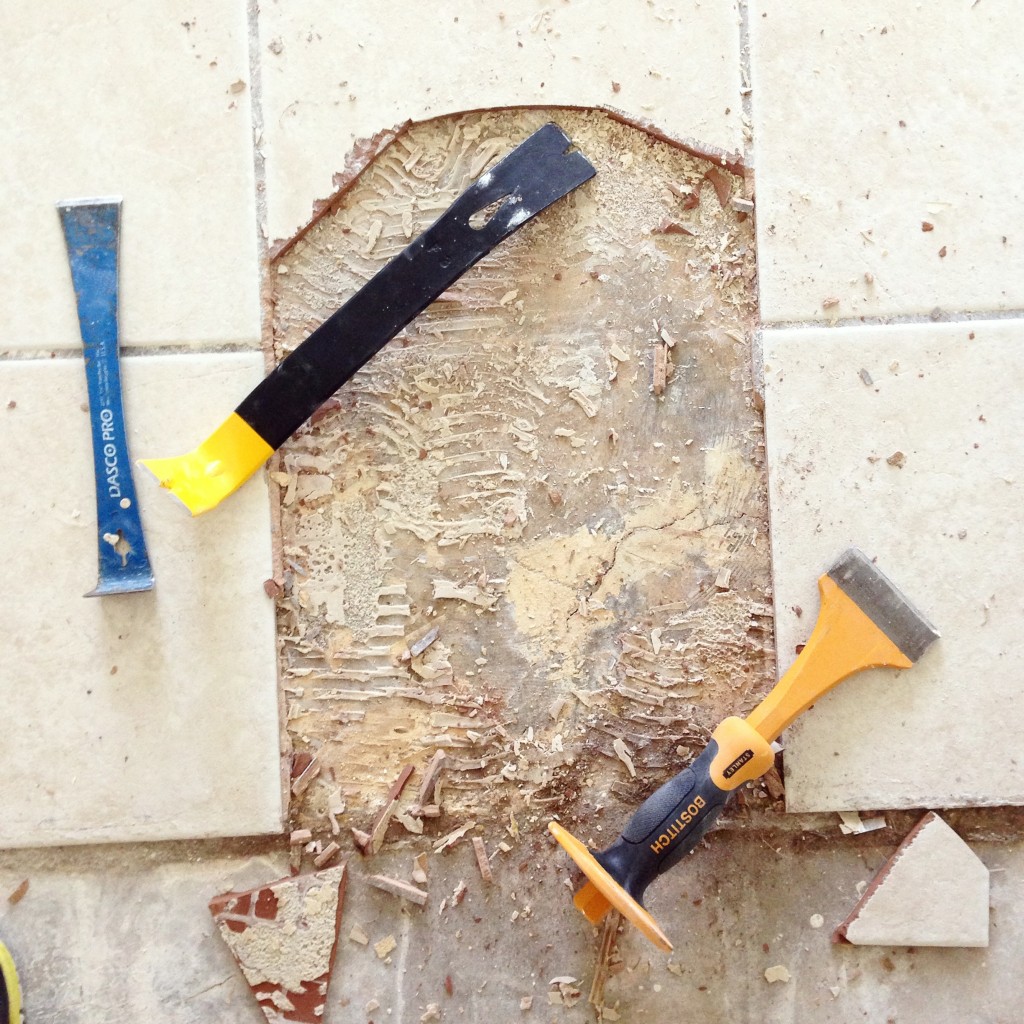
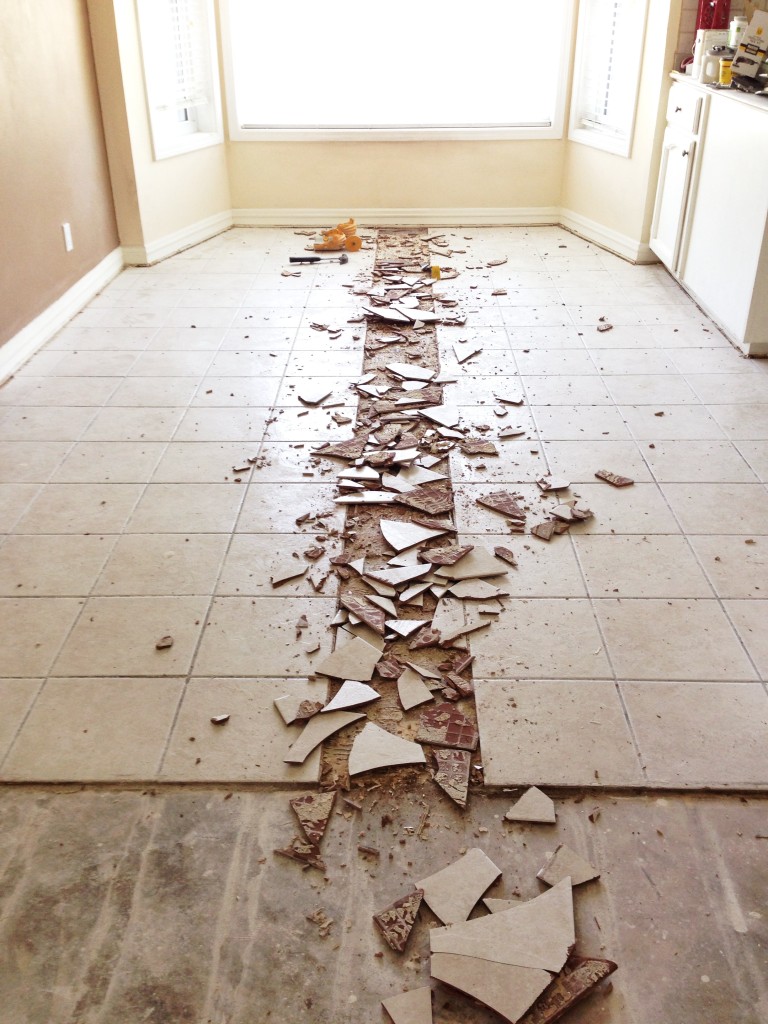
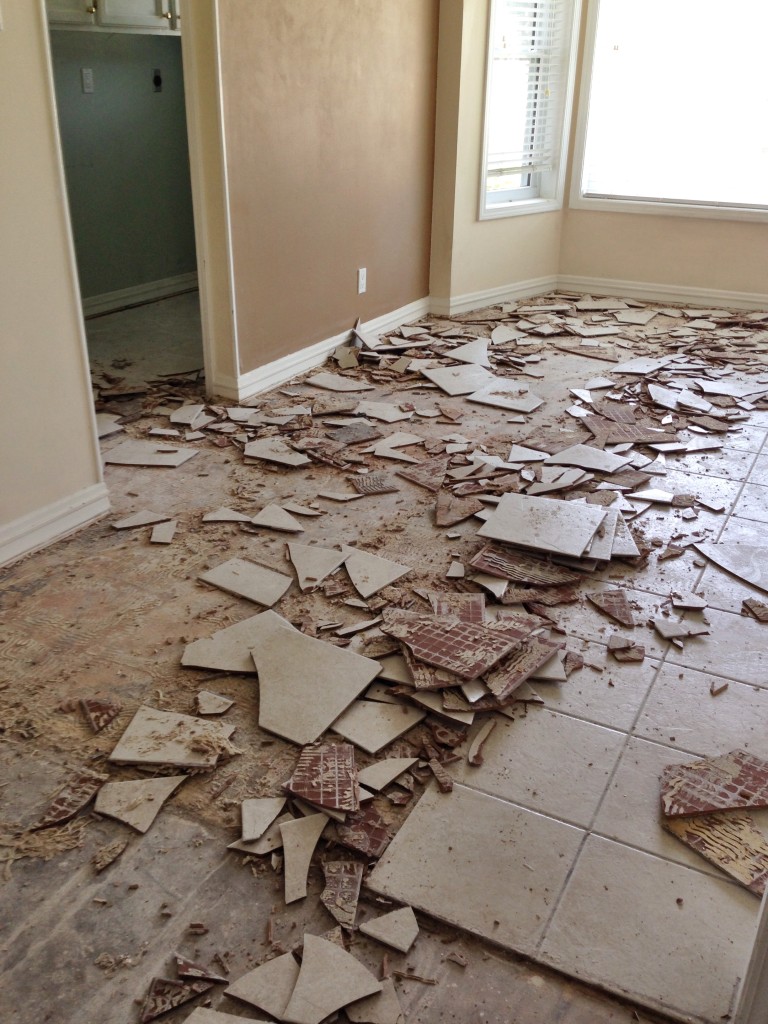
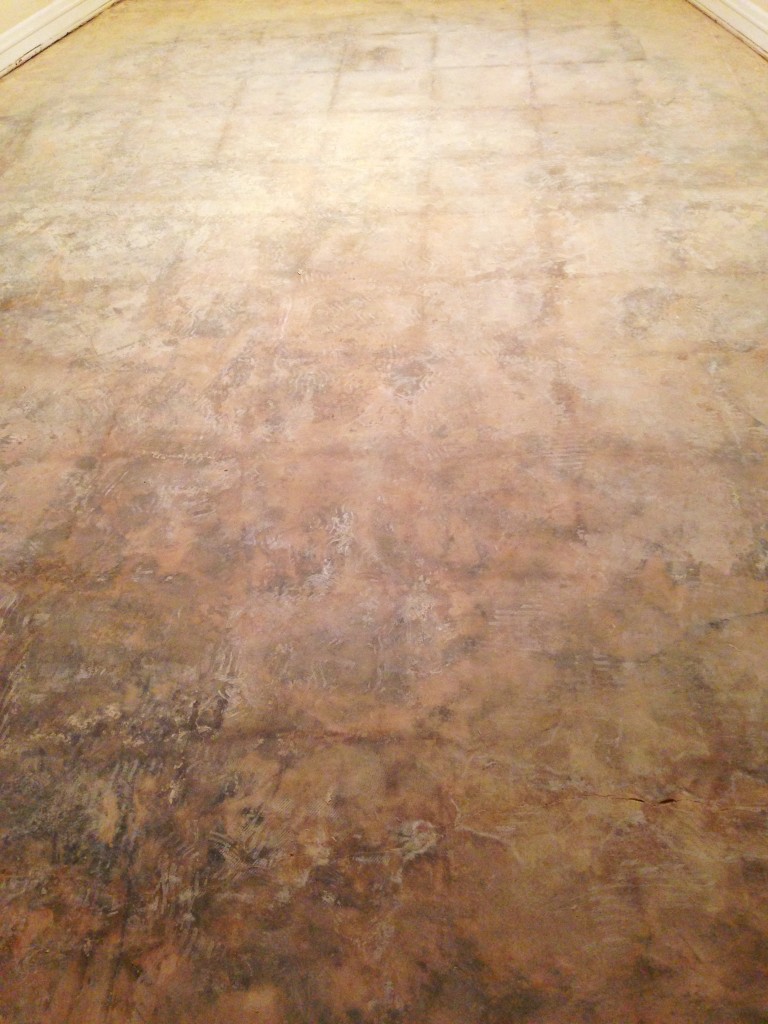
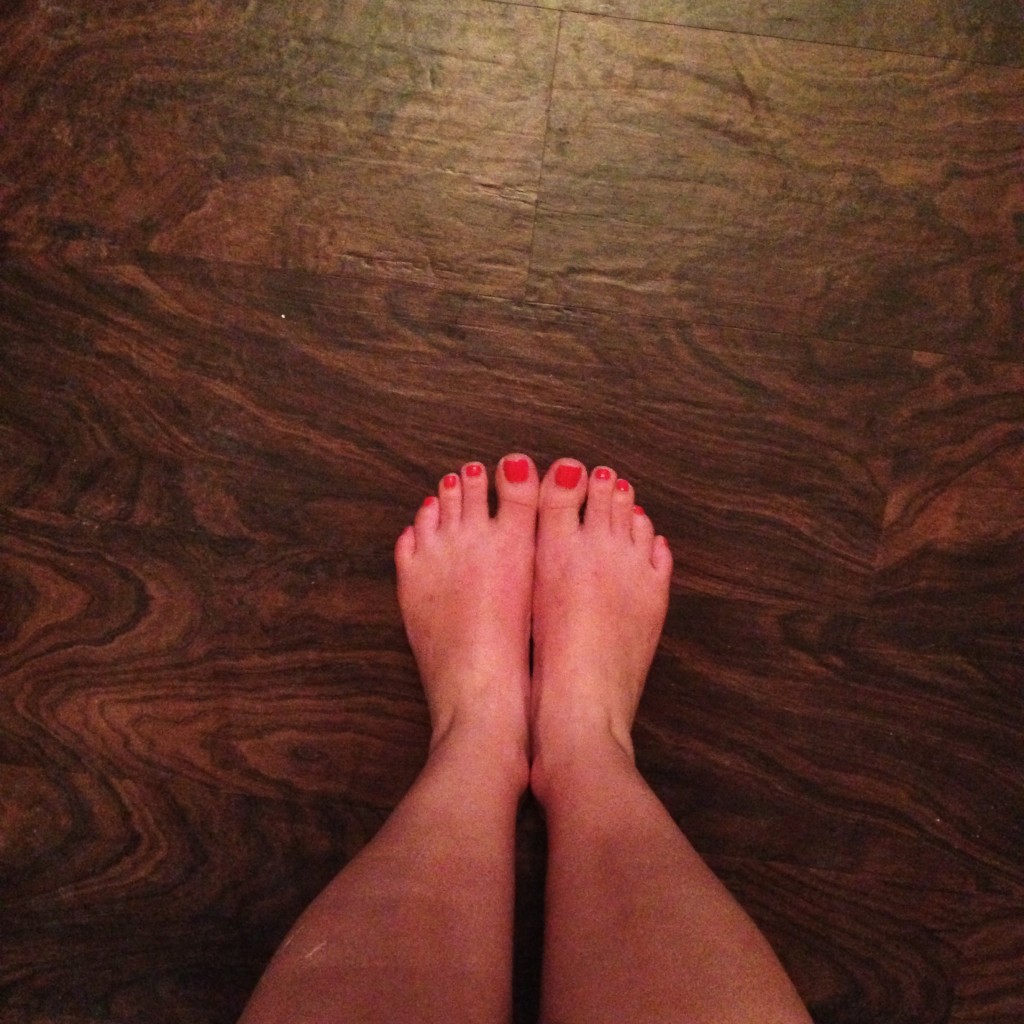
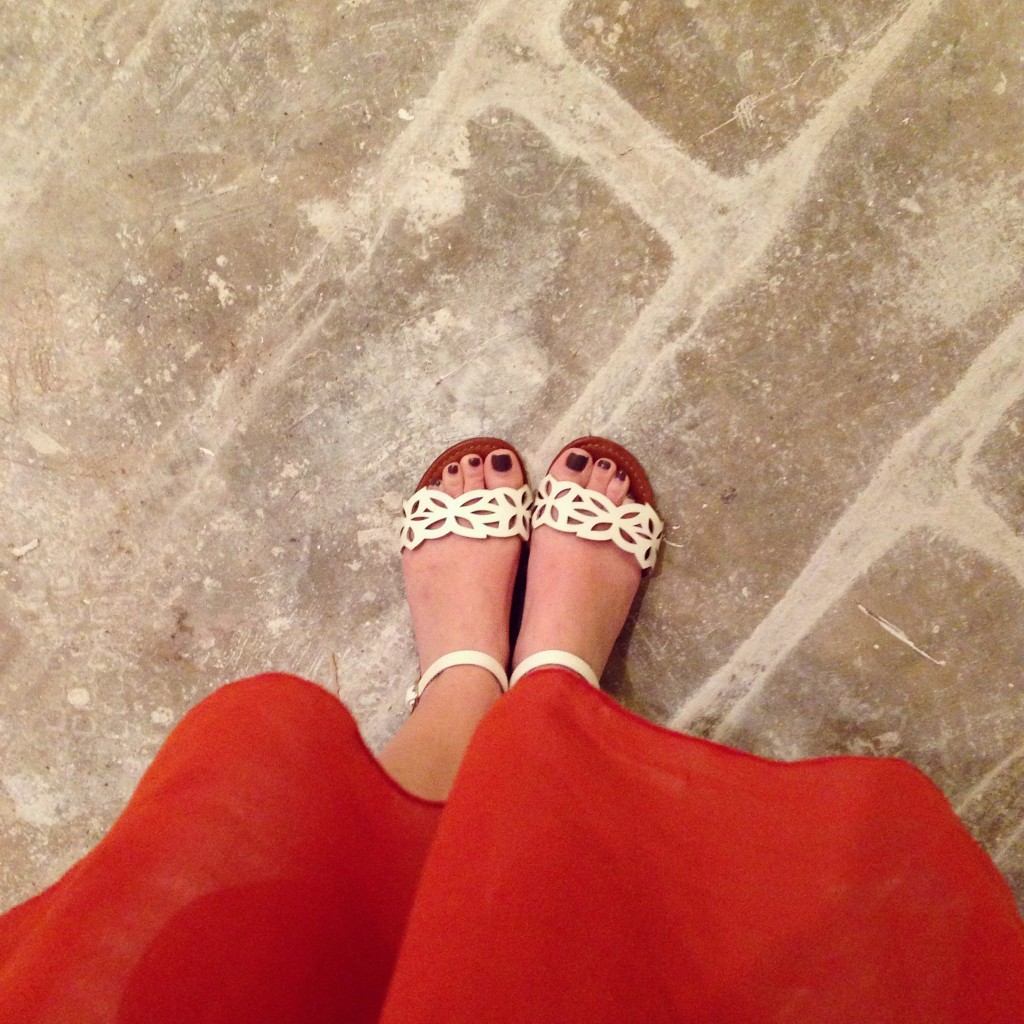
Removing Ceramic TileCeramic Tile RemovalOnce the demolition of the old floors began, I began to struggle seeing the light at the end of the tunnel. It was definitely a construction zone in there! At times I felt like we took an ok home and made it into a disaster area. These pics show a little bit of the process. (There’s also a short video of the process here.) Once all of the old glue was buffed from the slab, I finally saw the finished product coming together. Now we have new floors, and they look fantastic! 

Ceramic Tile RemovalBuffed FloorsNew FloorsWe didn’t do the floors ourselves, so this is not a DIY post. If you’re at least somewhat handy, you could likely handle this project yourself. However, with the amount of things we were hoping to accomplish before moving in and the timeline in which we were wanting them done (We have to be out of the rent house July 31.), Matthew and I knew that we better get help.

Instead of a DIY post, this is more of a “what to look for when you’re hiring someone to do floors” post. We talked to several different flooring folks and learned a lot along the way. Here are a few things to consider when you’re talking flooring.

  1. Flooring company vs. a person who does floors. You can probably save a tad of money by using an individual instead of a company. There’s certainly nothing wrong with that. However, be sure that the person is reputable and you’ve seen some of their work. (We heard tons of horror stories.) In the end, we chose a company because they provided a warranty for their work. That’s a pretty big deal if a few months from the installation you start having problems. The project could also be completed more quickly. Either way you go, do not pay for the entire project up front. A deposit (probably half) is usually required up front, but don’t pay the full balance until your project is complete. We used Custom Carpets in Monroe and were very pleased!
  2. Cost. When you’re shopping around at Lowe’s it’s easy to look at the cost per piece, multiple that by the number you need, and think you have your total. Be careful not to forget the installation and demolition costs if you have old floors to remove. The demo/installation costs can often be more that the cost of the new flooring and you’ll quickly blow your budget if you’re not careful. (For the record, any floors that have been glued down will cost more to remove.)
  3. Toilets. You’ll notice that you’re working with a reputable person/company if they bring up toilets. Most likely, your flooring person will remove the toilets to install the new floors. (If not, you should get a new person!) Since you’ll likely come home to a toilet sitting in your bathtub, you better have a plan for putting them back down!
  4. Quarter round and other molding. Any quarter round molding will need to be pulled up to put down new floors. (If not, the flooring job will probably not look good.) Keep in mind that any broken pieces will need to be replaced and be sure to know if putting the quarter round back down is included in your quote or not.
  5. Paint or floors first? There is much debate out there about which of these things should be done first. If you’re scraping your ceilings, DEFINITELY do that first. The amount of dust it creates is simply frightening. After scraping/painting the ceilings, we installed our floors. My main reason for this is that I didn’t want the demo of the old floors ruining a new paint job. Plus, I wanted the painters to be able to paint the quarter round after it had been put back down. (See above.) Otherwise, we’d have had to paint it twice.

Vinyl Plank FlooringAll in all, I’m so very glad that we decided to change the flooring in our new home. For the cost, it made a huge difference in both the look and value of our home. If you’re thinking about changing your flooring, take some time to do a little research and consider the cost vs. the benefit of all of your options. Also, remember that it will very likely get worse before it gets better, but you’ll have pretty, new floors in the end!

See the before photos here and the first stage of renovations here.
Also, keep up with the #mapfirsthouse on Instagram

Let’s talk about home renovations.

Popcorn ceilings removed!

When Matthew and I started looking for a house, we definitely wanted something “move in ready.” It was mandatory. We’re busy people…no time to work on a million projects at home. Welllllll….the house we ended up buying was not exactly move in ready for us. 

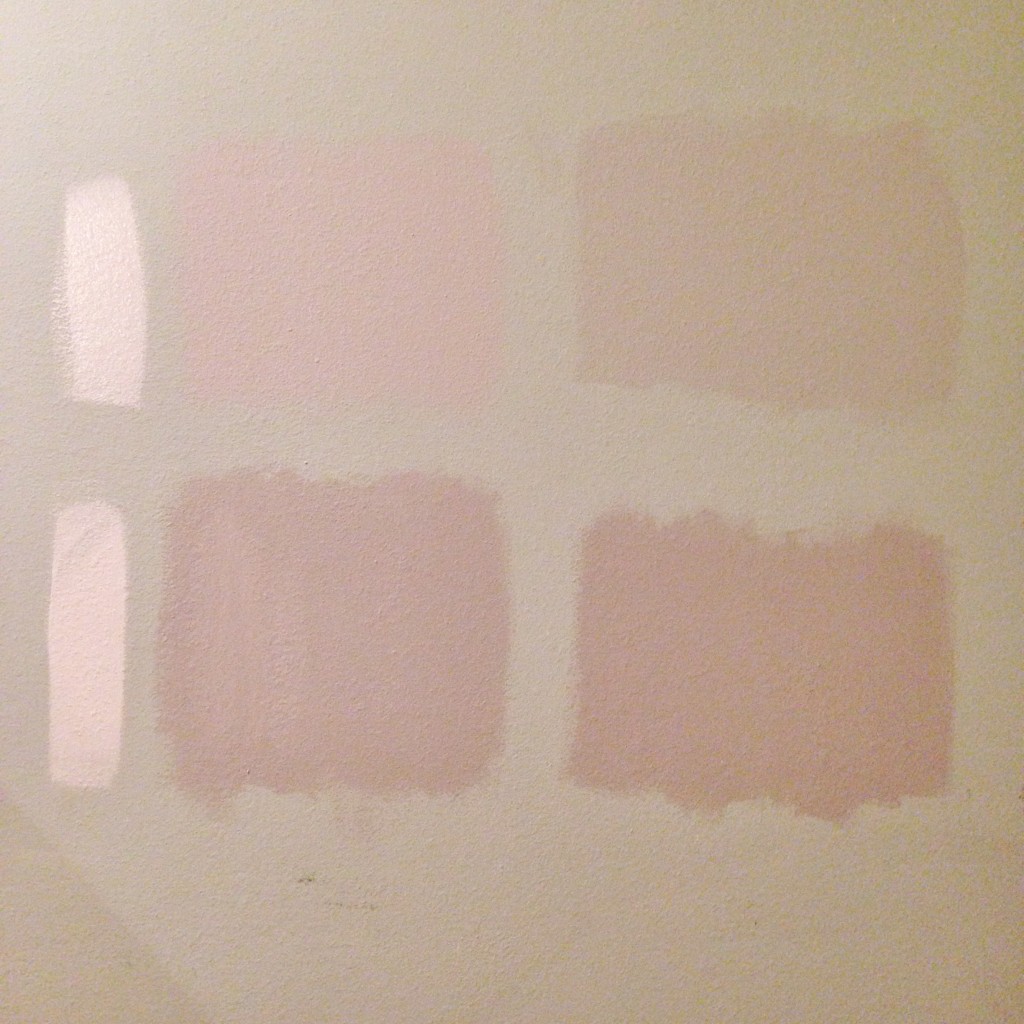
While the house was in good condition, it just wasn’t quite our style. It had popcorn ceilings with flooring and paint colors that weren’t quite “us.” However, the house was in a great neighborhood where we could easily ride our bikes and walk together like we enjoy. So, we went for it and decided to budget for some updates and changes instead of insisting on a fully updated home. Choosing Paint Colors!We have quite a bit of plans for our new house, and I’ll likely share my inspiration/plans for each area as we go along. For now, we’re working on having the popcorn ceilings scraped and everything painted. We’re also hoping to have the current floors demoed and replaced before moving our things in. Here’s some of the bigger plans we have for our new home.

  • Ceilings scraped, leveled and painted
  • Entire house painted (walls, cabinets, closets, trim….the whole house!)
  • New flooring throughout
  • All new light fixtures (except for 2)
  • Painting the exterior brick
  • Installing wood beams and shutters out front
  • Renovating both bathrooms

Most of these are immediate things that’ll be done rather quickly. Some of them (plus a lot more) will be done as we go along. Just changing the flooring and paint before moving in will make a huge difference in making this home feel more like Matthew and I. Even though we have several projects up our sleeves, we’re very excited about our new place to call home. We’re looking forward to making lots of wonderful memories here (hopefully they don’t involve construction mishaps), and we know that this home has amazing potential. It’ll still be a couple of weeks before we can move in, but we’re shooting to be in there the last week of July. 
All the floors have been ripped up!
We’ve gotten so many sweet comments from you all! Thanks so much for sharing in our excitement. You can keep up with the daily progress by following the #mapfirsthouse on Instagram. (That stands for Matthew and Pamela’s first house, by the way.) 

Here’s to new homes filled with lots of projects! (See the before pics here.

Our First House – Before

Our First HomeYesterday Matthew and I closed on our very first house together! It’s such an exciting time, but we have a bit of work to go before we make this house into our home. As a matter of a fact, it’ll be several weeks before we even move into the house, which is sort of sad.

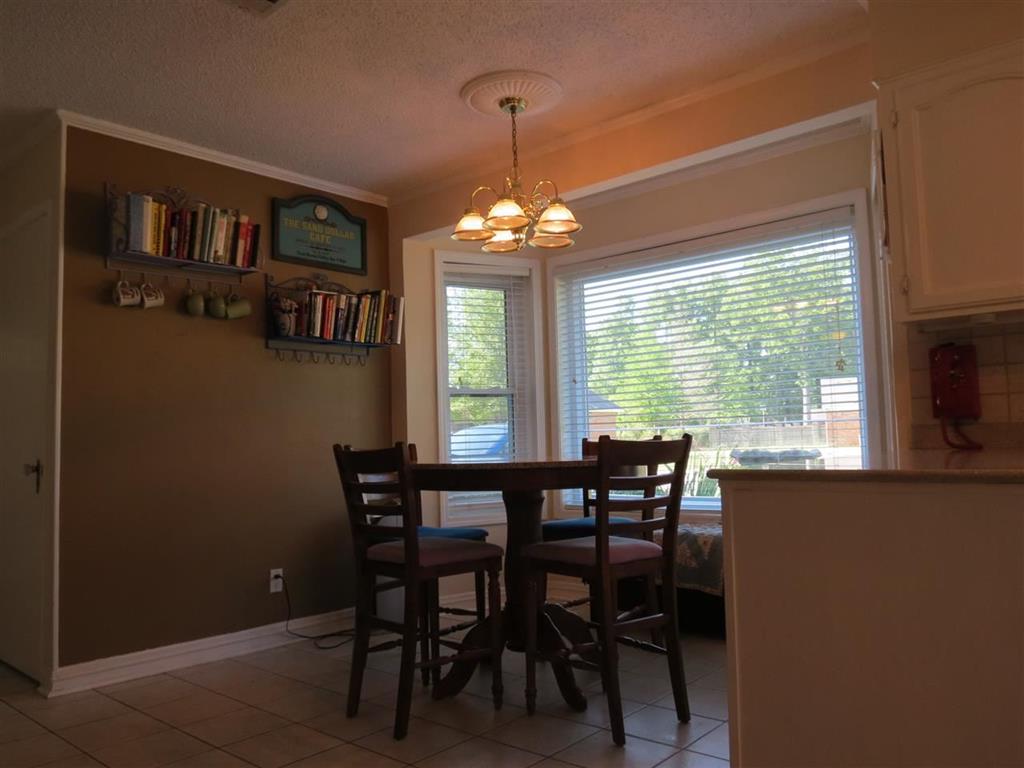
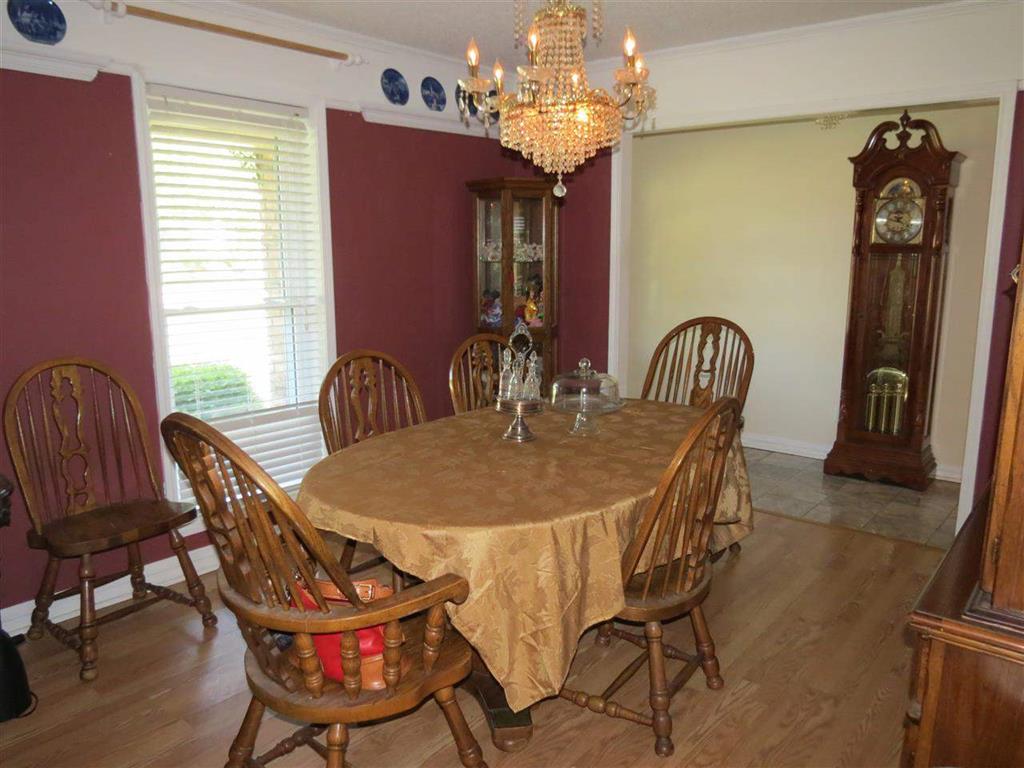
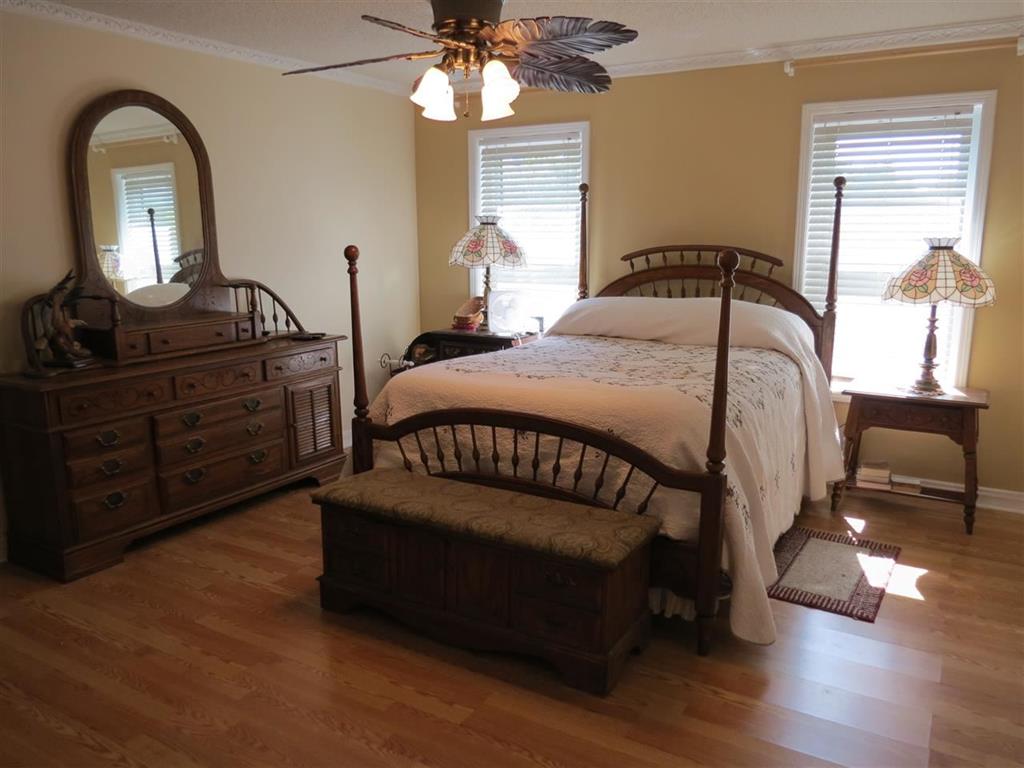
Nonetheless, we are very excited to have a new place to call our own that we will make into a home that we love. I wanted to go ahead and share these before photos, so everyone could see what we’re starting with. These are the photos from the MLS listing (taken by my sweet friend, Anna Kay), so you can see the home just as Matthew and I saw it when we made the decision to purchase this home.Before KitchenBefore Breakfast Nook

We have several big ideas in mind for this home, so you’ll have to stay tuned for the final product (if there’s actually such a thing as a “final” product). My biggest goal for this home is to create a place that we love to come home to. We’ve thought a lot about what that means, and I plan to be very intentional about every decision that’s made for this home. The ultimate goal is to create a space that reflects our personalities, is free of clutter and excess, and full things that we love. I’ll certainly be sharing our journey here, and I’d love to hear your thoughts. Now I’m off to choose more paint colors!

Before Dining RoomBefore Living RoomBefore Master Bedroom

Photo credit: Anna Kay Springer, Realtor

Antique Mirror Gallery Wall

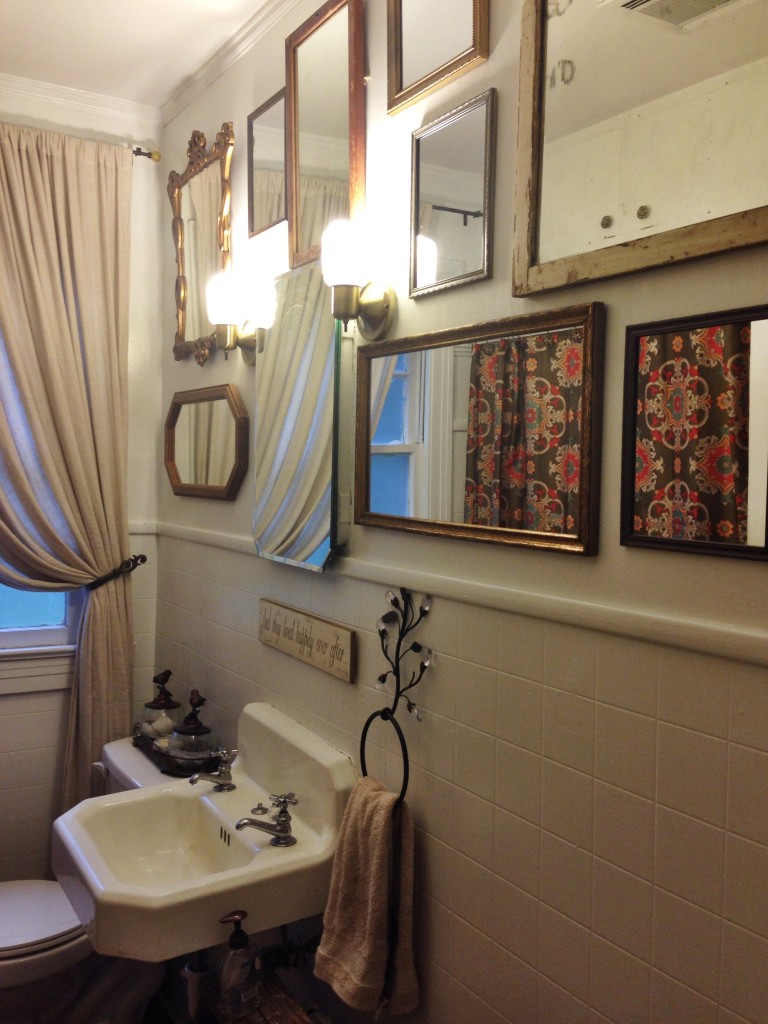
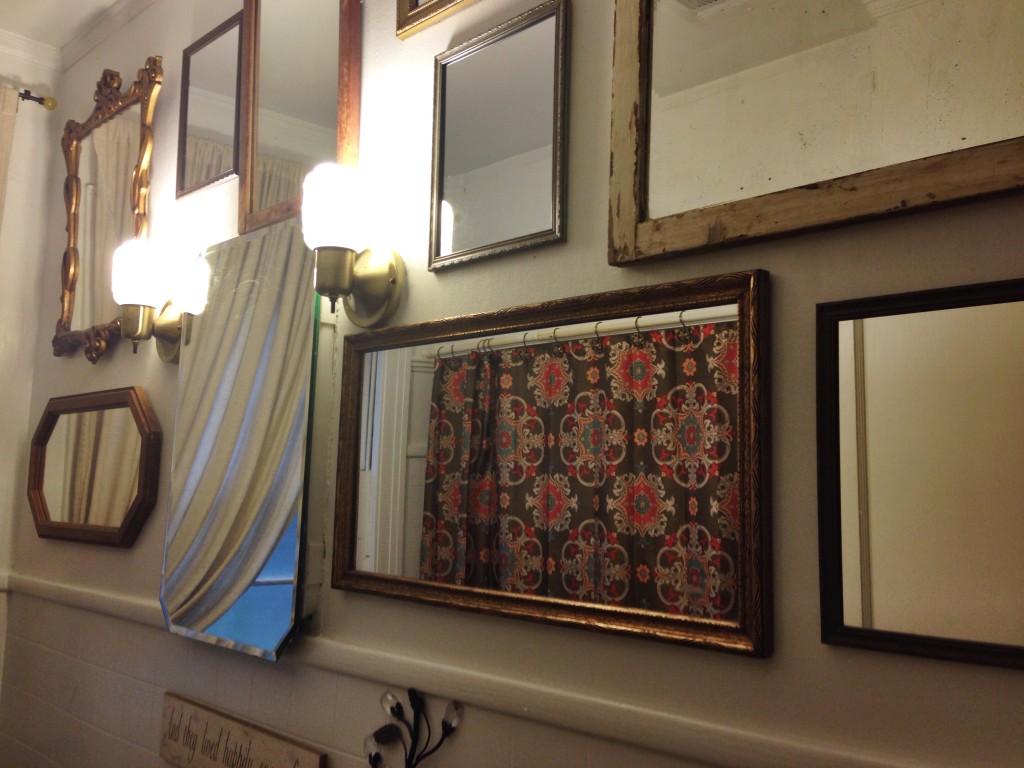
antique mirror gallery wallWhen we did our original bathroom update, I knew that I wanted a gallery wall on the top half of that wall. However, after painting and putting up the new shower curtain, I didn’t particularly care for the items that I’d collected to put there. I hung the two old sconces there in the meantime, and it took me several months to come up with a better idea.

Finally, one day it dawned on me. I should do a gallery wall of antique mirrors in there! After all, there’s little that I love more than gallery walls and antique mirrors…why not combine the two?? It took me a few weeks to gather enough mirrors that would work in the space, but I finally collected enough and had some spare time to work on the project.Mirror Gallery Wall Layout

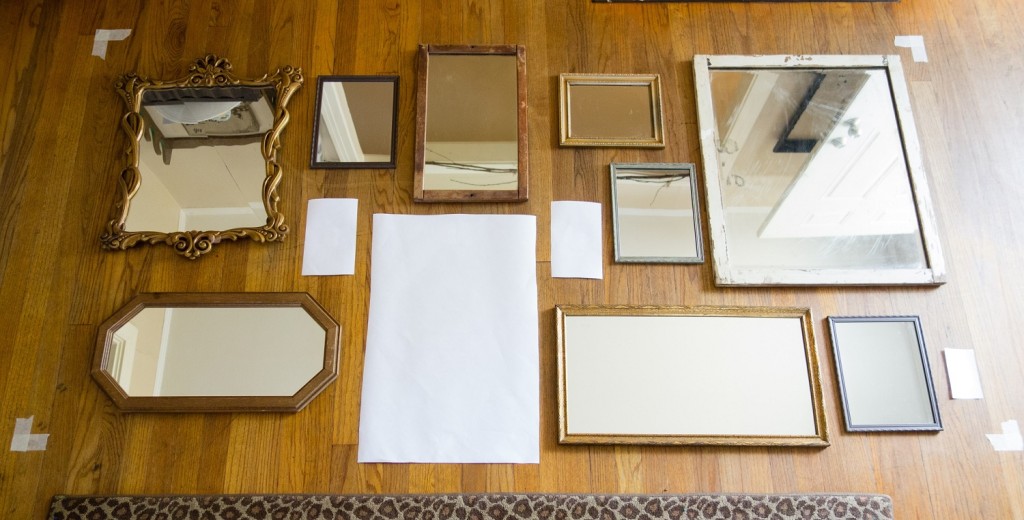
When planning out a gallery wall, it’s very important to play around with your layout before you start hanging things on the wall. Otherwise, you’ll likely end up with a bunch of excess nail holes and something that’s hung just a little off. I measured the size of the wall and marked the corners on my floor with masking tape. I cut slips of paper the size of the existing mirror, lights, and light switch and taped them on the floor according to their location on the wall. Then, I spread my mirrors out and moved them around until I was satisfied with the layout.

My darling husband hung the mirrors for me, and to do so he used the toothpaste trick. At first he thought I was a little crazy when I mentioned it, but then he agreed that it was genius! Basically, you just dab a little bit of toothpaste on the hangers of whatever you’re hanging. Then, you press it against the wall where it’s going to go and voila – you have a temporary mark on the wall, exactly where your nail needs to go! With the mirrors already laid out and using the toothpaste trick, I think it took him about 30 minutes to get them all hung. Aside from collecting the mirrors, the whole project took roughly 1-1 1/2 hours.
antique mirror gallery wall
I have to say that this is likely one of my favorite projects to date. I simply love how it turned out, and I enjoy getting to look at my collection of mirrors on a regular basis. Plus, it made our tiny bathroom feel a little bigger. Most of the mirrors I used are vintage from various sources, but the 8×10 filler mirrors are actually from the Dollar Tree! That’s right…I only paid $1 for those!

What do you think about the finished product? Think it looks better or worse than before? If you like gallery walls as much as I do, be sure to check out my first one from the living room.


DIY Winter Wreath

Winter Wreath

It’s no secret that I love wreaths…wreaths that are different and unique to be exact. As a matter of a fact, I have a Pinterest board dedicated to just them! This year, I was a little late switching from a Christmas wreath to a winter one. I didn’t put up a new wreath until the first of February, so I knew I wanted something that was wintery but could also welcome the first of spring without looking too dark.

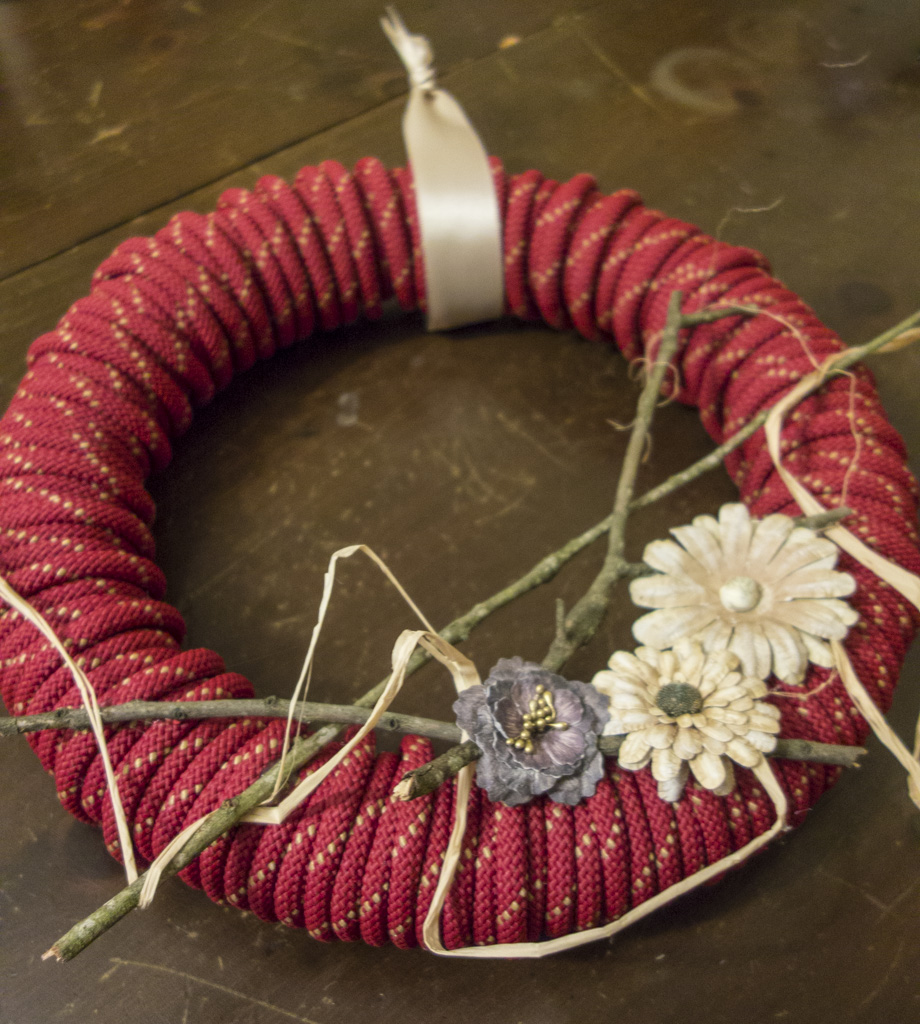
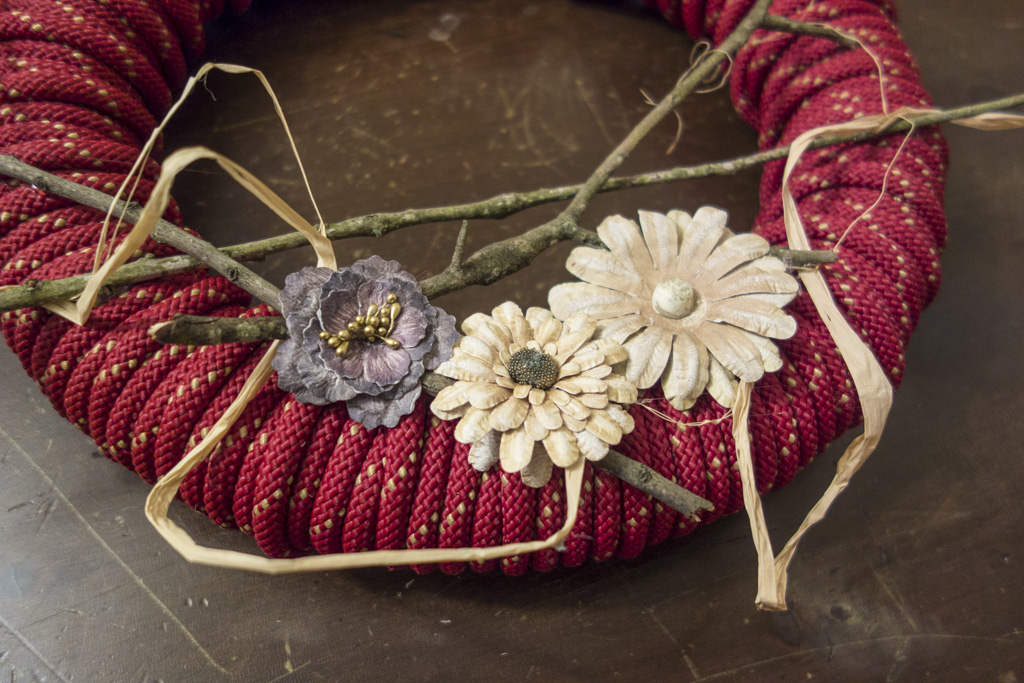
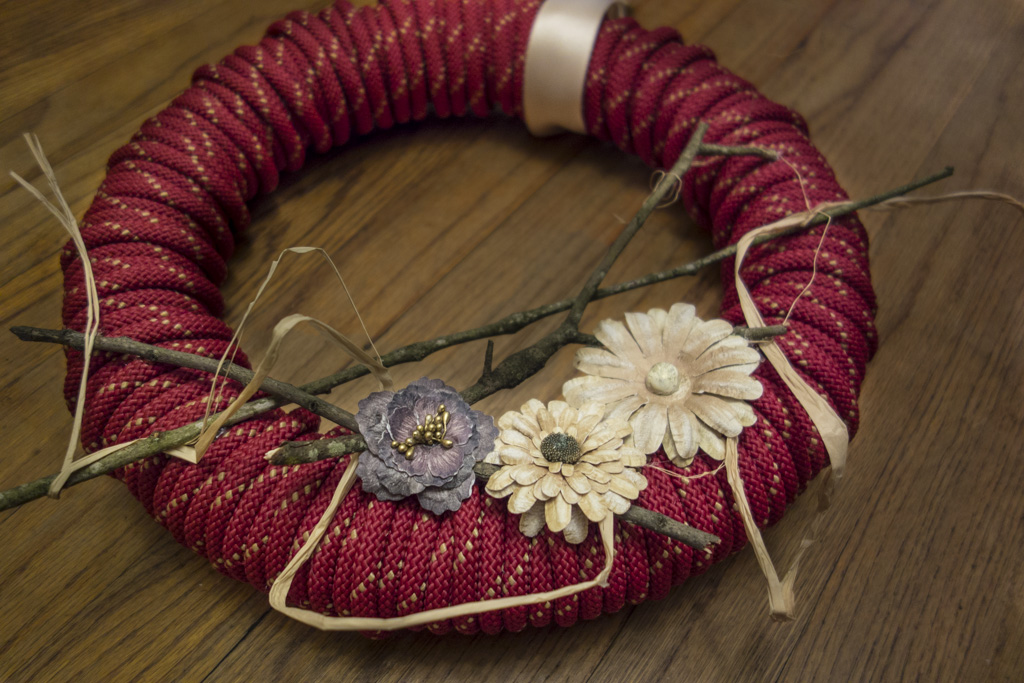
As usual, I didn’t actually like my first couple of strategies. The finished product is sort of a combination between this wreath and this one that I saw on Pinterest. I used a foam ring from Hobby Lobby, rope from Tyner Petrus, sticks from my yard, and flowers from my wedding hairpiece (They were originally from Hobby Lobby.).

Winter Wreath Close UpJust like with my yarn wrapped wreath, wrapping the rope took a little longer than planned. I had planned to do something similar to that first inspiration wreath with brown rope, but it looked like it belonged on the door of a cowboy’s house. Unfortunately, neither of us are cowboys, so I scratched that idea.

I loved the winter stick idea from the second photo, but I wanted something that had a little brightness to it so it could be left up through the beginning of spring. I went digging through my craft supplies and came across leftover flowers from making my wedding hairpiece. They were light and airy enough to brighten the wreath but not too bright to be inappropriate for this cold February. Plus, every time I walk through the door, I think about marrying my husband…not a bad bonus! Finally, I added a little bit of raffia to give it a whimsical look and some ribbon for a hanger. And there you have it…a new wreath that looked nothing like my original idea!

Winter WreathI wish I could end this post by saying how many people love my new wreath. However, during our little ice storm, my wreath literally froze and broke into several pieces. That’s not even a joke… click here to see my poor, little broken wreath. It wasn’t even up for a week!

Now I’m faced with a dilemma. Do I remake the same wreath or do something completely different?? Help me decide!


Valentine’s Day Inspiration

Valentine's DayI’ve rekindled my love affair with Pinterest lately, and I decided to share some of my latest favorites. Is it just me or is Pinterest the best place to look when you need a hefty dose of inspiration?? With Valentine’s Day right around the corner, I thought I’d share a few of my favorite finds.

These nails are what started my Valentine’s Day pin collection. The pins of elaborate art on nails are fascinating, but I’d never attempt such a feat. However, I think I can handle this one!

I think this pillow is adorable! I recently ordered some wall art for my office from Michelle, and this pillow is on my wish list. It’s great for year round decor, but I think it’s perfect for Valentine’s Day!

I really, really want to make some of these heart trees. It looks like such a cute and easy project! You could also do a similar version for other holidays.

I love this tutorial for making a heart cake. I don’t own a heart shaped pan, and this would be soooo much easier than trying to cut out a heart shape. Genius!

This post had some simple but good Valentine’s Day date ideas. Of course, I think you should show people that you love them year round, but there’s nothing wrong with using this holiday to do something extra special.

Feel free to browse my Be My Valentine board if you’re looking for more Valentine’s Day ideas. Plus, you can see my quick and easy heart wreath from last year here.

Have you seen any fun Valentine’s Day projects or decor that I should add to my list? Please share!

Merry Christmas!

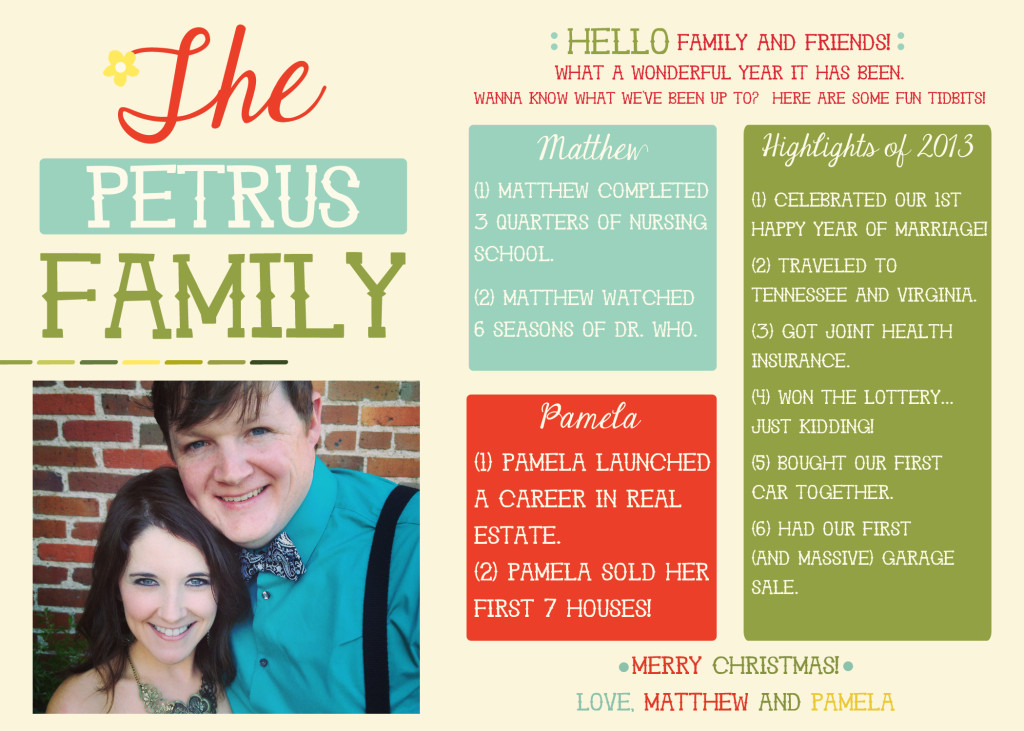
Christmas CardMerry Christmas from Matthew & I! We hope everyone has a splendid holiday season and thoroughly enjoys time with family. We love you all!

Follow along with some of our Christmas activities with #petruschristmas on Instagram!

This year’s card was designed by Christina over at Lacey Fields on Etsy. She did a fantastic and prompt job and was a pleasure to work with. You should look her up for next year’s cards, party invitations, etc!


DIY Fall Wreath

DIY fall wreathI’m working on building a wreath collection for our home. This fall, I had several different wreath ideas that I wanted to try and finally decided on combining a few ideas I collected on my Pinterest.

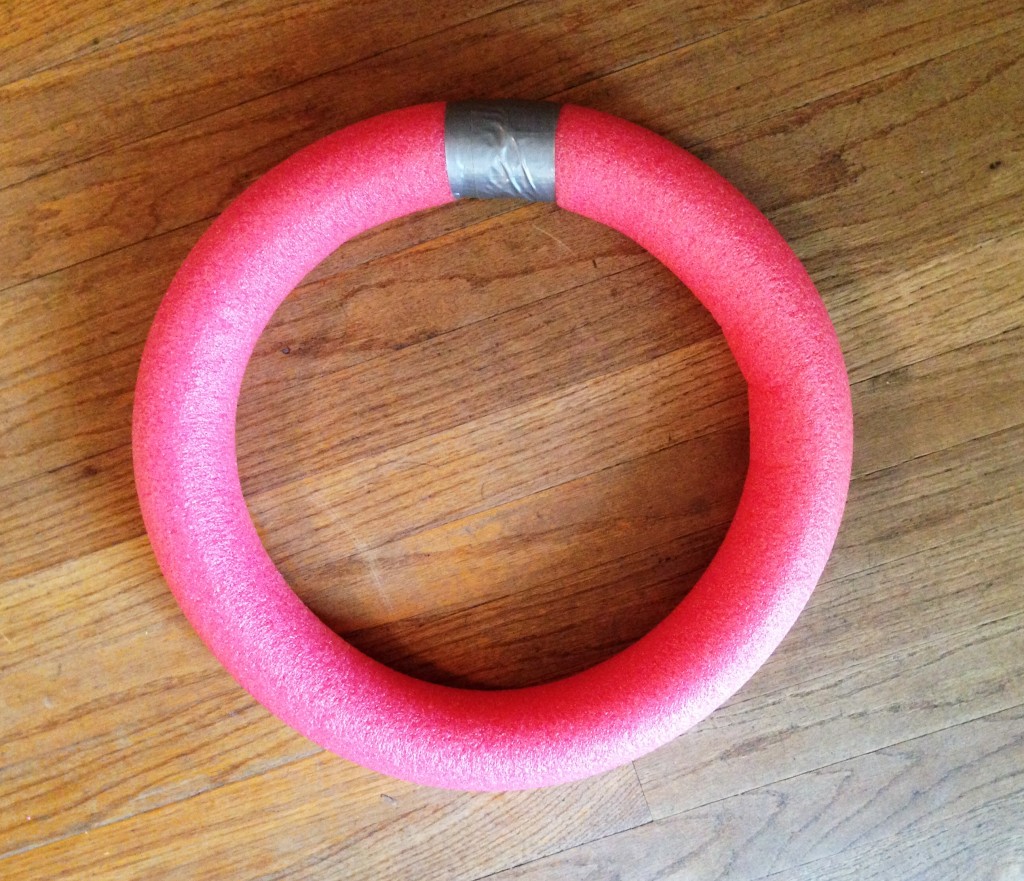
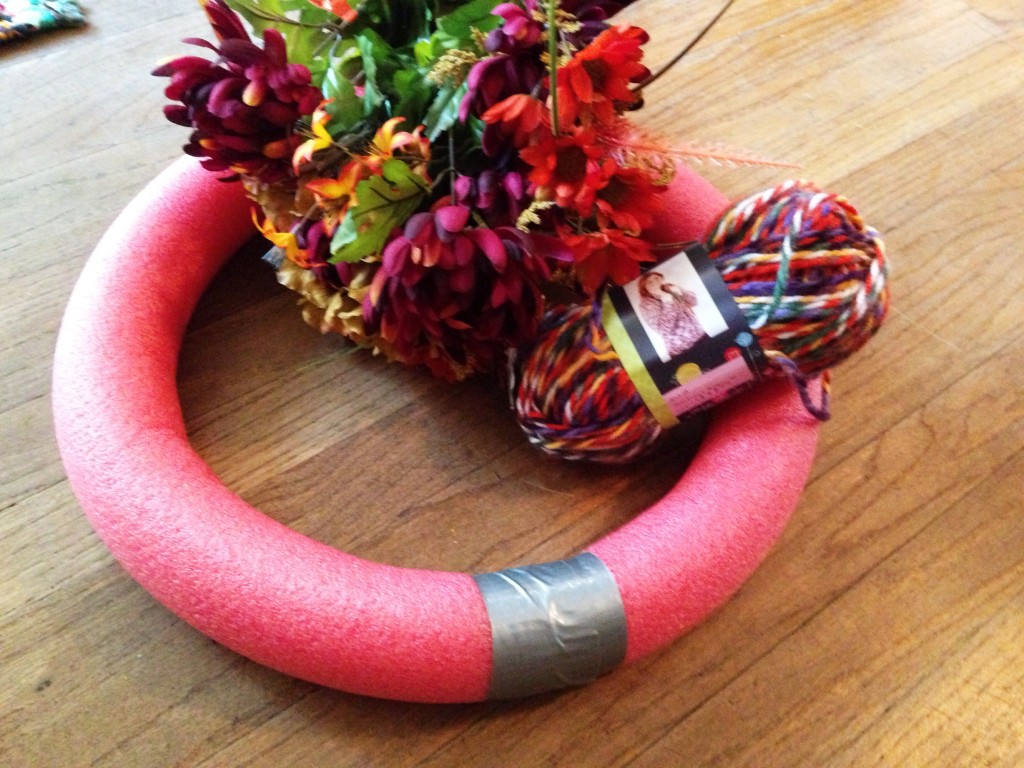
One of the main things I’ve been wanting to try is making a wreath from a pool noodle. I saw this idea somewhere on Pinterest (Sorry, I didn’t pin the link!) and thought it was genius! I picked up this pool noodle from the Dollar Tree (You guessed it, just $1.) and couldn’t wait to try the technique. To be completely honest, I bought this back in June with the intention of making a 4th of July wreath, but that never happened. Don’t judge.

DIY fall wreathDIY fall wreathSo, since I still had this pool noodle on hand, I chose a fall wreath plan that could use these supplies. You begin by using duct tape to attach the two ends of the noodle, creating your round wreath shape. Note: it’s very important to make several rounds with the tape, taping approximately 4-5 inches or more on either side of the connecting point. (The photo above is NOT enough tape.) You don’t want to come back to your wreath to find that it’s popped apart. I’m not speaking from experience here. Ok, maybe I am.

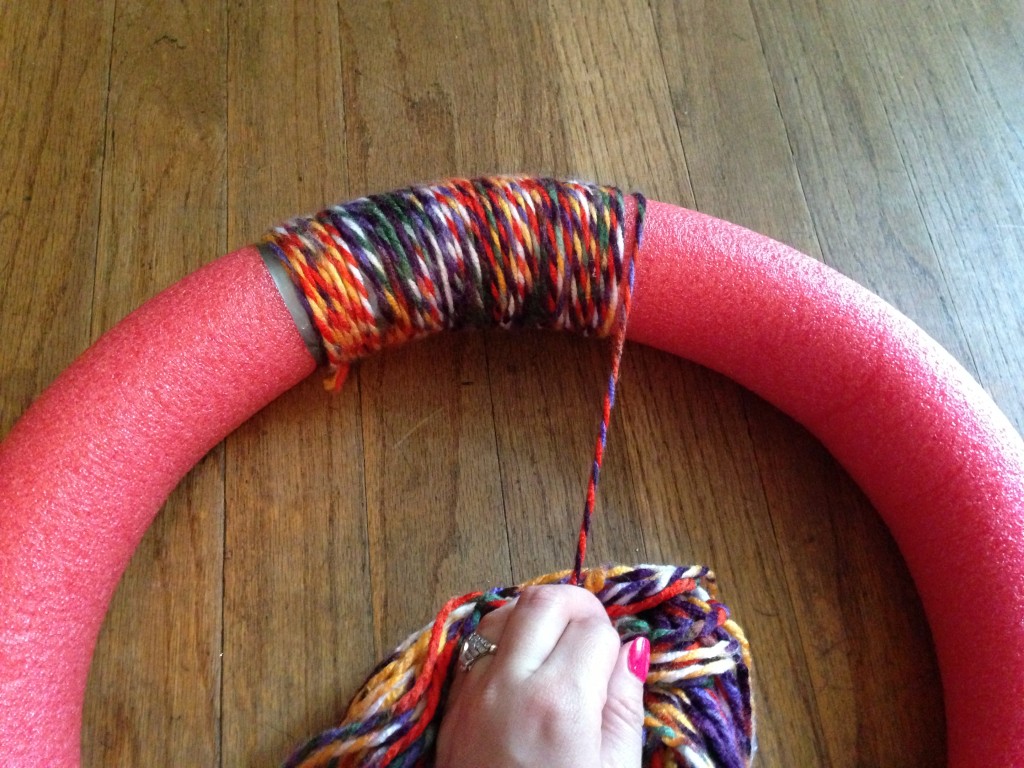
DIY fall wreathAfter I created my wreath, I chose to wrap the whole thing in fall colored yarn. Word to the wise: this process took a lot longer than I anticipated. I also ended up tangling the yarn more than a time or two. Nonetheless, I pressed on and didn’t set the whole project on fire like I may have wanted to at some points.

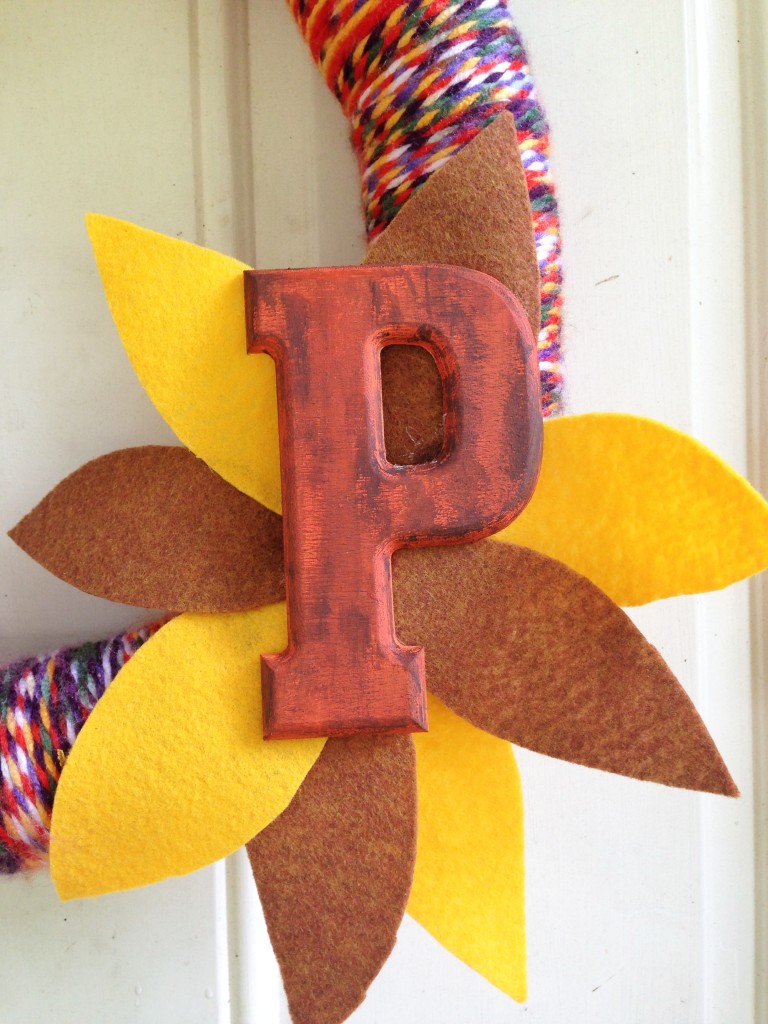
The day before I started working on my wreath, I saw Rachel’s fall wreath and thought it was adorable! I really liked the felt leaves so I decided to try to work those in. My original plan was to use fall-colored, silk flowers around the initial, but I thought the felt leaves would compliment the yarn I used. This project took on a few different looks before I actually completed it, as you can see from my supplies photo above. Those flowers didn’t make the cut.

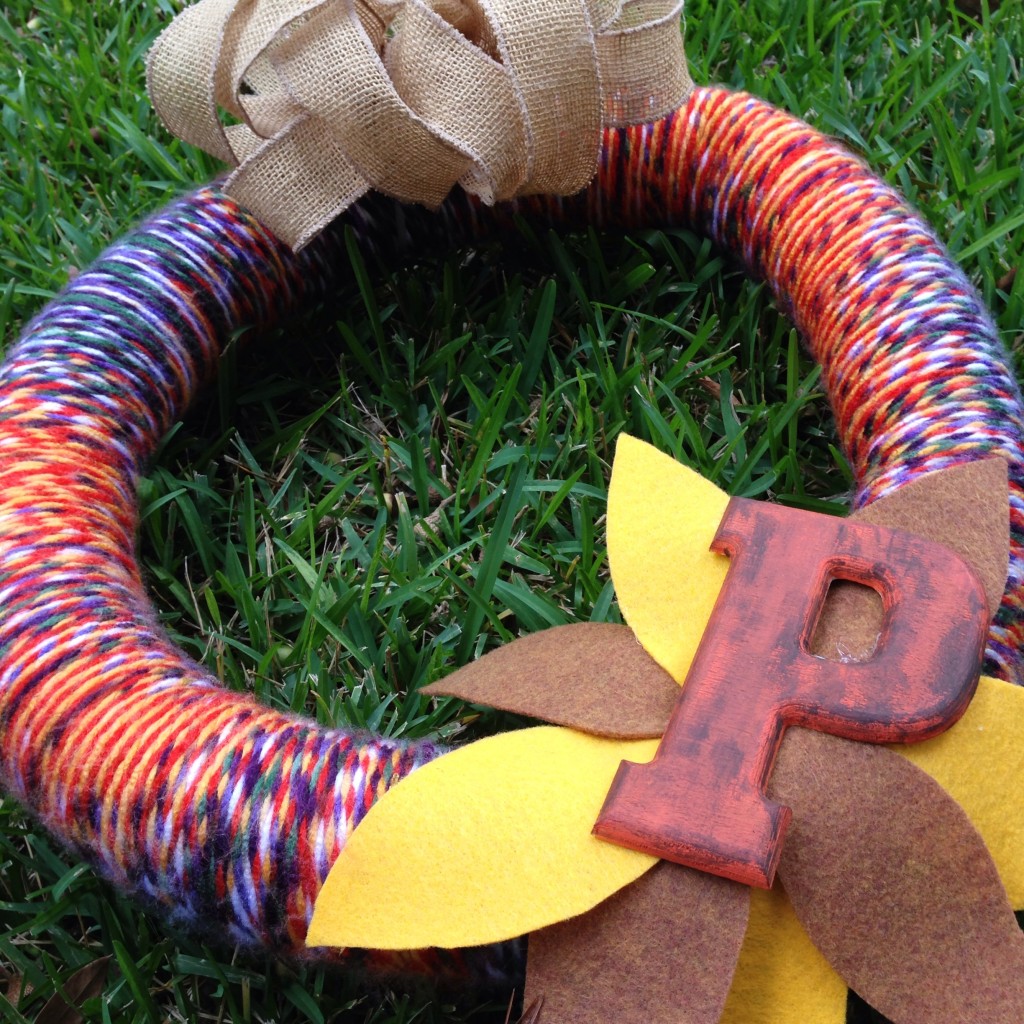
DIY fall wreathI couldn’t make her leaf layout look quite right with the initial, so I opted for creating a flower of sorts behind our “P” instead. I painted the letter orange, distressed it a little with some brown craft paint, and adhered all of the pieces with hot glue. I also added a burlap bow, which if you notice was on my last wreath. It was also on the one before that AND on one of my Christmas trees last year. Talk about versatility!

DIY fall wreathWhat do you think? Seen any fabulous fall wreaths this year? Share a link! Cool wreaths are my fav!

I’m Thankful: My Backyard

I want to start a series of posts about things that I’m thankful for. These won’t be things that I go around and look for. Instead, it will be more like me choosing to elaborate on things that I suddenly realize. All too often, we overlook and disregard the little (and sometimes big) things in our lives that we should be grateful for. This series is my attempt to celebrate my own gratefulness and maybe inspire others to see and acknowledge things to be thankful for in their own lives.

That being said, today I am thankful for my backyard. The past few months have been a tad stressful, and I often find solace in sitting on our patio and listening to the sounds around me. I’m learning that I really love to be outdoors and get an astonishing amount of peace and relaxation from it.

I’ve noticed over the past several years, that when I get upset, stressed, or even angry, I immediately want to go for a walk. I never put much thought into that tendency until recently. Turns out, just being outside in the sunshine for a few minutes each day has a dramatic improvement on my mood and mental state.

flowersflowersSo why I am thankful for my backyard? It’s certainly not the tidiest, largest, or nicest yard in town. As a matter of fact, my husband cringes at the greenery overload that came from neglect over the years. (We are renting, and the owner of the home hasn’t focused much on landscaping.) However, there’s something that I can’t help but love about the privacy the overgrown greenery adds. Regardless of the state of the landscaping, I’m thankful for this space because it’s the first time in years that I’ve had an outdoor space to revert to. It’s a nice, private area where my neighbors aren’t in clear sight. We have comfy patio furniture with new cushions that I love. The patio area is easily accessible, and I can walk out in my (or Matt’s) slippers. Even if some of the trees are covered in vines…everything is green, vibrant, and inspiring.

Matt's slipperspretty cushionsOur backyard is a place where I can go and wind down. A place where I can sit and write or read. A place where I did a lot of studying for my real estate exam. It’s a place where I can relax and think about who I want to be and what I want to become.

So today, I am thankful for this space….our perfectly imperfect backyard.

my backyardIf you have an outdoor space, I encourage you to get out and enjoy it. Multiple studies show that spending time outdoors can dramatically improve not only your mental state, but your physical health as well. Let’s all enjoy this beautiful world around us!

What do you have to be thankful for? Leave me a comment and let me know!