Tag Archives: DIY

Nail Holes & The Nesting Place

Nail Holes & The Nesting PlaceThis post is a bit of a combo post. First, I want to bring attention to the fact that I finished my first book in many, many years back in the fall. I honestly can’t remember when the last time was that I actually finished a book that I started. I was probably a little girl. It was probably Babysitters Club or Sweet Valley High. (Not kidding.) I’ve learned a lot about how I feel about reading lately, but we’ll talk more about that later. For now, let’s all celebrate the fact that I actually read a book from start to finish. Feel free to bring me celebratory cupcakes if you’d like.

Now, let’s talk about that book. I’ve been following along with The Nester’s blog lately, and I’ve seen her book mentioned here and there around the internet. Basically, this book is about designing a home that you love around things that you already have or can put together cheaply and easily. It’s not about going in debt to furnish a picture-perfect home and it’s not about following all of the rules.

Instead, The Nester’s motto is, “It doesn’t have to be perfect to be beautiful.” Honestly, this motto is what drew me to her blog and the book to begin with. We all know that I struggle with perfection. It’s not uncommon for me to just not do something if I don’t feel like I have the time to do it perfectly. This is especially true for decorating our home. I have hundreds and thousands of ideas, but I delay implementing any of them for the fear of finding a better idea or not haven’t enough time to plan it out completely. It’s quite tragic.
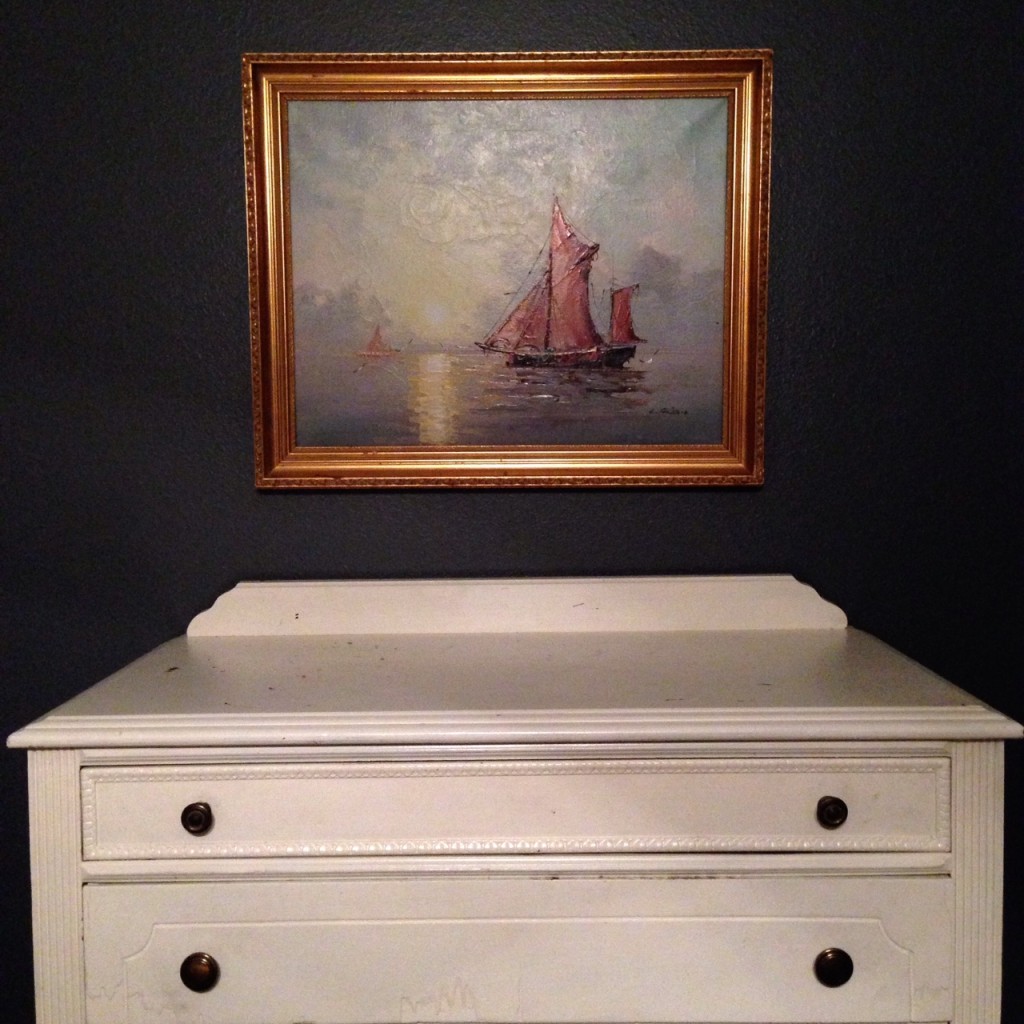
ship paintingWhen I stumbled upon Myquillyn’s blog, her message struck me. I shouldn’t be waiting on perfection. Instead, I should be creating a home that works for Matthew and I, and I can do so without a perfect plan. There are many beautiful things out there that aren’t perfect. As a matter of fact, I tend to find that the imperfections are what’s most beautiful. Why, then, do I put things off in a quest for perfection when I don’t even want a perfect home?

As I read more of Myquillyn’s posts, I knew that her message was exactly what I needed to hear. I needed someone to coax me into just doing things, both at home and in my life in general. I hesitated to buy the book because I knew I had a terrible track record of not finishing books. I also didn’t want to read a design book that “showed you how to properly mix patterns” or some other surface level design strategy. Finally, I broke down and purchased the book for my iPad and then struggled to put it down again.
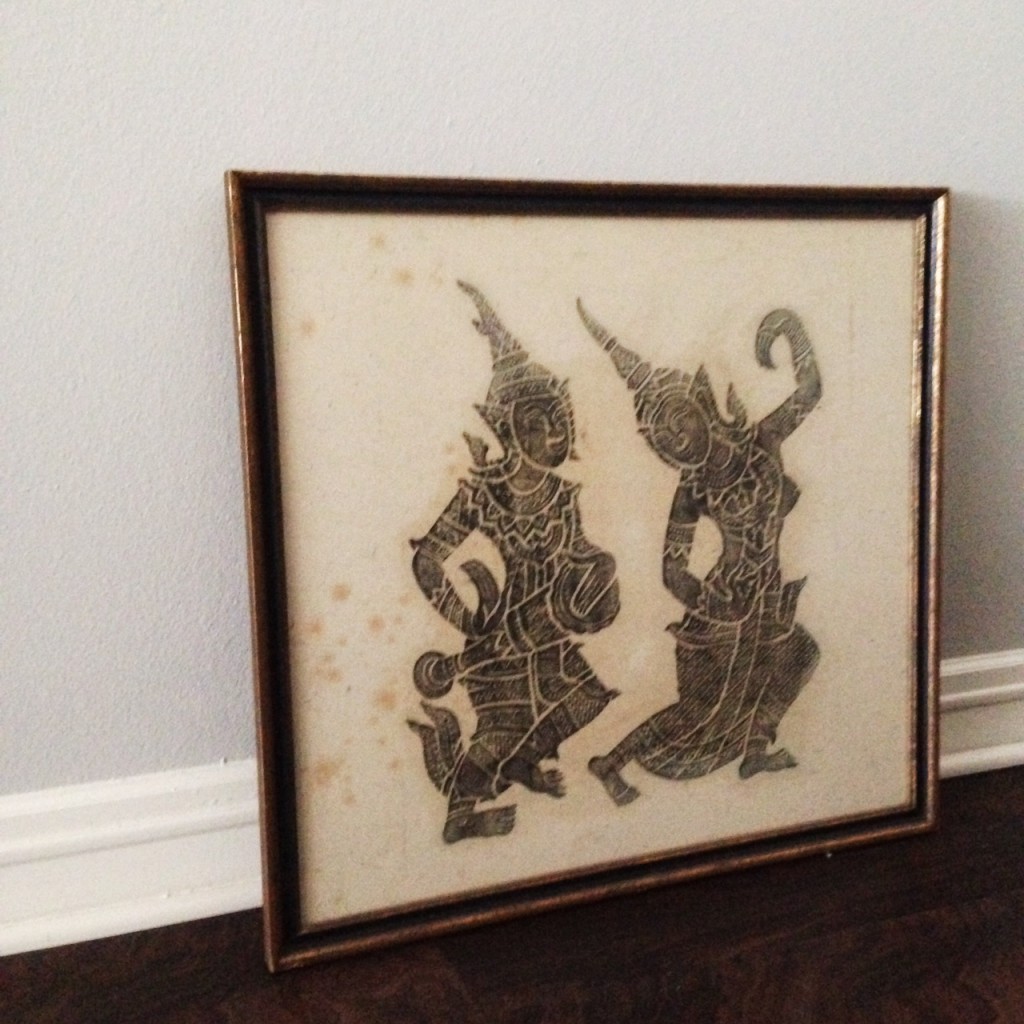
art waiting to be hungAfter reading the first few pages, I knew that I needed to really hear Myquillyn’s message. I knew that this book was far less about how do decorate and far more about why. After all, I don’t feel like I need help with how to do it. Instead, I needed someone to steer me towards actually doing things instead of waiting for the stars to align in a scenario where I have plenty of time and money and inspiration. The Nesting Place helped to me see all of the scenarios in which I was accidentally waiting for perfection. I was waiting for the perfect moment or the perfect shower curtain, and in reality, I had practically everything that I needed to at least make things beautiful for the time being. If I found a better rug/chair/ottoman/wall hanging later, then that’s fine! I could simply change it later. If you find yourself struggling with decorating your home or if you want some creative ideas for creating something beautiful on the cheap, I highly recommend reading the book.

This brings me to the second part of this post. There’s a section in The Nesting Place dedicated solely to nail holes. I almost shiver as I write this, because the thought of putting an unnecessary nail hole in my freshly painted walls, sends chills down my spine. After all, I paid a pretty penny (I suppose “pretty pennies” are worth more than ugly ones.) to have all of the holes filled and every single surface of this home painted. However, Myquillyn says, “Is there anything less risky in life than creating a one-millimeter hole in a wall that can be filled with your finger and some putty in two seconds?” She goes on to say, “Nail holes are just a part of living in a house. I’d say that a nail hole is the lowest entry-level risk-taking action you could have in life, other than getting no whip on your coffee.”
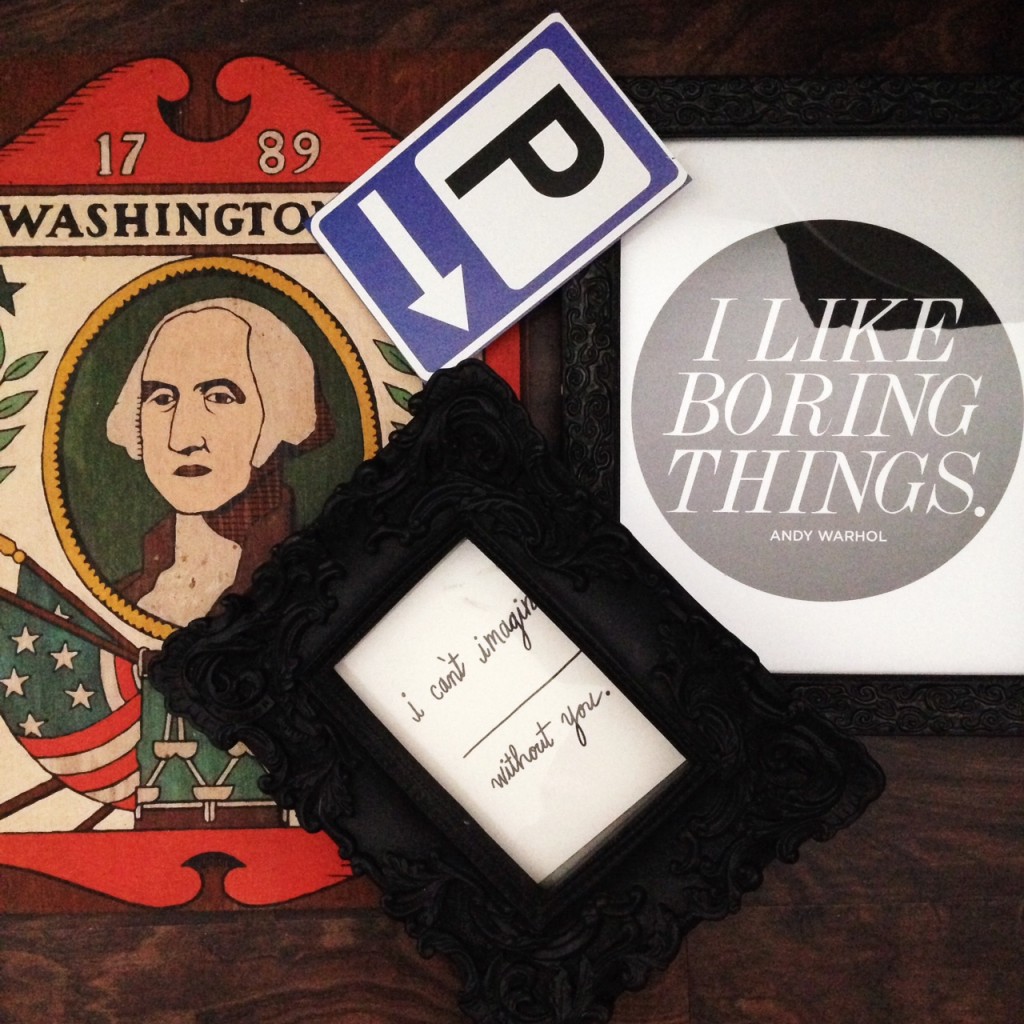
wall artAs crazy as it sounds, this section of the book was a huge turning point for me. I was putting off hanging things on my walls (something that I’ve desperately wanted to do for months) for the fear of putting a nail hole in the wrong place. How silly! That very day, I went and put a hole in the dining room wall. I hung a wreath as part of my Halloween decor…it’s wasn’t even a permanent decor item! As silly as it sounds, this was a huge step for me. I made a decision to not let such a tiny, little obstacle hinder me from having a beautiful home right now.

Each day that passes leads me closer to the day that Matthew and I will move from this home. I made a commitment that I wouldn’t put off decorating this home as I had done with our rent house. However, we’ve now lived here for 5 months and most of the house isn’t decorated as I’d like. Some of this stems from needing lots of new furniture. Some of it is from a lack of time. However, most of my hesitation to decorating has been a fear of missing the mark. It’s from a fear of hanging something in the “wrong” place or purchasing the “wrong” rug. These fears kept me from finishing our last home, and if I’m not careful, I’ll see the same thing happen in this home.

After reading Myquillyn’s book, I realized that most of my hesitation surrounds nail holes. I also realized that nail holes are really such a small issue, both literally and figuratively. The reality is, there’s a large chance that I’ll actually like where I hang something. The other reality is, if I don’t like where it’s hanging, I haven’t made some huge, life-altering mistake. I can simply move it. I can just as simply fill in the nail hole. After finishing this book, I decided to no longer let waiting on perfection be an obstacle for me in creating a home that I love.
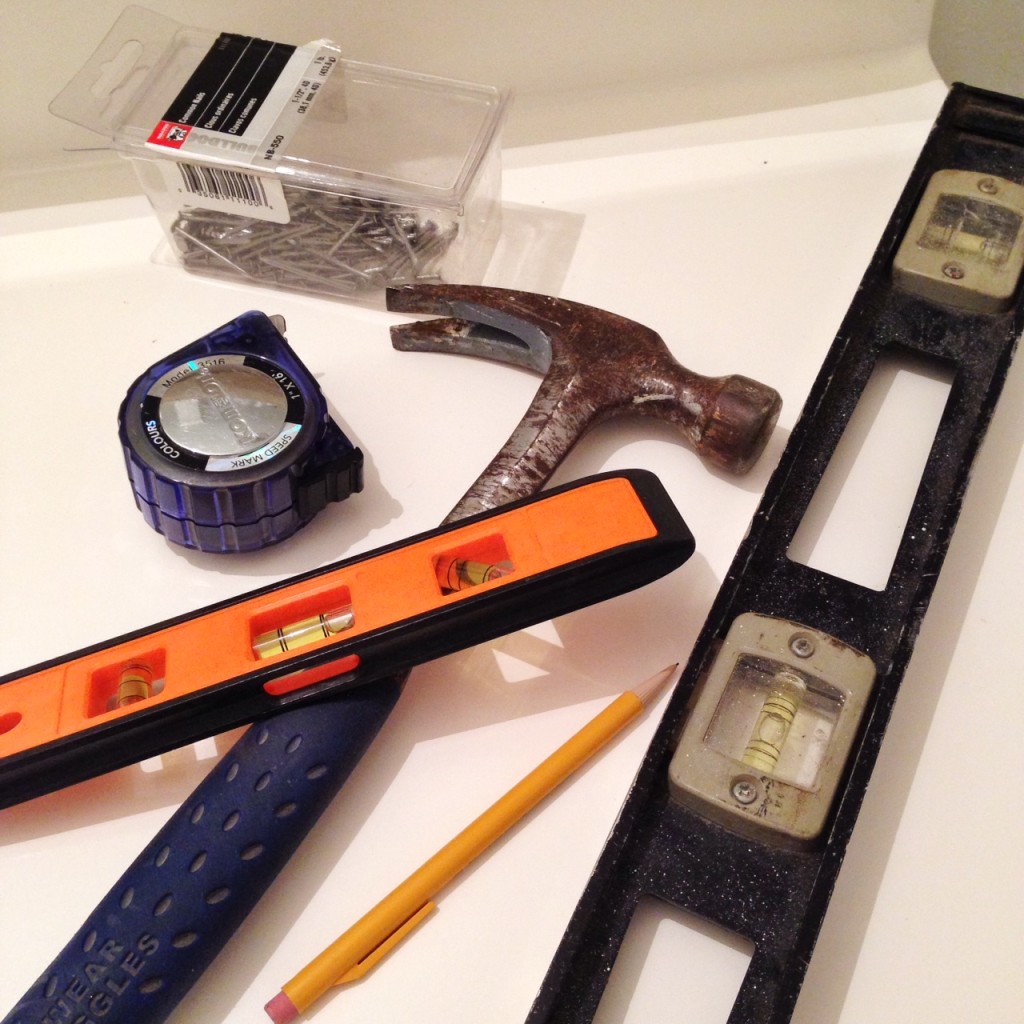
hammer and nailsHow many areas of our life do we approach in a similar manner? I think it’s safe to say that we often let fear of the unknown be an obstacle for us in creating a life that we love. Maybe we don’t go after that promotion for a fear of being told no. Maybe we don’t tell someone how we feel, because we’re scared of how they’ll react. Maybe we don’t put nail holes in freshly painted walls, because we’re afraid that it will be the “wrong” spot. Whatever it is, these little fears can quickly and sneakily be a total road block for us in creating the lives we want. Rather than holding on to fear and the struggle for perfection, let’s tackle life, one little nail hole at a time. Sometimes the risks we need to take are tiny. Sometimes they’re large. Either way, we’ll never know the outcome without first taking the risk.

What is one thing that you can do today to take a step towards the life that you want? Whatever it is, don’t spend too much time thinking about it. Just do it! For me, that means going to out another hole in the wall. Use this link to order the book and I receive a small commission!

DIY Wall Hanging

Rope Project

Rope Project

Rope Project

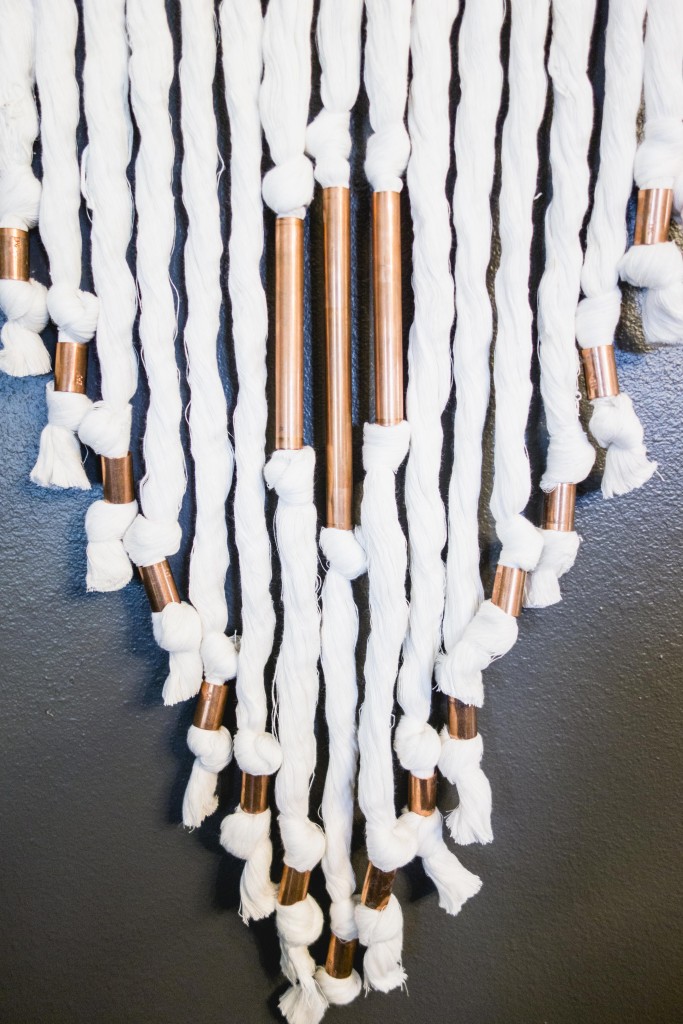
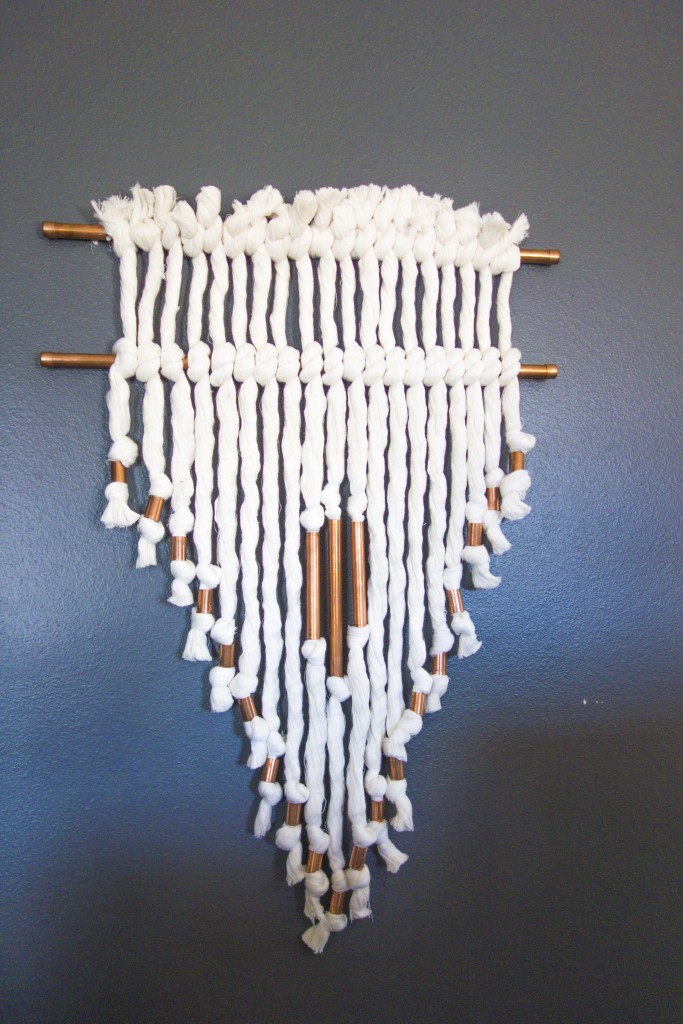
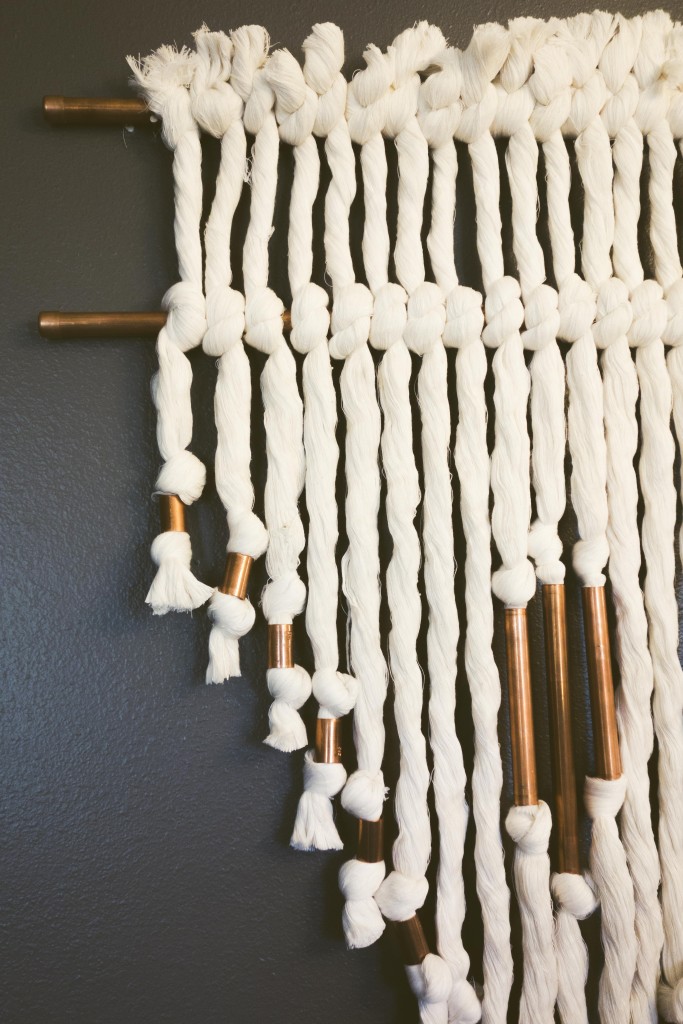
When I saw this wall hanging on A Beautiful Mess, I knew that I needed to give it a whirl for my own home. Rope is one of my favorite things ever, and I’ve been drawn to anything copper lately. Perfect combination! Plus, the world is being taken by storm with textured wall art and weavings these days, which I’m totally fine with. There’s some pretty awesome work making its way around the internet, if you’ll look around a bit. If I’m not careful, my home might end up with a weaving or rope/yarn art on every wall!

I actually started on and completed this project months ago. It was finished (with the exception of trimming the edges to level them out) months before we decided to move from our rent house. Now that I think about it, I may have actually purchased these supplies this time last year! (Take you a year to get something completely finished? Me too…don’t feel bad.) I planned to hang this in our master bedroom….that I never finished. Instead, this little guy just hung out in a laundry basket until we moved. However, it was one of the first things I planned out for the new house. I knew right away that I would hang it in our dining room, and I was excited about how it would pop on the dark gray wall.

Rope Project

Rope Project

Rope Project

Rope Project

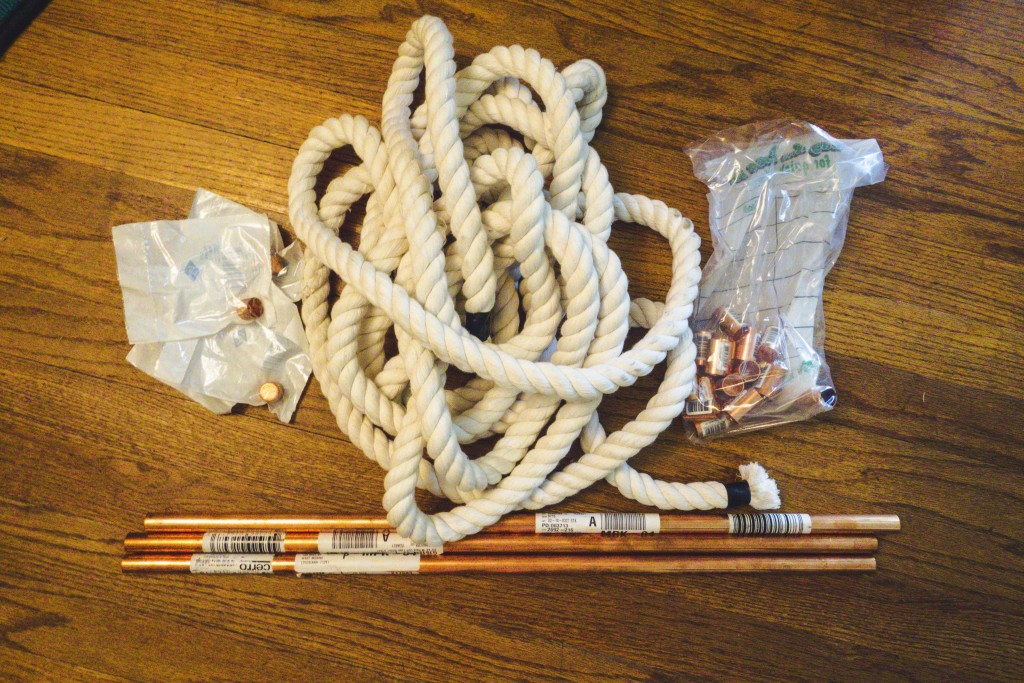
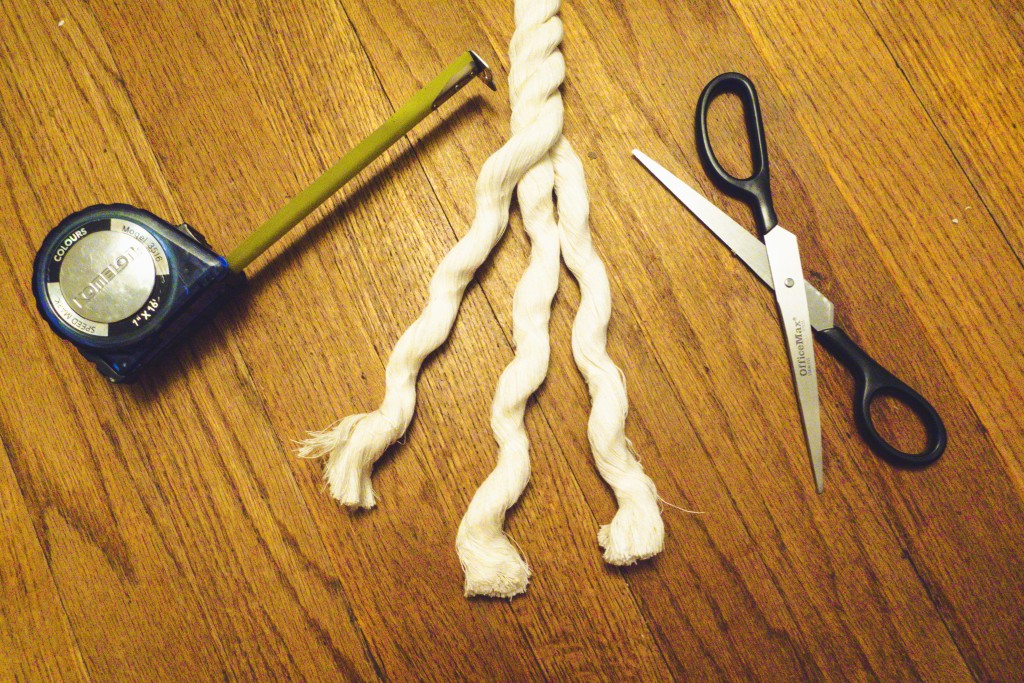
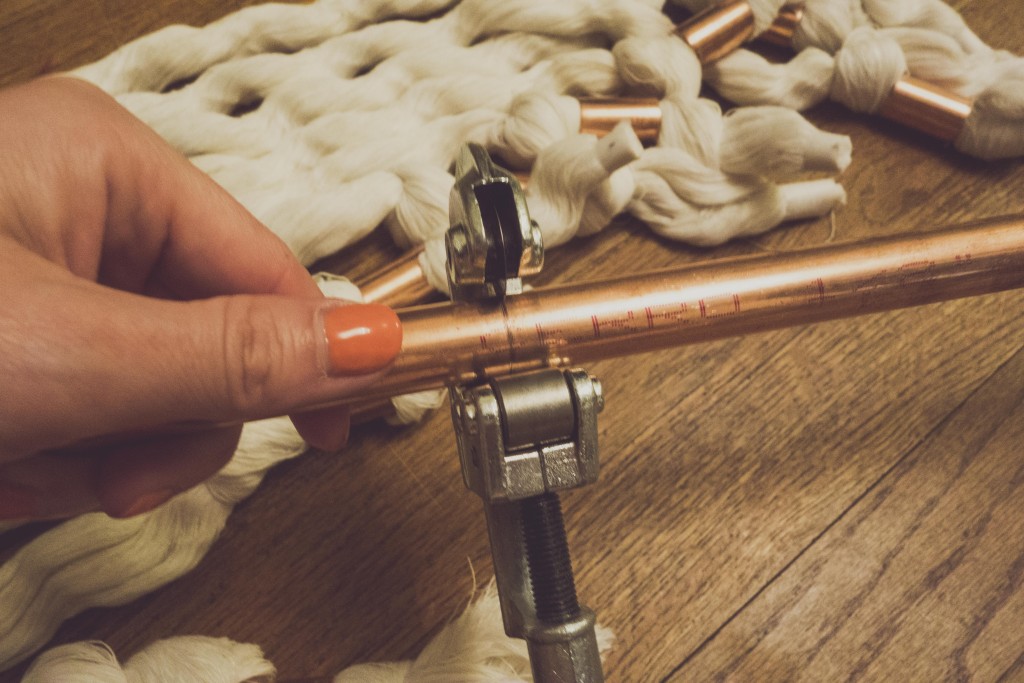
I’m not sharing much of a tutorial here since you can get all of that from the ABM link. I will say that all of the supplies came from TP Outdoors. The rope was a 3-strand rope, and I unraveled it to use the individual strands. I also taped the ends with scotch tape before cutting them to keep them from fraying quite so much as I worked. I removed the tape after hanging it on the wall. For the most part, I followed the directions pretty closely. The hardest part of this project was cutting all of the rope and getting the knots to line up. However, after you get going with a few strands, it’s pretty easy to work out a system. Don’t worry too much about the ends being the same length at this point. It’s much easier to make them a tad longer than necessary and then trim to the correct length after that.

This is one of my first DIY projects to make from ABM (They share so many good ones!), and it’s one of the first that I’ve done that turned out pretty much exactly how I’d hoped! It’s been a bit of a conversation piece in our new home and most people are shocked to hear that I made it.

How about you? Have you made any awesome DIY projects lately? I’d love to see them, so send me a link! I actually have another project that I made from ABM that I hope to share soon…just gotta get to work in that closet room of mine!

DIY Halloween Rug

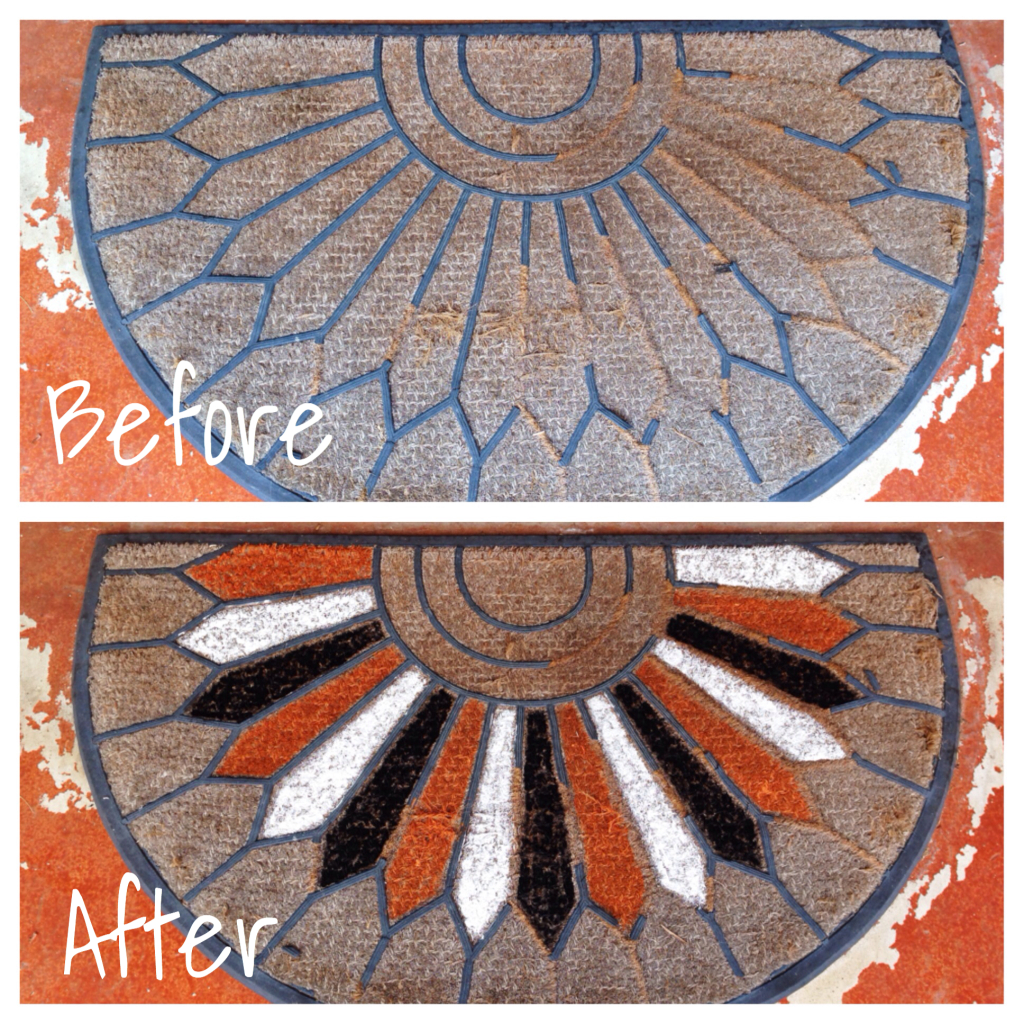
rug before and afterThis old, worn out rug was left at our house by the previous owners. I’d been meaning to pick up a new one but just hadn’t gotten around to it. The list of things that I need to get for this house is incredibly long. For example, light fixtures…I still need to pick out new light fixtures for every room in the house. One thing at a time, Pamela. One thing at a time.

Anyway, I was waking around outside, thinking about Halloween/fall decor one morning, and I decided that I should give this old rug one last ride before tossing it out. I decided to add a little paint and use it as part of my Halloween decor before replacing it. I could have just bought a Halloween rug from the store, but this option gave me a chance to use something that I already had, and I won’t have to try to reuse or store a new rug until next year.

Halloween craft suppliesI used simple craft paint for this project because it’s what I had on hand when I had the idea. This rug is under the front porch, so I don’t have to worry much about it getting wet. Also, I only needed it to last for a few weeks, so I didn’t spend too long worrying about the paint choice. If you’re going to do something similar in an area exposed to weather or want it to last longer than a couple of weeks, you’ll want to use a more durable, exterior paint.

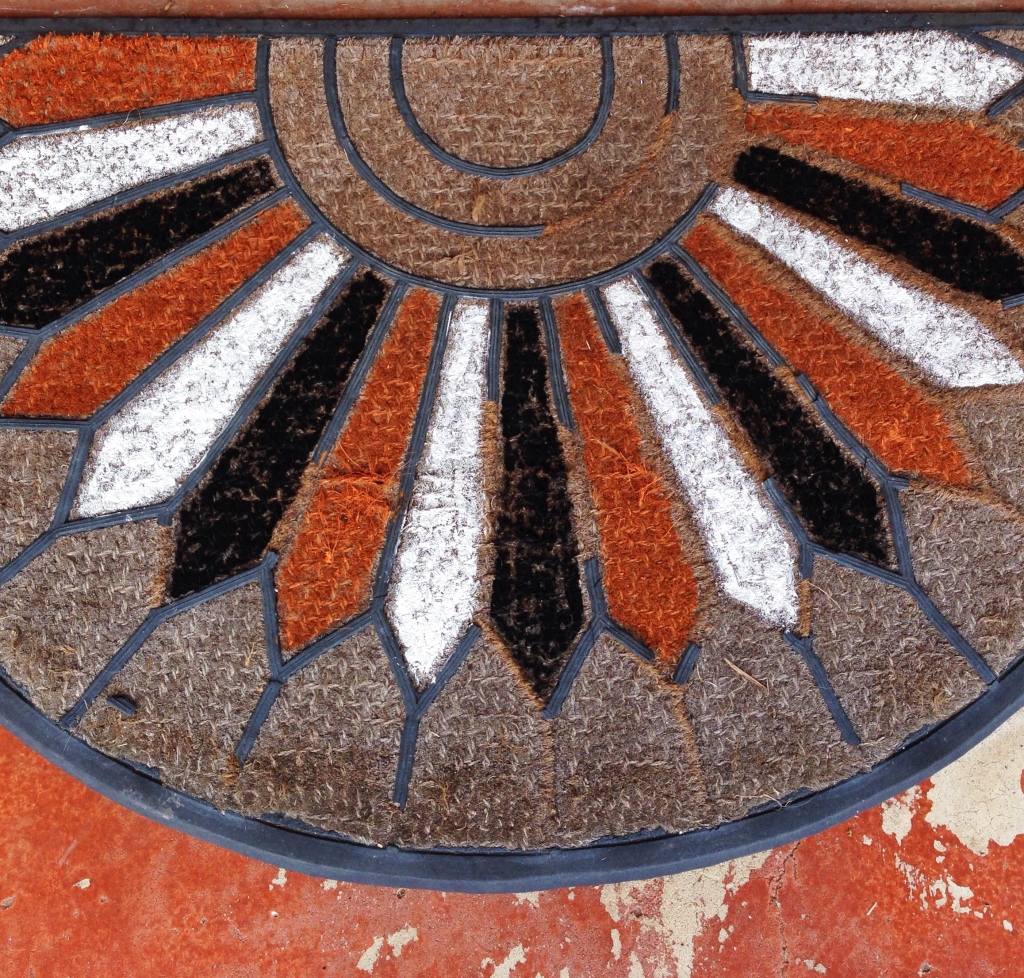
DIY Halloween RugLooking back, I should have probably painted the top and bottom portions instead of the middle where most of the feet-wiping will take place, especially since I used craft paint. However, I feel pretty confident that it’ll make it through Halloween anyway.

So there you have it….a quick and easy way to give a new life to something old. Do you have anything lying around your house that a little paint might spruce up? Even temporarily? This project took about an hour to complete. That includes the idea process and hunting up supplies. If you have an old, ugly rug lying around, you should try it!

See more Halloween decor ideas on my previous post.

Halloween Decorating Ideas

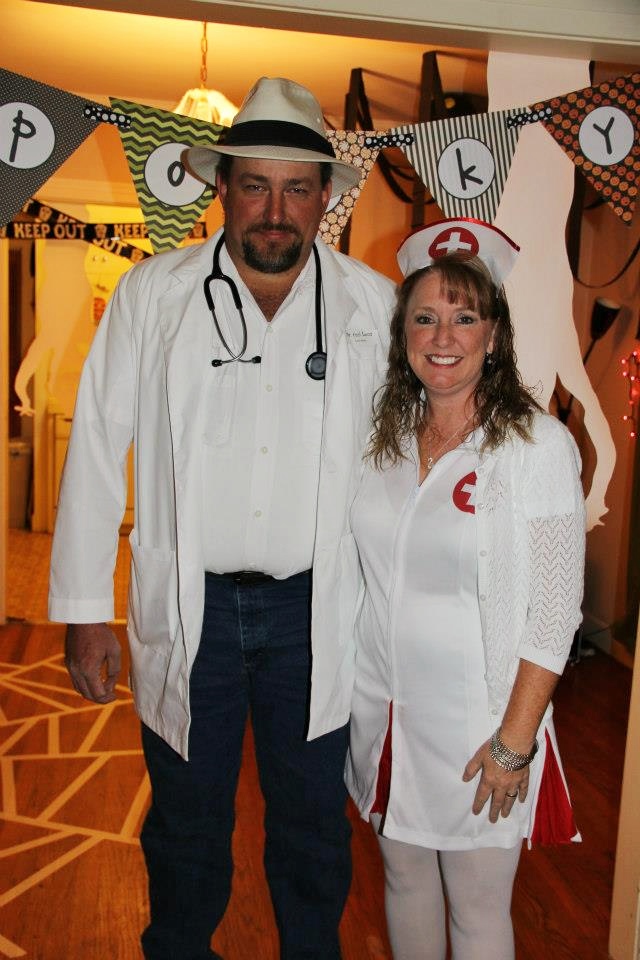
Halloween Decorating Ideas (9)Halloween has always been one of my favorite holidays. Costumes, decorations, the cool fall air…it’s just so much fun! Matthew and I hosted a Halloween party shortly after we were married in 2012, but I never shared any pictures from that night. (We ended not having a party last year.) When preparing for Halloween 2014, I thought it would be fun to share a few photos from the 2012 party. We didn’t get pictures of all of the guests, but how fun are these costumes?!

Halloween Decorating IdeasHalloween Decorating Ideas (6)Halloween Decorating IdeasHere are a few quick and easy decorating ideas from the 2012 party.

1. Giant spider web: Use masking tape to put a spider web design on the floor. I did mine coming out from under the food table. Note: Be careful using masking tape on hardwood floors. It didn’t leave a lasting web impression on the floor or anything. I’m definitely warning you from past experience.

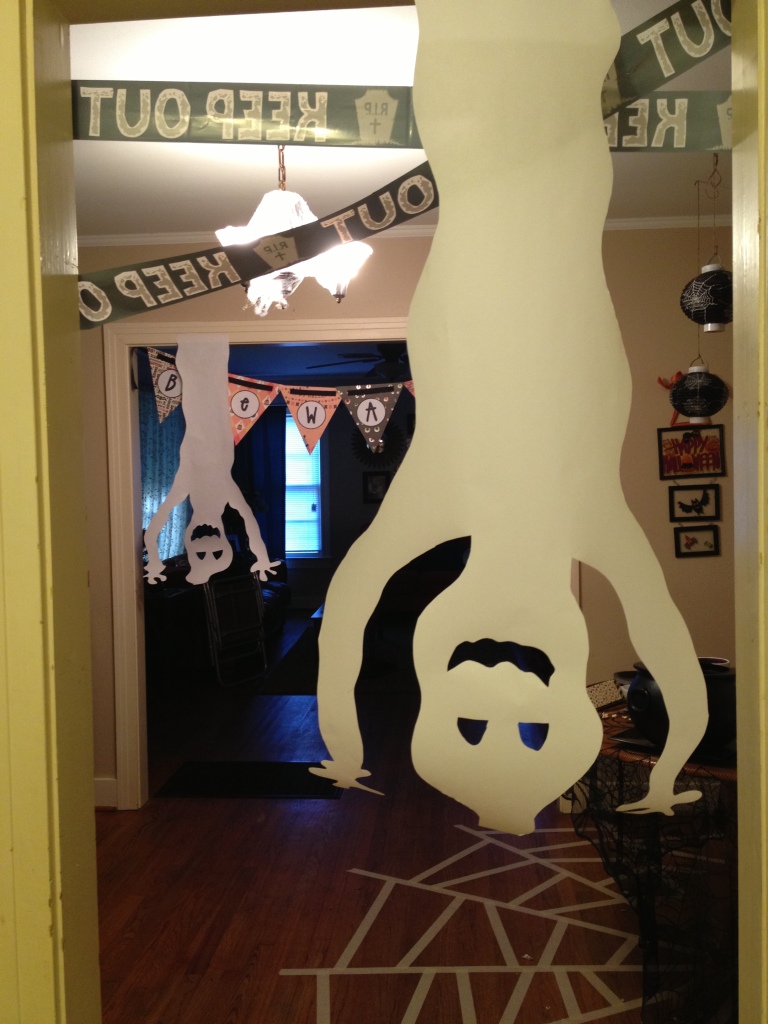
Halloween Decorating Ideas (7)2. Hanging ghosts: Cut scary ghosts from butcher paper and hang from the bottom of doorways. I added a little caution tape from the Dollar Tree to give it something extra.

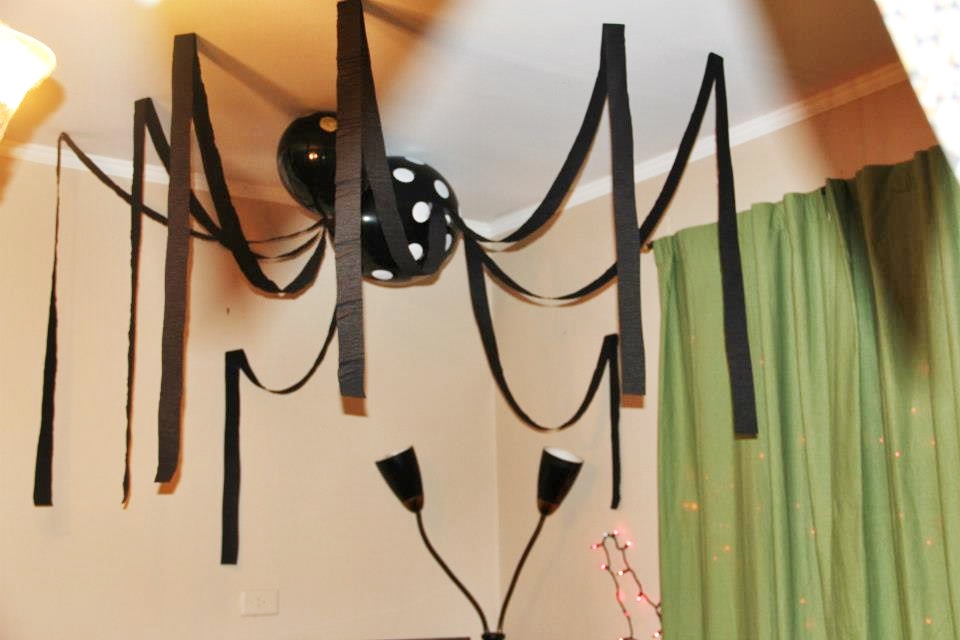
Halloween Decorating Ideas (14)3. Giant hanging spider: Tape black streamers to balloons and hang from the ceiling to make a giant spider. We used push pins to secure it to the sheetrock ceilings. This is a great idea to take up a large space…you could make it as big as you’d like!

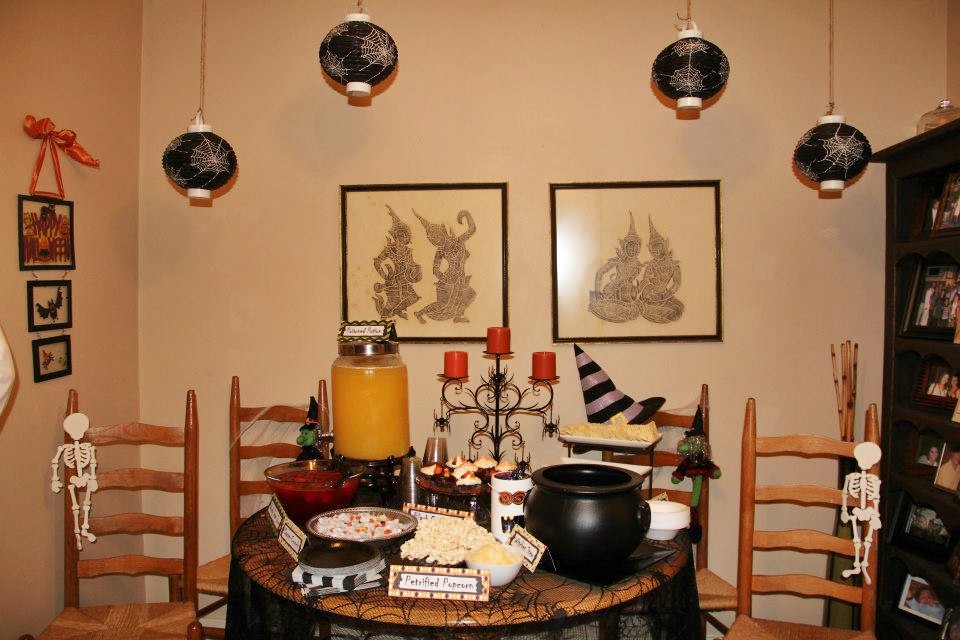
Halloween Decorating Ideas (8)4. Apothecary jars: Use plastic bones in water with green food coloring to create a lab-like vibe.

Halloween Decorating Ideas (5)5. Food labels: We made Halloween themed labels for the food and included names like Petrified Popcorn, Witches Stew, Black Cat Cakes, Poisoned Punch, Casper Crunch, etc.

Halloween Decorating Ideas (10)6. Faux spider webs: You can never have too many spider webs. This is a cheap and easy way to make any space look more festive. Stretch them over everything!

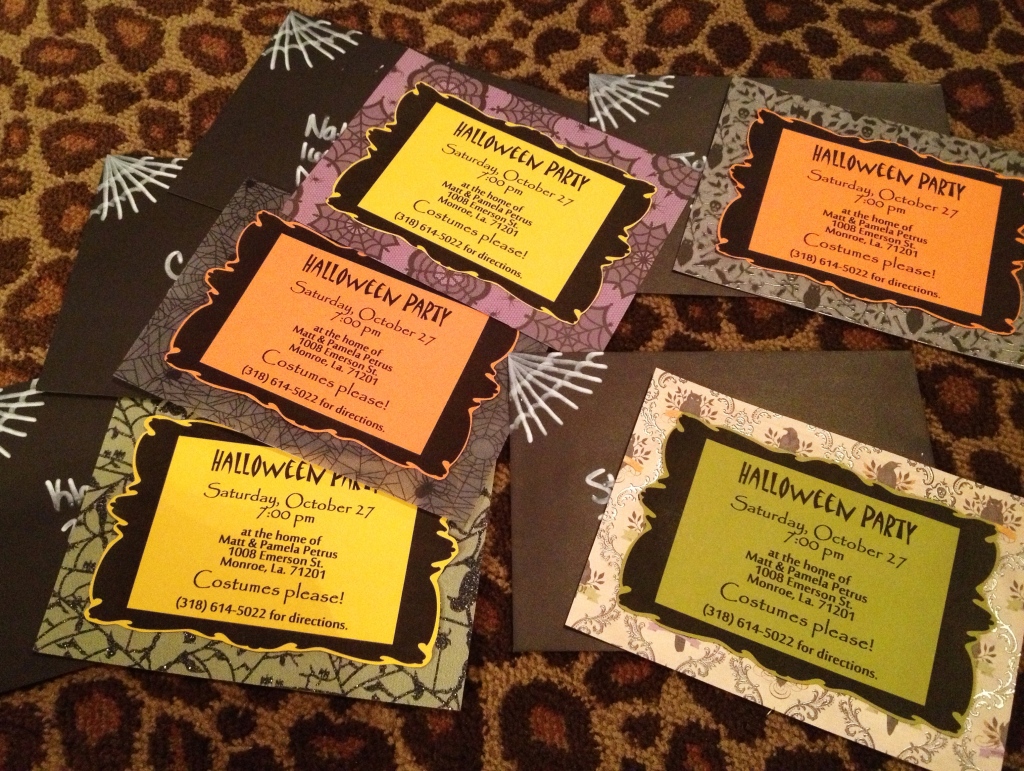
Halloween Decorating Ideas (2)7. Invitations: It’s no secret that I have a slight infatuation with stationary and paper products. We printed invites on fall-colored paper, cut them out, and glued them to Martha Stewart Halloween paper (similar to these). I mailed them in black envelopes and wrote the addresses with a white marker. I also drew a little spider web in the corner. I loved it! I might have to use this idea again this year.

Halloween Decorating Ideas (13)Halloween Decorating Ideas (4)Whether you’re doing a small get together or something larger, these ideas can be incorporated into practically any space or event. I’m getting pretty excited about this Halloween, and I know that I better get busy! I’ve been pinning quite a bit of Halloween and fall décor ideas lately. If you’d like an extra dose of inspiration, go check out my Halloween/Fall Board on Pinterest!


#mapfirsthouse – Closet Plans & Inspiration

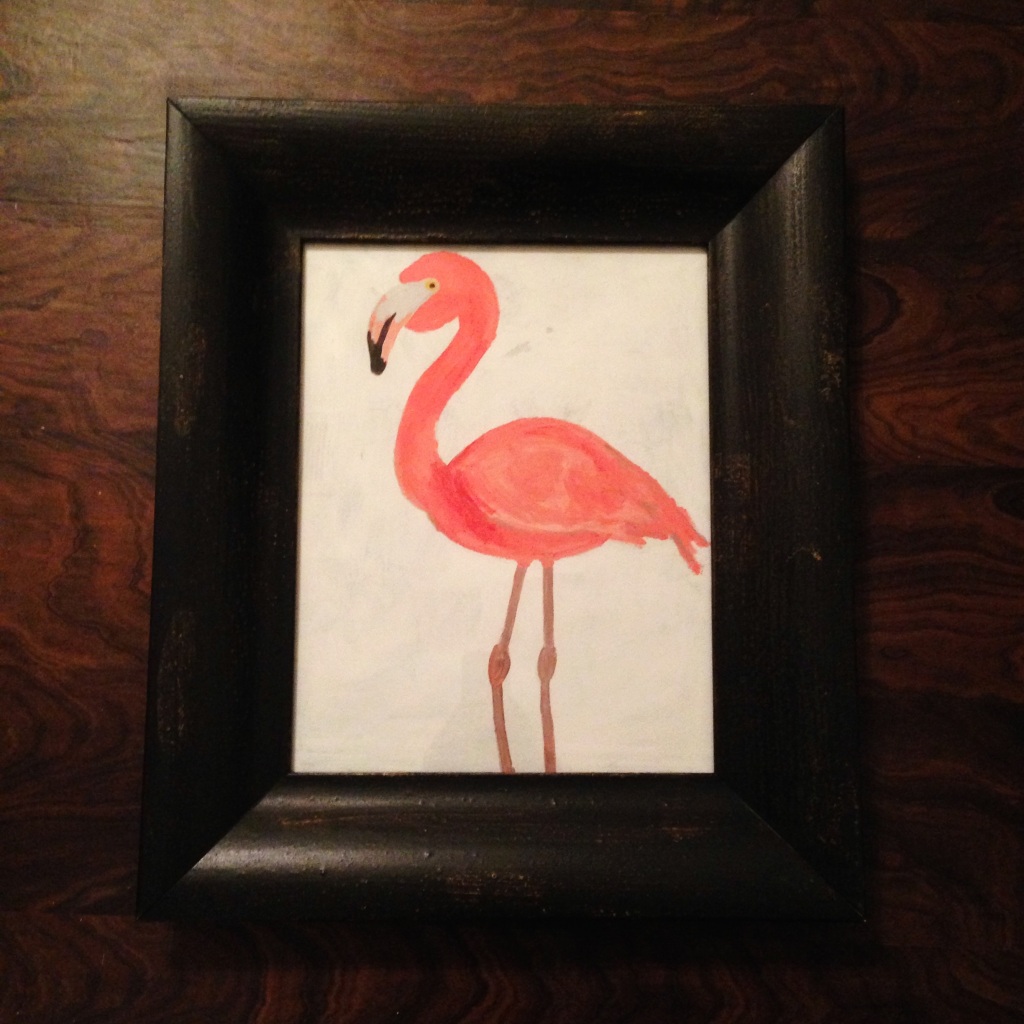
flamingo printI had a closet room in our last rent house, but I never quite made it into the room of fabulousness that I had hoped for. In this house, I have pretty large plans to make this room a dressing room paradise. 

My overall inspiration for the room came from this nursery. I loved the black and white stripes with hot pink and orange accents. I even ordered this flamingo print from Elise!  (Once upon a time, I really hated pink. However, since this spring I’ve really kind of liked it.) 

My original idea was to hang black and white striped curtains, but when reading this post by Myquillyn, I saw the striped wallpaper and fell in love! Striped wallpaper would make such a grander statement than just curtains, and I’m pretty excited about my new idea. (Also, I love the idea of those Style Saturdays by Lowe’s and would love for one to take place near me!)

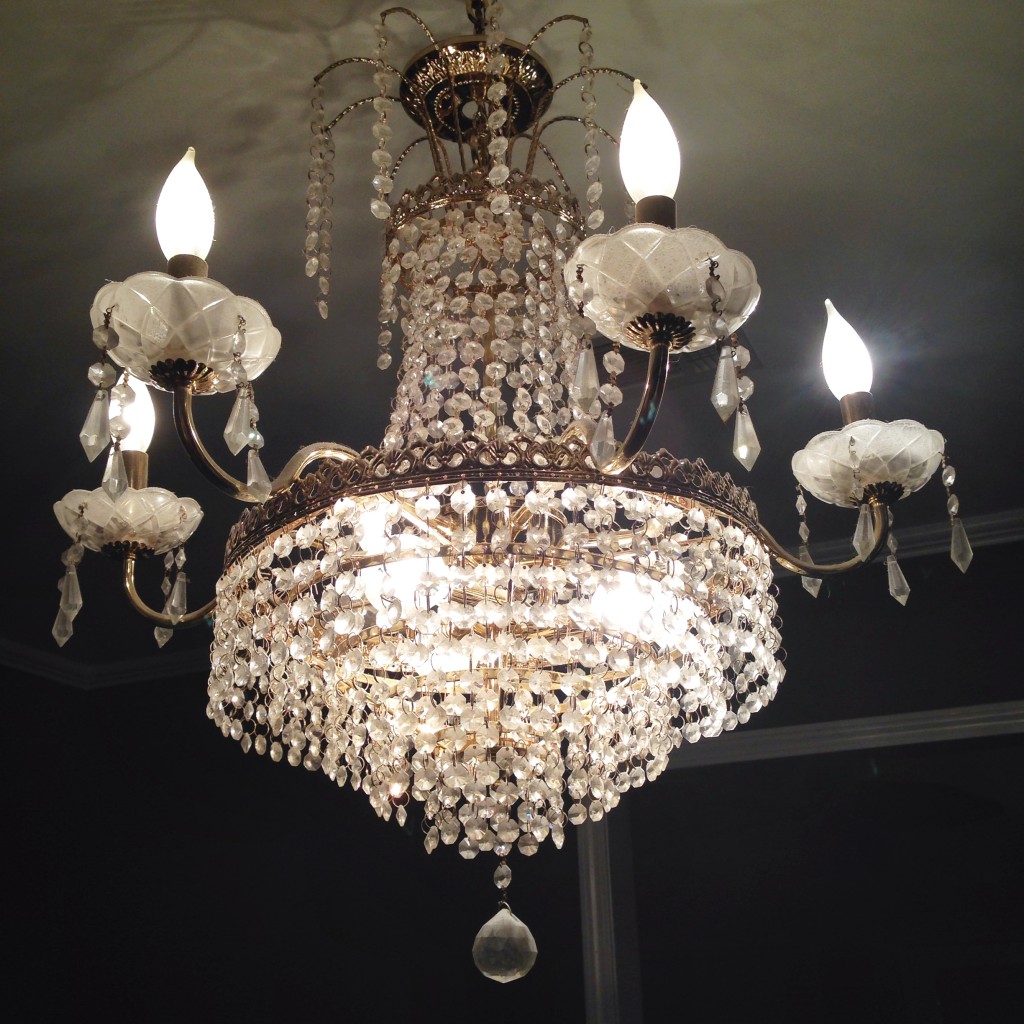
Chandelier

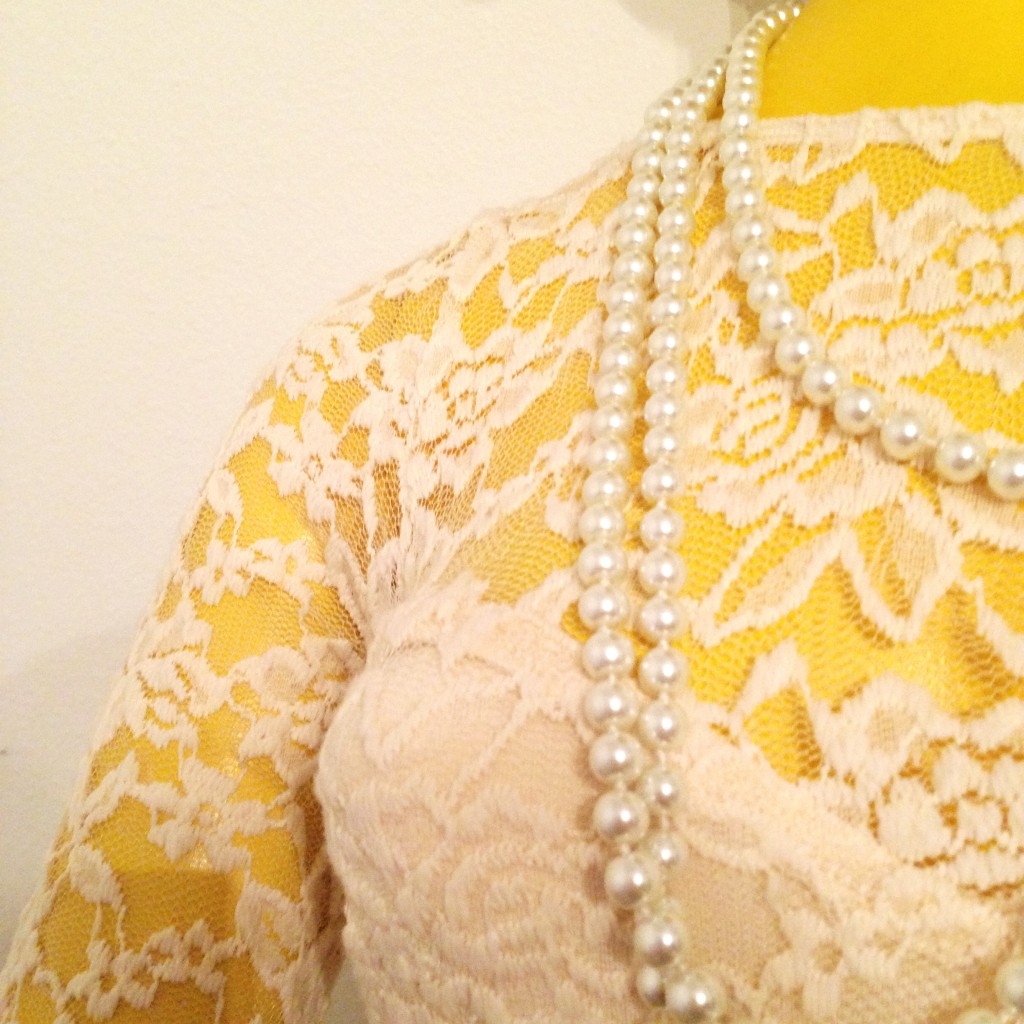
As for other inspiration, I plan to paint our current dining room chandelier and use it in the space. I’m also thinking I’ll spray paint/update my dear mannequin a copper color to pull from the orange. The yellow worked great at Salt & Pepper, but I think it’s time for an update. Have I mentioned that I’m loving copper these days?? I’d paint everything copper right now if it made sense. (P.S. That’s my wedding dress that she’s wearing.) 

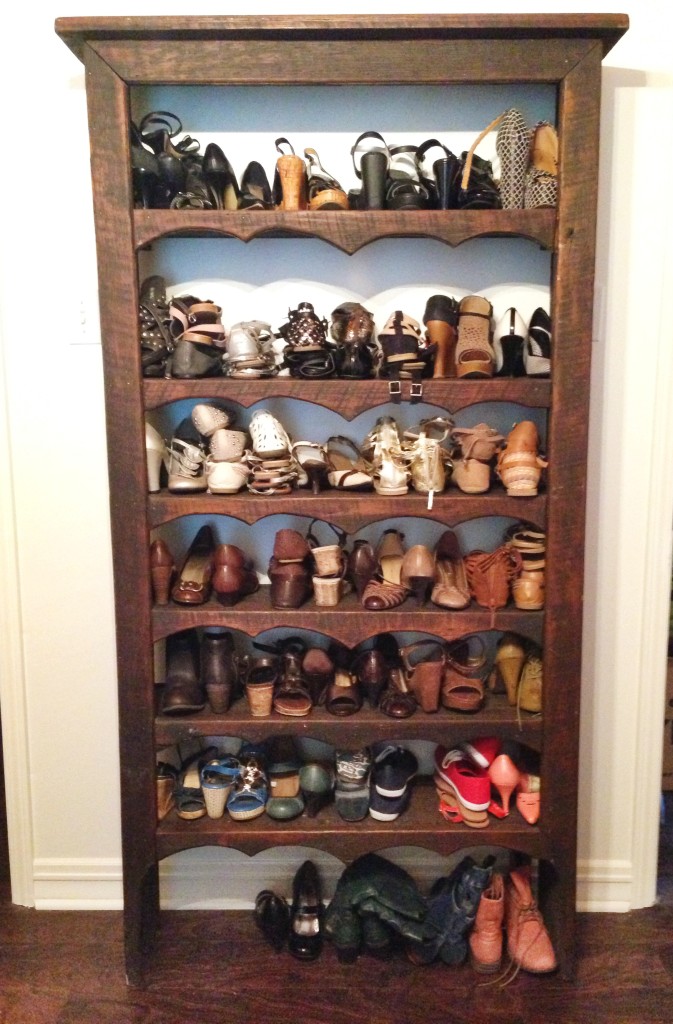
Yellow Mannequin I certainly hated to take down my old shoe shelves, but I was excited to make a new plan for this closet. I brought in this shelf as a temporary solution for my shoes until I could decide exactly how I wanted things done. However, I think I might love this option! This shelf was built by my dad with 100 year old wood from our old barn. That’s amazing, right?? I’ve always used this shelf for picture frames and such because the shelves are too narrow for books and taller items. I never considered it as an option for shoes, but I’m thinking that I might be in love! 

Barnwood ShelfAs of right now, I brought in the orange printed rug from my last closet. I’ll wait until more of the decor comes together before deciding if it stays, but I definitely love this rug. I’m thinking that I might end up with an ottoman in the center of the room, but I’m still thinking on that too. 

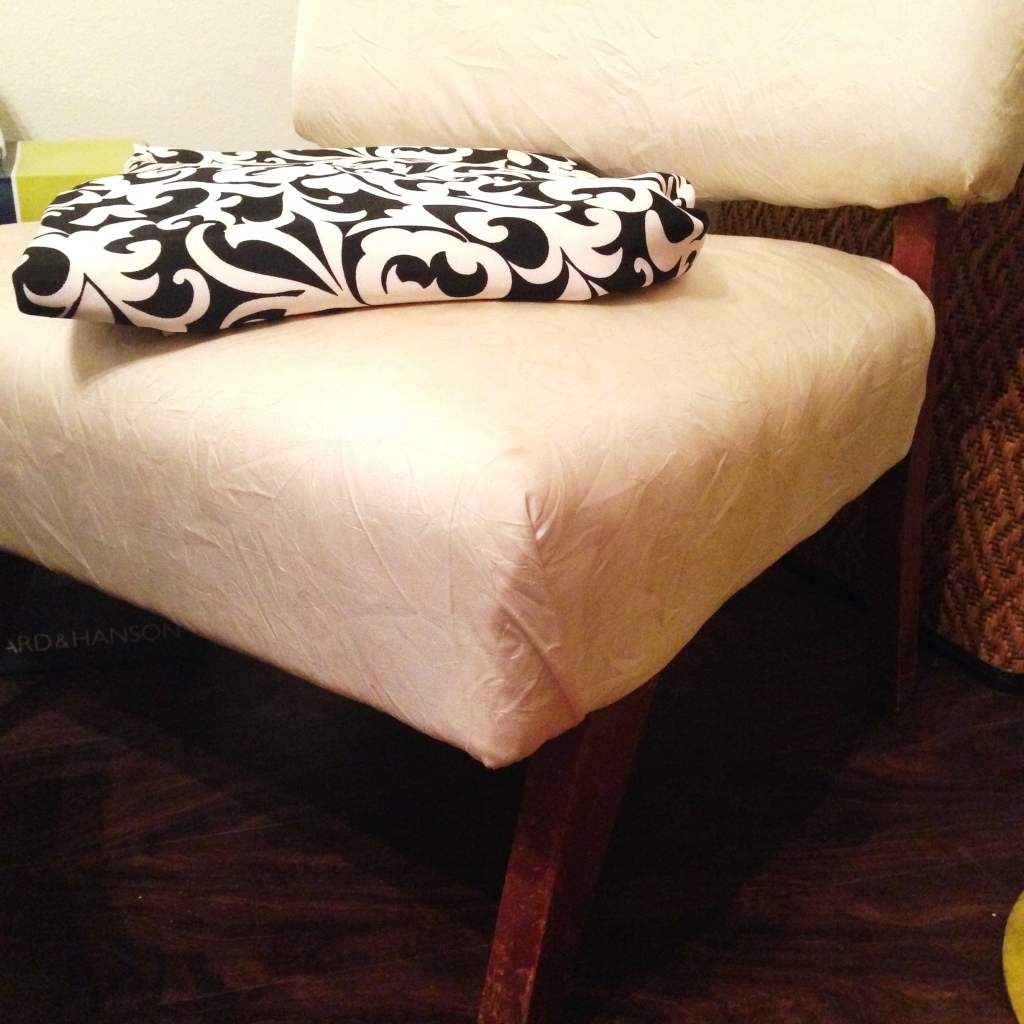
Orange RugMy next plan is to recover my grandmother’s cream vintage chair in this black and white printed fabric. I purchased this fabric from a clearance rack years ago with no plan for it. I’ve been waiting on the right project, and I think this is it! You might remember this chair from my old living room. I’ve used it since I was a little girl. Speaking of recovering chairs, if anyone has any tips for that project, I’m all ears! 

vintage chairThings are definitely coming together around the house. Of course, it’s a slow and steady process, but I’m feeling good about what we’ve accomplished so far. I’ve enjoyed dreaming up plans for this closet space of mine, and I can’t wait to pull it all together. Have you seen any fabulous closet spaces lately? Send me a link! 

Closet Room – Shoe Shelves

Shoe Wall
Anyone who knows me, knows that I have quite the shoe collection.
My last count was over 150 pair, and that number has certainly grown since then. The problem with having so many shoes is how to store/display them.

If you read my last post about shoe storage you know that I found an awesome new strategy for storing my out of season shoes. While that set up is still working wonderfully, my in-season shoes weren’t as accessible as I’d like. During the spring and summer months, my old shoe shelves worked ok and everything fit on the shelves decently. However, there was simply no way to fit all of my winter shoes/boots on those shelves. (See my earlier post to see what shelves I was using.) Last year I used a second shelf for tall boots, but I didn’t like having to rearrange the room to bring in another shelf just for boots. Besides, we sold that old shelf in the garage sale. (What better way to force yourself to come up with a better solution that to sell your current method in a garage sale?!)

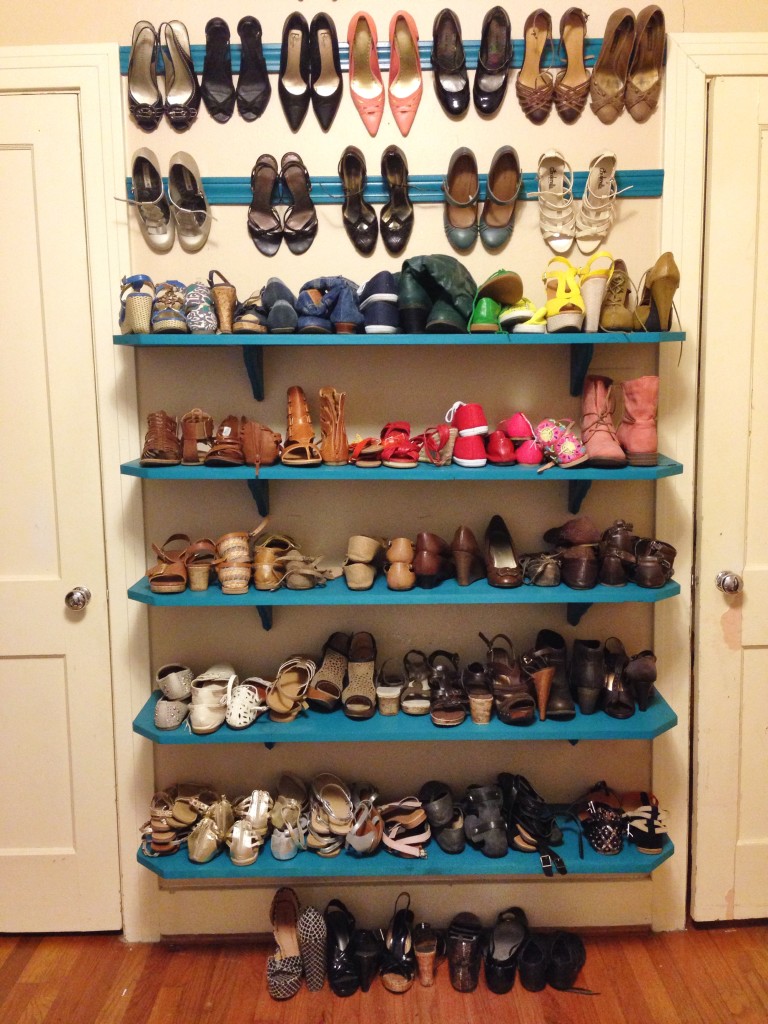
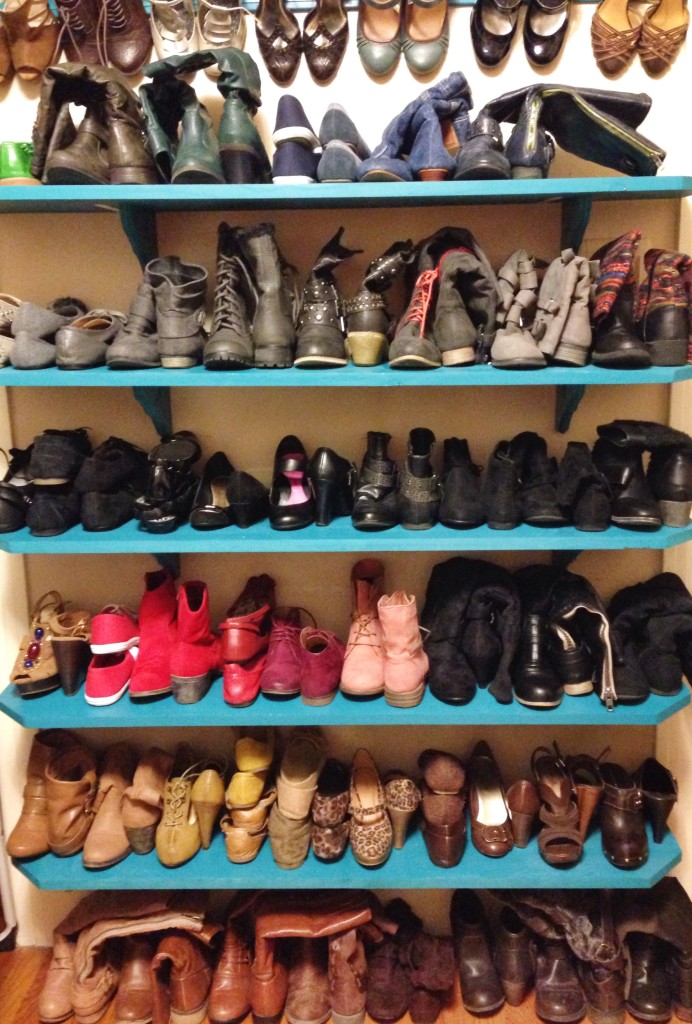
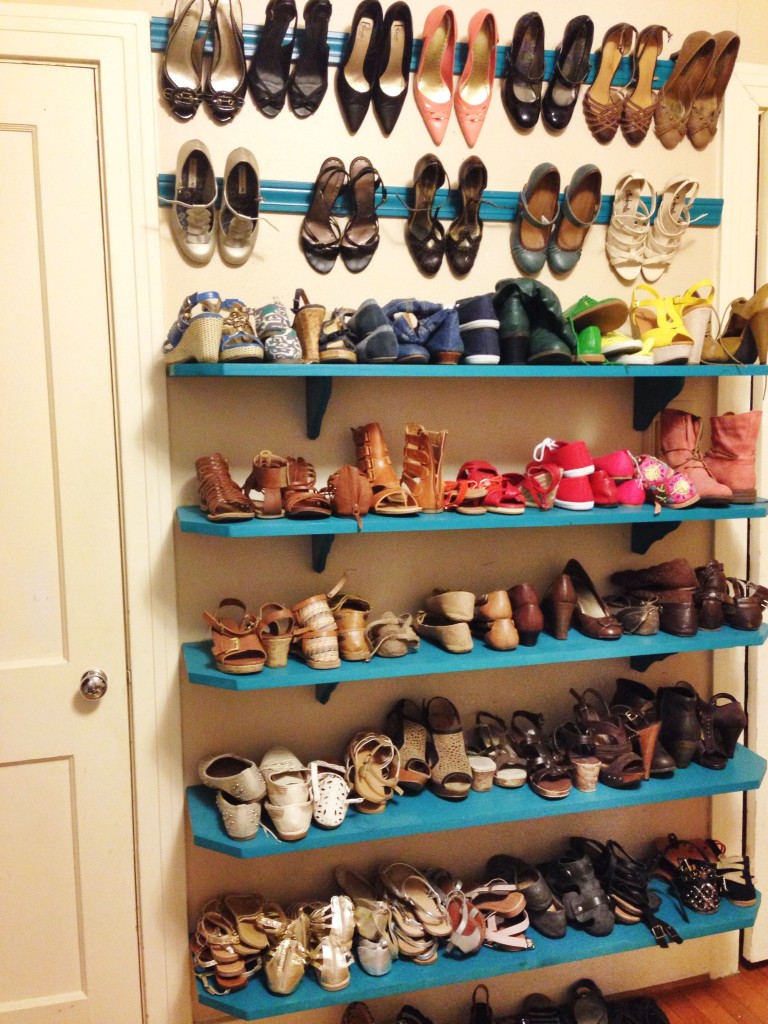
Winter Shoe WallI am so very lucky to have a handy husband who agreed to build me some custom shoe shelves. By making the shelves go from door frame to door frame, we added room for more shoes. Plus, by spacing the shelves farther apart, I can fit all of my shoes there, including my tall boots. We used the Pinterest-popular molding trick for heels and even ran the molding above the doorways for more storage. (I use one of those grabber thingys to get those down.) The molding isn’t working quite right, but it’ll do until we can investigate other solutions.

I’m not offering a full tutorial here because these were your basic shelf design…except for better because my wonderful husband built them. Matthew purchased the wood and ready-made brackets from Home Depot. He cut and rounded the corners of the shelves so I wouldn’t break my hips from running in to them…it’s bound to happen. He attached the brackets, sanded the wood, and I painted them this cool teal color. I wanted the color to be a tad darker, but I wasn’t going to argue with the grumpy old paint man in Lowes. (By the way, if you or someone you know needs a Lowe’s coupon, let me know. I have discounts that I can email to my clients/friends.)

I had to fight to fit all of my winter shoes out, but my summer shoes fit pretty well. During my last closet organization spree I mentioned getting rid of extra lounge pants to make them fit in just one drawer. I had to do a similar thing with boots. While I wasn’t ready to part with any of them, I had to put a few pair back in their containers to have enough room for my favorites. If I couldn’t remember wearing them even once last year, I figure they’ll be fine to leave in the top of the closet. After all, I can get them down if I decide to actually wear them this year. The reality is, I only wear those black cowboy boots to country music concerts. They can hang out up top with a few other not-regularly-worn friends until it’s time to “go out with my boots on.” I did the same thing with some summer shoes that aren’t worn often.Shoe Wall

What do you think about the new shelves? Didn’t Matthew do a wonderful job?? I love getting to shop these shelves while getting dressed in the morning. It’s like having my own personal department store! I hated to have to take the shelves down when we moved last week, but I’m already working on ideas for the new house!


Antique Mirror Gallery Wall

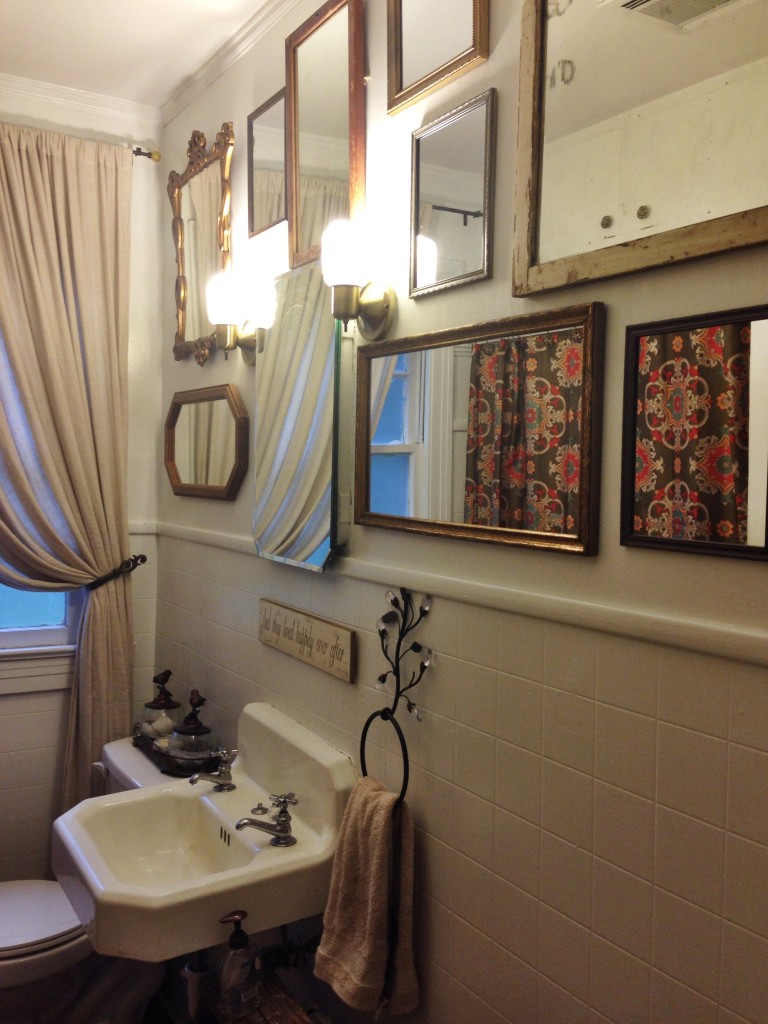
antique mirror gallery wallWhen we did our original bathroom update, I knew that I wanted a gallery wall on the top half of that wall. However, after painting and putting up the new shower curtain, I didn’t particularly care for the items that I’d collected to put there. I hung the two old sconces there in the meantime, and it took me several months to come up with a better idea.

Finally, one day it dawned on me. I should do a gallery wall of antique mirrors in there! After all, there’s little that I love more than gallery walls and antique mirrors…why not combine the two?? It took me a few weeks to gather enough mirrors that would work in the space, but I finally collected enough and had some spare time to work on the project.Mirror Gallery Wall Layout

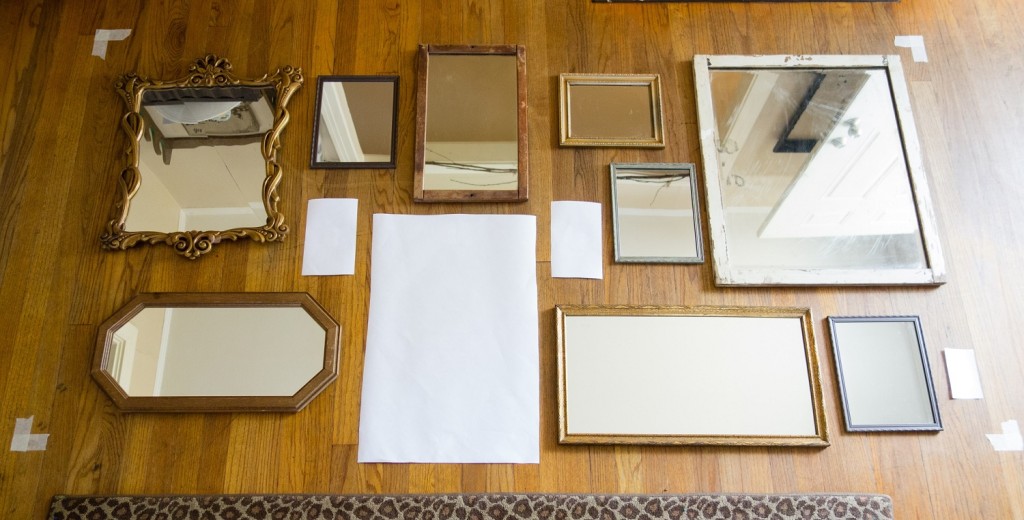
When planning out a gallery wall, it’s very important to play around with your layout before you start hanging things on the wall. Otherwise, you’ll likely end up with a bunch of excess nail holes and something that’s hung just a little off. I measured the size of the wall and marked the corners on my floor with masking tape. I cut slips of paper the size of the existing mirror, lights, and light switch and taped them on the floor according to their location on the wall. Then, I spread my mirrors out and moved them around until I was satisfied with the layout.

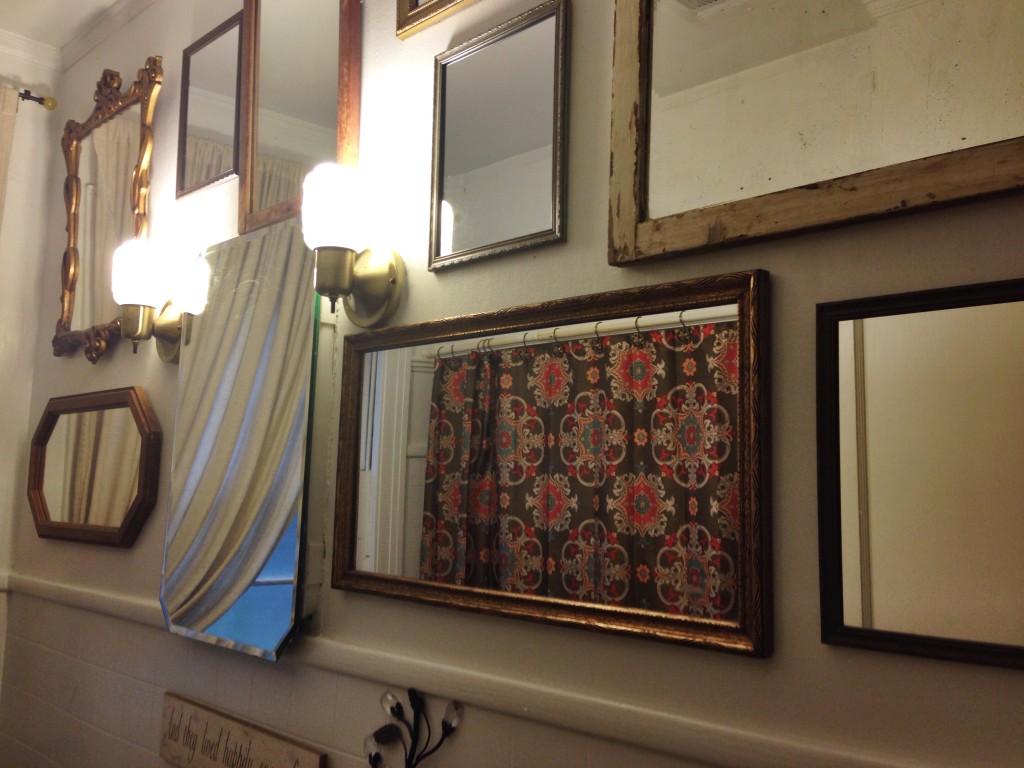
My darling husband hung the mirrors for me, and to do so he used the toothpaste trick. At first he thought I was a little crazy when I mentioned it, but then he agreed that it was genius! Basically, you just dab a little bit of toothpaste on the hangers of whatever you’re hanging. Then, you press it against the wall where it’s going to go and voila – you have a temporary mark on the wall, exactly where your nail needs to go! With the mirrors already laid out and using the toothpaste trick, I think it took him about 30 minutes to get them all hung. Aside from collecting the mirrors, the whole project took roughly 1-1 1/2 hours.
antique mirror gallery wall
I have to say that this is likely one of my favorite projects to date. I simply love how it turned out, and I enjoy getting to look at my collection of mirrors on a regular basis. Plus, it made our tiny bathroom feel a little bigger. Most of the mirrors I used are vintage from various sources, but the 8×10 filler mirrors are actually from the Dollar Tree! That’s right…I only paid $1 for those!

What do you think about the finished product? Think it looks better or worse than before? If you like gallery walls as much as I do, be sure to check out my first one from the living room.


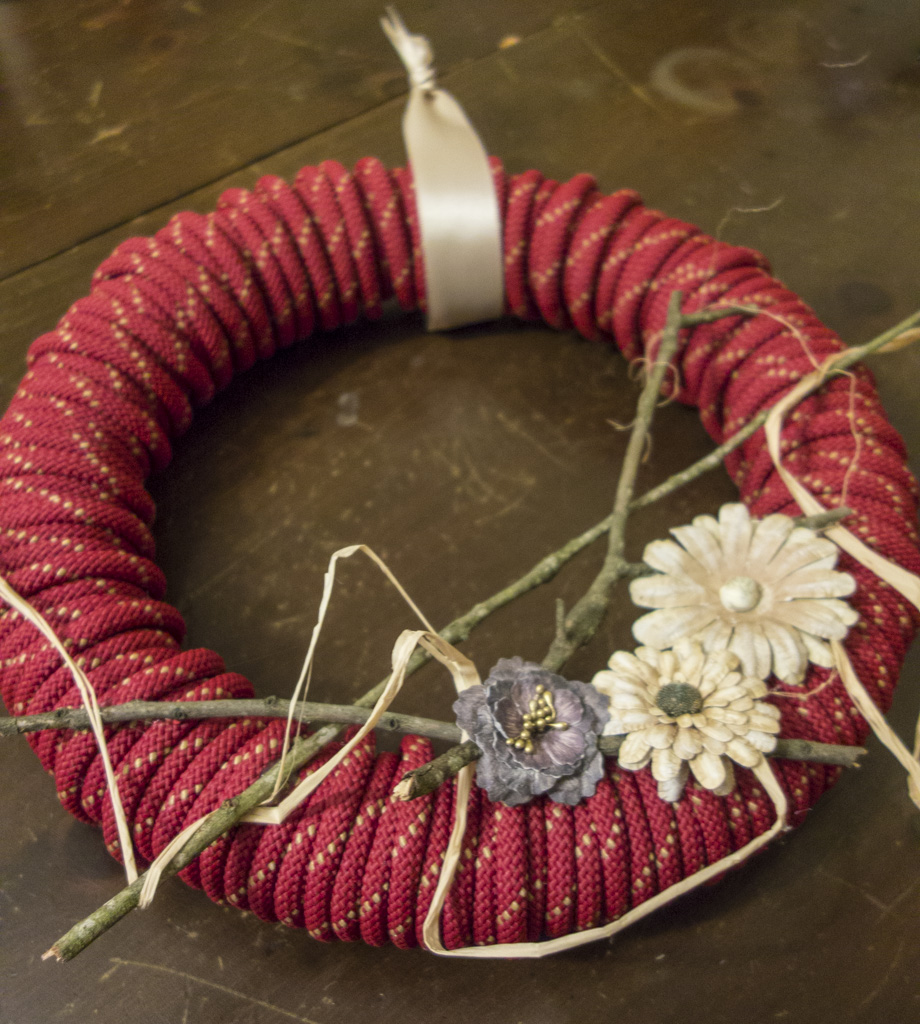
DIY Winter Wreath

Winter Wreath

It’s no secret that I love wreaths…wreaths that are different and unique to be exact. As a matter of a fact, I have a Pinterest board dedicated to just them! This year, I was a little late switching from a Christmas wreath to a winter one. I didn’t put up a new wreath until the first of February, so I knew I wanted something that was wintery but could also welcome the first of spring without looking too dark.

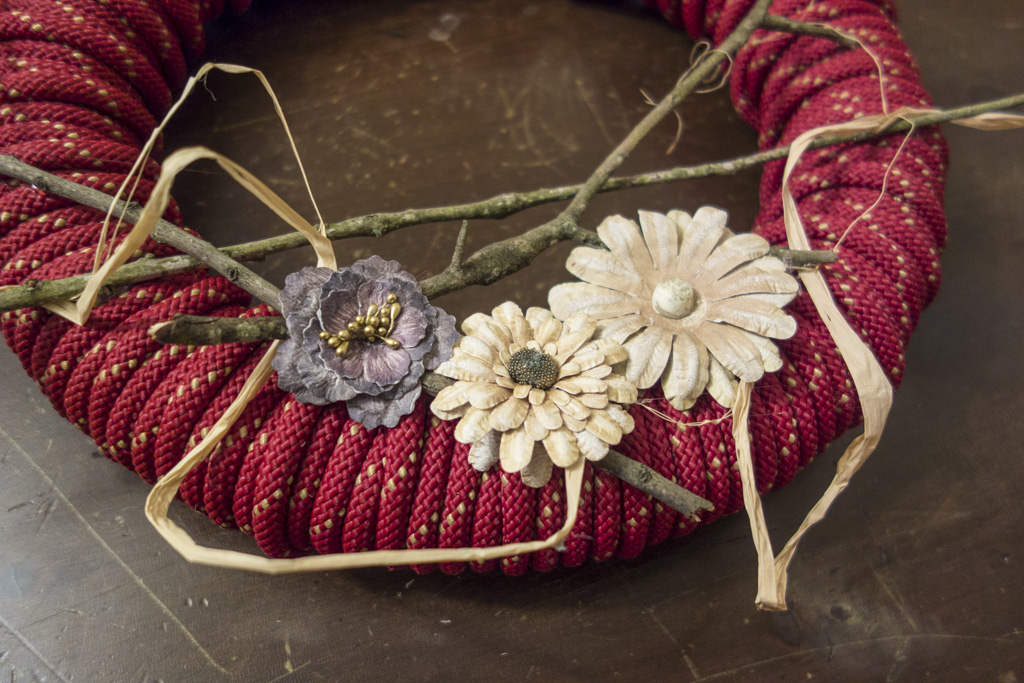
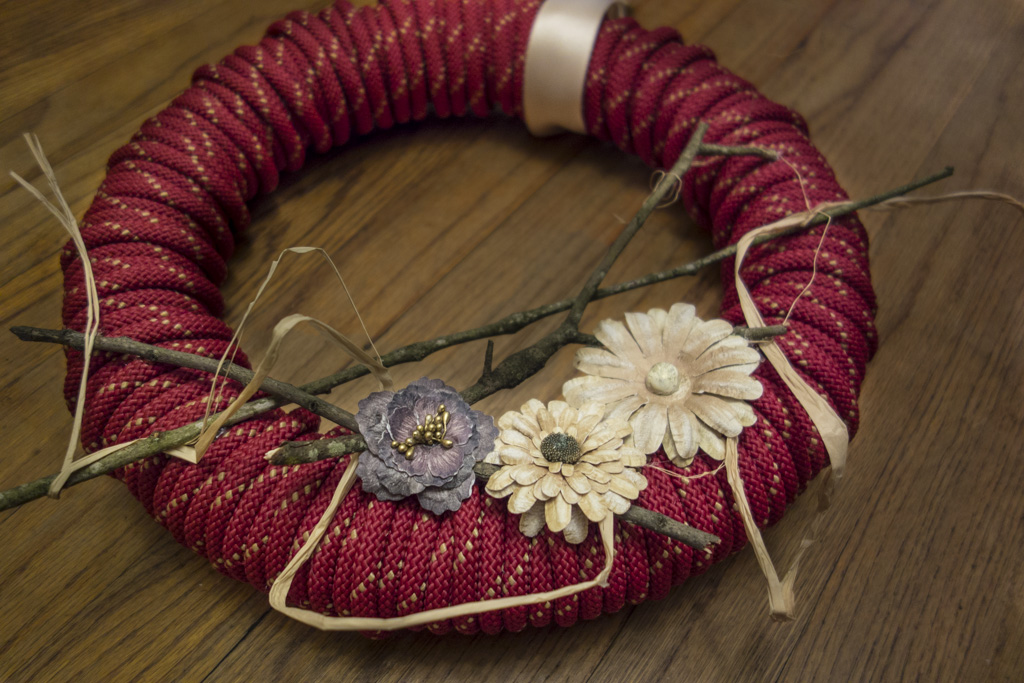
As usual, I didn’t actually like my first couple of strategies. The finished product is sort of a combination between this wreath and this one that I saw on Pinterest. I used a foam ring from Hobby Lobby, rope from Tyner Petrus, sticks from my yard, and flowers from my wedding hairpiece (They were originally from Hobby Lobby.).

Winter Wreath Close UpJust like with my yarn wrapped wreath, wrapping the rope took a little longer than planned. I had planned to do something similar to that first inspiration wreath with brown rope, but it looked like it belonged on the door of a cowboy’s house. Unfortunately, neither of us are cowboys, so I scratched that idea.

I loved the winter stick idea from the second photo, but I wanted something that had a little brightness to it so it could be left up through the beginning of spring. I went digging through my craft supplies and came across leftover flowers from making my wedding hairpiece. They were light and airy enough to brighten the wreath but not too bright to be inappropriate for this cold February. Plus, every time I walk through the door, I think about marrying my husband…not a bad bonus! Finally, I added a little bit of raffia to give it a whimsical look and some ribbon for a hanger. And there you have it…a new wreath that looked nothing like my original idea!

Winter WreathI wish I could end this post by saying how many people love my new wreath. However, during our little ice storm, my wreath literally froze and broke into several pieces. That’s not even a joke… click here to see my poor, little broken wreath. It wasn’t even up for a week!

Now I’m faced with a dilemma. Do I remake the same wreath or do something completely different?? Help me decide!


Valentine’s Day Inspiration

Valentine's DayI’ve rekindled my love affair with Pinterest lately, and I decided to share some of my latest favorites. Is it just me or is Pinterest the best place to look when you need a hefty dose of inspiration?? With Valentine’s Day right around the corner, I thought I’d share a few of my favorite finds.

These nails are what started my Valentine’s Day pin collection. The pins of elaborate art on nails are fascinating, but I’d never attempt such a feat. However, I think I can handle this one!

I think this pillow is adorable! I recently ordered some wall art for my office from Michelle, and this pillow is on my wish list. It’s great for year round decor, but I think it’s perfect for Valentine’s Day!

I really, really want to make some of these heart trees. It looks like such a cute and easy project! You could also do a similar version for other holidays.

I love this tutorial for making a heart cake. I don’t own a heart shaped pan, and this would be soooo much easier than trying to cut out a heart shape. Genius!

This post had some simple but good Valentine’s Day date ideas. Of course, I think you should show people that you love them year round, but there’s nothing wrong with using this holiday to do something extra special.

Feel free to browse my Be My Valentine board if you’re looking for more Valentine’s Day ideas. Plus, you can see my quick and easy heart wreath from last year here.

Have you seen any fun Valentine’s Day projects or decor that I should add to my list? Please share!

DIY Cupcake Flags

4th of July flagI made cupcakes for Matthew’s family reunion 4th of July weekend. I had about thirty minutes to spare before time to head out, so I decided to make my cupcakes a little more festive.

I saw a post about making drink embellishments on one of my favorite blogs, so I decided to try a variation of their tutorial to use for cupcakes. This is such an easy DIY that I probably don’t even need to spell out the directions, but I will…just in case.

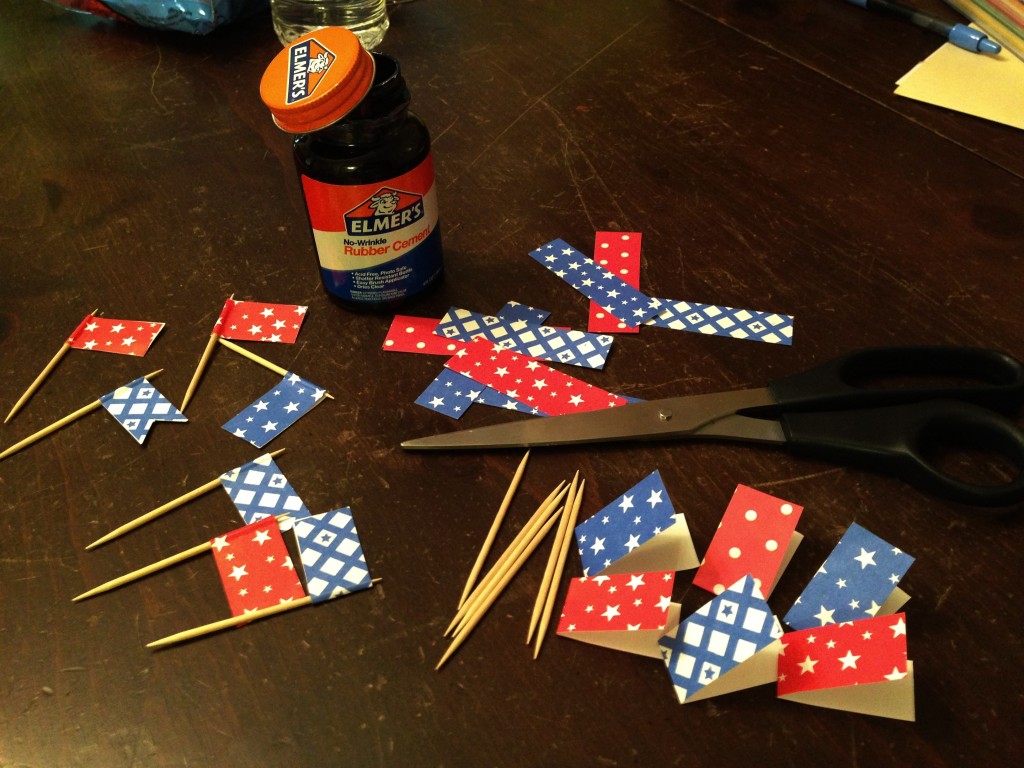
4th of July pick suppliesHere are the supplies I used:
Red, white, and blue printed scrapbook paper
Toothpicks
Rubber cement
Scissors

This project doesn’t use much paper, so you could easily use scraps of paper from another project.

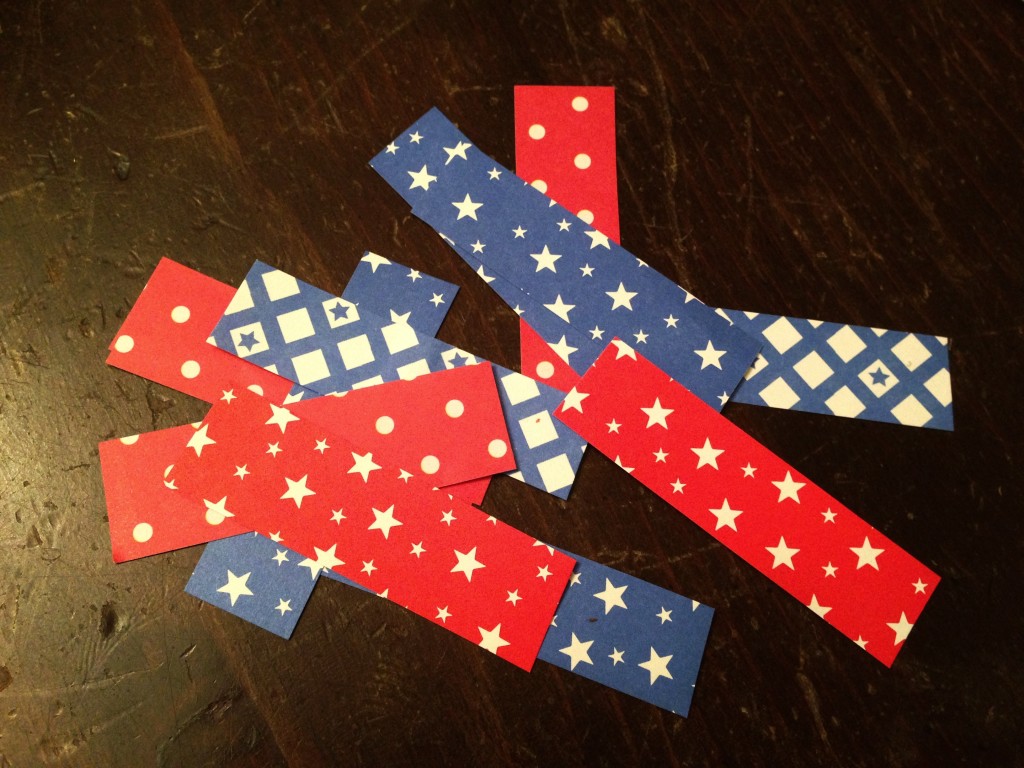
Festive strips1. Cut strips of paper approximately 1 inch wide and 2.5 inches long. These don’t have to be perfect, so I didn’t measure them. I just cut them all approximately the same size.

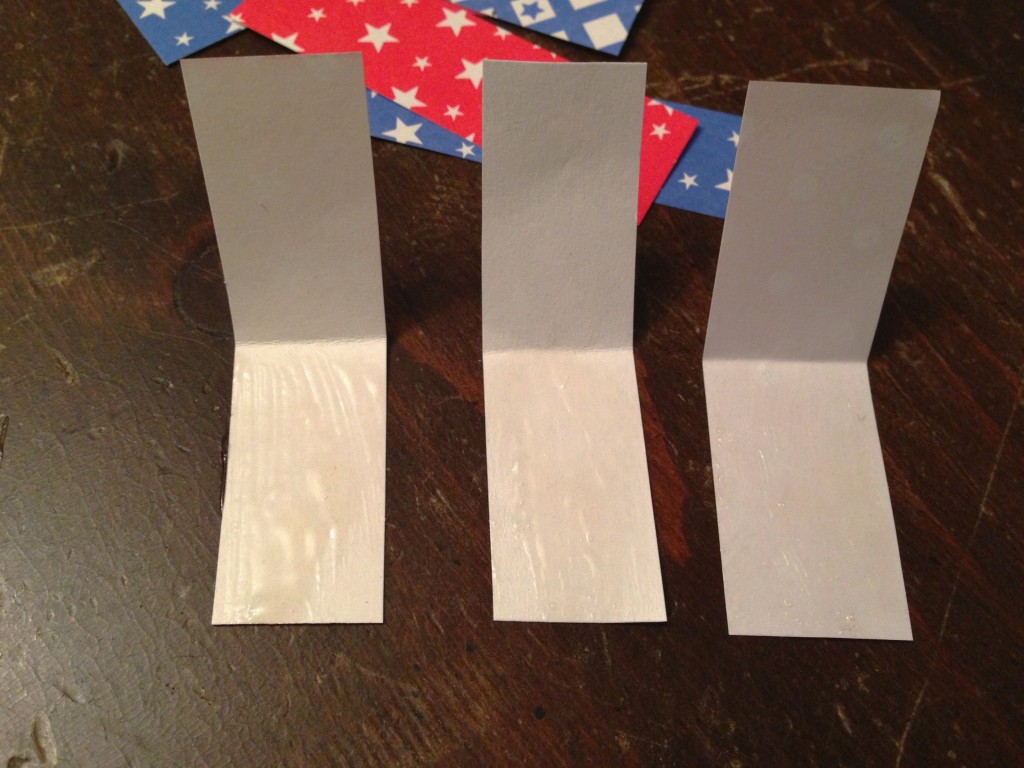
2. Fold 3 or 4 strips in half. This will help with toothpick placement, and make it quicker to assemble them by doing multiple at once. Folding them in half helps you to move faster so the glue doesn’t dry on you.

strips with glue3. Spread glue on one half of the folded piece of paper. Again, I did 3 or 4 at a time to make the process quicker.

4. Place a toothpick in the crease of the paper. I used regular sized toothpicks, so I only left a small portion sticking from the top so that I had plenty of room to insert the pick into the cupcake.

5. Line the ends of the paper up, and press the pick firmly into the crease. You’ll want to be sure the paper is glued tightly together around the toothpick. Otherwise, the flag will slide down the pick once it’s upright.

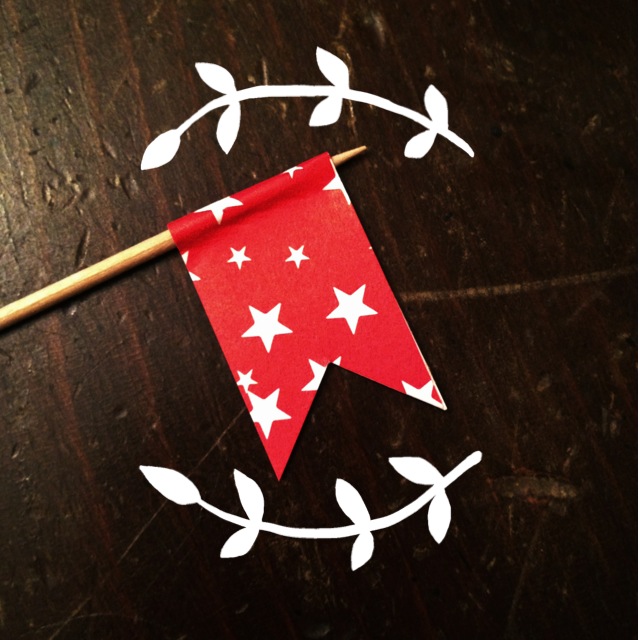
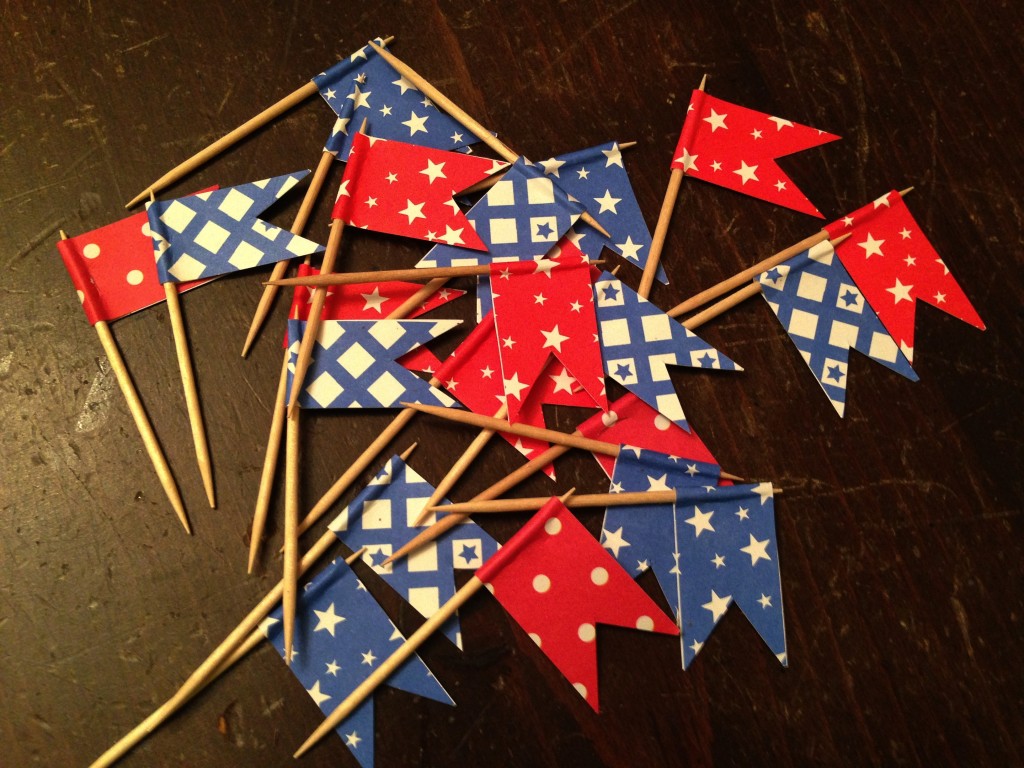
4th of July picks6. Once the flags are dry, you can snip a little “v” into the flag to give it a more finished look. Again, I didn’t measure these…I just tried to cut them evenly.

This post should end with a photo of my festively decorated cupcakes, but the said photo doesn’t exist. For some wild reason, our oven decided to heat to 450 instead of 350, so my red velvet cupcakes were burned to a crisp! Can you imagine my frustration when I realized I made 24+ handmade flags for cupcakes that I couldn’t even take to the party?! Instead, we stopped at Walmart and purchased some cupcakes from the bakery. I still used my flags, but it seems a little strange to put handmade decorations into store bought cupcakes!

I was also going to use my fancy cupcakes for my #summerfood challenge for the Phone Photography Project. Another bummer.

4th of July cupcakesThe beauty of this project is that is can be adjusted to fit any holiday or occasion, just by altering the paper. I envision making these flags for several projects, but hopefully I’ll have a dessert to stick them in next time!