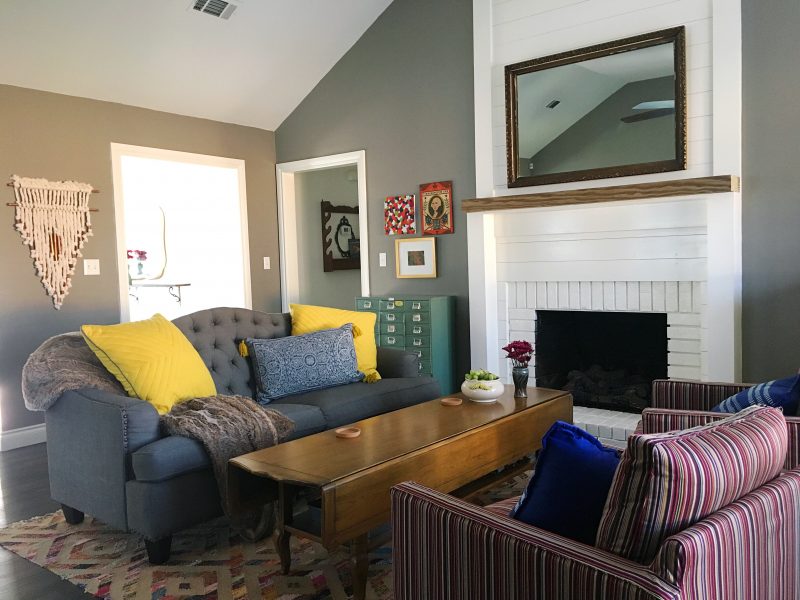

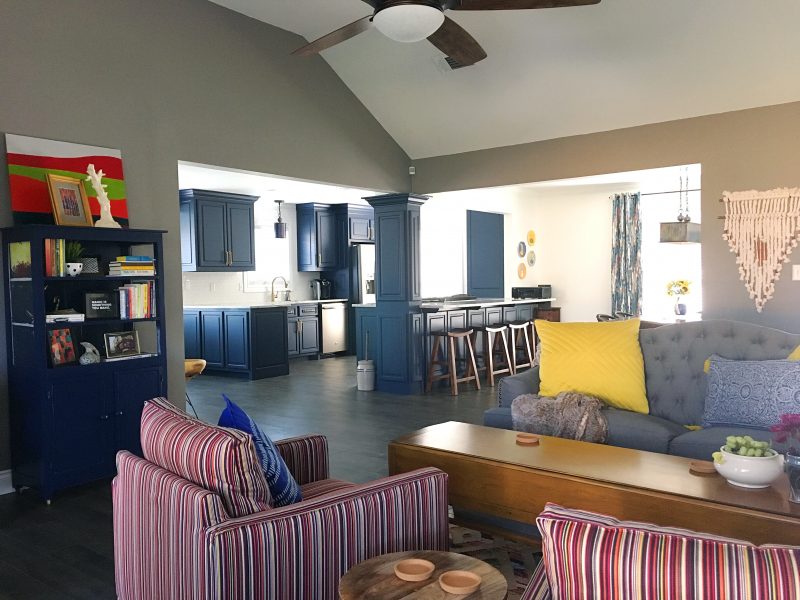
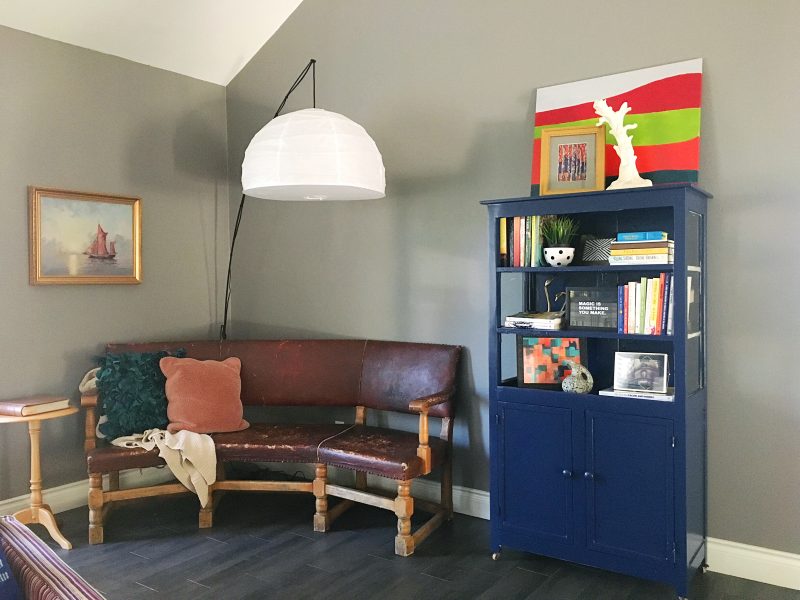
 Last Sunday we opened up our “new” home for those who’ve watched the flood recovery process to come and see the finished product. We worked insanely hard to tie up what felt like a thousand loose ends to be ready to have people over. For example, when I announced the get together, we didn’t even have a hall bathroom sink. Or master bathroom door. Among a handful of larger items, there were 1,000 small things that still needed to be done. Hence the reason we decided to have the party in two weeks…a hard deadline makes things happen magically fast. We pushed hard to get a lot done in a short amount of time and now we can rest for a bit. There’s still a few larger and smaller things that we want to complete, and those can wait for a bit.
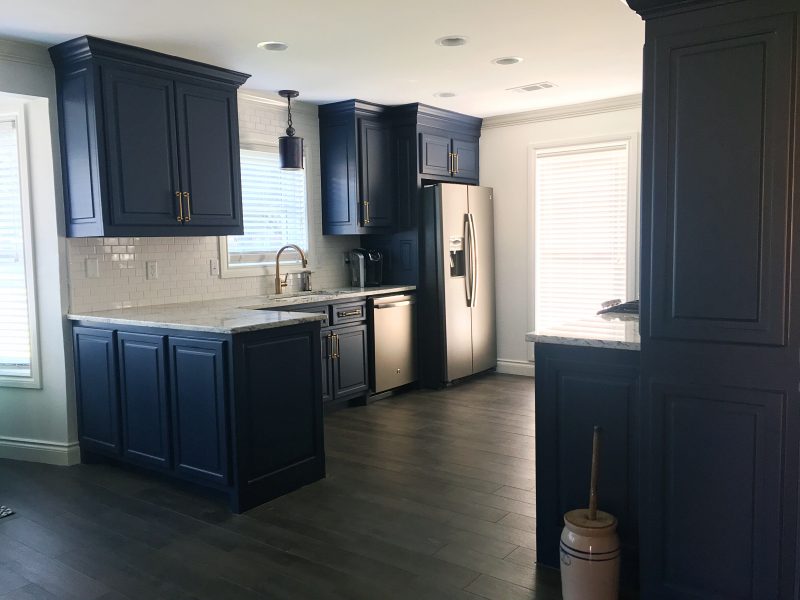
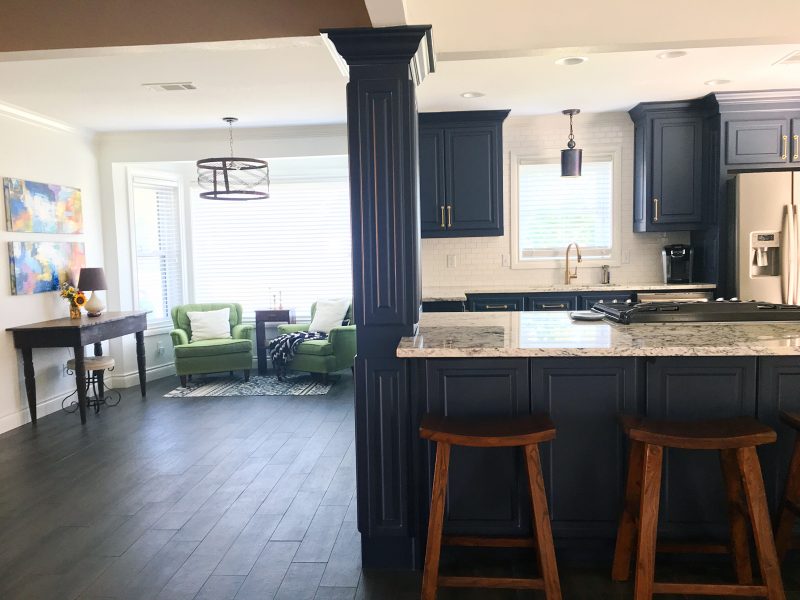
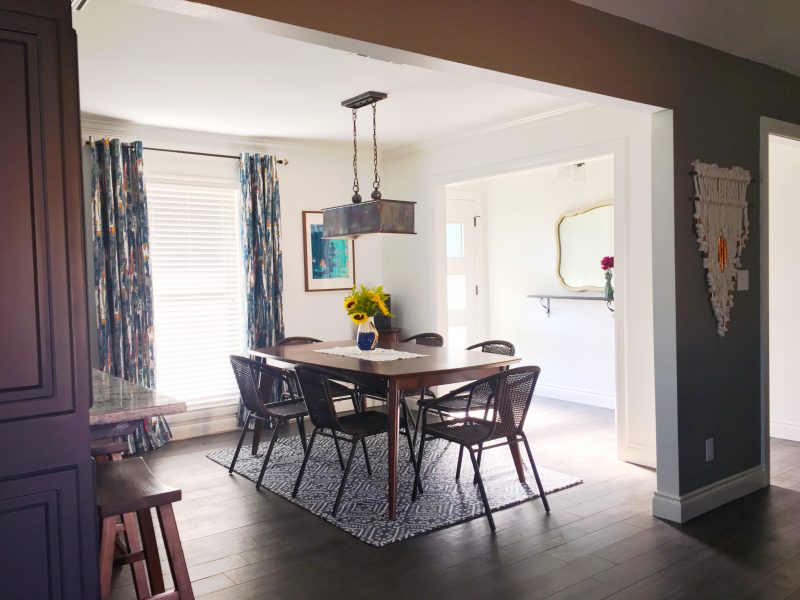
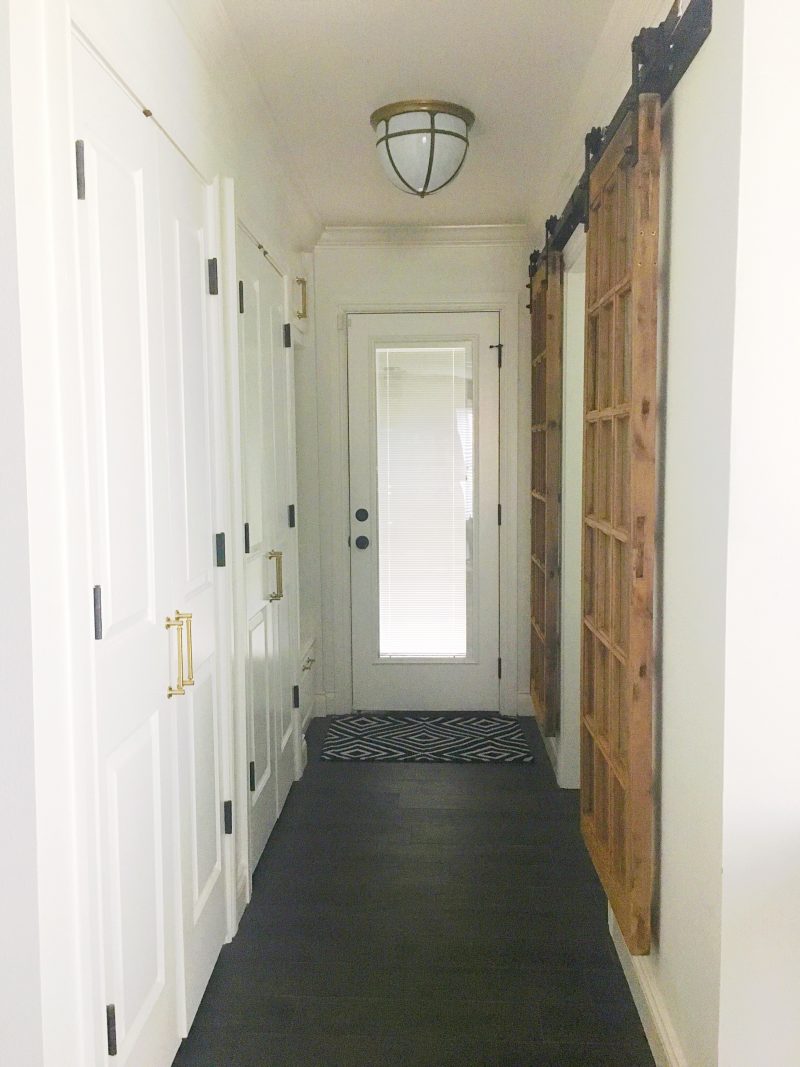 I’ll go through all of the changes in each room with you eventually, and here’s a few snapshots of the finished product to hold you over for now. If you want to take your own before and after tour, you can look back on the before photos and a tour from one year after we moved in.
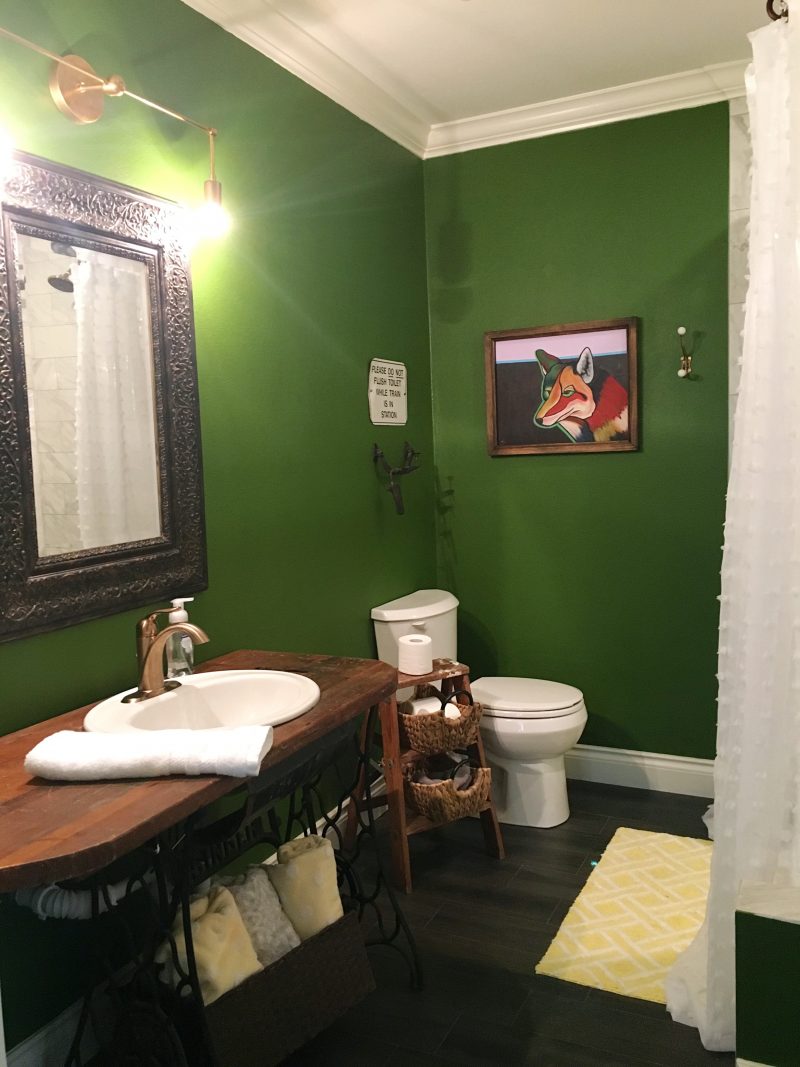
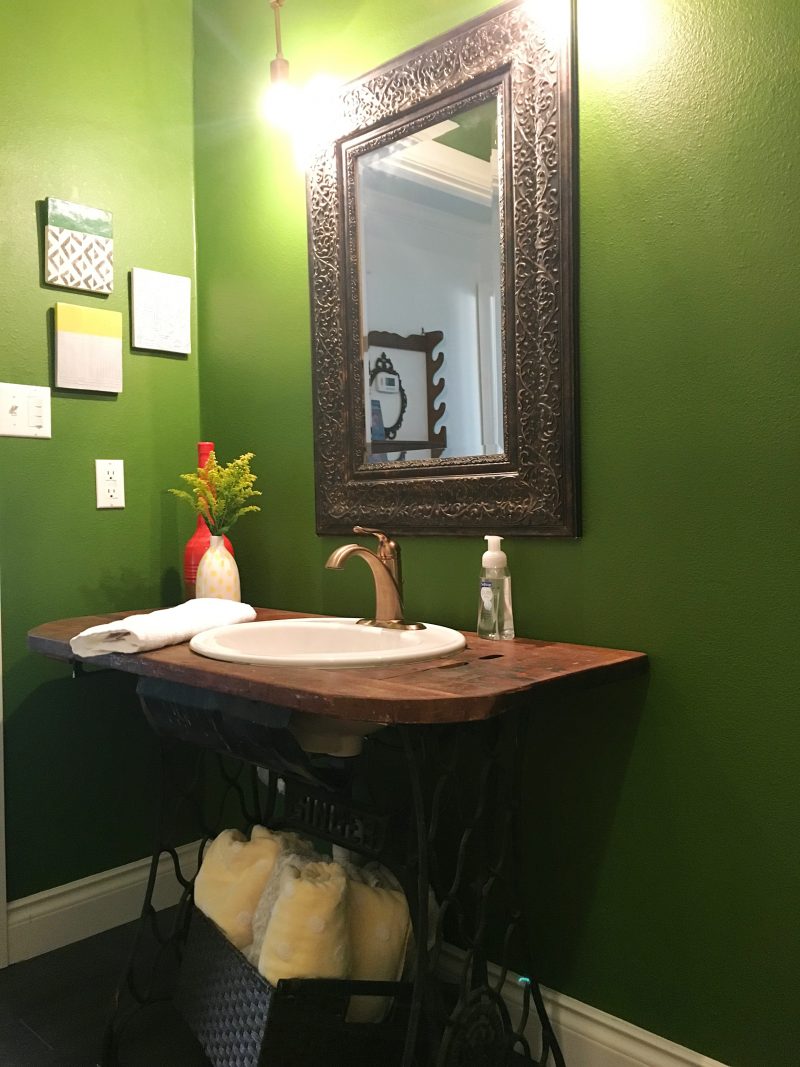
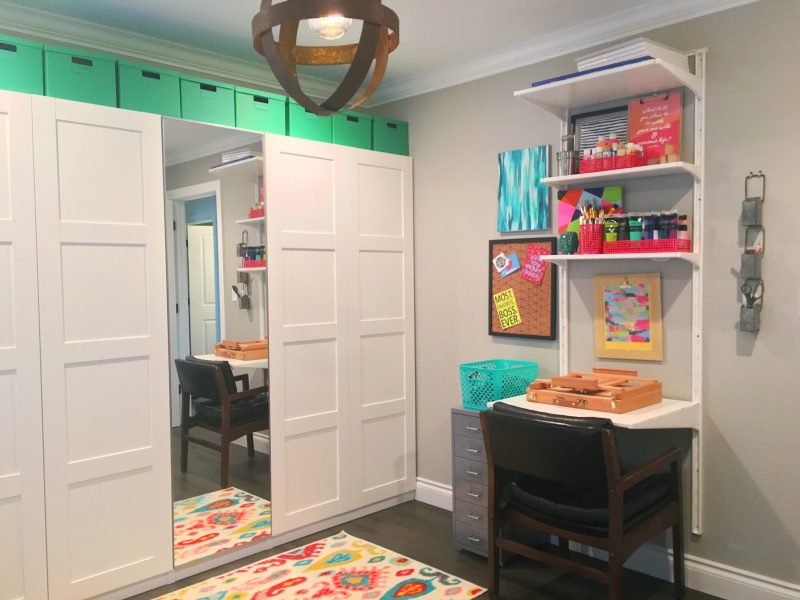
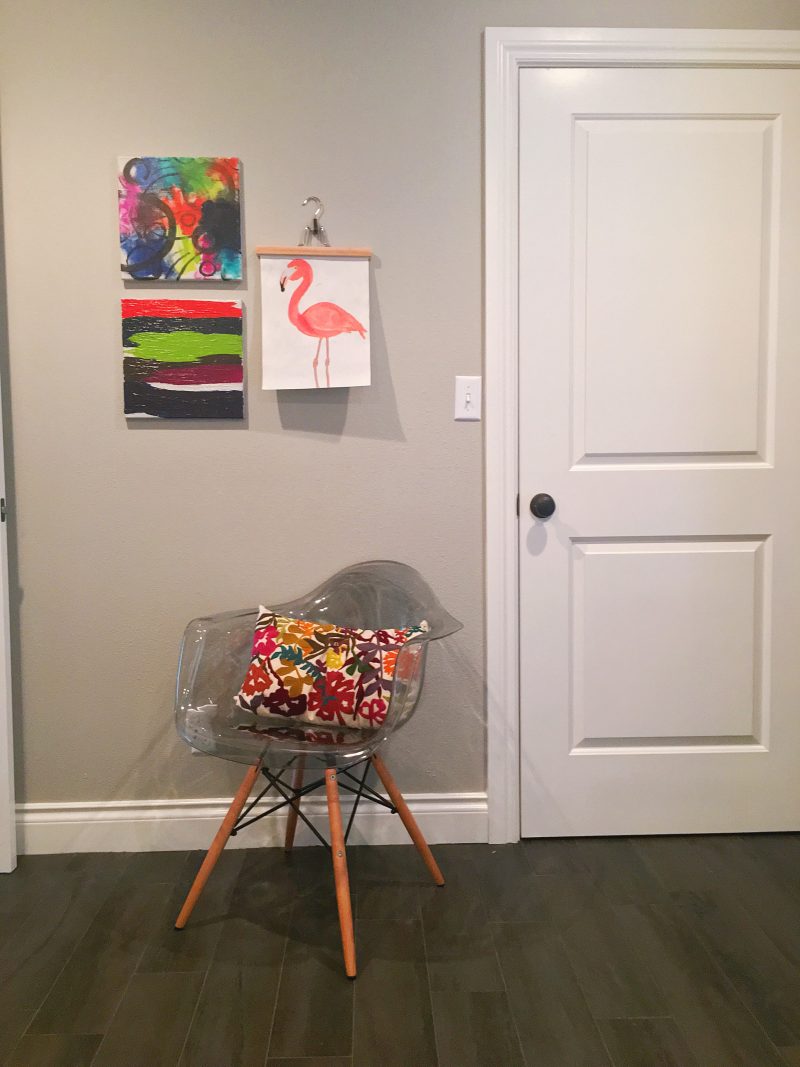 I can’t wait to break down all the before and after details because this house has come SO. FAR. And as with most things, I feel like the beauty is in the details. We worked very, very hard to add as much of our personality to this home as possible and just thinking back on what it once was…at all of the different stages…is quite mind-blowing for me.
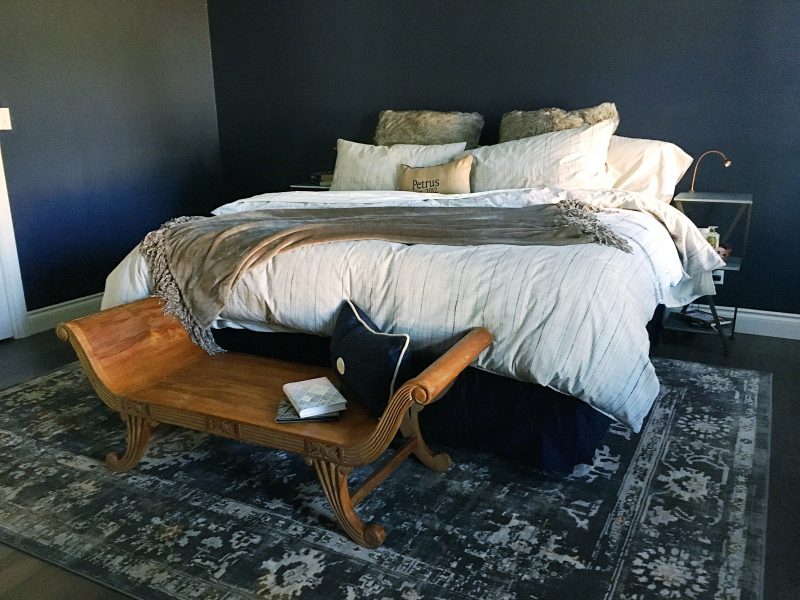
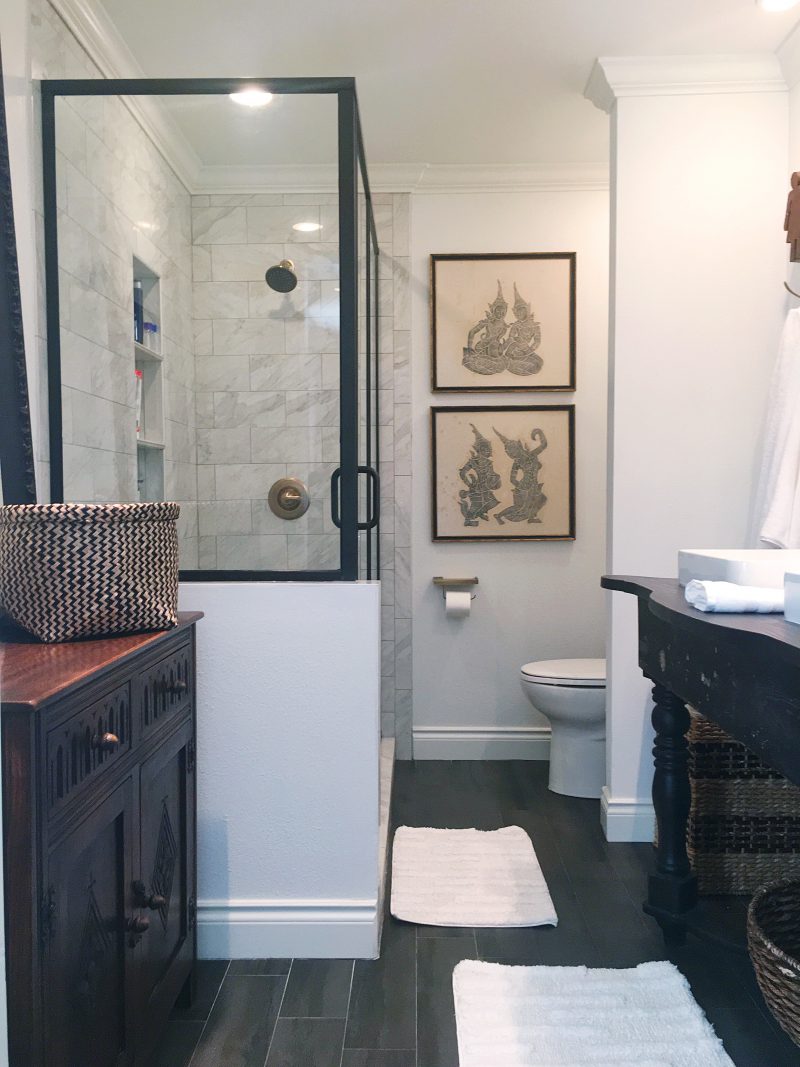 There are a ton of things that I LOVE about the new remodel. I’m thrilled to come home every day and I want to host all the parties. I made a few bold moves with remodel decisions and after seeing the finished product, I’m so glad that I did. What do you think so far??
Category Archives: Home
Home sweet home!
When to Buy Expensive & When to Go Cheap
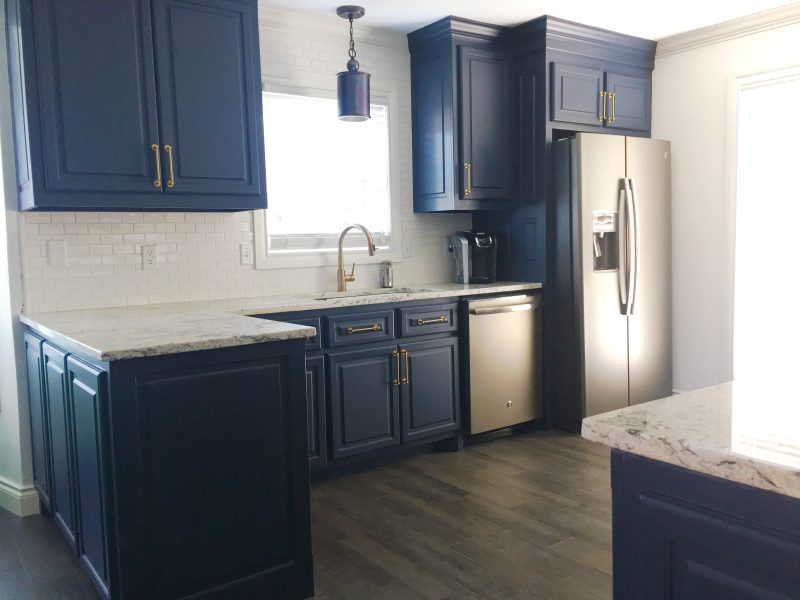 This post is basically when to be fancy and when to be basic. Keep in mind, these are my thoughts and what I use for myself, so you definitely don’t have to agree or even care about my rules. That being said, this post is my tell-all handbook for how I remodeled our home on a budget.
First, a little backstory. Our home flooded and left us with about ¼ of the items we owned and a completely demoed house. We saved the top ½ of the sheetrock, the studs, and the roof – actually, we ended up replacing the roof too. That’s pretty much it. After the initial shock, we were forced to start making all the decisions about rebuilding – basically our lives where a whirlwind of who, what, where, when, and how. (You can read about how that was a nightmare for me here.) Now that construction is finished, I thought I’d share a bit about how I made what decisions and where I chose to splurge versus not.
For this project, we had a budget. We basically had XX number of dollars to rebuild the entire house, do any upgrades we’d been dreaming about, AND replaced all of the personal items we lost. There was simply that number of dollars. We weren’t taking out a second mortgage or selling a car to pay for things. We had to make tough decisions CONSTANTLY about where to splurge and where to save.
An old adage to note here is, “you get what you pay for.” Most of us have heard that since the beginning of time and unfortunately for our pocketbooks, it’s true. We simply don’t get high quality items for pennies. This, of course, doesn’t count the occasional sale or lucky find. And, that being said, you can usually easily tell the difference in how the quality version of something performs compared to the lower quality one. I noticed this immediately with my car. It simply drives and feels different than any other vehicle I’ve ever had. This was a fact that I didn’t understand until I drove one myself, which was the day I drove it off the lot. Have I mentioned that I love that car?? I digress.
Back to the house. One of the first examples of quality difference that I noticed in the “new” house was the faucets. We chose to put Delta faucets and Kohler sinks throughout the entire house. (Please make a note of this if you’re considering buying my house in the future and you’re doing your research on the property. Upgrades throughout! A lovely place to call home! *wink wink*) Back to the faucets. When I first used the new kitchen faucet, I nearly swung it off the countertop because it swiveled so easily! The last faucet we had was much harder to rotate, and to be honest, I often thought I was going to break it. I was also super impressed with the new pull down sprayer. When I released it from spraying out the sink, it just popped right back into place and looked as beautiful as ever! After the first use on the last faucet, I felt like it never fit back together properly and you always had to force it back into place. It was better that what we had previously, though this Delta faucet makes the old one feel like an ugly stepchild. (No offense, ugly step children.) Expensive definitely doesn’t always equal quality. However, in most cases, the “pay for what you get” rule does apply.
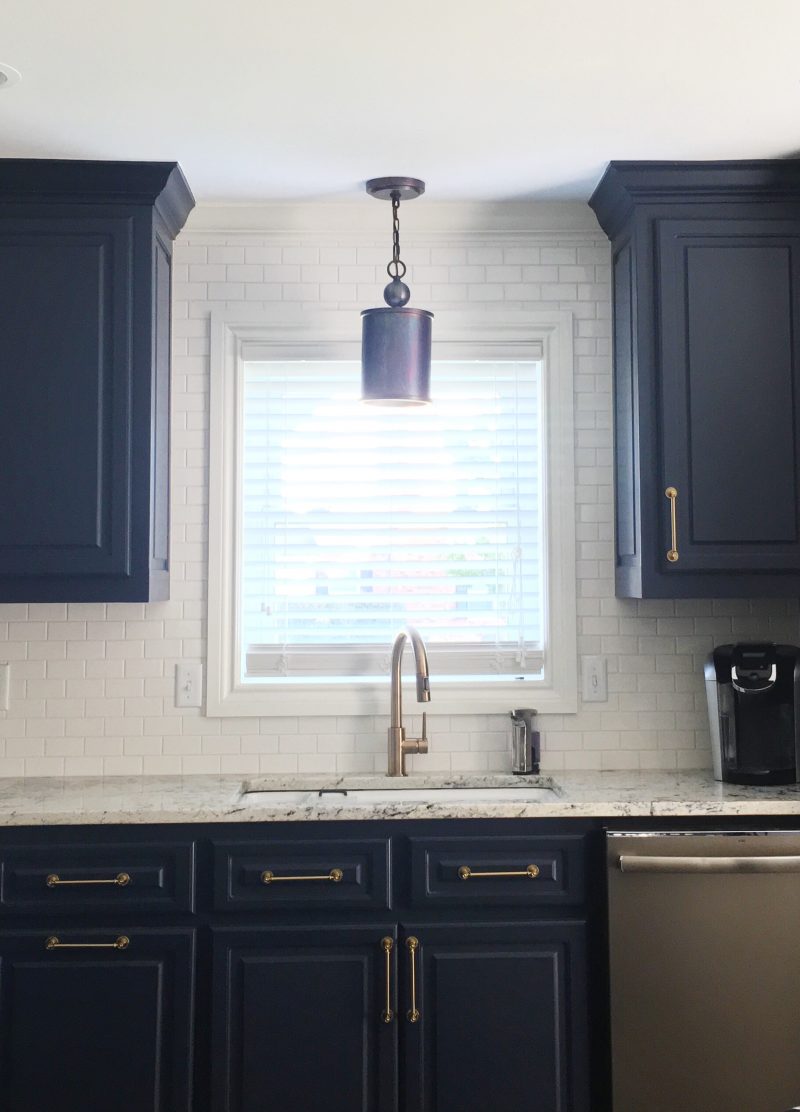 So, how does one know where to upgrade and where to not? I’m glad you asked. I feel like sort of an expert on this topic because I’ve always applied these principles in most areas of my life and used them daily lately. My wardrobe, for example, is a compilation of quality where necessary and inexpensive where people won’t notice. When it comes to the house, we splurged on some items like the faucets and I won’t splurge on other things like door mats or paper towel holders. I’ll wait until I find adorable options at a discount store like TJ Maxx or Ross. (So, stay out of those stores until I find all of the cute, cheap items that I need. Then you can return to your normal shopping pleasure.) Here are a few rules I applied to splurging on our house renovation that I’ve used over and over again in other areas too:
- Splurge on items that you use often. An example here would be the faucets. They’re touched and turned on and off every single day. Delta faucets even come with a lifetime warranty so if something goes wrong, you just call them. You don’t get that with cheaper brands. I also applied this principle to our bed which I’ll never, ever regret. We could have gotten a cheaper mattress. However, you spend almost half of your life in bed. That should definitely be an area to splurge. (If you need a suggestion for someone to talk to here locally, let me know!) A third example here is the washer and dryer. Even for just the two of us, I do a LOT of laundry. And I’m very, very particular about my clothes. (Ask my friends. “Yes, you may borrow this. Don’t mess it up and bring it back to me dirty so that I can wash it myself” is basically how those conversations always went.) By investing in a nice, larger washer/dryer, I have more options for caring for our clothes AND I’ve cut my laundry time in half by being able to do larger loads.
- Splurge on items that will otherwise deteriorate quickly. The first example that comes to mind here is towels. Sure, you can buy cheap towels at the dollar store. However, it’s important to think about how long they’ll last. Towels certainly fall into the first category too, because ideally (hopefully) you use them every day. While I’m not ordering imported, fancy towels from wherever you import fancy towels from, I certainly won’t buy the cheapest version. This way, the bath experience feels a tad more luxurious and the product will last longer. If you have to repeatedly replace the cheaper version of something, you’re likely spending more money and having more headaches than if you’d have just upgraded a bit in the first place.
- Splurge on items that you LOVE. Clearly, we can’t splurge on everything we love. If so, I’d basically own Anthropolgie. However, sometimes you come across something that speaks to you, even though it might cost a little more than a similar version. Most of the time when this happens, it’s probably something you’ll use repeatedly for years to come. For example, Matthew and I found a rug that we both liked and it was neutral enough and high enough quality that we knew we’d use it for years to come, even if it was in a different room later. We decided to spend a little extra there because based on the years we’d use it, the cost was completely justified. Get this though – when he got to the checkout counter, it was 50% off!! We didn’t even know it was on sale when we made the decision to purchase. *Insert 1,000 dancing emojis.*
- Splurge when the process of trying NOT to splurge is more trouble than it’s worth. This is a big one for me. If you’re not naturally anxious like me, you can probably skip this one. To be honest, this rule has only become part of my splurge versus not conversation since I married my super chill husband. One day when complaining about how I just couldn’t find an affordable version of *insert random object here,* he asked if I’d wasted enough time already looking for a deal that I could have just bought the original version. It was a light bulb moment for me. Time is definitely worth something and I might be sacrificing way too much of my time to save just $5, $10, or $20. Now, I try to ask myself – could the time I spend looking for a “deal” actually be costing me time. Could the time I’m using be used in a more productive or profitable way? If I realize that the answer is yes – it’d be better to spend $10 extra dollars here than driving across town, spending time and gas, then I “splurge.”
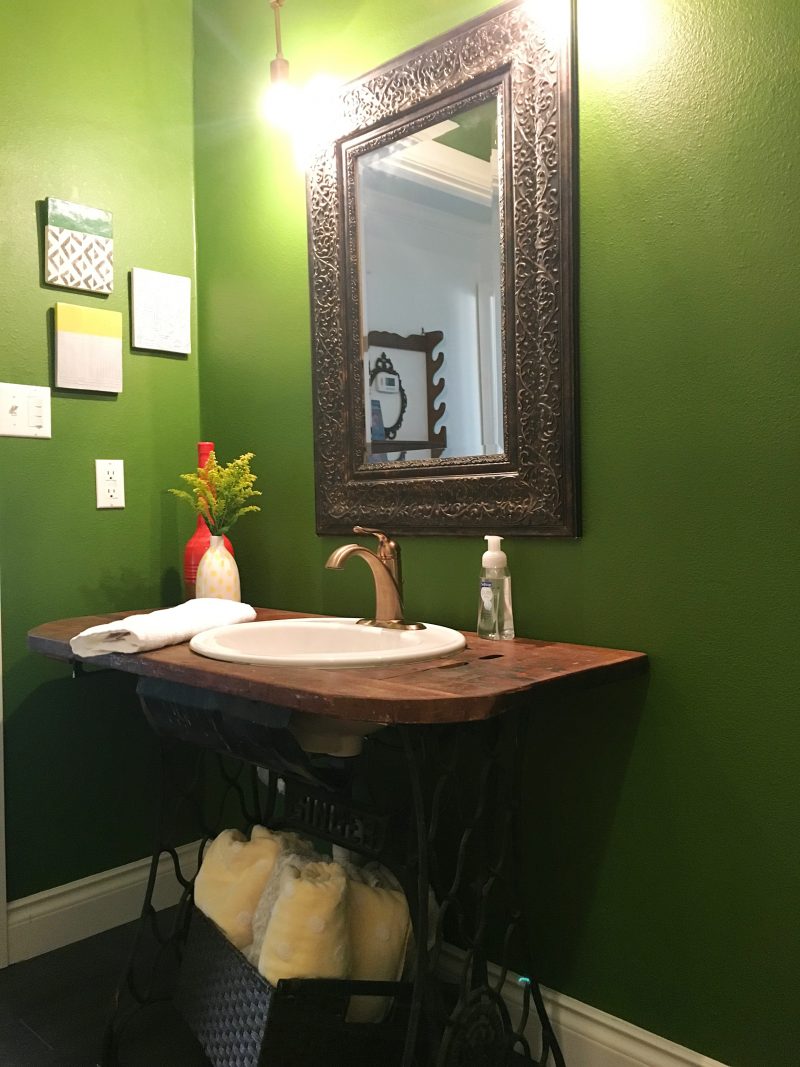 Now, where should you not splurge? These “rules” will vary greatly depending on what’s important to you. If you’re passionate about soap dishes or kitchen sponges, then so be it. I’m just not, so these tips are based on my personal preferences. In a nutshell, I feel like you should generally avoid splurging on the less noticeable things. However, here are some more specifics:
- Do not splurge on trendy items. We’ve all seen it. One day everyone is raving about mesh wreaths and the next it’s wall weavings. Trends ebb and flow constantly. My general rule of thumb is to never, ever splurge on something too trendy. If it happens to fall into #3 above, then maaaybe. However, if you go all out on something too trendy and the trends change, your home is going to look dated instantly. You need to be able to practice “out with the old and in with the new” in regards to trends and if you’ve mortgaged the house on that item, it’s going to be a lot harder to do. Actually, while we’re at it, I generally try to avoid anything that’s gone mass trendy anyway. If everyone you know is using it/wearing it/has it, it’s probably going to be lame in a matter of minutes. If you struggle with picking what’s classic and cool (and not overly trendy), watch your artsy friends. They’ll be doing trends before they’re cool and then likely abandon them once they’re widespread. The moral of this story is to not splurge on trends. And to avoid gangbuster trends altogether (if you wanna be supa fly, that is).
- Do not splurge on the small stuff. I’ll use the paper towel holder as an example again. There is most likely a marble or handmade stone paper towel holder out there that is breathtakingly beautiful. And most likely, I’d love to have it. However, I’ve never hosted a party and had guest ooh and ahh over my paper towel holder. Or the rags that I clean with. Or the front door mat. Or the light switch covers. There are definitely high quality, expensive versions of these things out there and again, if they fall into #3 above, go for it. Chances are though, most people don’t even notice the small stuff. AND most of the time you can find nice, less expensive version of these items either at a discount store or on sale somewhere. I have never paid more than $10 for a door mat and I’m quite proud of that fact. Usually by waiting, you can come across cute versions of these smaller items for less money. It’s how I create balance.
- Do not splurge simply for the sake of splurging. I know some people who simply spend money for what seems like no reason. They buy the expensive versions of everything because they equate dollar signs with value and worth. I do believe that quality comes with higher prices the majority of the time. However, the quality of my light switch covers is just not important to me. If you find yourself splurging on every single thing or spending money just to spend it, you should probably speak to your therapist. And cut up those credit cards.
- Do not splurge on a temporary solution. If you desperately need a dresser to hold your unmentionables and you really, really want that vintage chifferobe that will take you a bit to find, don’t splurge on the temporary solution. Buy something that works alright for now so that you can replace it without hurt feelings and a hurt pocketbook when you find the thing you really want. Similarly, I wouldn’t suggest spending a ton on something that will only work in this one spot in this one house. If you won’t be able to reuse that item, then it probably shouldn’t be a splurge item. My most recent example is our master bedding. I think that it’s important to get your bedroom set up and comfortable ASAP after a move, or remodel in our case. I haven’t chosen my permanent bedding yet, and rather than spending a lot on something temporary, we purchased an Ikea duvet to use in the interim. The room will be “fixed” and functional for now, and when I find my permanent bedding, I won’t have wasted a ton of money on the temporary.
As I said above, these guidelines are just how I personally approach spending money on my home. These tips were fresh on my mind since I’ve been employing them every single day lately, so I thought I’d share with the class. There will sometimes be exceptions (but pay close attention to #3 on what NOT to do) and there will always be differences in budgets and opportunities. You might want to be jealous of my Delta faucets (cause they’re awesome). However, I’ll kindly remind you that I had to go through one of the most traumatic experiences of my life thus far to get those faucets. If I had to spell out the biggest thing for you to take away from this post, it would be this – never spend more money than you have and never, ever compare yourself and your situation to someone else’s. Save where you can and treat yo self sometimes. If you’d like some inspiration on building a lovely home on a budget, this book and her blog is a great resource.
If you have any guidelines that you follow when deciding when to splurge and when not to, I’d love to hear them. Most of us don’t have the luxury (or are responsible enough to not to use it) to simply buy whatever we want, whenever we want it. I’d imagine that we all have strategies that we use, maybe without even noticing it, when making purchasing decision. I’d love to hear your tactics!
Fun & Simple Halloween Projects
Halloween has always been one of my favorite holidays, so it’s no surprise that I’ve been pinning different fall and Halloween goodies for a while now. Since it’s officially fall (!!) and October is right around the corner, I thought I’d share a few of my latest favorites with you. It’s time to start making those fall and Halloween crafts, my friends!
 I’ve never been too much of a fan of the crayon art projects. These pumpkins though… *heart eyes*. That black/purple/blue one is GORGEOUS!
Sources: Oh Gee Lindsey & Dream A Little Bigger
 I also love a good, simple wood project. When we end up with scraps of wood from a project, I’m always wanting Matthew to save it. (I get it from my Mama..) And this is why! This project (and this wooden candy corn DIY without a source) would be so easy to make with scrap pieces from around the house. If you don’t have any scraps and aren’t super handy with the power tools, you can buy wood from Lowes and they’ll cut it to size for you there.
Sources: Hazel & Ruby & If that candy corn is your crafty work, please let me know!
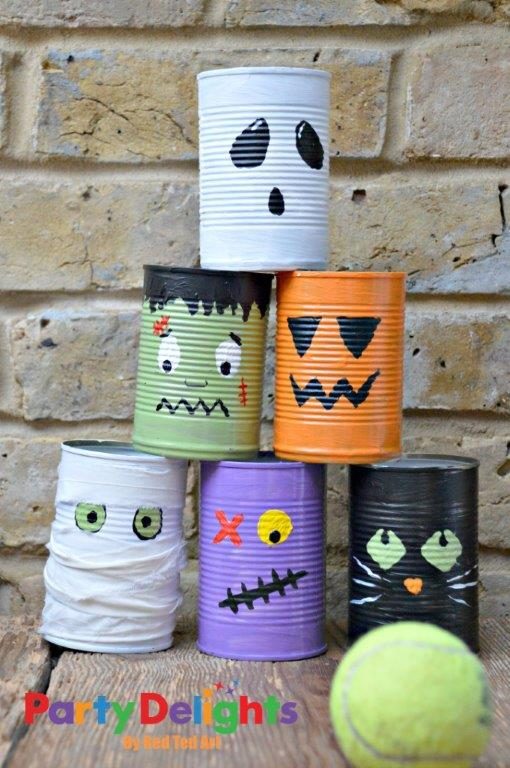 Here’s another project you can make out of scraps around the house. She turned them into a bowling game and I think they’d be cute as just decorations too! You could use them for candy, decorative twigs, flowers…you name it!
Source: Party Delights
 I’m always looking for creative ways to give little gifts, so it’s not surprising that this one caught my eye. I wouldn’t recommend this approach for your 1,000 trick or treaters, though it’d make a great little prize for folks around the office, teachers, etc. I will most likely be handing these out to someone this year…
Source: One Little Project
 This is possibly one of my favorite projects because I love yarn. I love garland. And I love tassels! The tutorial shows you how to make each item, so it seems pretty simple!
Source: Growing Up Gabel
 And finally, for those more crafty in nature and serious about their Halloween décor… (I’m looking at you, Meghan.) This burning spell book is simply stunning! Apparently the original source hasn’t been traced. It’s thought to have been a part of a college sculpture class. If this beauty is yours, let me know because you deserve some credit!
These few items should get you started on your fall crafting adventures. If you want more inspiration, go ahead and follow my Fall & Halloween board, or follow me on Pinterest altogether! (Right now, you’ll see lots of pumpkins, Christmas décor, and flannel. If those are your things, hop on over!)
Also, check the Halloween tag for a few more ideas. Have you seen any other cool ways of decorating lately?? I can’t wait to get started!
A Place to Call Home
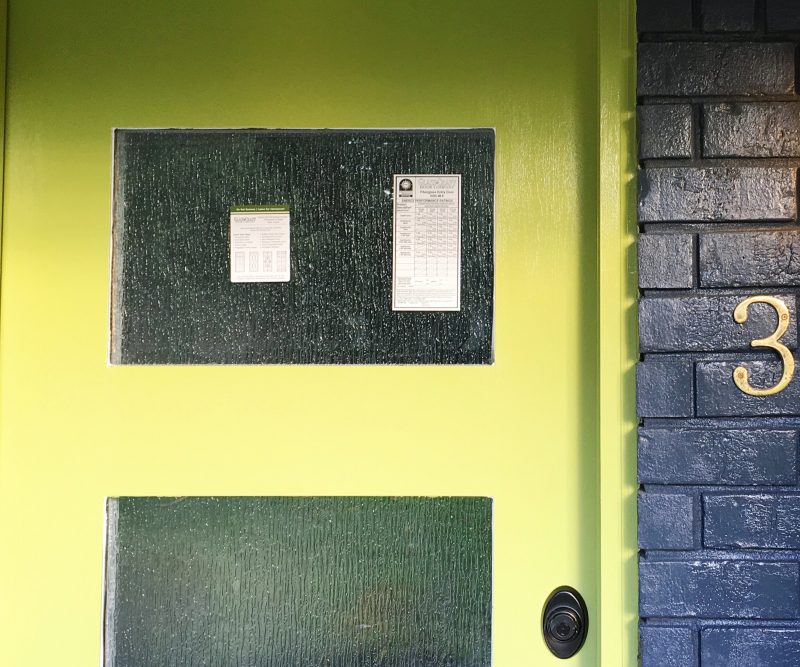 We bought our home two years ago in July. We did a lot of work immediately, before we even moved in. I couldn’t live with the oak-ish floors and butter colored walls. We made as many changes as possible and then started prioritizing other updates as we could get to them. One morning, sipping my coffee in a duplex across town, I realized something profound.
I had worried myself sick about undone projects. I’d fretted constantly over how and when the rest of the updates would get done. I longed to be “finished” and have that picture perfect home I saw in my mind. In essence, I tortured myself.
You know what happened next. The house flooded and we had to rip what we had done apart and literally start over. And then, we had the opportunity (albeit it not ideal) to rebuild in a way that we’ll hopefully love. I won’t say that this flood happened to teach me a lesson, though I can definitely say I’ve learned several. I also don’t want to give you the impression that I’m happy it happened so that I could rebuild. This is by far, one of the most difficult and trying obstacles I’ve faced thus far, and even if something good does hopefully come from it, I still wouldn’t have chosen this route.
First, I need to understand that everything happens in due time. My lack of patience wants everything done yesterday. I’m not great at planning things for the long term and often get frustrated when things don’t happen right away. I suddenly realized that I need to just have faith and understand that every single dream, idea, or plan will unfold eventually. There’s no point in fretting over it. I wrote something similar about just being patient before. However, I was not using that strategy in our home renovation.
Second, I need to spend more time appreciating what I have. Don’t get me wrong, I always operate under a sense of gratitude. However, I wasn’t focusing on that at home. I started out with a grateful mind despite my wishlist and then lost site of that somewhere down the line. And then suddenly, when it’s all ripped away from you, you realize what you had. And what you lost. When we were crashing with friends, or living in a camper, or not actually knowing where we’d live next, I would have given anything to have that home back, imperfections and all. Who cares that I hated that seashell sink and that the bathroom was a little small. Who cares that the living room layout bugged me a bit and that the cabinets looked like they battled in World War 2. I just wanted to be back home. Suddenly none of those imperfections mattered. I didn’t care how many updates or projects were still needed. I just wanted to be home.
It’s rather silly that I lived in a state of stress and worry over getting that home finished. I simply lost site of the here and now and instead of enjoying what I had and how far we’d come, I, like so many others wanted more. This experience has definitely been a lesson in patience and appreciation. I’m thankful for a place to call home. I’m thankful for the shelter it provides and for its benefits, as well as it’s imperfections. I’m also thankful for the opportunity to change my mindset. When we finish rebuilding, it still might not be perfect. Our next home might not be perfect. Nonetheless, I’ll always be grateful for a place to call home. A place to rejuvenate and relax and make memories, regardless of the type of counter tops it has.
Here’s a peak at what the house looked like when we bought it and a brief tour of where we were in updates.
What To Do After a Flood
 Right now a large portion of South Louisiana sits under water. Just mere months ago, North Louisiana experienced the same trauma, and even though Matthew and I have made it through the hardest parts, the pain/fear/uncertainty/stress still feels fresh. A few weeks into the rebuilding process, I joked that I could now write a manual on “what to do in a flood.” Now, when so many of our friends are suffering through the same things we did, the idea struck that I should actually jot down a few pointers from our experience. Keep in mind, every situation/insurance and mortgage company is different, so these tips are based solely on our experience and could vary based on each individual situation.
Here’s what we did:
- Start a “flood notebook.” You are about to be bombarded with information, phone numbers, policy numbers, deadlines, etc. and you’ll want all of that information in one place. My flood notebook was attached to me at all times during the first 3+ months and every bit of information was kept there.
- Contact your insurance company. If you have flood insurance, file a claim immediately. With a disaster of this nature, insurance adjusters will be swamped and you want to get on the books ASAP. If your cars were damaged, you’ll need to file separate claims for those. (Remember to be nice to everyone you speak to. They want to help you.)
- Contact your mortgage company. If you have a mortgage on the property, you’ll need to let the mortgage holder know. They’ll be a part of the rebuilding process and you’ll most likely have to run funds through them to rebuild. Also, they’ll possibly delay your house payments for a few months to help out until you sort things out. (Be mindful that these payments will probably all become due at the end of the delay period. They’re most likely not doing away with those payments – just delaying.)
- Register on disasterassistance.gov. We did not register with FEMA at first because we thought they wouldn’t help since we had flood insurance. That’s not true. Register anyway. There’s most likely things your insurance won’t pay for and FEMA can help with that. If you do not have flood insurance, register right away!! This will most likely be your best form of assistance.
- Take lots and lots of photos. Hundreds. Thousands. You can’t have too many. Take photos in all rooms, from all angles. Inside closets. Inside cabinets and drawers. YOU CANNOT HAVE TOO MANY PHOTOS.
- Find a more permanent place to stay. We were overly ambitious and thought we’d be back home in 3-4 months. We were home before most of our neighbors/friends and it still look way longer than expected. You’re about to be stressed to the max and pushed to limits you’ve never been before. Find a place to retreat. My suggestion would be to plan for something stable for at least 6 months. This way, you’ll be less stressed when you experience delays or bumps in the road.
- Delay/pause your excess utilities. You won’t be using a lot of your excess things like cable, internet, alarm services, etc. for a bit so if you can, pause or cancel those temporarily. Some will be great about this, some won’t. Just save where you can. For internet, for example, it didn’t make sense to cancel so we just dropped it down to the very basic plan. Our alarm company let us disconnect and easily reconnect when we were back home.
- Call your cell service provider. If you begin to run low on data/service, you can call and ask for help. Once the area is declared a natural disaster, some providers will extend your limits for the month so you’re able to make those important calls, etc.
- Write down people to thank in your flood notebook. I kept a running list of those who helped so I could thank them when things settled. (I still have some cards to send.) There is no possible way you’ll remember everyone so start writing down names immediately. And believe me, you’ll want to thank those people. These people will literally be your heroes.
 Once the water is out of the house, here’s some things to do next:
- Take more photos. If you took photos while the water was inside the house, take more with the water gone. Be sure to document any visible water lines. Again, be sure to get inside all cabinets and drawers. You want a record of everything in the house.
- Remove any and everything that is salvageable. If it is dry, pack it up and find a place to store it. This is very important – DO NOT PUT ANYTHING EVEN REMOTELY DAMP INTO A BOX WITH DRY ITEMS. If you do, you’ll have lost everything in the box by the time you’re able to unpack it. If you think clothes can be saved, launder them immediately. Remember, it’s not just rain water you’re dealing with here. If it’s dry, get it out immediately and keep it separate from anything wet. If it didn’t get touched by water, insurance probably will not cover it. Save it if you can.
- Pull anything wet out outside. You want to get everything out that’s holding water. Carpet and rugs need to be pulled ASAP. They hold water in the house, so remove them as soon as possible.
- Make note of EVERYTHING, big and small, that’s tossed. As you take something out, write it down. I bought several yellow notepads and some of the girls helping us stood by the doors, making note of everything that was tossed. This will be a LIFESAVER when you go to inventory things for insurance. The more pictures and notes you have, the better. You’ll want to write down the model/serial number of appliances and the other can be general notes…anything that helps trigger your memory of what the item was. It would also help if whoever is writing in that notepad would include their name. That way, if you have questions later, you’ll know who to ask. Also, know how many notepads you have going so you can be sure one doesn’t get misplaced.
- If there’s furniture that you think you can save, clean it immediately, especially before you put it into storage. If it’s upholstered or cloth, it’s probably not salvageable. If it’s cheap furniture or not real wood, you should probably toss it. Anything that’s real wood (antique furniture, etc.) might survive if you clean it and get it dried out immediately. We wiped everything single thing that we thought could be saved vigorously with Lysol/Clorox wipes and let it dry before storing it. Some survived. Some didn’t. Again, be careful storing anything wet because it could ruin everything around it. NOTE: Some real wood items might have faux wood backs, etc. If so, rip those off and try to save the rest. You can add a new back later. Just clean it really, really good.
- If you don’t have a dumpster, make piles within 10 feet of the edge of the road. It’s going to be a while before they can pick these items up, so put them as far out of your way as you can. If you have someone with a trailer or dumpster, these are good options too. If not, make piles close enough to the road that the trash collectors can legally pick it up and far enough back that it won’t fall into the road.
- Begin pulling out sheetrock/insulation. The amount of water you had inside will determine how much sheetrock needs to be removed. Usually, it’s done in 2 or 4 feet increments. It’ll be easier to replace that way. At a minimum, pry away the baseboards. Usually, there’s a gap at the bottom of the sheetrock that’ll allow air to start flowing within the walls. If there’s not a gap or you can’t remove baseboards, knock holes along the bottom of the sheetrock with a hammer. This will allow some airflow. If you’re doing demo yourself, wear gloves. Get gloves for anyone helping you. Pull up flooring, pull out sheetrock, wet cabinets, appliances, etc. Note: It’s ok to do these items before the adjusters come AS LONG AS YOU’VE TAKEN A TON OF PHOTOS. Some people are afraid to start and there’s actually probably a clause in your insurance policy somewhere that says you’ll do everything you can to “maintain the integrity of the home.” In this case, it means getting it dry ASAP. The insurance company will be very unhappy if you simply leave it until the adjuster comes and you’ll only cause more problems that way.
- Hire a professional water remediation specialist. These folks will be swarming your area soon and a lot of them do demo too. We used Clean Master and Service Master is another good one. They’ll professionally dry the home once it’s demoed and treat the studs etc. for mold. You’ll want to hold on to the “dry logs” they provide you because insurance will want them and they’ll be handy when/if you sell the home in the future.
- Accept help. There will most likely be church groups and volunteers everywhere offering help, food, or supplies. This is not the time to be prideful. These people want to help. Let them. You’ll need strength later, I promise. (Just remember to make a note of who helped in your notebook.)
- Choose a good contractor. Your mortgage company will most likely require a licensed contractor to oversee the reconstruction. Pick a good one. The good ones will book up fast, so call as soon as you can. Ask around for suggestions. Listen to reviews. Be sure not to choose a crappy or unreliable contractor.
- Be wary of poachers and scammers. Within hours, you’ll notice people scoping your trash piles and offering services with hand-written business cards. Accept help from others, yet be cautious of people just trying to make a buck from a bad situation. Don’t leave valuables outside, especially not near the trash pile. You might also have investors make offers on your property as-is. This isn’t always a bad deal…just be sure you aren’t taken advantage of. If you have questions about this, contact me.
- Save all receipts. All of them. Anything you buy or pay for right now should be documented. In addition to my flood notebook, I bought an accordion file to keep all paperwork in one spot.
 And a few more practical/sanity related tips:
- If you’re not attached to an item, do not save it. Now is not the time to save anything that doesn’t mean something to you or than you don’t need. Storage will be scarce and once you’re ready to move back in, you won’t want to clutter your new, pretty home with old junk. If it’s damaged or if you don’t love or need it, get rid of it now.
- If there’s an area of the house or items that are important to you, have someone close to you work in that room. My closest friends/family worked in my closet because they knew better how to handle those personal items. They also knew to just toss what was ruined without me seeing it (after writing it on the damaged inventory) because that was easier than me having to face that item at that moment.
- If photos got wet, pull what you can apart gently and lay them out to dry ASAP. They won’t be perfect, but you might can salvage some this way. I also had friends help with this task so maybe I wouldn’t even remember photos that had to be tossed.
- And possibly most importantly, remember that this sucks and it’ll be really, really tough. However, IT’S TEMPORARY. You won’t have to live this way forever and someday things will level back out. I think that the only way I kept my sanity is by constantly reminding myself that I can handle anything for a limited amount of time, and this nightmare is just temporary. As with any situation, it is what you make of it. It sucks and if you let yourself wallow in that, you’ll only make the process worse. It can be positive or negative…you decide your outlook.
- When the new wears off and the volunteers go back to work, you’ll feel the most alone you’ve ever felt in your life. However, there’s a group of us out there that will be constantly thinking about you and cheering you on. I’ll be constantly thinking about you and cheering you on. And I know that you’ll pull through. You’ll come out on the other side with a new perspective on life and you’ll feel invincible. I promise.
These steps are not something I worked on for weeks and I haven’t even proofread. The thought just came to me to share my tips in case it helped just one person find their way in this tough time. I wish I had someone to reply on for instruction when this tragedy first happened to us. If you have questions, feel free to ask. I’m happy to help in any way that I can!
I haven’t shared much yet, but you can find some of our story here or check the #100daysofrebuilding hashtag on Instagram. If you’re struggling today, know that I feel your pain and I’m on this journey with you.
Much love, Pamela
EDIT 8/19/16:
Call the tax assessor. This isn’t something that needs to be done right away. However, make a note to call them when you have time. They’ll keep a tally of damaged homes and this is how they’ll determine whether tax breaks can be given for the year. (Thanks, Madeline, for this reminder.)
*These thoughts and suggestions are all my own. I’m not a professional, nor are these hard and fast rules. This is just my experience and what I did to survive it.
**The last, overhead photo was taken via drone by a neighbor.
2015 Christmas Decor
 I learned a few things about Christmas this year.
- If my decorations aren’t up by mid-November, there’s a chance that they might not go up at all, and I’ll be super stressed. The longer I can enjoy my holiday décor, the better. Sitting in a room filled with cozy lights could be my favorite part of the year.
- I should invite people over early in the season. The sooner I have people over, the sooner I’ll get all of those lingering Christmas tubs put away! The weekend after all of the extra items were put away felt simply magical. I want to reach that point earlier in the season.
- Photos of Christmas décor are much better when taken in the early evening/afternoon hours. The photos of my big tree in the living room are much better than the one of Matthew and I by the tree, which was taken a few hours later. Speaking of, I’m not sure what those random specks of light/dust/glitter are on us. Something tells me that my lens was dirty. Next year, I’ll make a point to take all photos while there’s still a bit of daylight left…and to clean my lens before our little photo session.
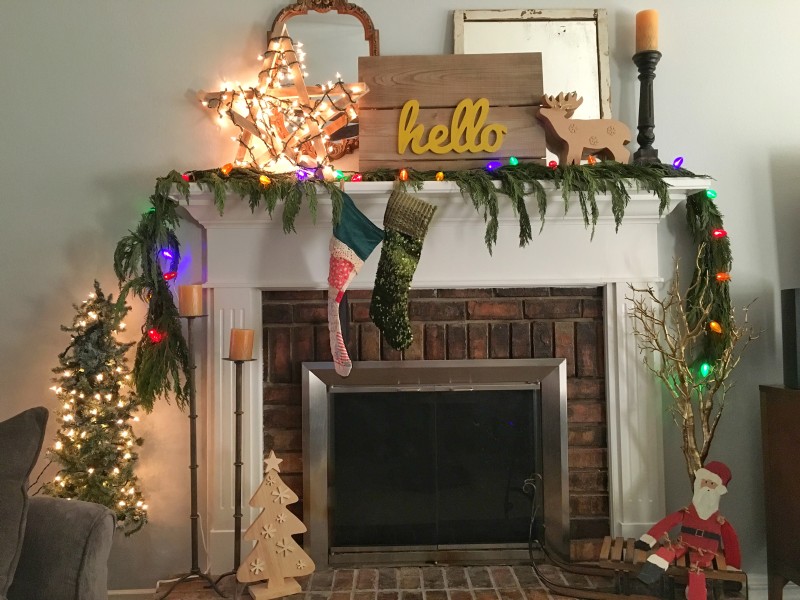

 If you remember the post about my inspiration for the year, you’ll quickly notice that my actual décor looks nothing like my plans. Literally. Nothing like it. This fact is what brings me to realization #1. As time passed by quickly, I ran out of time to plan for new décor. Instead, I used items that I already had to get things decorated ASAP. There just simply wasn’t time to search out new items. Next year, I hope to start a little earlier so that I have more time to plan.

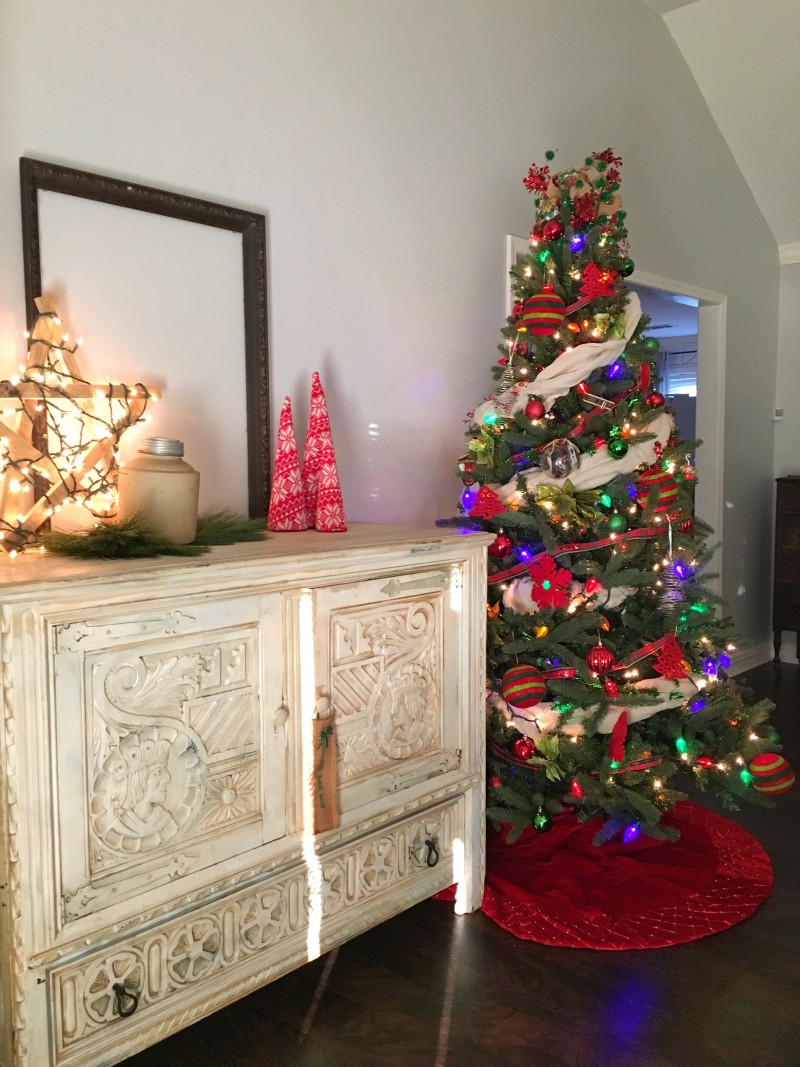 Hopefully these few photos give you an idea of what our home looks like this holiday season. Imagine Christmas music, lots of twinkling lights, and hot chocolate galore. That about sums it up. We’re only a few days away from the bulk of the holiday festivities, so I hope you’re well rested, full of the holiday spirit, and eager to mark off another holiday season with those you love. Remember, don’t get too caught up in the hustle and bustle. Be sure to make time to truly enjoy this magical season.
P.S. If you’d like to look back, here’s last year’s Christmas decor.
My First Thanksgiving Dinner!
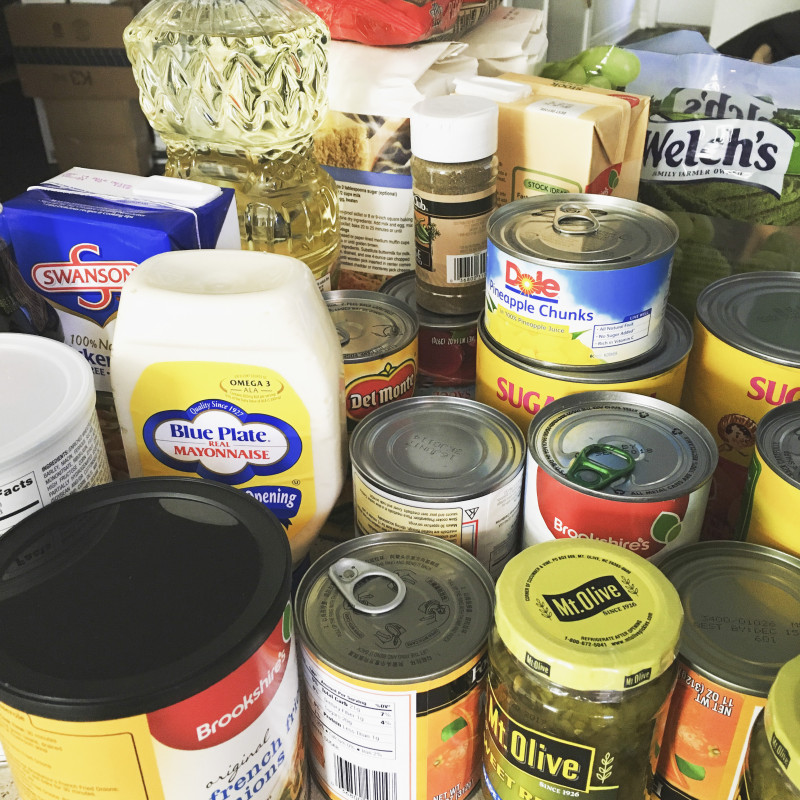
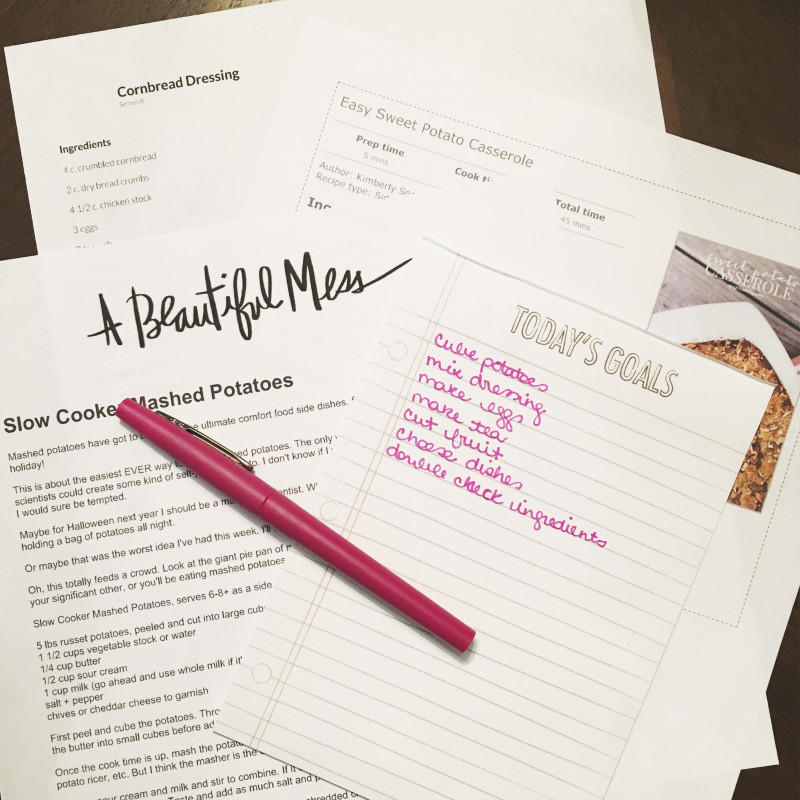 This year I signed up for a rather large task. I agreed to prepare the entire Thanksgiving meal (sans desserts) and have my entire family over. Coming from someone who hardly cooks on the regular, this was a rather shocking (and a bit daunting) arrangement. In the sake of honesty, I partially agreed to do this because I wanted to prove to myself that I could…and because Matthew agreed to help. I’m not ashamed to admit that he’s a better cook than me.
Regardless of the reasoning, I set out to prepare a full Thanksgiving meal for my family. I planned, shopped, and cooked like it was my job. I organized serving dishes and did my best to think of every single thing. I baked cornbread for dressing completely from scratch. I attempted some new recipes and didn’t have any major breakdowns. I burned my elbow on the oven and only yelled at/threatened my husband once or twice. All in all, it was a successful event.

 Thankfully, I had help from my mother (the usual host) and from Matthew’s grandmother (a fantastic and knowledgeable cook). With their help and Matthew’s, I somehow pulled off an edible meal that was mostly prepared on time and still somewhat warm. This might go down as one of my big accomplishments of the year!
So, what’d I learn from this event? (You know, I’m always looking to “learn” something.)
- I learned that sometimes I’m capable of much more than I give myself credit for.
- I learned that I’m pretty darn good at breaking down and organizing a large project.
- I learned that cooking isn’t quite as difficult and stressful as I make it.
- I learned that someday, with a little bit of practice, I might be a pretty good host (of something other than spaghetti or a crockpot meal).
- I learned that I really enjoy sharing the fruits of my work with others.
If I can learn so many things from preparing just one meal, I’m sure you stand to learn a few things from trying something new too. I encourage you to take on a large task and go for it! Try something new. Embark on a great adventure. No matter the outcome, you’ll likely learn something about yourself and the world around you. That’s always worth it.

 I hope you and yours have a fantastic Thanksgiving. Wherever you are and whatever you’re doing, make the best of it!
2015 Christmas Decor Inspiration
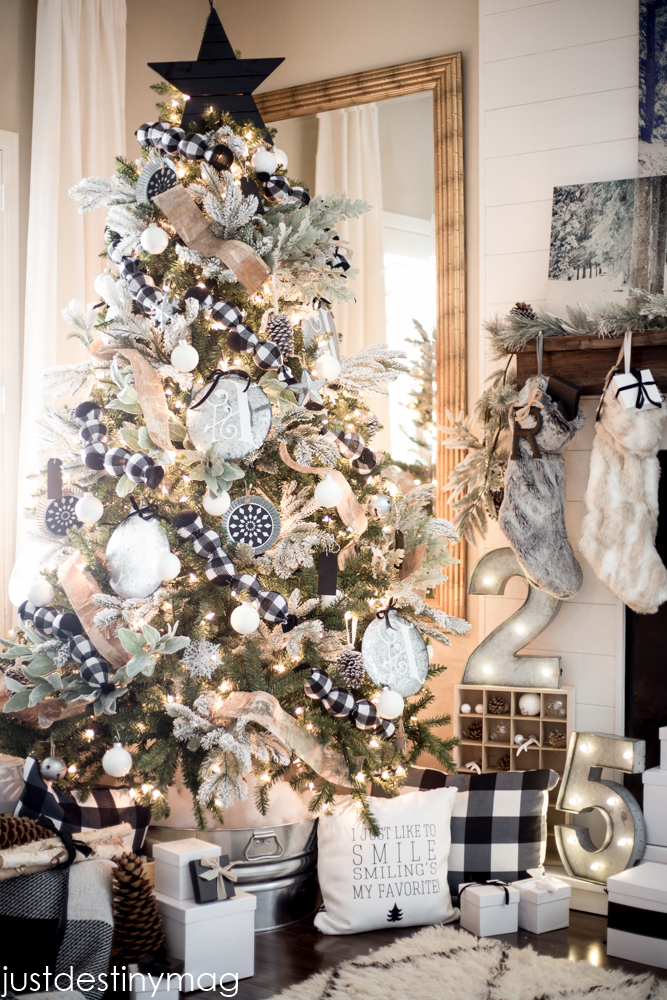

 Oh, how I love Christmas! It’s no secret that I am SO ready for the holidays this year. Honestly, I wanted to put my tree up on Halloween. I showed some self-restraint and did not. However, it will happen very soon. I have a few home improvement projects that I want to get done and then it’ll be full-fledged Christmas City in the Petrus household. Since I’m making myself wait a bit longer to decorate, I thought I’d share some of my ideas/plans for this year with you. (Basically, this is my excuse to dive into Christmas without actually diving in just yet.)
I’m working on a bit of a black and white theme in my living room, and I’m thinking that I’ll have my Christmas décor play off of that this year. I first got the idea looking through the Michaels Makers Christmas Tree reveals (or on Instragram…which was my favorite), and I’ve been stuck on the idea of black and white ever since. The first tree above is what set all of my ideas into motion. Isn’t it lovely??! Rather than sticking with an entire black and white theme though, I’m planning to incorporate big, multi-colored lights and some classic Christmas elements. Basically, I’m thinking black and white stripes and all of the buffalo plaid with bright, Christmas colors sprinkled in. I think it’ll be a blend of classic, retro, and candy colored Christmas. All of my favorites!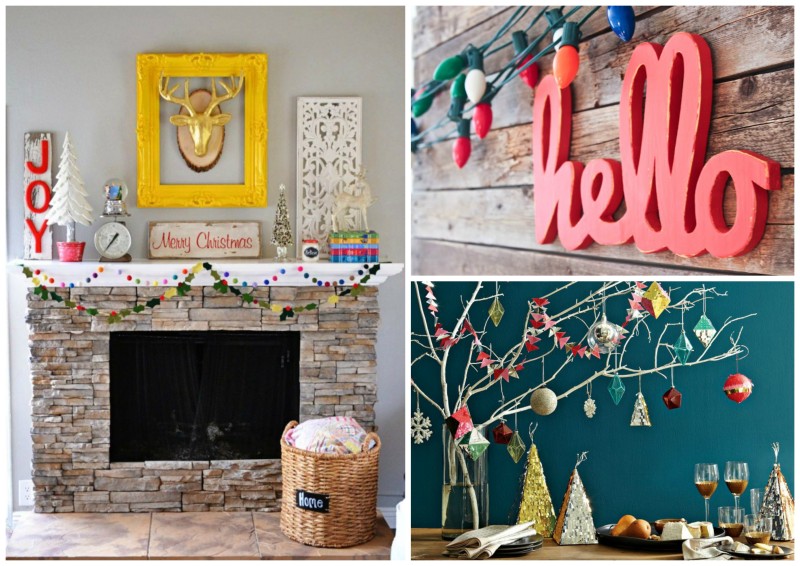 For the mantel, I plan to add some black and white (maybe these DIY trees) and I might leave my “hello” sign with lights done like this one. I think I’m going to do a fun color scheme like the photos above and sprinkle in my black and white favorites. I might also include some brown fur because I saw some fur stockings that made my heart go pitter-patter. In a nutshell, I’ll probably combine a variety of looks that *hopefully* all come together nicely.
How about you? Do you have a specific theme in mind this year or are you all about the hodge podge? Either way, I’m sure it’ll look lovely!
Photo sources: 1 / 2 / 3 / 4 / 5 / 6…and I want all of those modern trees in #6. And while we’re at it, my decor last year.
Living Room Inspiration: Pink + Black & White
 I have recently fallen in love with this look that I’ve seen popping up around the internet. I’m loving it so much so that I’m thinking of abandoning my previous plans for my living room and heading this direction instead. I should probably go ahead and admit that I often create a “new plan” for a space and then simultaneously move on to something else before I ever even make that first plan a reality.
I have been planning to paint the fireplace wall in our living room and add wood from the mantle to the ceiling. I’ve been searching for a new coffee table and I intended to buy a new cowhide rug for underneath. Before this, I was going to replace the hodge-podge of colors I’ve been using with black/cream/mint/gold. This look never made it from my head to the room and it looks like my most recent plan might not either. That being said, this photo (and this and this) is a sample of the look that I’m most excited about right now – black and white with a touch of pink. I first saw the look on @katekillsit‘s Instagram. Since then, I’ve been drawn to every similar photo.
I’ve never been much of a pink girl. However, these bright pink rugs paired with black, white, and gold have really be catching my attention lately. I stumbled upon a few similar rugs at a furniture store in Dallas recently and I’m really considering jumping ship from my most recent décor plan. Our gray sectional takes up most of the room, so you will really only see a small portion of the rug. Nonetheless, I’m thinking that this little touch of pink might add some personality. Right now, our living room is the equivalent of talking to the guy at the party whose main interest is spreadsheets. I’d much rather it be like talking to the world-traveled artist who lived in Uganda for a bit. A pink rug would most likely transition the room from Boring Bill to Racy Raul, right??
For now, here’s what I’m thinking:
- Bold rug, probably in the dark pink family
- Black fireplace wall
- White wood above the fireplace
- Gold curtain rod with white flowy curtains
- A collection of fun pillows (or all black & white)
- Something fun and bold above the mantle (I’m seriously considering a picture of a goat.)
- Lots of gold accents
- Bold, fun light fixture
Clearly, I could just as quickly abandon this idea as I’ve abandoned the last few. I may even stick with the cowhide instead of the pink patterned rug…depending on what I can find. Even if these plans alter a bit, my goal is still to create a space that screams, “I’m perfectly put together, yet very fun.” The intention is that you’ll want to talk to my living room at a party…not that other silly room that picks his nose when he thinks no one is looking.
If you’d like to see more of my living room inspiration, check out my Pinterest board!
(Photo by Kate Mills.)
Clutter + the KonMari Method
 My quest to reduce clutter began when Matthew and I married in 2012. We had both lived on our own for quite some time, so in essence we were combining two full households. There were basically two of everything and to fit in our quaint rent house, we had to pare down. In addition to having doubles of things, it was also evident that Matthew had way less stuff than what I’d accumulated and that made me feel a little self conscious.
You see, I had an addiction to keeping everything. After doing a bit of self-exploration, I realized that most of this tendency came from a fear of not having what I needed. I was afraid that if I got rid of something and needed it later, I wouldn’t have the money or ability to replace it. I’ve also experienced my fair share of losing loved ones. This caused me to have boxes and boxes of sentimental items that I simply must keep because they originally belonged to someone that I loved. The reality is, most of these things were just given to me, not things that I actually chose for a reason. Shortly after Matthew and I were married, I purged so many things. We had an epic garage sale and the result made me feel pretty good about myself and our home.
My second voyage towards a clutter-free home came when we bought the new house. Even though I’d purged quite a bit from the rent house, there was still so much extra. When we moved, I was determined to not fill this new house with extras. The tall ceilings and ample windows made me really want an open, airy, and tidy home. We had another garage sale and donated so many things. I considered it great progress.
After these two large purges (and several small ones), things were looking up. There wasn’t nearly as much stuff, yet there was still more than we needed or used. Then, I picked up Marie Kondo’s book The Life-Changing Magic of Tidying Up: The Japanese Art of Decluttering and Organizing. Honestly, I did this primarily out of curiosity. The internet acted like this book was indeed life-changing and I read about it everywhere I turned. I figured that I’d read the book, maybe pick up a few new tricks, and then go on about my life. Instead, reading this book prompted one of the biggest purges of my entire life and has completely changed how I look at things in my home.
First, I immediately tackled my closet. Even though I’d thinned quite a bit in the other purges, I was still hanging on to so much extra clothing. My approach was to either hold on to it because “I might wear it again” or because “I’d not gotten my money’s worth out of it.” Therefore, even though I’d thinned and thinned, I still had a closet full of things I didn’t love or feel fantastic in. I had mentioned some tips for cleaning out your closet before, yet I still had so much extra that I “might wear under something one day.”
After just a few chapters of this book, I was filling garbage bag after garbage bag of items. It was like something clicked and finally gave me permission to get rid of those things I didn’t really want to keep anyway. Kondo’s approach is to take every single item that you own into your hand and ask yourself if it brings you joy. If it does not, then it’s just taking up space and it’s time to get rid of it. This approach alone was responsible for me purging over five large bags of clothing and shoes and 200+ writing utensils.
Not only has Kondo’s book helped me to make serious headway in a curated home, it’s also changed my approach to shopping. I no longer by things that I just barely like because it’s on sale or a good price. Instead, sometimes I pay a little bit more for things that I love. Overall, I’m spending less money and not bringing as many extra things into my home. Because of this book, I have a new outlook on how easy it is to have a clutter-free home full of only things that you love. If you’re even slightly concerned about having a home that you’re proud of, I recommend the book. It’s a no-nonsense approach to tidiness and you’re guaranteed to find at least a bit of insight as you read along.
Another way that I’ve been able to create a much more tidy home is by actually using my sentimental items. Rather than continuing to store box after box full of miscellaneous sentimental items, I got rid of the things that meant nothing to me and am now actually using the others. (There are still a few boxes of these items in the attic that I’m prepared to cull.) I read somewhere that our grandmothers would much rather us actually use their old wedding China than have it stored in a box in the attic where we never even see it. The risk of breaking a plate is worth it for the years of memories we’ll create using those plates and thinking of our grandmothers. Those family quilts should be draped across our couches and used for family movie nights instead of stuffed away in clear containers in the closet. You should wear your mother’s pearls instead of just seeing them in the jewelry box occasionally. I wish I could find the link to that post to share with you, because reading this made me realize that I was just storing things instead of using them. Even if a quilt becomes more tattered or a plate gets broken, I’d still rather have the memories with those items rather than my home being a storage unit for things we don’t touch. Beginning to use my sentimental items alone has contributed to less cluttered storage space, and using those items brings me joy now rather than the sadness I used to feel when opening a box and being flooded with forgotten memories.
There are a million and one strategies that you can use to reduce the clutter in your home and we can all have different approaches. Whatever method you use, I know that you’ll feel like a new person as you reduce the clutter because I certainly have. I found that by having less things stuffed in my home, I get to actually live rather than spending all of my time working on my things. There’s less to put away. We don’t need as big of a house. I don’t have to spend entire weekends trying to get things back in order. And most importantly for me, I don’t loathe putting away my laundry as much as I once did. Instead, I can tidy quickly and easily and the rest of my time can be spent exploring new hobbies or spending time with family and friends. There are still some areas and closets that I hope to tackle. However, the progress I’ve already made feels amazing.
Keep in mind that I’ve been working towards this goal for three years now, so don’t feel like you have to tackle everything in one weekend. Instead, start in one little area and do a bit as you can. And be sure to read the book. It very well could change your life.
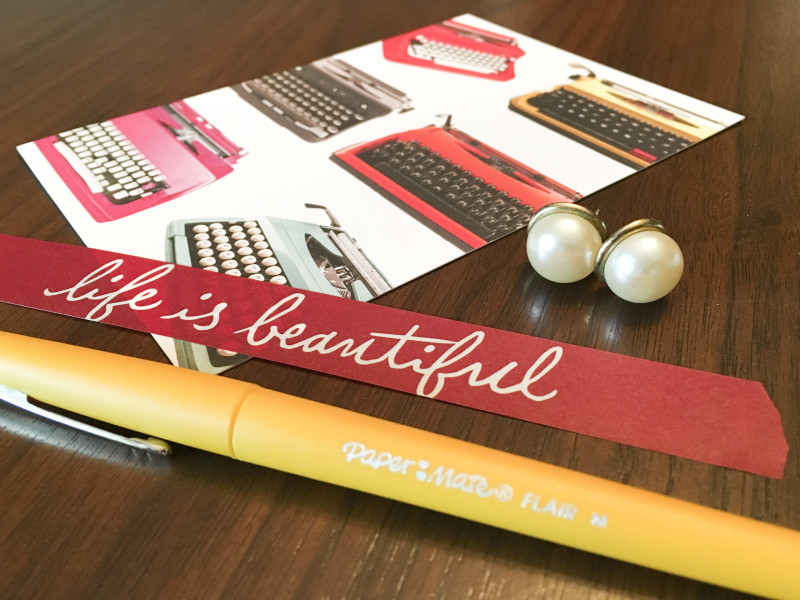
*The earrings pictured above belonged to my great aunt and I wear them often.*
