

When Matthew and I purchased our current home, we had quite a hefty list of updates that we planned to do. (You can see some of the before photos here.) Some of the updates we envisioned were immediate, like painting and new floors. Others will come along later, like painting the exterior and bathroom overhauls. Light fixtures were one of the items that we knew we’d do rather quickly. However, I’ve had the hardest time finding decently priced lights that I like, so we’re still working on this one.
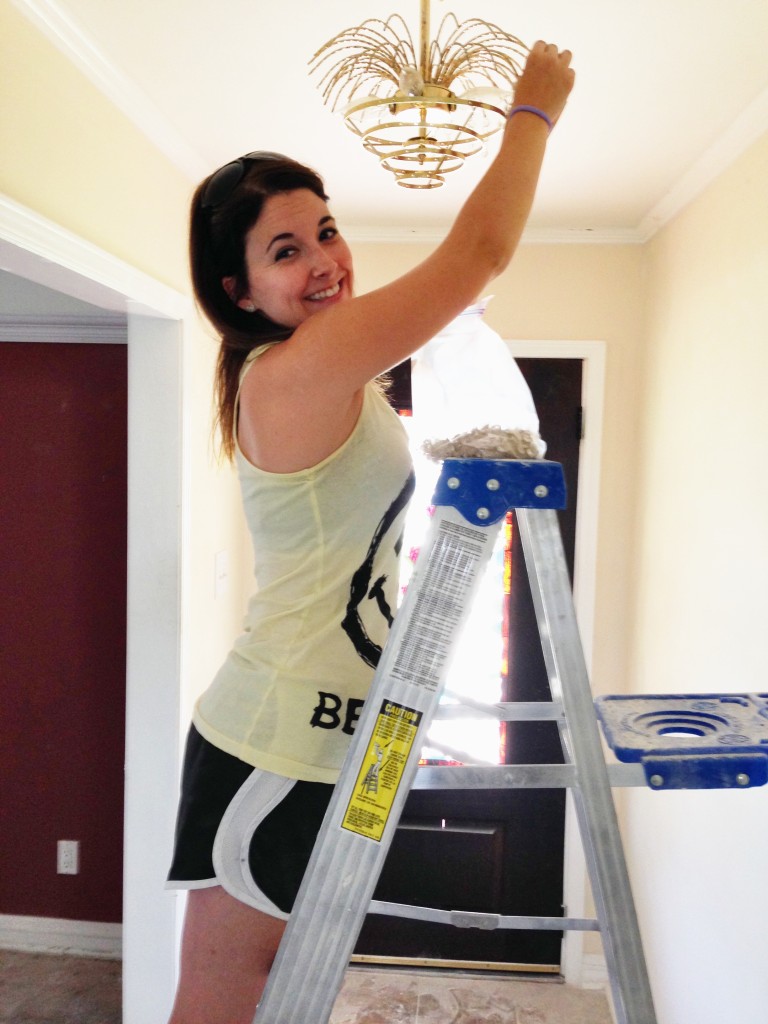 When we bought the home, there were only two light fixtures in the house that I even remotely liked…the dining room chandelier and the entry way light. All of the others were very dated or not at all my style. (The leaf fan, for example, doesn’t fit my décor style.) Our bedroom fan is also leaves. The kitchen had a ceiling fan, which Matthew could only barely walk under without risking decapitation. The rest of the fixtures were classic 1990s brass. The two fixtures that I liked were also brass, but the bones were good. Rather than replacing these two, I decided to give them a little facelift.

 I haven’t tackled the dining chandelier yet, but I worked on the entry light pretty soon after moving in. I used Rust-oleum Hammered spray paint, and the process was rather quick and easy. Here’s what I did:
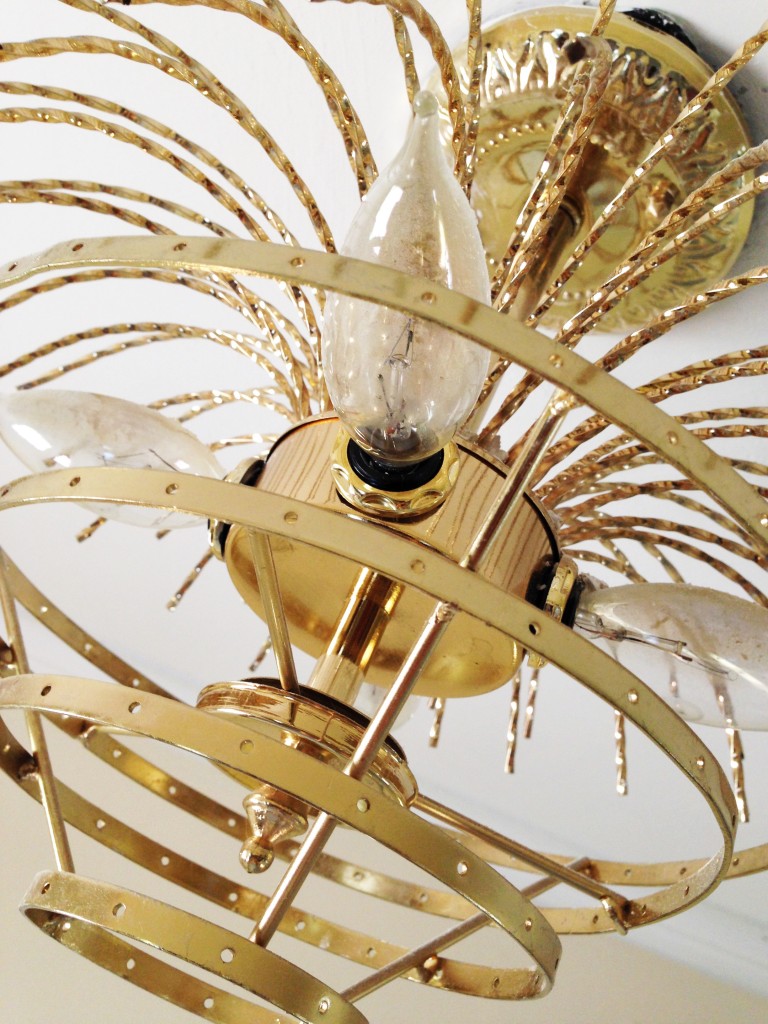
- Remove any crystals or globes. Luckily, the crystals on our entry light were attached with hooks instead of rings. I removed all of the crystals and cleaned them individually with a damp cloth. I didn’t want to submerge them in case it would cause a discoloration of the metal. Honestly, this was the most time consuming part of the process.
- Remove the fixture. Be sure to turn of the power before taking the fixture down!
- Clean the fixture well. You’ll want to be sure it’s free of dust and debris, especially if it’s an older fixture. Most of our lights (and every other square inch of the house) were covered in construction dust from having the ceilings scraped. Even after a professional cleaning, there was still quite a bit of dust in the crevices.
- Get to painting! I sprayed two coats of paint on our fixture, being sure to coat both the top and bottom of the fixture so that you didn’t see any traces of the old, brass color. Be sure to let it dry between coats. This was super quick and easy.
- Once the paint dries, hang the fixture back up and reattach any crystals or globes.
 Simple as that, you have a new fixture for less than $5. I’ve seen numerous tutorials online where people find dated fixtures at garage sales and thrift shops and paint them bright, fun colors. I went with a neutral color on our fixture because I wasn’t quite sure what décor I was going with yet. Whether you already have an old fixture or pick one up somewhere, using a little spray paint is a great, inexpensive way to update your lighting.
 Next up is the dining room chandelier. I have a bit of a different plan for it, but I’ll hopefully get to work on it soon. Have you ever used spray paint to update light fixtures in your home? I’d love to see your before and after pics!
